logo资料库

Mimaki打印机-DS-1600说明书.pdf

第1页 / 共172页
第2页 / 共172页
第3页 / 共172页
第4页 / 共172页
第5页 / 共172页
第6页 / 共172页
第7页 / 共172页
第8页 / 共172页
资料共172页,剩余部分请下载后查看
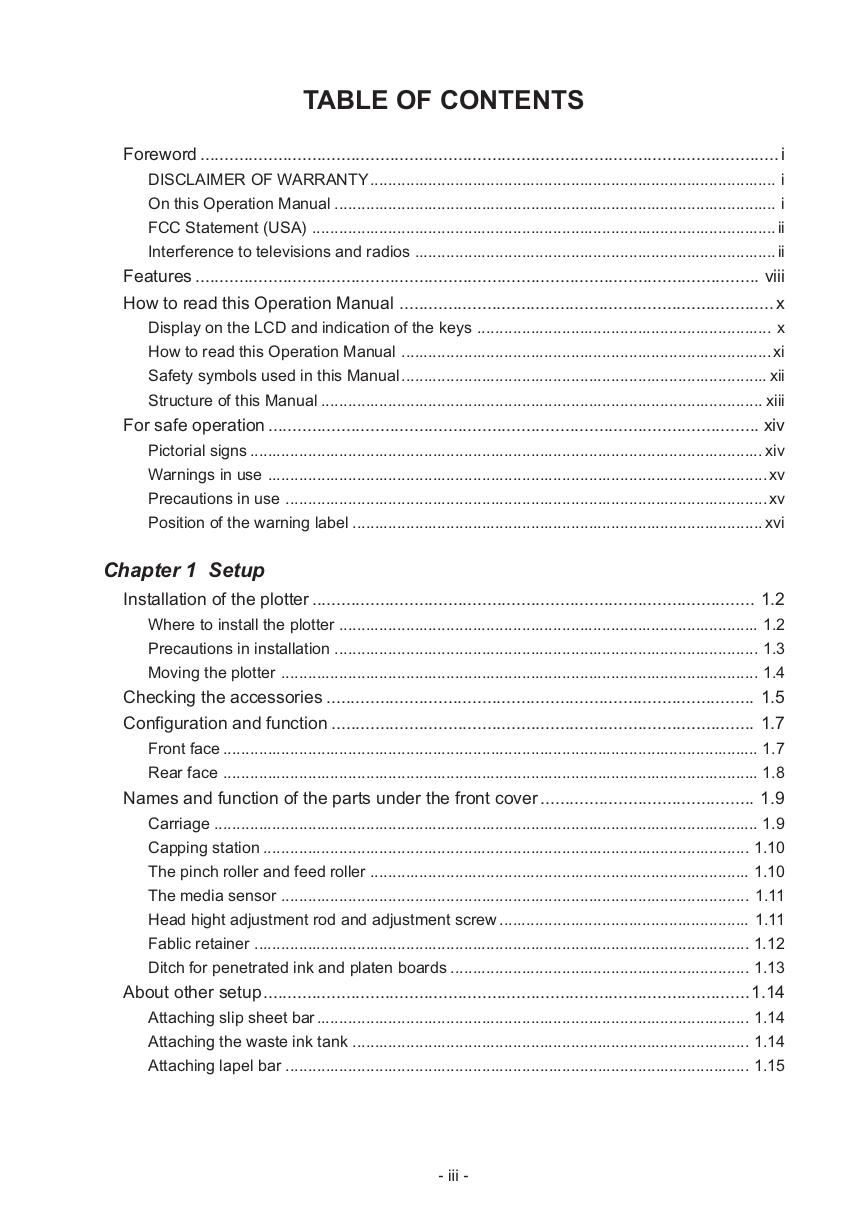
TABLE OF CONTENTS
Foreword
DISCLAIMER OF WARRANTY
On this Operation Manual
FCC Statement (USA)
Interference to televisions and radios
Features
How to read this Operation Manual
Display on the LCD and indication of the keys
How to read this Operation Manual
Safety symbols used in this Manual
Structure of this Manual
For safe operation
Pictorial signs
Warnings in use
Precautions in use
Position of the warning label
Chapter 1 Setup
Installation of the plotter
Where to install the plotter
Precautions in installation
Moving the plotter
Checking the accessories
Configuration and function
Front face
Rear face
Names and function of the parts under the front cover
Carriage
Capping station
The pinch roller and feed roller
The media sensor
Head hight adjustment rod and adjustment screw
Fablic retainer
Ditch for penetrated ink and platen boards
About other setup
Attaching slip sheet bar
Attaching the waste ink tank
Attaching lapel bar
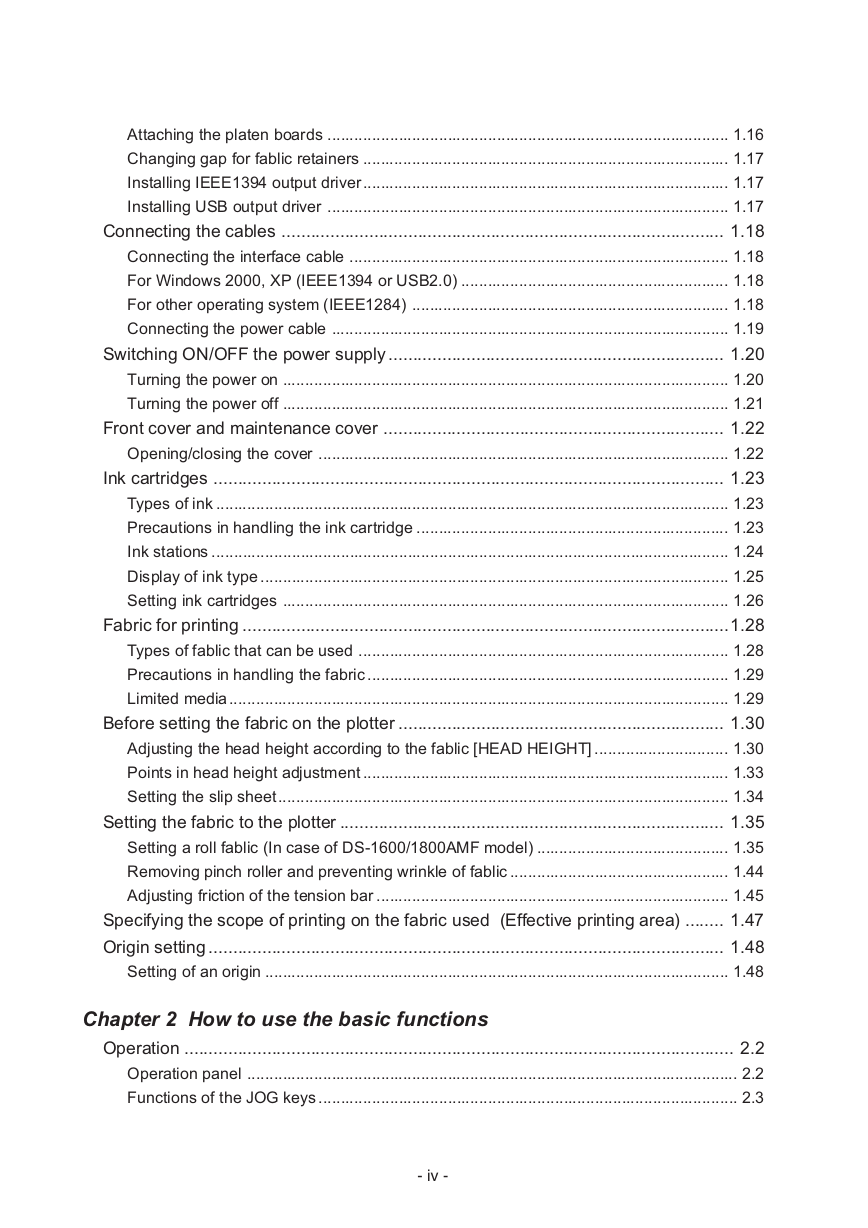
Attaching the platen boards
Changing gap for fablic retainers
Installing IEEE1394 output driver
Installing USB output driver
Connecting the cables
Connecting the interface cable
For Windows 2000, XP (IEEE1394 or USB2.0)
For other operating system (IEEE1284)
Connecting the power cable
Switching ON/OFF the power supply
Turning the power on
Turning the power off
Front cover and maintenance cover
Opening/closing the cover
Ink cartridges
Types of ink
Precautions in handling the ink cartridge
Ink stations
Display of ink type
Setting ink cartridges
Fabric for printing
Types of fablic that can be used
Precautions in handling the fabric
Limited media
Before setting the fabric on the plotter
Adjusting the head height according to the fablic [HEAD HEIGHT]
Points in head height adjustment
Setting the slip sheet
Setting the fabric to the plotter
Setting a roll fablic (In case of DS-1600/1800AMF model)
Removing pinch roller and preventing wrinkle of fablic
Adjusting friction of the tension bar
Specifying the scope of printing on the fabric used (Effective printing area)
Origin setting
Setting of an origin
Chapter 2 How to use the basic functions
Operation
Operation panel
Functions of the JOG keys
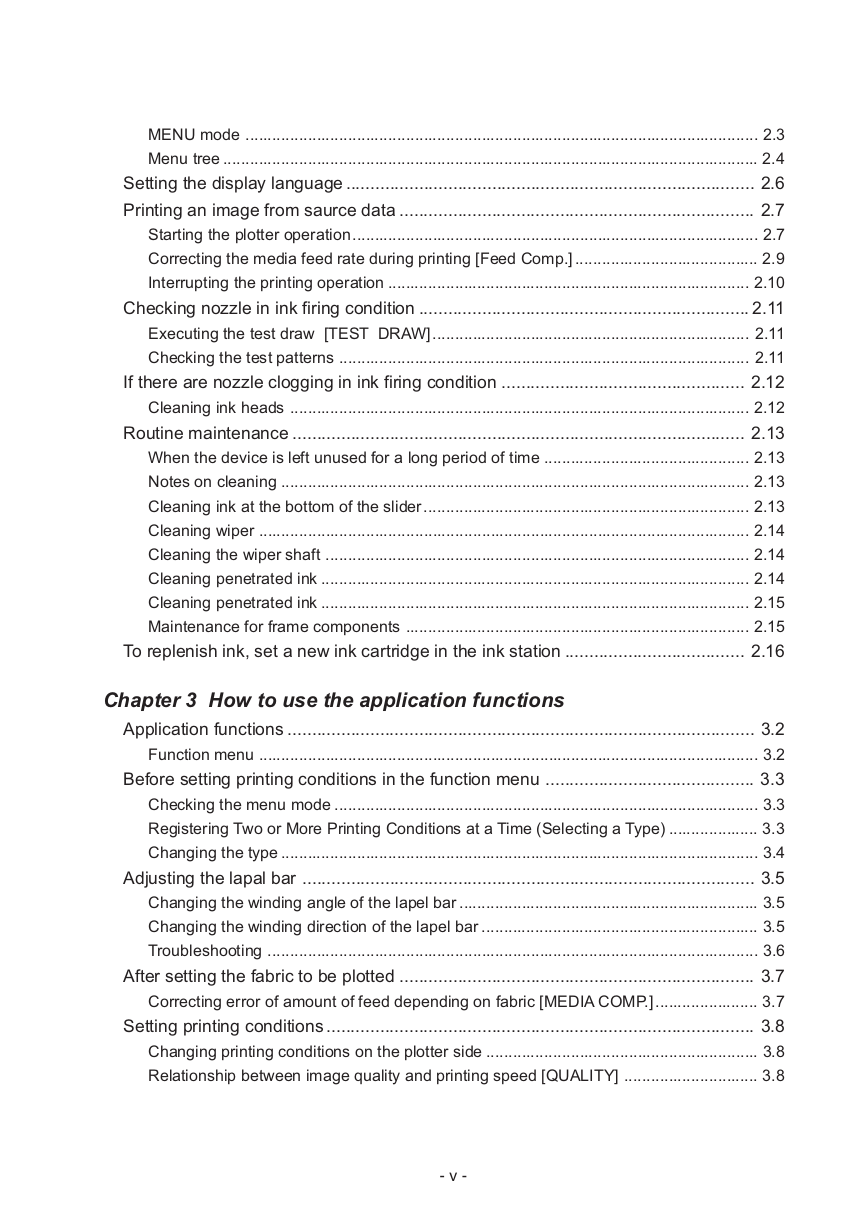
MENU mode
Menu tree
Setting the display language
Printing an image from saurce data
Starting the plotter operation
Correcting the media feed rate during printing [Feed Comp.]
Interrupting the printing operation
Checking nozzle in ink firing condition
Executing the test draw [TEST DRAW]
Checking the test patterns
If there are nozzle clogging in ink firing condition
Cleaning ink heads
Routine maintenance
When the device is left unused for a long period of time
Notes on cleaning
Cleaning ink at the bottom of the slider
Cleaning wiper
Cleaning the wiper shaft
Cleaning penetrated ink
Maintenance for frame components
To replenish ink, set a new ink cartridge in the ink station
Chapter 3 How to use the application functions
Application functions
Function menu
Before setting printing conditions in the function menu
Checking the menu mode
Registering Two or More Printing Conditions at a Time (Selecting a Type)
Changing the type
Adjusting the lapal bar
Changing the winding angle of the lapel bar
Changing the winding direction of the lapel bar
Troubleshooting
After setting the fabric to be plotted
Correcting error of amount of feed depending on fabric [MEDIA COMP.]
Setting printing conditions
Changing printing conditions on the plotter side
Relationship between image quality and printing speed [QUALITY]
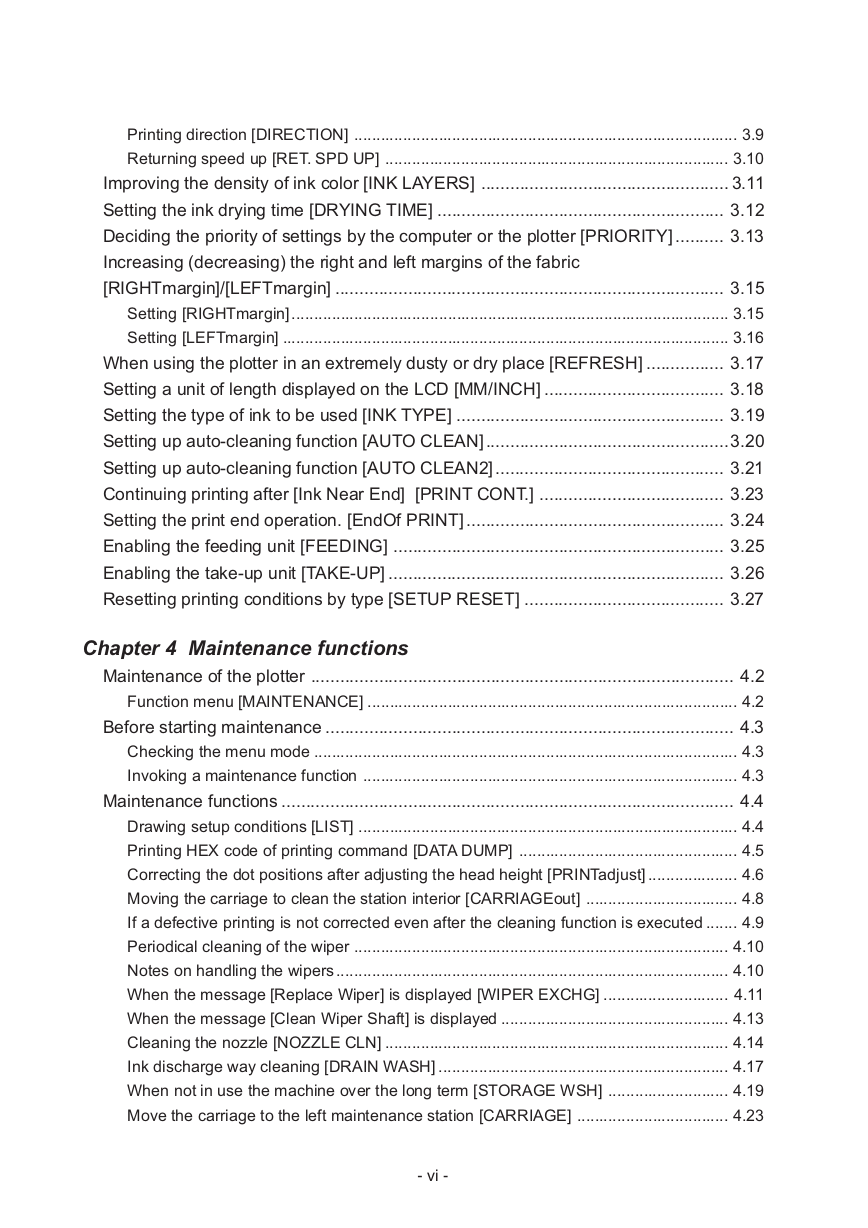
Printing direction [DIRECTION]
Returning speed up [RET. SPD UP]
Improving the density of ink color [INK LAYERS]
Setting the ink drying time [DRYING TIME]
Deciding the priority of settings by the computer or the plotter [PRIORITY]
Increasing (decreasing) the right and left margins of the fabric [RIGHTmargin]/[LEFTmargin]
Setting [RIGHTmargin]
Setting [LEFTmargin]
When using the plotter in an extremely dusty or dry place [REFRESH]
Setting a unit of length displayed on the LCD [MM/INCH]
Setting the type of ink to be used [INK TYPE]
Setting up auto-cleaning function [AUTO CLEAN]
Setting up auto-cleaning function [AUTO CLEAN2]
Continuing printing after [Ink Near End] [PRINT CONT.]
Setting the print end operation. [EndOf PRINT]
Enabling the feeding unit [FEEDING]
Enabling the take-up unit [TAKE-UP]
Resetting printing conditions by type [SETUP RESET]
Chapter 4 Maintenance functions
Maintenance of the plotter
Function menu [MAINTENANCE]
Before starting maintenance
Checking the menu mode
Invoking a maintenance function
Maintenance functions
Drawing setup conditions [LIST]
Printing HEX code of printing command [DATA DUMP]
Correcting the dot positions after adjusting the head height [PRINTadjust]
Moving the carriage to clean the station interior [CARRIAGEout]
If a defective printing is not corrected even after the cleaning function is executed
Periodical cleaning of the wiper
Notes on handling the wipers
When the message [Replace Wiper] is displayed [WIPER EXCHG]
When the message [Clean Wiper Shaft] is displayed
Cleaning the nozzle [NOZZLE CLN]
Ink discharge way cleaning [DRAIN WASH]
When not in use the machine over the long term [STORAGE WSH]
Move the carriage to the left maintenance station [CARRIAGE]
Adjusting the head height when the fabric used is changed [HEAD HEIGHT]
Menu displayed after the ink cartridge is installed [FILL UP INK]
When charging ink different from the one in use [INK CHANGE]
Selecting ink head [USE HEAD]
Check the stretch and shrink of fabric after the printing [STRETCH CHK]
Execute the flushing and cleaning regularly [ROUTINE CTR]
Setting the machine name [MACHINE NAME]
Displaying the plotter information [INFORMATION]
Chapter 5 When abnormal conditions are encountered
Before taking a phenomenon as a sign of failure
The plotter cannot be energized
The plotter cannot perform printing
Paper jamming arises/fabric is soiled
If image quality declines
White lines/thin spots are obvious (In the direction of travel of the head)
Displacement is observed between outward and inward printing
The respective color ink injected by the respective color heads do not properly overlap
Troubles for which error message are given on the LCD
Warning message
Error messages
Chapter 6 Ink guidance
Emergency measures
Printing procedures
Printing procedures by ink type
Sublimation dye ink recipe
Textile pigment ink recipe
Appendix
Basic specifications
Speification for ink
Optional extras
Function flow chart
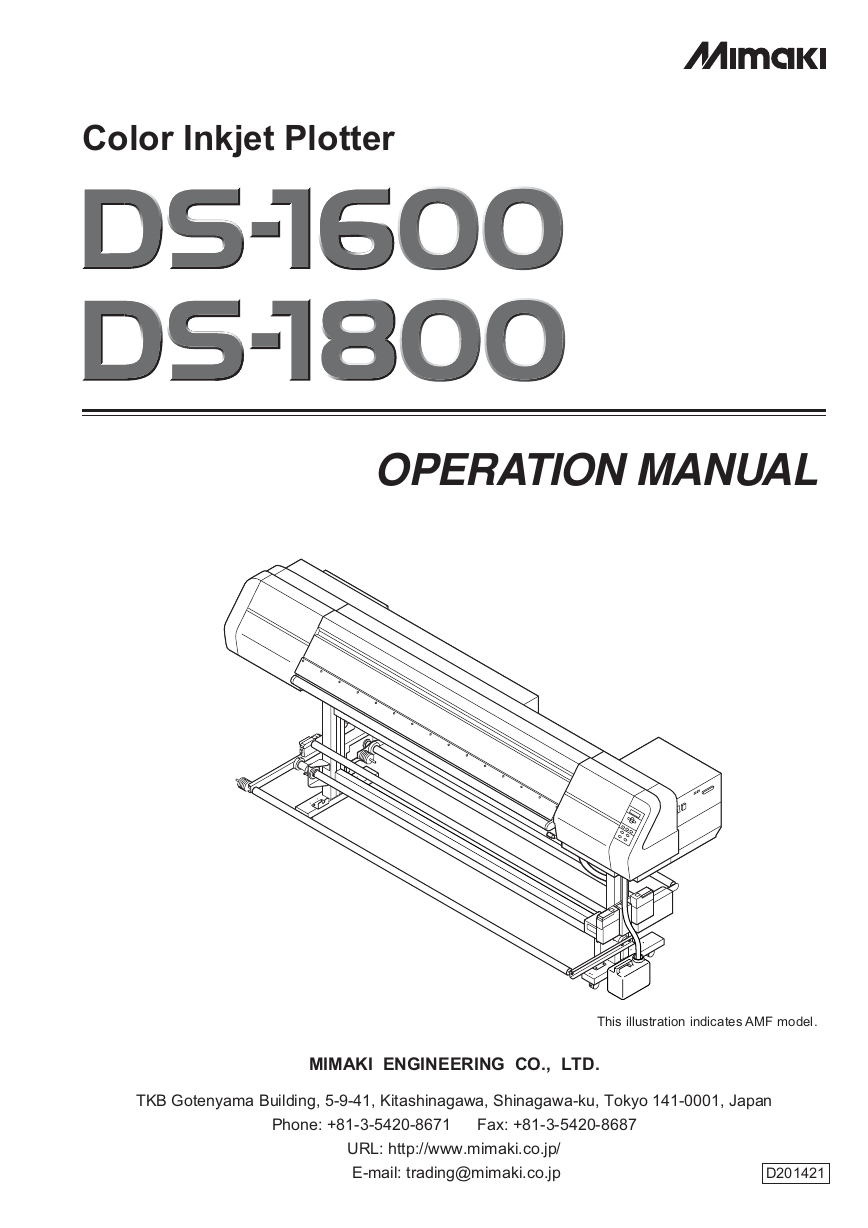
Color Inkjet Plotter OPERATION MANUAL This illustration indicates AMF model. MIMAKI ENGINEERING CO., LTD. TKB Gotenyama Building, 5-9-41, Kitashinagawa, Shinagawa-ku, Tokyo 141-0001, Japan Phone: +81-3-5420-8671 Fax: +81-3-5420-8687 URL: http://www.mimaki.co.jp/ E-mail: trading@mimaki.co.jp D201421
Foreword Thank you for purchasing MIMAKI DS-1600/1800 color inkjet plotter. Model DS-1600/1800 is a color inkjet plotter for printing on fabric. This operation manual describes the operation and maintenance of model DS-1600/1800 Color InkJet Plotter (hereinafter referred to as the plotter). Read this manual carefully and make the most effective use of your plotter. DISCLAIMER OF WARRANTY THIS LIMITED WARRANTY OF MIMAKI SHALL BE THE SOLE AND EXCLUSIVE WARRANTY AND IS IN LIEU OF ALL OTHER WARRANTIES, EXPRESS OR IMPLIED, INCLUDING , BUT NOT LIMITED TO, ANY IMPLIED WARRANTY OF MERCHANTABILITY OR FITNESS, AND MIMAKI NEITHER ASSUMES NOR AUTHORIZES DEALER TO ASSUME FOR IT ANY OTHER OBLIGATION OR LIABILITY OR MAKE ANY OTHER WARRANTY OR MAKE ANY OTHER WARRANTY IN CONNECTION WITH ANY PRODUCT WITHOUT MIMAKI’S PRIOR WRITTEN CONSENT. IN NO EVENT SHALL MIMAKI BE LIABLE FOR SPECIAL, INCIDNETAL OR CONSEQUENTIAL DAMAGES OR FOR LOSS OF PROFITS OF DEALER OR CUSTOMERS OF ANY PRODUCT. On this Operation Manual • The plotter is equipped with a high speed print head and other high performance part that may be dangerous. Please be sure to read this manual carefully before starting this plotter operation in order to prevent the injuries or damages. • Please read and fully understand this Operation Manual before putting the plotter into service. It is also necessary to keep this Operation Manual on hand. • This Operation Manual has been carefully prepared for your easy understanding, however, please do not hesitate to contact a distributor in your district if you have any inquiry. • Description contained in this Operation Manual are subject to change without notice for improvement. • In the case where this Operation Manual should be illegible due to destruction by fire or breakage, purchase another copy of the Operation Manual from our distributor. • Generally, names and designations referred to in this Operation Manual are trade marks or registered trade marks of the manufacturers or suppliers. Reproduction of this manual is strictly prohibited. All Rights Reserved. Copyright © 2006 MIMAKI ENGINEERING CO., LTD. - i -
FCC Statement (USA) This equipment has been tested and found to comply with the limits for a Class A digital device, pursuant to Part 15 of the FCC Rules. These limits are designed to provide reason- able protection against harmful interference when the equipment is operated in a commer- cial environment. This equipment generates, uses and can radiate radio frequency energy and, if not installed and used in accordance with the instruction manual, may cause harmful interference to radio commnications. Operation of this equipment in a residential area is likely to cause harmful interference in which cause the user will be required to correct the interference at his own expense. • In the case where MIMAKI-recommended cable is not used for connection of this plotter, limits provided by FCC rules can be exceeded. To prevent this, use of MIMAKI-recommended cable is essential for the connection of this plotter. Interference to televisions and radios The product covered by this Operation Manual produces low radio waves while it is in operation. The product can interfere with radios and televisions if set up or commissioned under improper conditions. The product is not guaranteed against any damage to specific- purpose radio and televisions. The product’s interference with your radio or television will be checked by turning on/off the power switch of the product. In the event that the product is the cause of interference, try to eliminate it by taking one of the following corrective measures or taking some of them in combination. • Change the direction of the receiving antenna or the feeder of your radio/television. • Change the installing direction of the product. • Move the receiver away from the product. • Use a power line for the receiver that is not shared with the product. - ii -
TABLE OF CONTENTS Foreword ....................................................................................................................... i DISCLAIMER OF WARRANTY........................................................................................... i On this Operation Manual ................................................................................................... i FCC Statement (USA) ........................................................................................................ ii Interference to televisions and radios ................................................................................. ii Features .................................................................................................................... viii How to read this Operation Manual ............................................................................. x Display on the LCD and indication of the keys .................................................................. x How to read this Operation Manual ................................................................................... xi Safety symbols used in this Manual .................................................................................. xii Structure of this Manual ................................................................................................... xiii For safe operation ..................................................................................................... xiv Pictorial signs ................................................................................................................... xiv Warnings in use ................................................................................................................ xv Precautions in use ............................................................................................................ xv Position of the warning label ............................................................................................ xvi Chapter 1 Setup Installation of the plotter ........................................................................................... 1.2 Where to install the plotter .............................................................................................. 1.2 Precautions in installation ............................................................................................... 1.3 Moving the plotter ........................................................................................................... 1.4 Checking the accessories ........................................................................................ 1.5 Configuration and function ....................................................................................... 1.7 Front face ........................................................................................................................ 1.7 Rear face ........................................................................................................................ 1.8 Names and function of the parts under the front cover ............................................ 1.9 Carriage .......................................................................................................................... 1.9 Capping station ............................................................................................................. 1.10 The pinch roller and feed roller ..................................................................................... 1.10 The media sensor ......................................................................................................... 1.11 Head hight adjustment rod and adjustment screw ........................................................ 1.11 Fablic retainer ............................................................................................................... 1.12 Ditch for penetrated ink and platen boards ................................................................... 1.13 About other setup....................................................................................................1.14 Attaching slip sheet bar ................................................................................................. 1.14 Attaching the waste ink tank ......................................................................................... 1.14 Attaching lapel bar ........................................................................................................ 1.15 - iii -
Attaching the platen boards .......................................................................................... 1.16 Changing gap for fablic retainers .................................................................................. 1.17 Installing IEEE1394 output driver .................................................................................. 1.17 Installing USB output driver .......................................................................................... 1.17 Connecting the cables ........................................................................................... 1.18 Connecting the interface cable ..................................................................................... 1.18 For Windows 2000, XP (IEEE1394 or USB2.0) ............................................................ 1.18 For other operating system (IEEE1284) ....................................................................... 1.18 Connecting the power cable ......................................................................................... 1.19 Switching ON/OFF the power supply ..................................................................... 1.20 Turning the power on .................................................................................................... 1.20 Turning the power off .................................................................................................... 1.21 Front cover and maintenance cover ...................................................................... 1.22 Opening/closing the cover ............................................................................................ 1.22 Ink cartridges ......................................................................................................... 1.23 Types of ink ................................................................................................................... 1.23 Precautions in handling the ink cartridge ...................................................................... 1.23 Ink stations .................................................................................................................... 1.24 Display of ink type ......................................................................................................... 1.25 Setting ink cartridges .................................................................................................... 1.26 Fabric for printing ....................................................................................................1.28 Types of fablic that can be used ................................................................................... 1.28 Precautions in handling the fabric ................................................................................. 1.29 Limited media ................................................................................................................ 1.29 Before setting the fabric on the plotter ................................................................... 1.30 Adjusting the head height according to the fablic [HEAD HEIGHT] .............................. 1.30 Points in head height adjustment .................................................................................. 1.33 Setting the slip sheet ..................................................................................................... 1.34 Setting the fabric to the plotter ............................................................................... 1.35 Setting a roll fablic (In case of DS-1600/1800AMF model) ........................................... 1.35 Removing pinch roller and preventing wrinkle of fablic ................................................. 1.44 Adjusting friction of the tension bar ............................................................................... 1.45 Specifying the scope of printing on the fabric used (Effective printing area) ........ 1.47 Origin setting .......................................................................................................... 1.48 Setting of an origin ........................................................................................................ 1.48 Chapter 2 How to use the basic functions Operation ................................................................................................................. 2.2 Operation panel .............................................................................................................. 2.2 Functions of the JOG keys .............................................................................................. 2.3 - iv -
MENU mode ................................................................................................................... 2.3 Menu tree ........................................................................................................................ 2.4 Setting the display language .................................................................................... 2.6 Printing an image from saurce data ......................................................................... 2.7 Starting the plotter operation ........................................................................................... 2.7 Correcting the media feed rate during printing [Feed Comp.] ......................................... 2.9 Interrupting the printing operation ................................................................................. 2.10 Checking nozzle in ink firing condition .................................................................... 2.11 Executing the test draw [TEST DRAW] ....................................................................... 2.11 Checking the test patterns ............................................................................................ 2.11 If there are nozzle clogging in ink firing condition .................................................. 2.12 Cleaning ink heads ....................................................................................................... 2.12 Routine maintenance ............................................................................................. 2.13 When the device is left unused for a long period of time .............................................. 2.13 Notes on cleaning ......................................................................................................... 2.13 Cleaning ink at the bottom of the slider ......................................................................... 2.13 Cleaning wiper .............................................................................................................. 2.14 Cleaning the wiper shaft ............................................................................................... 2.14 Cleaning penetrated ink ................................................................................................ 2.14 Cleaning penetrated ink ................................................................................................ 2.15 Maintenance for frame components ............................................................................. 2.15 To replenish ink, set a new ink cartridge in the ink station ..................................... 2.16 Chapter 3 How to use the application functions Application functions ................................................................................................ 3.2 Function menu ................................................................................................................ 3.2 Before setting printing conditions in the function menu ........................................... 3.3 Checking the menu mode ............................................................................................... 3.3 Registering Two or More Printing Conditions at a Time (Selecting a Type) .................... 3.3 Changing the type ........................................................................................................... 3.4 Adjusting the lapal bar ............................................................................................. 3.5 Changing the winding angle of the lapel bar ................................................................... 3.5 Changing the winding direction of the lapel bar .............................................................. 3.5 Troubleshooting .............................................................................................................. 3.6 After setting the fabric to be plotted ......................................................................... 3.7 Correcting error of amount of feed depending on fabric [MEDIA COMP.] ....................... 3.7 Setting printing conditions ........................................................................................ 3.8 Changing printing conditions on the plotter side ............................................................. 3.8 Relationship between image quality and printing speed [QUALITY] .............................. 3.8 - v -
Printing direction [DIRECTION] ...................................................................................... 3.9 Returning speed up [RET. SPD UP] ............................................................................. 3.10 Improving the density of ink color [INK LAYERS] ................................................... 3.11 Setting the ink drying time [DRYING TIME] ........................................................... 3.12 Deciding the priority of settings by the computer or the plotter [PRIORITY] .......... 3.13 Increasing (decreasing) the right and left margins of the fabric [RIGHTmargin]/[LEFTmargin] ................................................................................ 3.15 Setting [RIGHTmargin] .................................................................................................. 3.15 Setting [LEFTmargin] .................................................................................................... 3.16 When using the plotter in an extremely dusty or dry place [REFRESH] ................ 3.17 Setting a unit of length displayed on the LCD [MM/INCH] ..................................... 3.18 Setting the type of ink to be used [INK TYPE] ....................................................... 3.19 Setting up auto-cleaning function [AUTO CLEAN] ..................................................3.20 Setting up auto-cleaning function [AUTO CLEAN2] ............................................... 3.21 Continuing printing after [Ink Near End] [PRINT CONT.] ...................................... 3.23 Setting the print end operation. [EndOf PRINT] ..................................................... 3.24 Enabling the feeding unit [FEEDING] .................................................................... 3.25 Enabling the take-up unit [TAKE-UP] ..................................................................... 3.26 Resetting printing conditions by type [SETUP RESET] ......................................... 3.27 Chapter 4 Maintenance functions Maintenance of the plotter ....................................................................................... 4.2 Function menu [MAINTENANCE] ................................................................................... 4.2 Before starting maintenance .................................................................................... 4.3 Checking the menu mode ............................................................................................... 4.3 Invoking a maintenance function .................................................................................... 4.3 Maintenance functions ............................................................................................. 4.4 Drawing setup conditions [LIST] ..................................................................................... 4.4 Printing HEX code of printing command [DATA DUMP] ................................................. 4.5 Correcting the dot positions after adjusting the head height [PRINTadjust] .................... 4.6 Moving the carriage to clean the station interior [CARRIAGEout] .................................. 4.8 If a defective printing is not corrected even after the cleaning function is executed ....... 4.9 Periodical cleaning of the wiper .................................................................................... 4.10 Notes on handling the wipers ........................................................................................ 4.10 When the message [Replace Wiper] is displayed [WIPER EXCHG] ............................ 4.11 When the message [Clean Wiper Shaft] is displayed ................................................... 4.13 Cleaning the nozzle [NOZZLE CLN] ............................................................................. 4.14 Ink discharge way cleaning [DRAIN WASH] ................................................................. 4.17 When not in use the machine over the long term [STORAGE WSH] ........................... 4.19 Move the carriage to the left maintenance station [CARRIAGE] .................................. 4.23 - vi -
分享到:
收藏