�
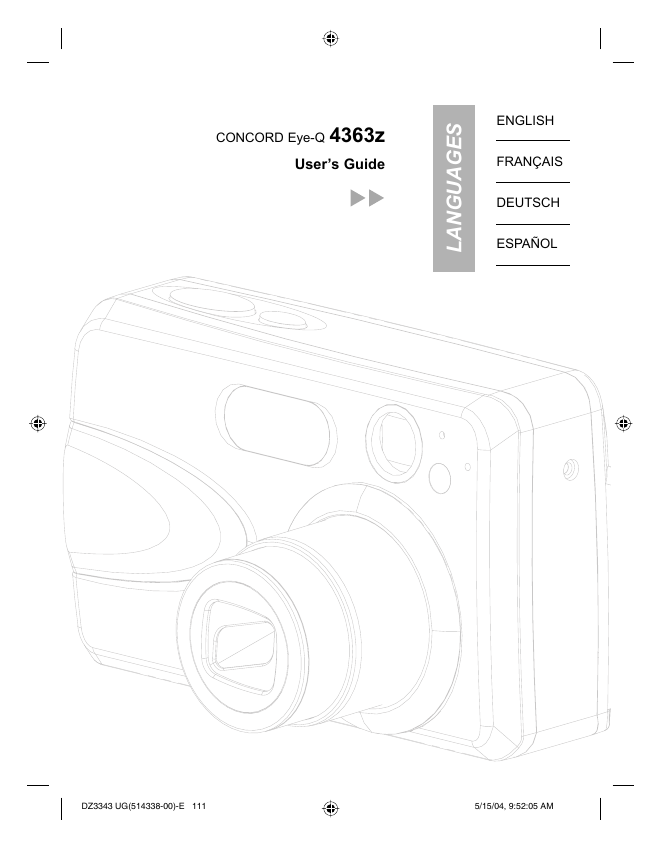
CONCORD Eye-Q 4363z
User’s Guide
S
E
G
A
U
G
N
A
L
ENGLISH
FRANÇAIS
DEUTSCH
ESPAÑOL
DZ3343 UG(514338-00)-E 111
5/15/04, 9:52:05 AM
n
E
ENGLISH
CONGRATULATIONS
Congratulations on the purchase of your new camera. Your camera has
been carefully engineered and manufactured to give you dependable
operation. Read this manual before operating the camera to become
more familiar with it.
This manual has been written and formatted with depth and detail so
that you can easily follow the instructions to maximize the features of
your camera.
1
1
DZ4363 UG(514338-02)-E 1
6/15/04, 5:07:13 PM
�
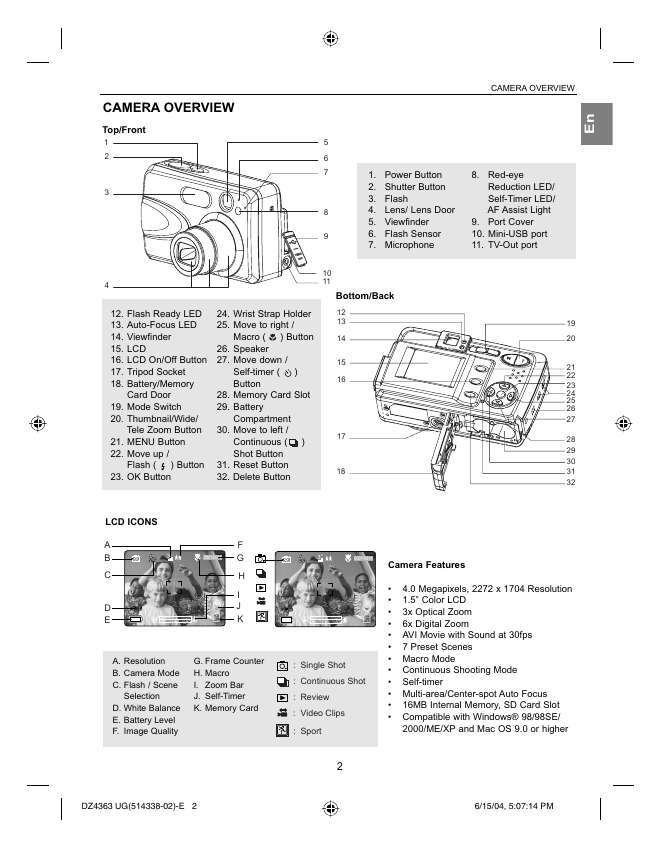
CAMERA OVERVIEW
Top/Front
1
2
3
4
5
6
7
8
9
10
11
CAMERA OVERVIEW
n
E
1. Power Button
2. Shutter Button
3. Flash
4. Lens/ Lens Door
5. Viewfinder
6. Flash Sensor
7. Microphone
Reduction LED/
Self-Timer LED/
AF Assist Light
8. Red-eye
9. Port Cover
10. Mini-USB port
11. TV-Out port
12. Flash Ready LED
13. Auto-Focus LED
14. Viewfinder
15. LCD
16. LCD On/Off Button
17. Tripod Socket
18. Battery/Memory
19. Mode Switch
20. Thumbnail/Wide/
Tele Zoom Button
21. MENU Button
22. Move up /
23. OK Button
Flash ( ) Button
Card Door
Self-timer ( )
Button
24. Wrist Strap Holder
25. Move to right /
Macro ( ) Button
26. Speaker
27. Move down /
28. Memory Card Slot
29. Battery
Compartment
30. Move to left /
Continuous ( )
Shot Button
31. Reset Button
32. Delete Button
A
Bottom/Back
12
13
14
15
16
17
18
19
20
21
22
23
24
25
26
27
28
29
30
31
32
LCD ICONS
A
A
A
B
C
D
E
AWB
A
3M
AWB
0001/0014
AWB
A
F
G
H
I
J
K
AWB
AWB
A
3M
A
0001/0014
Camera Features
AWB
A
4.0 Megapixels, 2272 x 1704 Resolution
1.5” Color LCD
3x Optical Zoom
6x Digital Zoom
AVI Movie with Sound at 30fps
7 Preset Scenes
Macro Mode
Continuous Shooting Mode
Self-timer
Multi-area/Center-spot Auto Focus
16MB Internal Memory, SD Card Slot
Compatible with Windows® 98/98SE/
2000/ME/XP and Mac OS 9.0 or higher
AWB
A
AWB
A. Resolution
A
B. Camera Mode
C. Flash / Scene
Selection
D. White Balance
E. Battery Level
F. Image Quality
AWB
AWB
G. Frame Counter
H. Macro
I. Zoom Bar
J. Self-Timer
K. Memory Card
: Single Shot
: Continuous Shot
: Review
: Video Clips
: Sport
2
DZ4363 UG(514338-02)-E 2
6/15/04, 5:07:14 PM
�
n
E
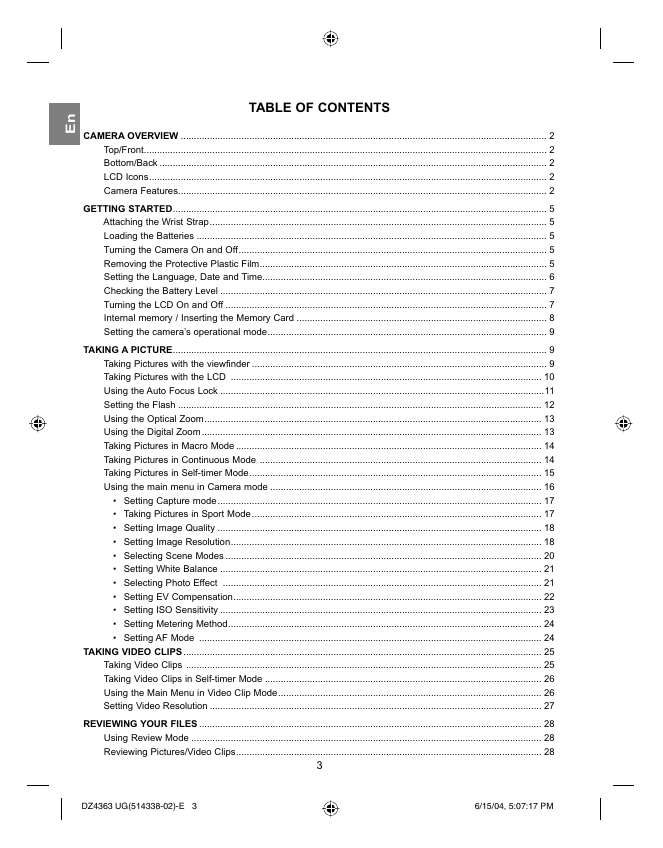
TABLE OF CONTENTS
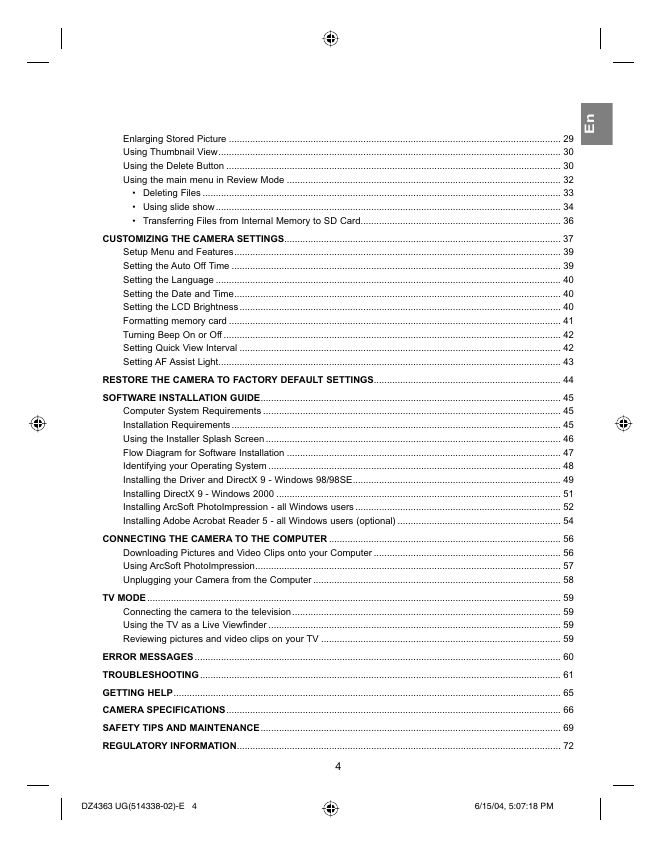
CAMERA OVERVIEW ........................................................................................................................................... 2
Top/Front......................................................................................................................................................... 2
Bottom/Back ................................................................................................................................................... 2
LCD Icons....................................................................................................................................................... 2
Camera Features............................................................................................................................................ 2
GETTING STARTED.............................................................................................................................................. 5
Attaching the Wrist Strap................................................................................................................................ 5
Loading the Batteries ..................................................................................................................................... 5
Turning the Camera On and Off..................................................................................................................... 5
Removing the Protective Plastic Film............................................................................................................. 5
Setting the Language, Date and Time............................................................................................................ 6
Checking the Battery Level ............................................................................................................................ 7
Turning the LCD On and Off .......................................................................................................................... 7
Internal memory / Inserting the Memory Card ............................................................................................... 8
Setting the camera’s operational mode.......................................................................................................... 9
TAKING A PICTURE.............................................................................................................................................. 9
Taking Pictures with the viewfinder ................................................................................................................ 9
Taking Pictures with the LCD ...................................................................................................................... 10
Using the Auto Focus Lock ...........................................................................................................................11
Setting the Flash .......................................................................................................................................... 12
Using the Optical Zoom................................................................................................................................ 13
Using the Digital Zoom ................................................................................................................................. 13
Taking Pictures in Macro Mode .................................................................................................................... 14
Taking Pictures in Continuous Mode ........................................................................................................... 14
Taking Pictures in Self-timer Mode............................................................................................................... 15
Using the main menu in Camera mode ....................................................................................................... 16
Setting Capture mode........................................................................................................................... 17
Taking Pictures in Sport Mode.............................................................................................................. 17
Setting Image Quality ........................................................................................................................... 18
Setting Image Resolution...................................................................................................................... 18
Selecting Scene Modes ........................................................................................................................ 20
Setting White Balance .......................................................................................................................... 21
Selecting Photo Effect ......................................................................................................................... 21
Setting EV Compensation..................................................................................................................... 22
Setting ISO Sensitivity .......................................................................................................................... 23
Setting Metering Method....................................................................................................................... 24
Setting AF Mode .................................................................................................................................. 24
TAKING VIDEO CLIPS ........................................................................................................................................ 25
Taking Video Clips ....................................................................................................................................... 25
Taking Video Clips in Self-timer Mode ......................................................................................................... 26
Using the Main Menu in Video Clip Mode.................................................................................................... 26
Setting Video Resolution .............................................................................................................................. 27
REVIEWING YOUR FILES .................................................................................................................................. 28
Using Review Mode ..................................................................................................................................... 28
Reviewing Pictures/Video Clips.................................................................................................................... 28
3
3
DZ4363 UG(514338-02)-E 3
6/15/04, 5:07:17 PM
�
n
E
Enlarging Stored Picture .............................................................................................................................. 29
Using Thumbnail View.................................................................................................................................. 30
Using the Delete Button ............................................................................................................................... 30
Using the main menu in Review Mode ........................................................................................................ 32
Deleting Files ........................................................................................................................................ 33
Using slide show................................................................................................................................... 34
Transferring Files from Internal Memory to SD Card............................................................................ 36
CUSTOMIZING THE CAMERA SETTINGS......................................................................................................... 37
Setup Menu and Features............................................................................................................................ 39
Setting the Auto Off Time ............................................................................................................................. 39
Setting the Language ................................................................................................................................... 40
Setting the Date and Time............................................................................................................................ 40
Setting the LCD Brightness .......................................................................................................................... 40
Formatting memory card .............................................................................................................................. 41
Turning Beep On or Off ................................................................................................................................ 42
Setting Quick View Interval .......................................................................................................................... 42
Setting AF Assist Light.................................................................................................................................. 43
RESTORE THE CAMERA TO FACTORY DEFAULT SETTINGS....................................................................... 44
SOFTWARE INSTALLATION GUIDE.................................................................................................................. 45
Computer System Requirements ................................................................................................................. 45
Installation Requirements ............................................................................................................................. 45
Using the Installer Splash Screen ................................................................................................................ 46
Flow Diagram for Software Installation ........................................................................................................ 47
Identifying your Operating System ............................................................................................................... 48
Installing the Driver and DirectX 9 - Windows 98/98SE............................................................................... 49
Installing DirectX 9 - Windows 2000 ............................................................................................................ 51
Installing ArcSoft PhotoImpression - all Windows users .............................................................................. 52
Installing Adobe Acrobat Reader 5 - all Windows users (optional) .............................................................. 54
CONNECTING THE CAMERA TO THE COMPUTER ........................................................................................ 56
Downloading Pictures and Video Clips onto your Computer ....................................................................... 56
Using ArcSoft PhotoImpression.................................................................................................................... 57
Unplugging your Camera from the Computer .............................................................................................. 58
TV MODE ............................................................................................................................................................. 59
Connecting the camera to the television ...................................................................................................... 59
Using the TV as a Live Viewfinder ............................................................................................................... 59
Reviewing pictures and video clips on your TV ........................................................................................... 59
ERROR MESSAGES ........................................................................................................................................... 60
TROUBLESHOOTING......................................................................................................................................... 61
GETTING HELP................................................................................................................................................... 65
CAMERA SPECIFICATIONS............................................................................................................................... 66
SAFETY TIPS AND MAINTENANCE.................................................................................................................. 69
REGULATORY INFORMATION........................................................................................................................... 72
4
4
DZ4363 UG(514338-02)-E 4
6/15/04, 5:07:18 PM
�
AWB
⁄
⁄
AWB
⁄
⁄
A
GETTING STARTED
GETTING STARTED
AWB
⁄
⁄
A
A
AWB
⁄
⁄
n
E
A
AWB
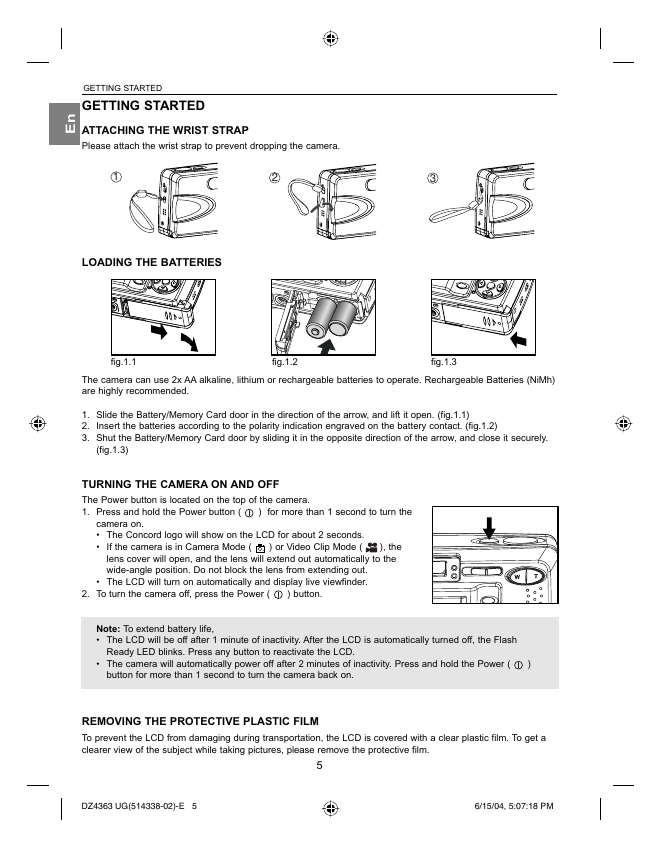
ATTACHING THE WRIST STRAP
Please attach the wrist strap to prevent dropping the camera.
AWB
1
2
3
LOADING THE BATTERIES
fig.1.1
fig.1.2
A
A
AWB
⁄
⁄
AWB
⁄
⁄
A
fig.1.3
The camera can use 2x AA alkaline, lithium or rechargeable batteries to operate. Rechargeable Batteries (NiMh)
are highly recommended.
AWB
1. Slide the Battery/Memory Card door in the direction of the arrow, and lift it open. (fig.1.1)
2. Insert the batteries according to the polarity indication engraved on the battery contact. (fig.1.2)
3. Shut the Battery/Memory Card door by sliding it in the opposite direction of the arrow, and close it securely.
A
(fig.1.3)
A
AWB
TURNING THE CAMERA ON AND OFF
The Power button is located on the top of the camera.
1. Press and hold the Power button ( ) for more than 1 second to turn the
camera on.
The Concord logo will show on the LCD for about 2 seconds.
If the camera is in Camera Mode ( ) or Video Clip Mode ( ), the
lens cover will open, and the lens will extend out automatically to the
wide-angle position. Do not block the lens from extending out.
The LCD will turn on automatically and display live viewfinder.
AWB
A
AWB
A
AWB
2. To turn the camera off, press the Power ( ) button.
A
Note: To extend battery life,
The LCD will be off after 1 minute of inactivity. After the LCD is automatically turned off, the Flash
A
AWB
Ready LED blinks. Press any button to reactivate the LCD.
AWB
The camera will automatically power off after 2 minutes of inactivity. Press and hold the Power ( )
button for more than 1 second to turn the camera back on.
A
AWB
A
AWB
AWB
REMOVING THE PROTECTIVE PLASTIC FILM
To prevent the LCD from damaging during transportation, the LCD is covered with a clear plastic film. To get a
clearer view of the subject while taking pictures, please remove the protective film.
5
DZ4363 UG(514338-02)-E 5
6/15/04, 5:07:18 PM
�
2
3
GETTING STARTED
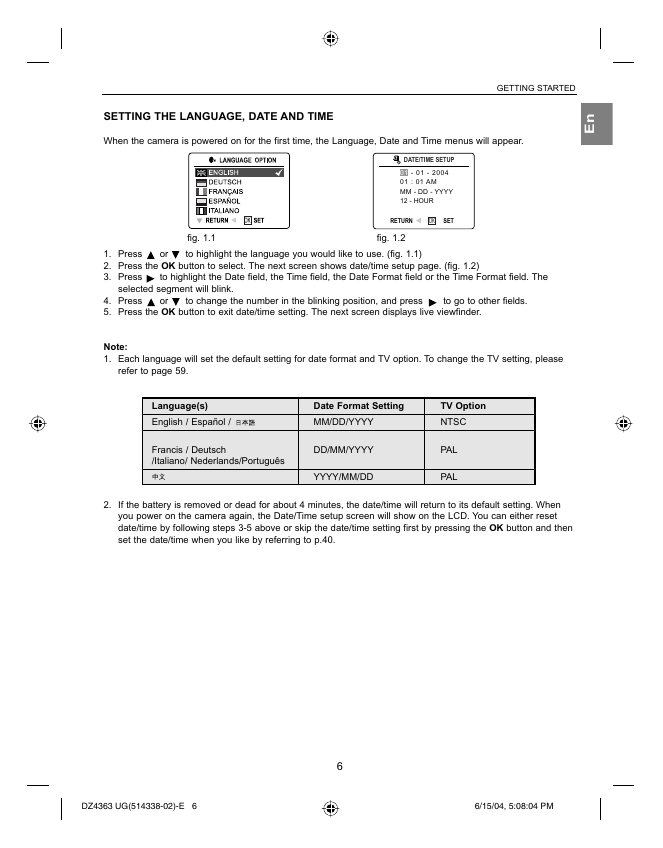
SETTING THE LANGUAGE, DATE AND TIME
When the camera is powered on for the first time, the Language, Date and Time menus will appear.
n
E
DATE/TIME SETUP
01 - 01 - 2004
01 : 01 AM
MM - DD - YYYY
12 - HOUR
RETURN
OK
SET
fig. 1.1
fig. 1.2
1. Press or to highlight the language you would like to use. (fig. 1.1)
2. Press the OK button to select. The next screen shows date/time setup page. (fig. 1.2)
3. Press to highlight the Date field, the Time field, the Date Format field or the Time Format field. The
selected segment will blink.
4. Press or to change the number in the blinking position, and press to go to other fields.
5. Press the OK button to exit date/time setting. The next screen displays live viewfinder.
Note:
1. Each language will set the default setting for date format and TV option. To change the TV setting, please
refer to page 59.
1
3
5
Language(s)
English / Español /
Date Format Setting
MM/DD/YYYY
TV Option
NTSC
Francis / Deutsch
/Italiano/ Nederlands/Português
2. If the battery is removed or dead for about 4 minutes, the date/time will return to its default setting. When
you power on the camera again, the Date/Time setup screen will show on the LCD. You can either reset
date/time by following steps 3-5 above or skip the date/time setting first by pressing the OK button and then
set the date/time when you like by referring to p.40.
DD/MM/YYYY
YYYY/MM/DD
PAL
PAL
1
3
5
DZ4363 UG(514338-02)-E 6
6/15/04, 5:08:04 PM
6
�



 2023年江西萍乡中考道德与法治真题及答案.doc
 2012年重庆南川中考生物真题及答案.doc
 2013年江西师范大学地理学综合及文艺理论基础考研真题.doc
 2020年四川甘孜小升初语文真题及答案I卷.doc
 2020年注册岩土工程师专业基础考试真题及答案.doc
 2023-2024学年福建省厦门市九年级上学期数学月考试题及答案.doc
 2021-2022学年辽宁省沈阳市大东区九年级上学期语文期末试题及答案.doc
 2022-2023学年北京东城区初三第一学期物理期末试卷及答案.doc
 2018上半年江西教师资格初中地理学科知识与教学能力真题及答案.doc
 2012年河北国家公务员申论考试真题及答案-省级.doc
 2020-2021学年江苏省扬州市江都区邵樊片九年级上学期数学第一次质量检测试题及答案.doc
 2022下半年黑龙江教师资格证中学综合素质真题及答案.doc