1. 初始化配置
1.1. 连接 SD-WAN 管理口
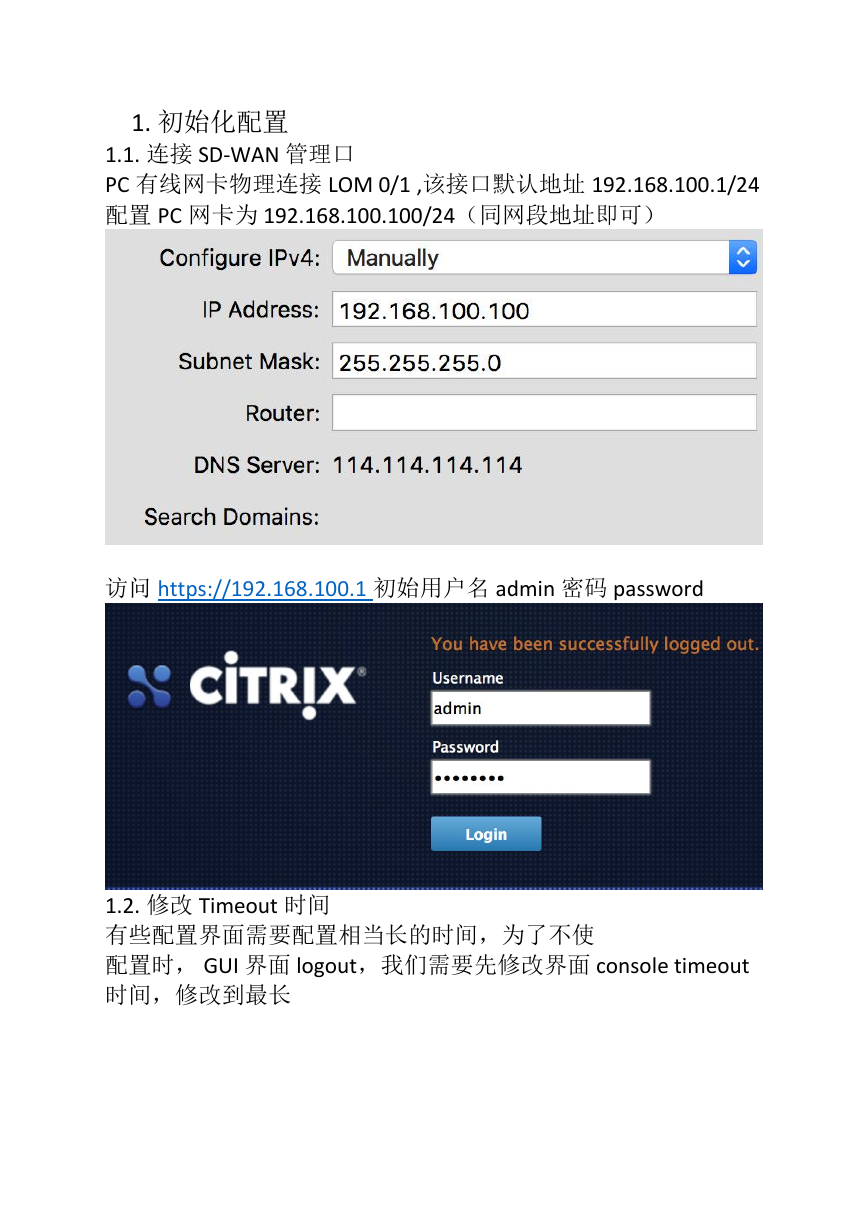
PC 有线网卡物理连接 LOM 0/1 ,该接口默认地址 192.168.100.1/24
配置 PC 网卡为 192.168.100.100/24(同网段地址即可)
访问 https://192.168.100.1 初始用户名 admin 密码 password
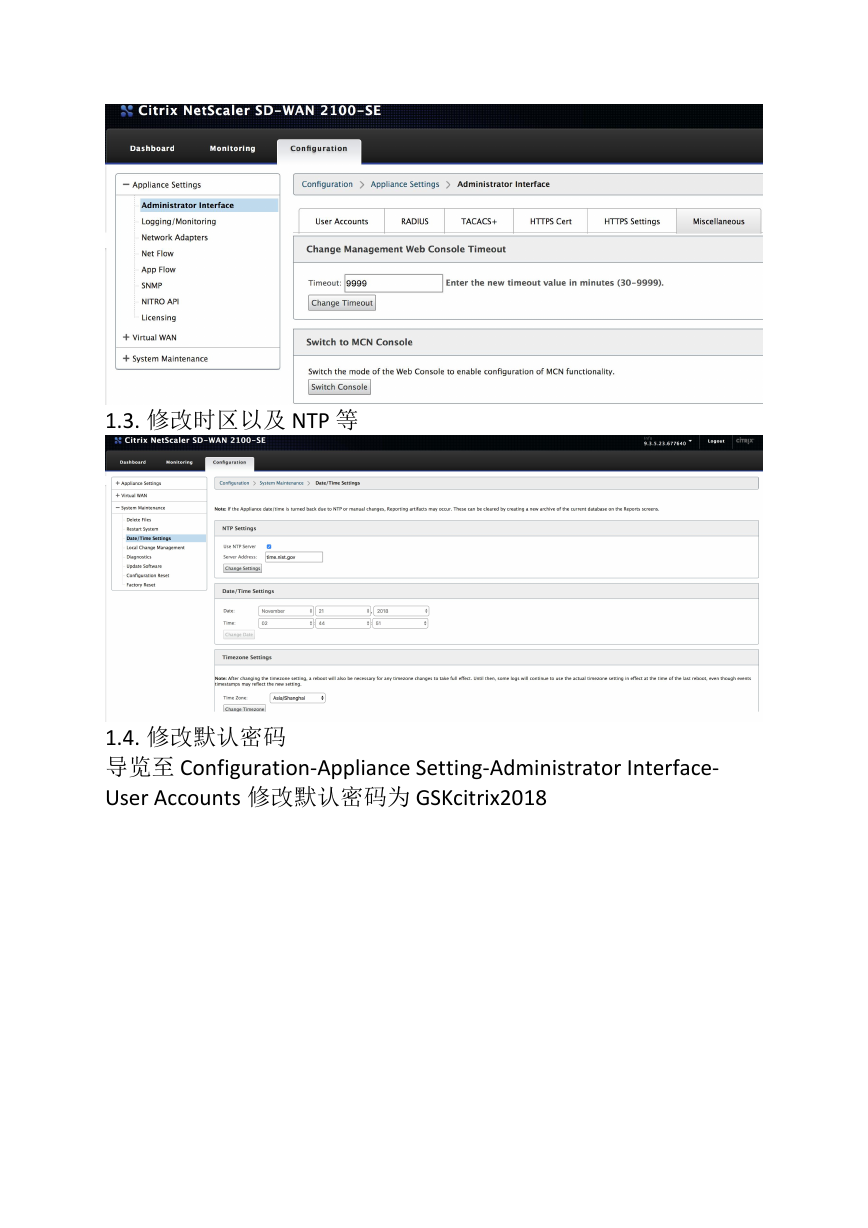
1.2. 修改 Timeout 时间
有些配置界面需要配置相当长的时间,为了不使
配置时, GUI 界面 logout,我们需要先修改界面 console timeout
时间,修改到最长
�
1.3. 修改时区以及 NTP 等
1.4. 修改默认密码
导览至 Configuration-Appliance Setting-Administrator Interface-
User Accounts 修改默认密码为 GSKcitrix2018
�
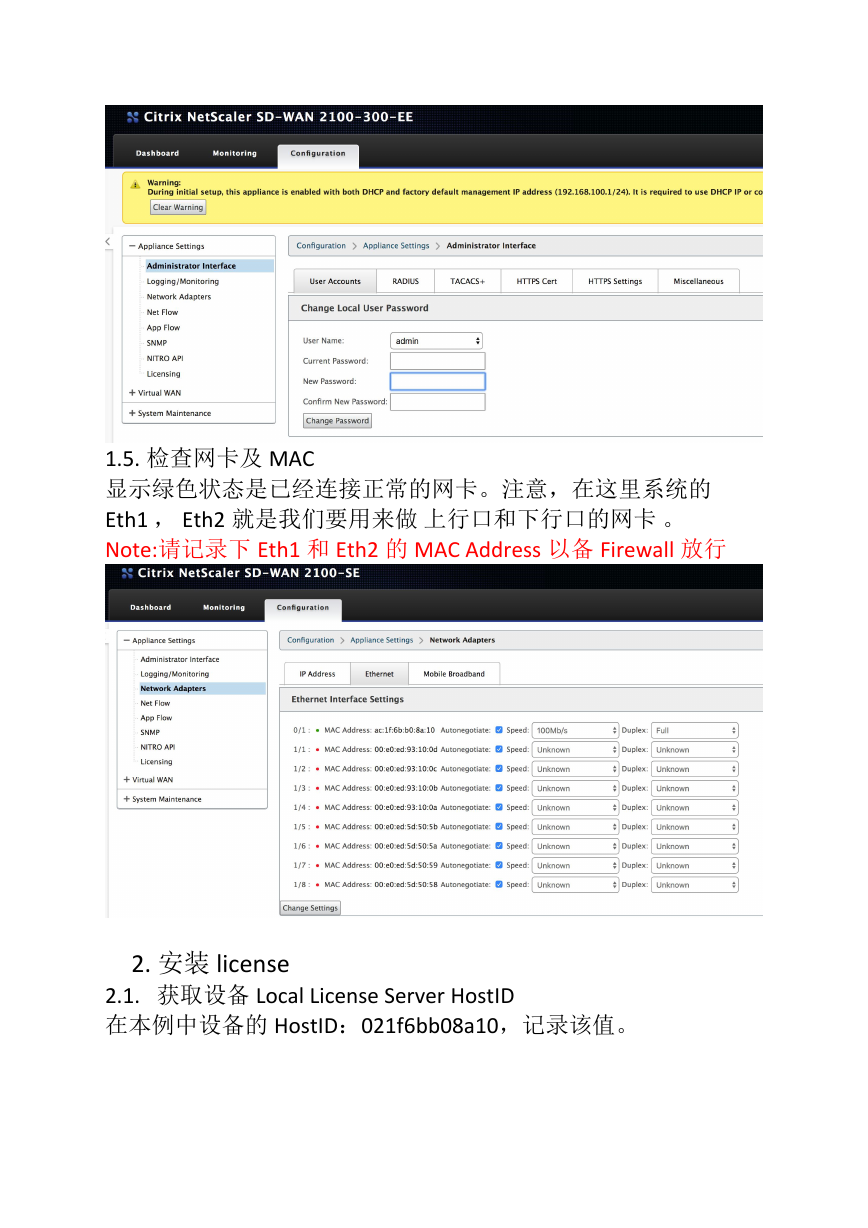
1.5. 检查网卡及 MAC
显示绿色状态是已经连接正常的网卡。注意,在这里系统的
Eth1 , Eth2 就是我们要用来做 上行口和下行口的网卡 。
Note:请记录下 Eth1 和 Eth2 的 MAC Address 以备 Firewall 放行
2. 安装 license
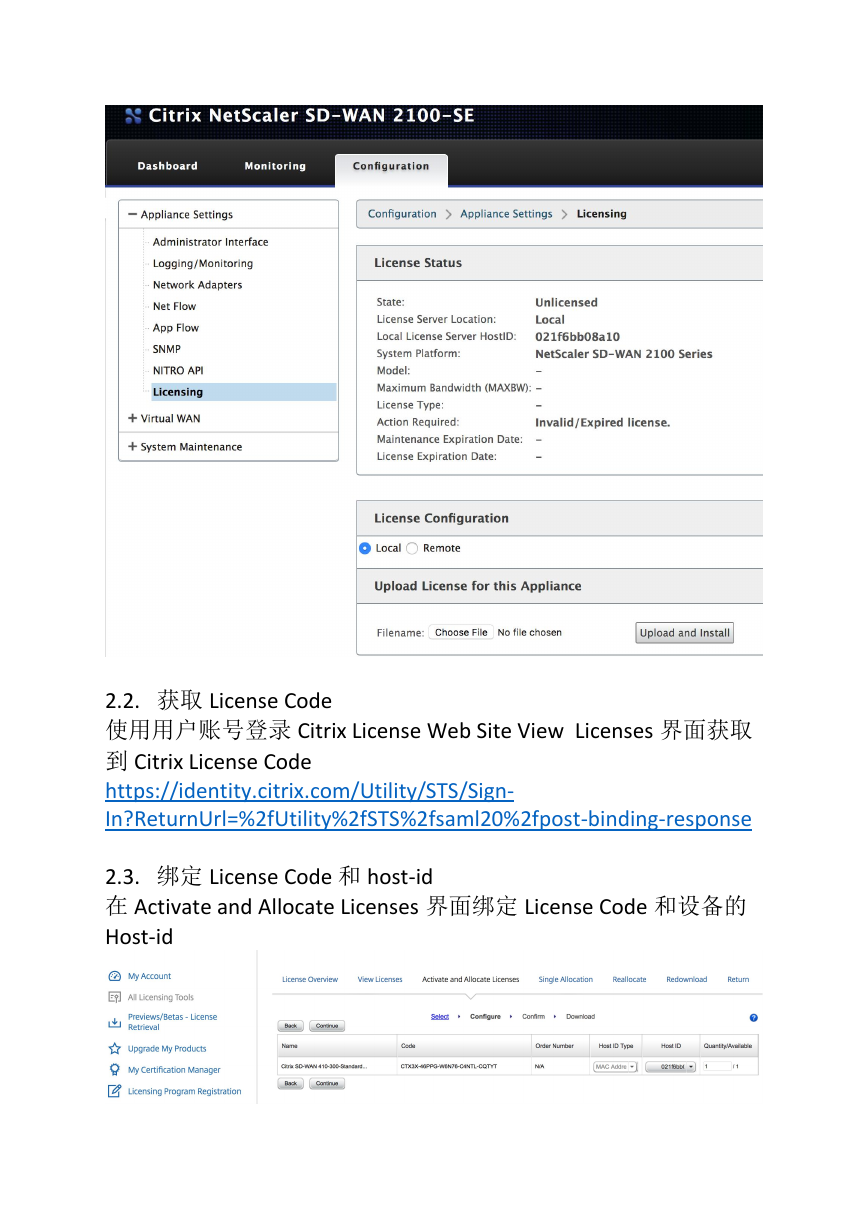
2.1. 获取设备 Local License Server HostID
在本例中设备的 HostID:021f6bb08a10,记录该值。
�
2.2. 获取 License Code
使用用户账号登录 Citrix License Web Site View Licenses 界面获取
到 Citrix License Code
https://identity.citrix.com/Utility/STS/Sign-
In?ReturnUrl=%2fUtility%2fSTS%2fsaml20%2fpost-binding-response
2.3. 绑定 License Code 和 host-id
在 Activate and Allocate Licenses 界面绑定 License Code 和设备的
Host-id
�
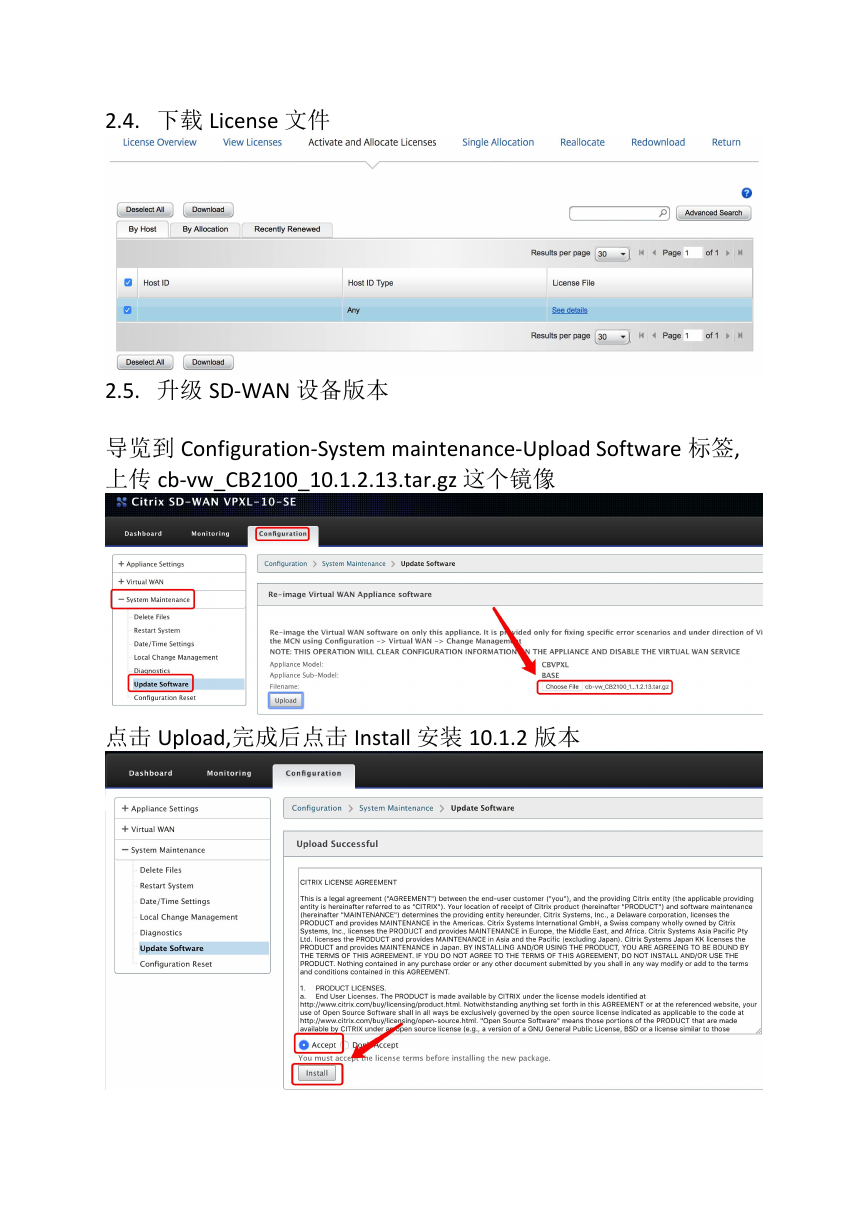
2.4. 下载 License 文件
2.5. 升级 SD-WAN 设备版本
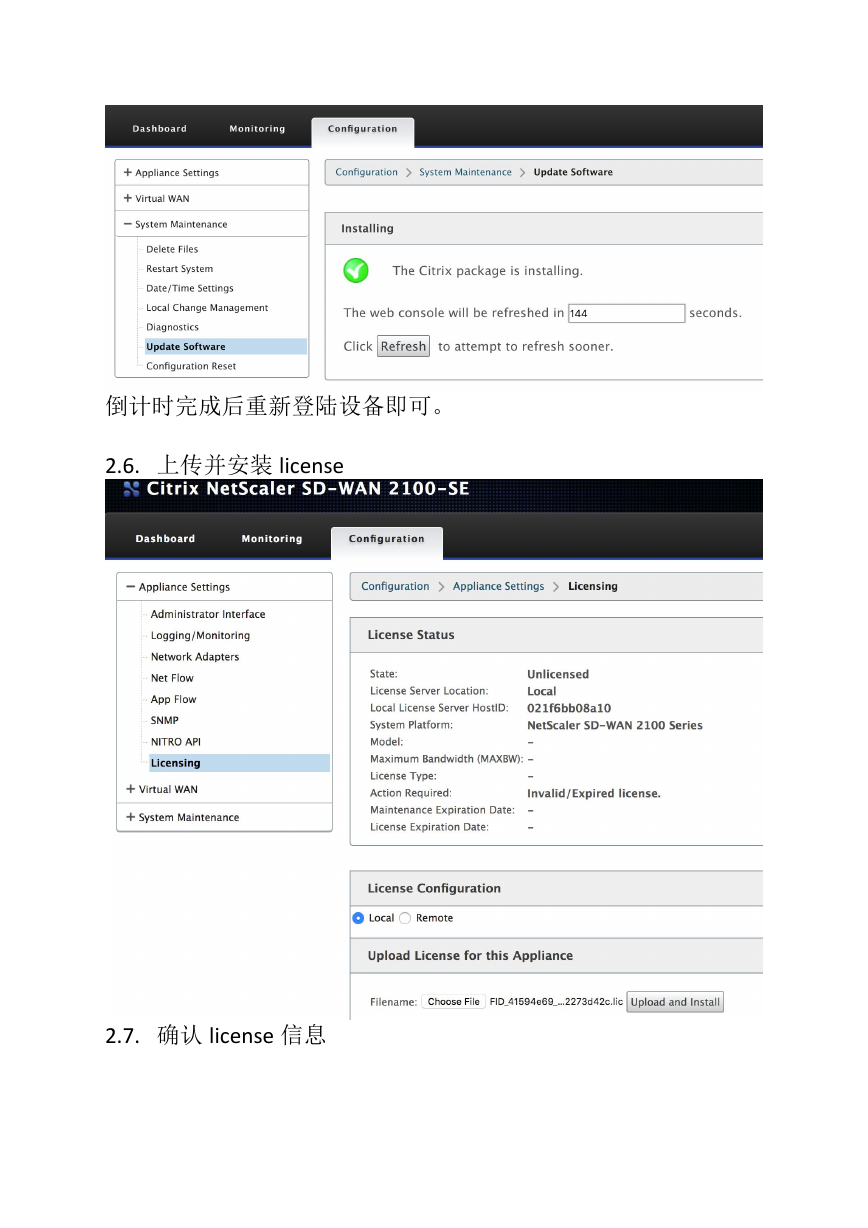
导览到 Configuration-System maintenance-Upload Software 标签,
上传 cb-vw_CB2100_10.1.2.13.tar.gz 这个镜像
点击 Upload,完成后点击 Install 安装 10.1.2 版本
�
倒计时完成后重新登陆设备即可。
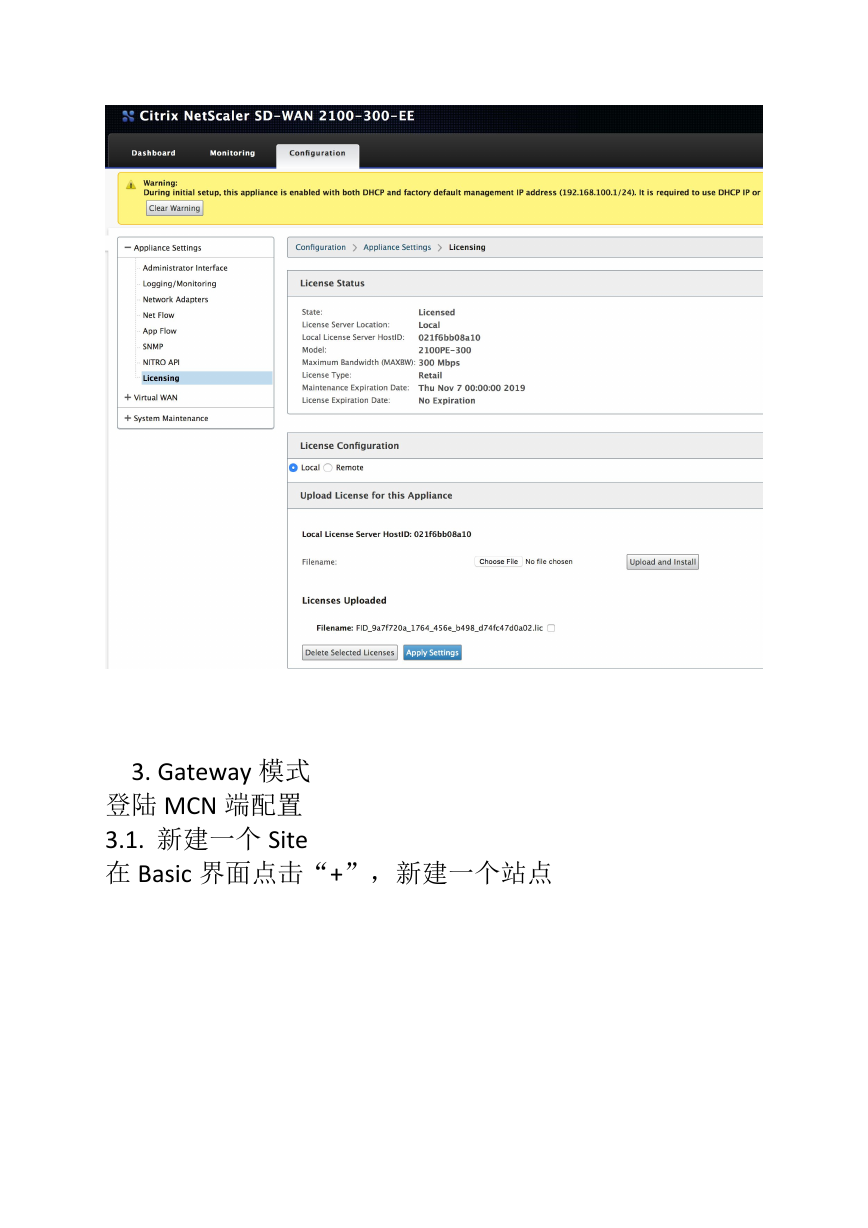
2.6. 上传并安装 license
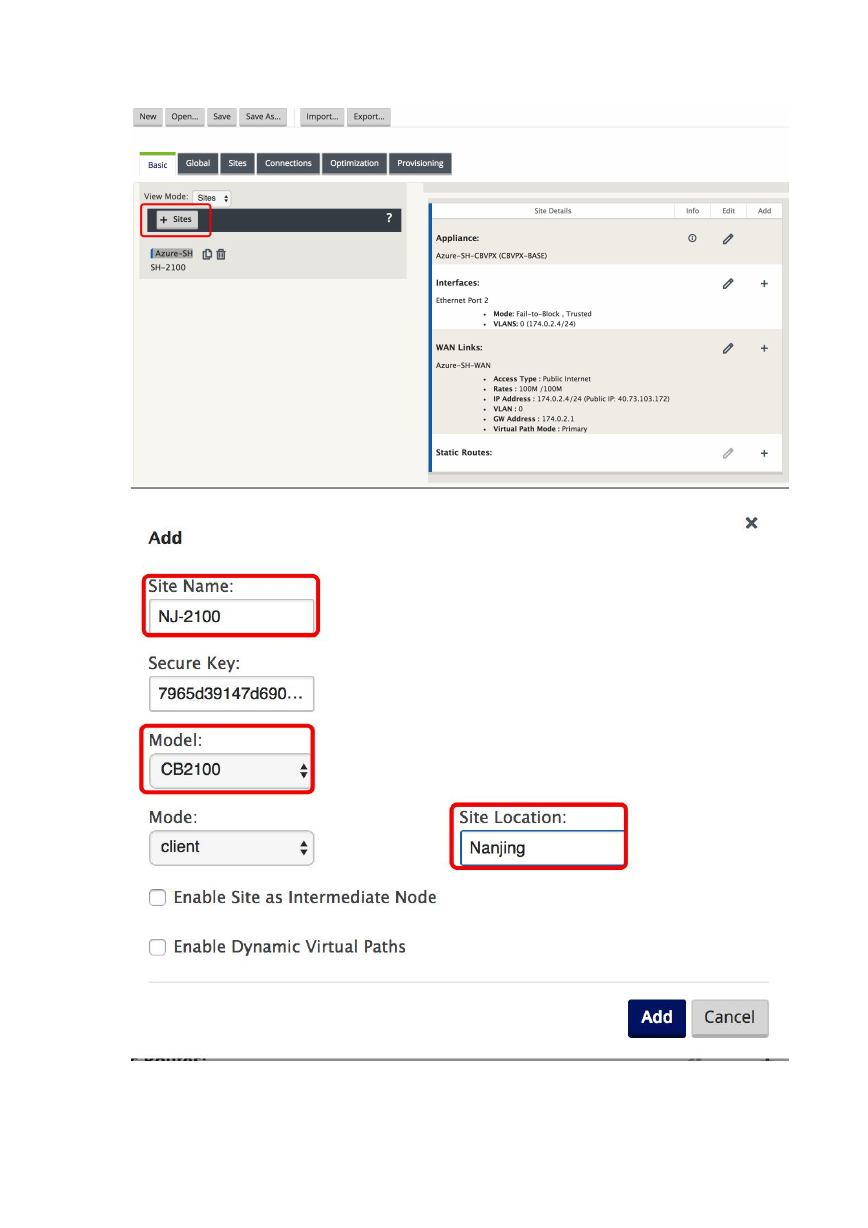
2.7. 确认 license 信息
�
3. Gateway 模式
登陆 MCN 端配置
3.1. 新建一个 Site
在 Basic 界面点击“+”,新建一个站点
�
�


 2023年江西萍乡中考道德与法治真题及答案.doc
 2012年重庆南川中考生物真题及答案.doc
 2013年江西师范大学地理学综合及文艺理论基础考研真题.doc
 2020年四川甘孜小升初语文真题及答案I卷.doc
 2020年注册岩土工程师专业基础考试真题及答案.doc
 2023-2024学年福建省厦门市九年级上学期数学月考试题及答案.doc
 2021-2022学年辽宁省沈阳市大东区九年级上学期语文期末试题及答案.doc
 2022-2023学年北京东城区初三第一学期物理期末试卷及答案.doc
 2018上半年江西教师资格初中地理学科知识与教学能力真题及答案.doc
 2012年河北国家公务员申论考试真题及答案-省级.doc
 2020-2021学年江苏省扬州市江都区邵樊片九年级上学期数学第一次质量检测试题及答案.doc
 2022下半年黑龙江教师资格证中学综合素质真题及答案.doc