logo资料库

爱普生投影机-EH-TW3600说明书.pdf

第1页 / 共62页
第2页 / 共62页
第3页 / 共62页
第4页 / 共62页
第5页 / 共62页
第6页 / 共62页
第7页 / 共62页
第8页 / 共62页
资料共62页,剩余部分请下载后查看
About the Manuals and Notations Used
Types of Manual
Notations used in this User’s Guide
Checking the Components
Table of Contents
Installing the Projector
Basic Operations
Image Quality Adjustments
Configuration Menu
Troubleshooting
Appendix
Features of the Projector
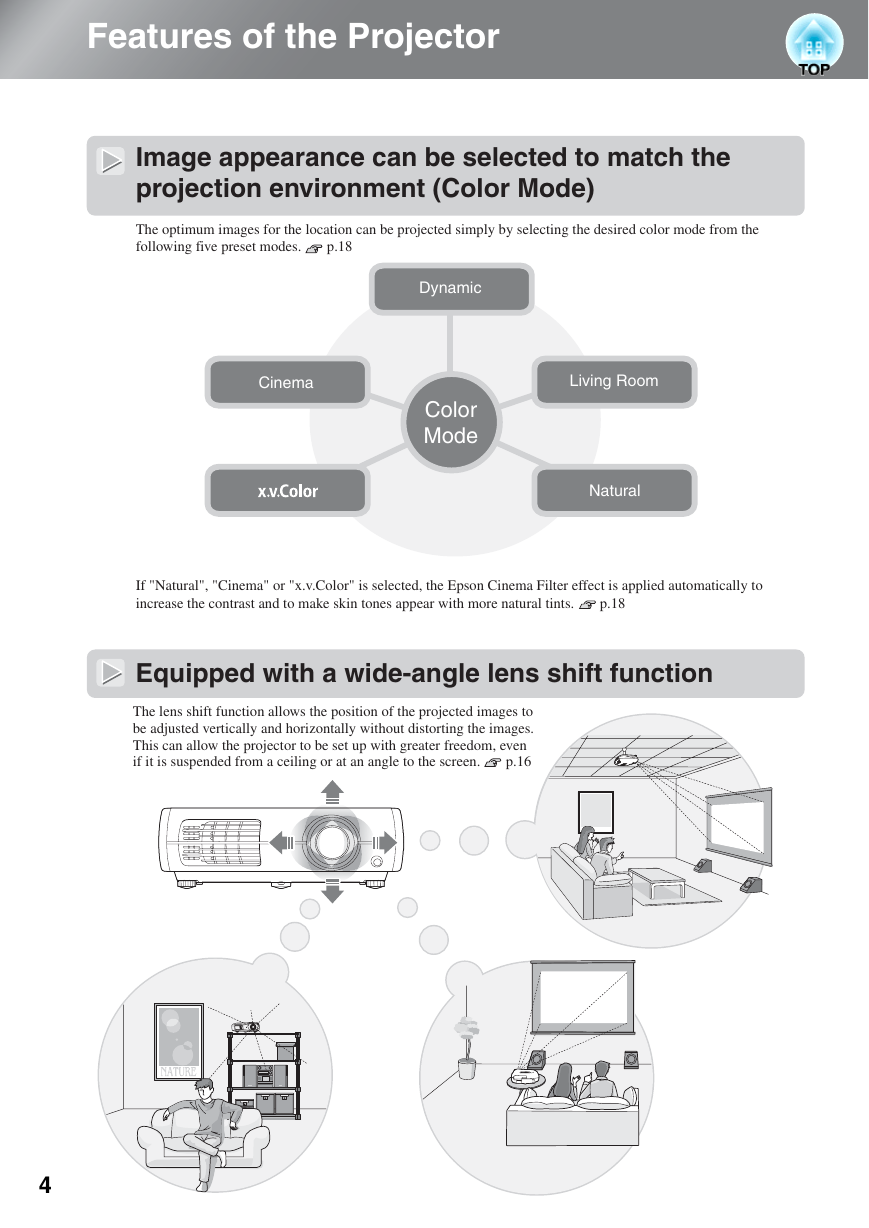
Image appearance can be selected to match the projection environment (Color Mode)
Equipped with a wide-angle lens shift function
"x.v.Color" mode realizes more natural color reproduction
Sophisticated color adjustment
Equipped with 2.1x short throw zoom lens
Advanced image quality adjustment functions
Other functions to enjoy images more
Part Names and Functions
Front / Top
Control panel
Remote control
Rear
Base
Appearance
Setting up
Adjusting the projection size
Projection methods
Connecting Image Sources
Preparing the Remote Control
Inserting batteries into the remote control
Using the remote control
Starting and Stopping Projection
Turning the power on and projecting images
When the expected images are not projected
Turning the power off
Adjusting the Projection Screen
Focus adjustment
Projection size adjustment (Zoom adjustment)
Projection image position adjustment (Lens shift)
Adjusting the tilt of the projector
Displaying a test pattern
Basic Image Quality Adjustments
Selecting the color mode
Selecting the aspect
Advanced Color Adjustments
Hue, saturation, and brightness adjustment
Gamma adjustment
RGB adjustment (Offset, Gain)
Examining Image Quality Further
Sharpness (Advanced) adjustment
Auto Iris (automatic aperture) setting
Viewing Images at a Preset Image Quality (Memory Function)
Saving, Loading and Erasing memory
Configuration Menu Functions
Using the configuration menus
List of configuration menus
"Image" menu
"Signal" menu
"Settings" menu
"Memory" menu
"Reset" menu
Problem Solving
Reading the indicators
When the (warning) indicator is lit or flashing
Indicator statuses in normal operation
When the indicators provide no help
Problems relating to images
Problems when projection starts
Problems with the remote control
Maintenance
Cleaning
Cleaning the air filter
Cleaning the projector case
Cleaning the lens
Consumable replacement periods
Air filter replacement period
Lamp replacement period
Replacing consumables
Replacing the air filter
Replacing the lamp
Resetting the lamp operating time
Optional Accessories/Consumables
List of Supported Monitor Displays
Component Video
Composite Video/S-Video
Input signal from the [HDMI1] / [HDMI2] input port
Computer image (analog RGB)
Specifications
Glossary
Index
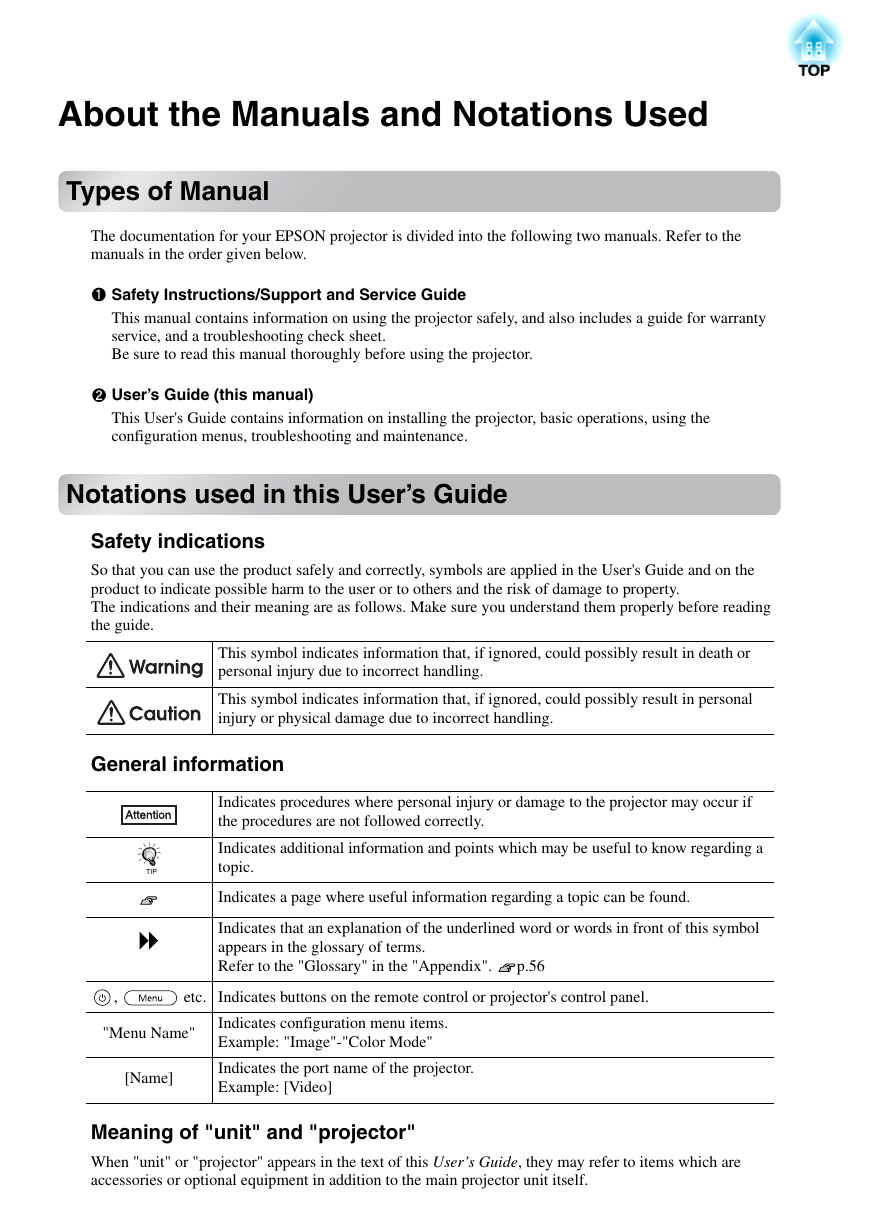
About the Manuals and Notations Used Types of Manual The documentation for your EPSON projector is divided into the following two manuals. Refer to the manuals in the order given below. Safety Instructions/Support and Service Guide This manual contains information on using the projector safely, and also includes a guide for warranty service, and a troubleshooting check sheet. Be sure to read this manual thoroughly before using the projector. User’s Guide (this manual) This User's Guide contains information on installing the projector, basic operations, using the configuration menus, troubleshooting and maintenance. Notations used in this User’s Guide Safety indications So that you can use the product safely and correctly, symbols are applied in the User's Guide and on the product to indicate possible harm to the user or to others and the risk of damage to property. The indications and their meaning are as follows. Make sure you understand them properly before reading the guide. This symbol indicates information that, if ignored, could possibly result in death or personal injury due to incorrect handling. This symbol indicates information that, if ignored, could possibly result in personal injury or physical damage due to incorrect handling. General information Indicates procedures where personal injury or damage to the projector may occur if the procedures are not followed correctly. Indicates additional information and points which may be useful to know regarding a topic. TIP Indicates a page where useful information regarding a topic can be found. Indicates that an explanation of the underlined word or words in front of this symbol appears in the glossary of terms. Refer to the "Glossary" in the "Appendix". p.56 , etc. "Menu Name" [Name] Indicates buttons on the remote control or projector's control panel. Indicates configuration menu items. Example: "Image"-"Color Mode" Indicates the port name of the projector. Example: [Video] Meaning of "unit" and "projector" When "unit" or "projector" appears in the text of this User’s Guide, they may refer to items which are accessories or optional equipment in addition to the main projector unit itself.
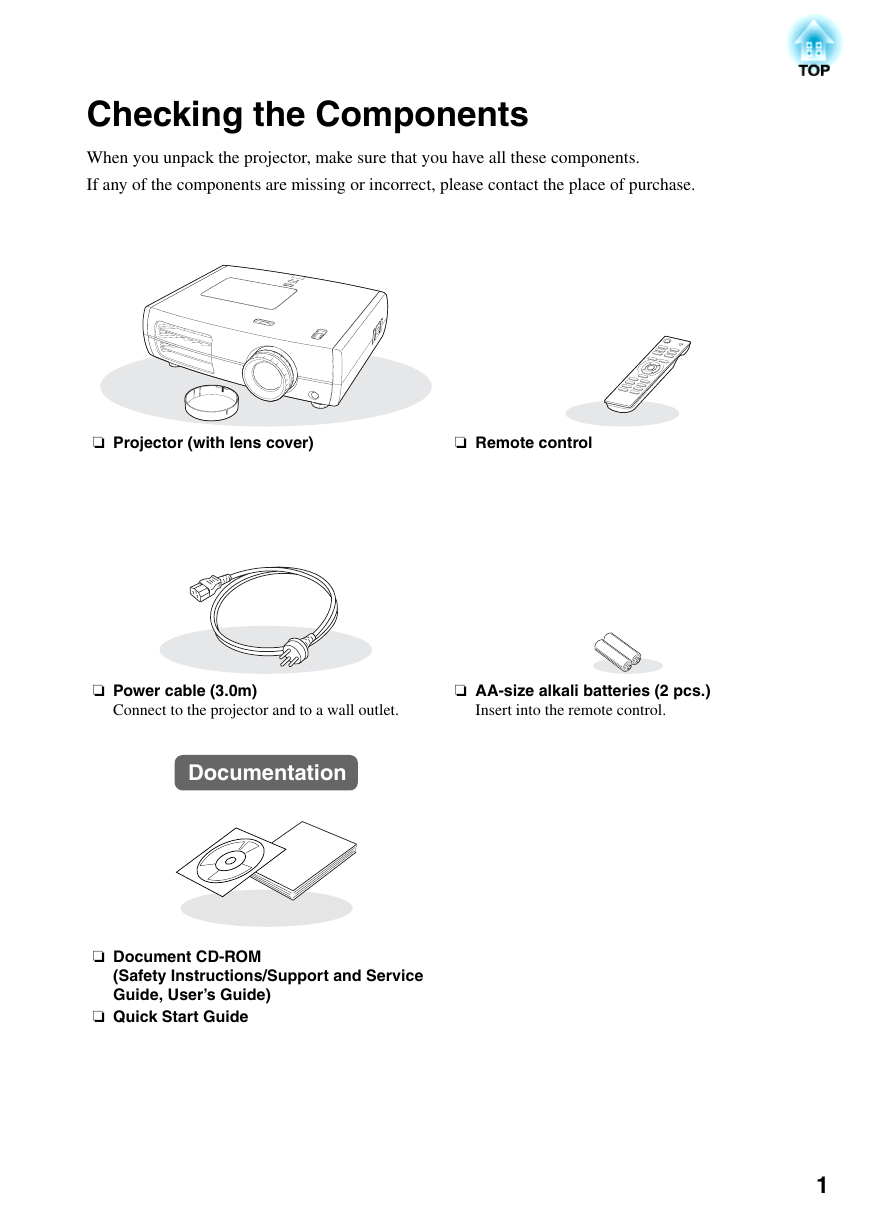
Checking the Components When you unpack the projector, make sure that you have all these components. If any of the components are missing or incorrect, please contact the place of purchase. ❏ Projector (with lens cover) ❏ Remote control ❏ Power cable (3.0m) ❏ AA-size alkali batteries (2 pcs.) Connect to the projector and to a wall outlet. Insert into the remote control. Documentation ❏ Document CD-ROM (Safety Instructions/Support and Service Guide, User’s Guide) ❏ Quick Start Guide 1
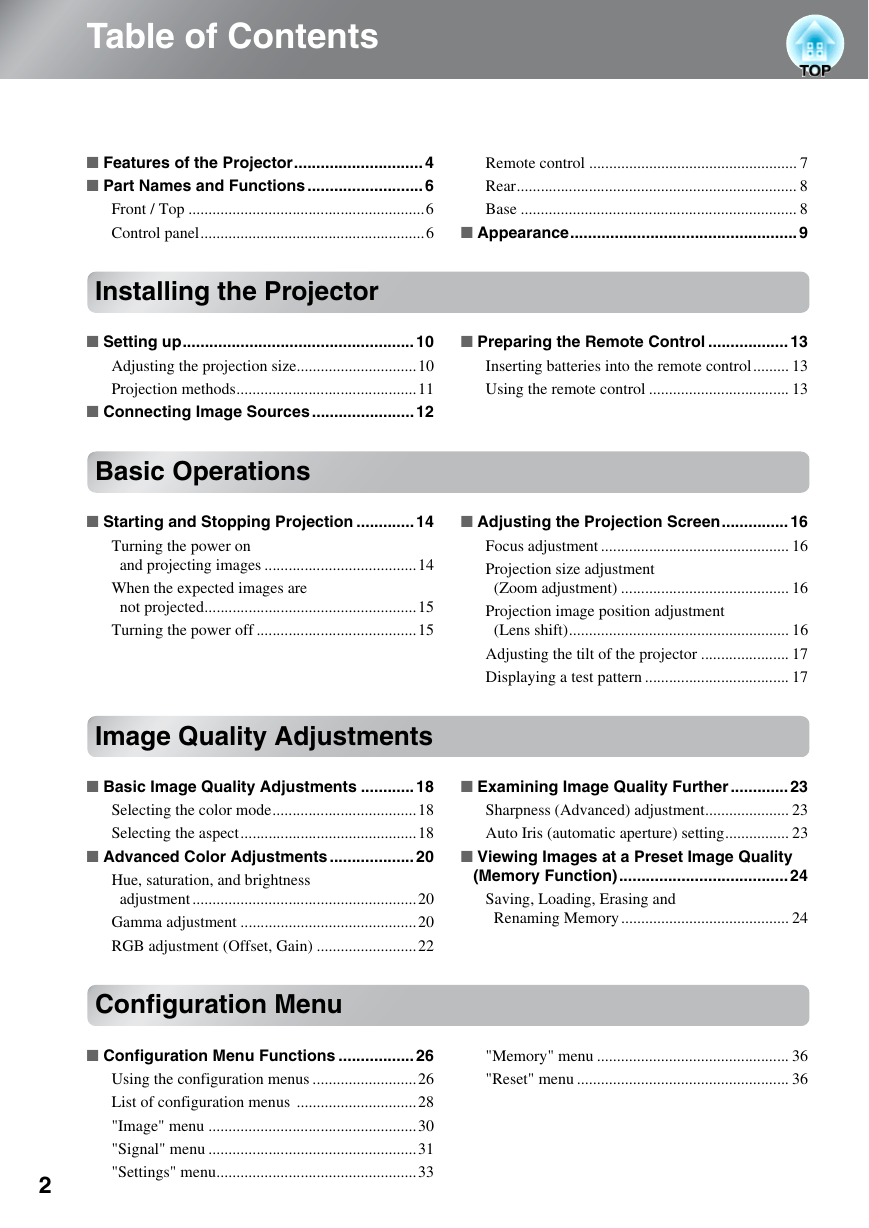
Table of Contents ■ Features of the Projector............................. 4 ■ Part Names and Functions .......................... 6 Front / Top ...........................................................6 Control panel........................................................6 Remote control .................................................... 7 Rear...................................................................... 8 Base ..................................................................... 8 ■ Appearance................................................... 9 Installing the Projector ■ Setting up.................................................... 10 Adjusting the projection size..............................10 Projection methods.............................................11 ■ Connecting Image Sources ....................... 12 ■ Preparing the Remote Control .................. 13 Inserting batteries into the remote control......... 13 Using the remote control ................................... 13 Basic Operations ■ Starting and Stopping Projection ............. 14 Turning the power on and projecting images ......................................14 When the expected images are not projected.....................................................15 Turning the power off ........................................15 Image Quality Adjustments ■ Basic Image Quality Adjustments ............ 18 Selecting the color mode....................................18 Selecting the aspect............................................18 ■ Advanced Color Adjustments ................... 20 Hue, saturation, and brightness adjustment ........................................................20 Gamma adjustment ............................................20 RGB adjustment (Offset, Gain) .........................22 Configuration Menu ■ Configuration Menu Functions ................. 26 Using the configuration menus ..........................26 List of configuration menus ..............................28 "Image" menu ....................................................30 "Signal" menu ....................................................31 "Settings" menu..................................................33 2 ■ Adjusting the Projection Screen............... 16 Focus adjustment ............................................... 16 Projection size adjustment (Zoom adjustment) .......................................... 16 Projection image position adjustment (Lens shift)....................................................... 16 Adjusting the tilt of the projector ...................... 17 Displaying a test pattern .................................... 17 ■ Examining Image Quality Further ............. 23 Sharpness (Advanced) adjustment..................... 23 Auto Iris (automatic aperture) setting................ 23 ■ Viewing Images at a Preset Image Quality (Memory Function)...................................... 24 Saving, Loading, Erasing and Renaming Memory .......................................... 24 "Memory" menu ................................................ 36 "Reset" menu ..................................................... 36
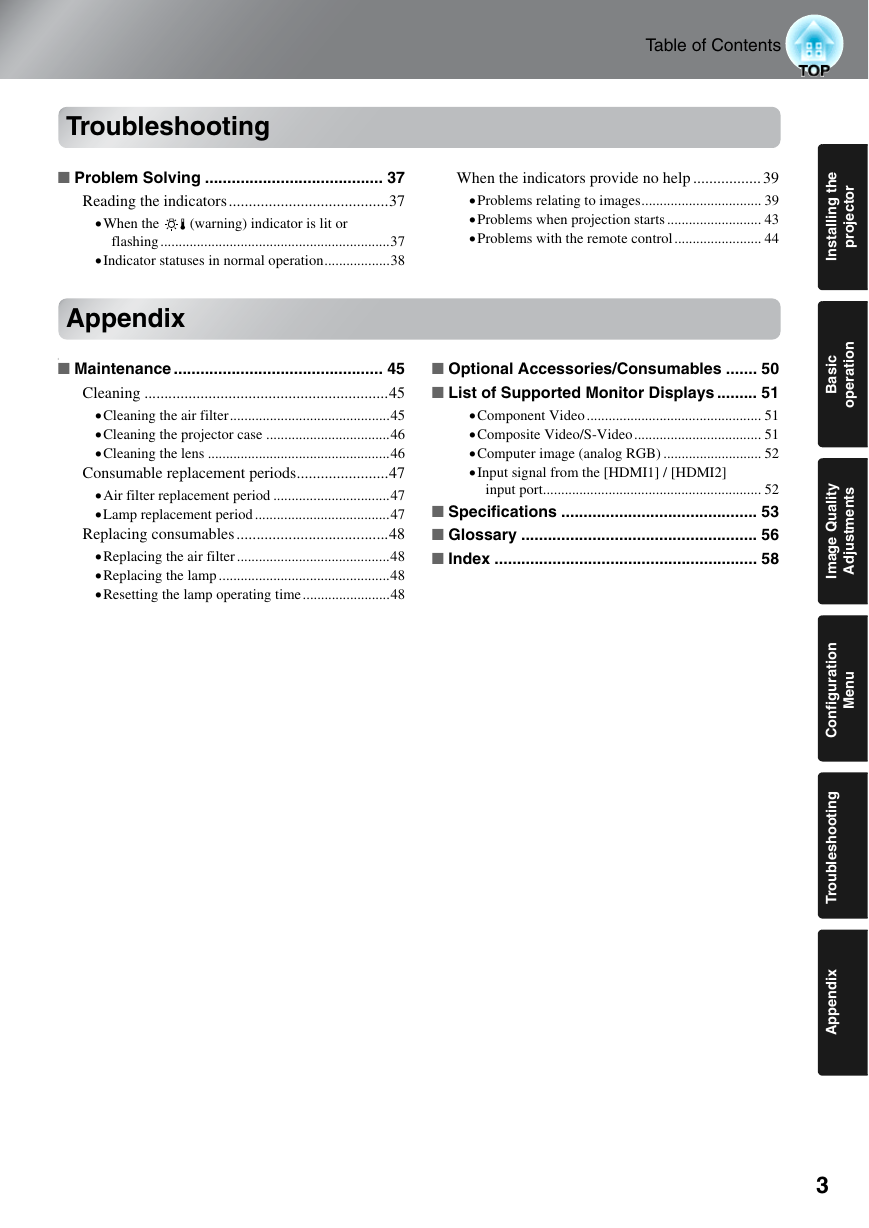
Table of Contents Troubleshooting ■ Problem Solving ........................................ 37 Reading the indicators........................................37 •When the (warning) indicator is lit or flashing ...............................................................37 •Indicator statuses in normal operation..................38 When the indicators provide no help ................. 39 •Problems relating to images................................. 39 •Problems when projection starts .......................... 43 •Problems with the remote control........................ 44 Appendix l ■ Maintenance ............................................... 45 Cleaning .............................................................45 •Cleaning the air filter............................................45 •Cleaning the projector case ..................................46 •Cleaning the lens ..................................................46 Consumable replacement periods.......................47 •Air filter replacement period ................................47 •Lamp replacement period .....................................47 Replacing consumables ......................................48 •Replacing the air filter ..........................................48 •Replacing the lamp ...............................................48 •Resetting the lamp operating time........................48 ■ Optional Accessories/Consumables ....... 50 ■ List of Supported Monitor Displays ......... 51 •Component Video ................................................ 51 •Composite Video/S-Video................................... 51 •Computer image (analog RGB) ........................... 52 •Input signal from the [HDMI1] / [HDMI2] input port............................................................ 52 ■ Specifications ............................................ 53 ■ Glossary ..................................................... 56 ■ Index ........................................................... 58 e h t g n i l l a t s n I r o t c e o r p j c i s a B n o i t a r e p o y t i l a u Q e g a m I s t n e m t s u d A j u n e M n o i t a r u g i f n o C g n i t o o h s e b u o r T l i x d n e p p A 3
Features of the Projector Image appearance can be selected to match the projection environment (Color Mode) The optimum images for the location can be projected simply by selecting the desired color mode from the following five preset modes. p.18 Dynamic Cinema Living Room Color Mode Natural If "Natural", "Cinema" or "x.v.Color" is selected, the Epson Cinema Filter effect is applied automatically to increase the contrast and to make skin tones appear with more natural tints. p.18 Equipped with a wide-angle lens shift function The lens shift function allows the position of the projected images to be adjusted vertically and horizontally without distorting the images. This can allow the projector to be set up with greater freedom, even if it is suspended from a ceiling or at an angle to the screen. p.16 "x.v.Color" mode realizes more natural color reproduction 4
Features of the Projector " " mode realizes more natural color reproduction This mode is compatible with the extended-gamut color space standard for video (xvYCC). Extended-gamut color images output by equipment supporting this standard are more faithful to the original, and the viewer can enjoy clearer, more natural images. p.18 Sophisticated color adjustment In addition to the "Color Mode", the absolute color temperature and skin tones can be adjusted by simple procedures to render the picture even more to your own liking. Further, you can adjust gamma, the offset and gain for RGB colors, and the hue, saturation, and brightness of RGBCMY colors, to create colors that match the image. p.20 Equipped with 2.1x short throw zoom lens For zoom adjustment, 2.1x short throw zoom lens is provided. Images can be projected onto an 100" screen (16:9 screen only) even at a distance of approximately 3 m. p.10 Advanced image quality adjustment functions Advanced image quality adjustment functions such as "Auto Iris" and "Sharpness (Advanced)" can be used to enjoy even sharper images. With the Auto Iris function turned on, the amount of light can be automatically adjusted to match the images being projected, to create images with depth and perspective. The Sharpness function is used not only to adjust the entire image, but also to emphasize specific regions, such as hair and clothing. p.23 Other functions to enjoy images more Some of the other many functions are available as follows. EPSON Super White that prevents overexposure in images that are too bright p.32 The memory function makes it easy to store your preferred color tone settings for projected images into memory, and to load them again. p.24 Remote control with backlight provides greater visibility and ease of operation in dark rooms. p.7 Auto iris function automatically recognizes changes in the brightness of images to produce natural feelings of depth and stereoscopic effect. p.23 5
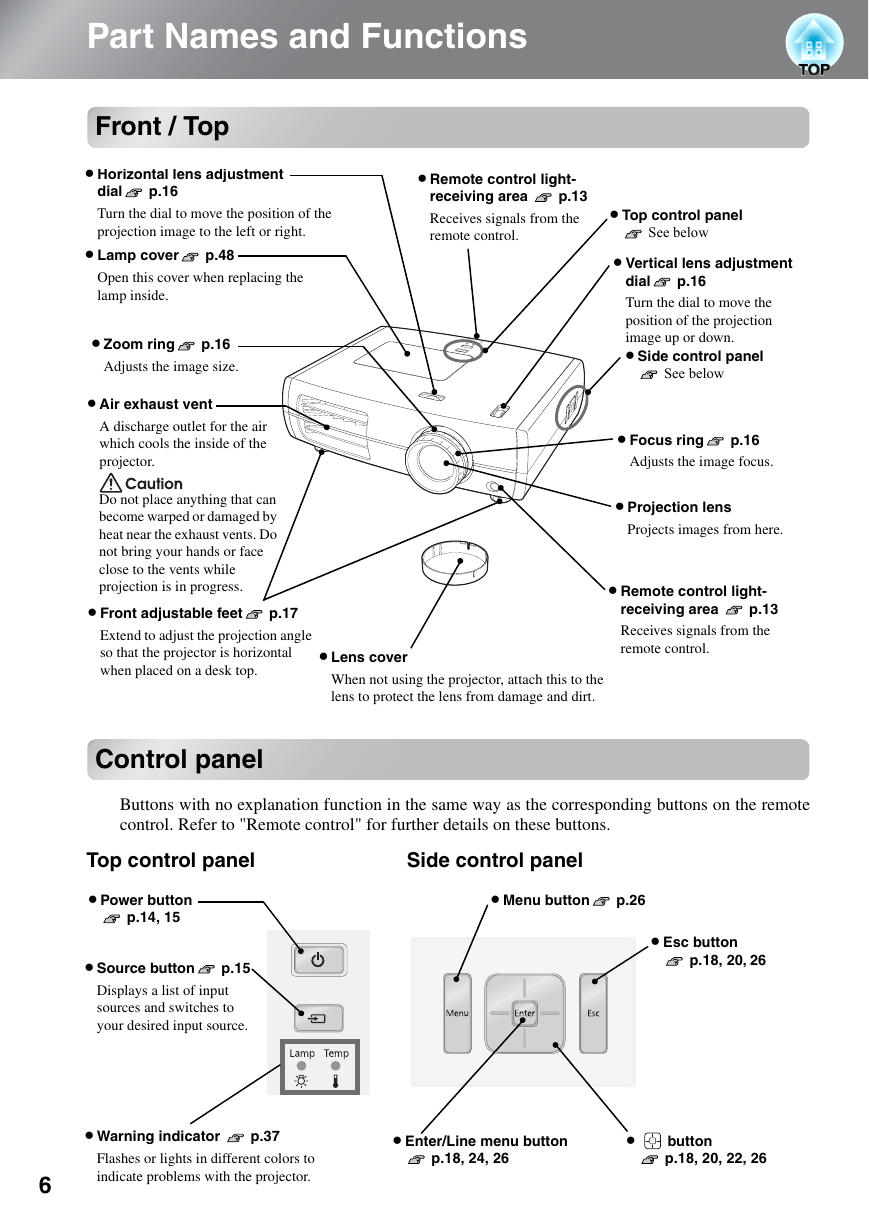
Part Names and Functions Front / Top p.16 • Horizontal lens adjustment dial Turn the dial to move the position of the projection image to the left or right. • Lamp cover Open this cover when replacing the lamp inside. p.48 • Zoom ring p.16 Adjusts the image size. • Air exhaust vent A discharge outlet for the air which cools the inside of the projector. Do not place anything that can become warped or damaged by heat near the exhaust vents. Do not bring your hands or face close to the vents while projection is in progress. • Front adjustable feet Extend to adjust the projection angle so that the projector is horizontal when placed on a desk top. p.17 Control panel • Remote control light- receiving area p.13 Receives signals from the remote control. • Top control panel See below p.16 • Vertical lens adjustment dial Turn the dial to move the position of the projection image up or down. • Side control panel See below • Focus ring Adjusts the image focus. p.16 • Projection lens Projects images from here. • Remote control light- receiving area p.13 Receives signals from the remote control. • Lens cover When not using the projector, attach this to the lens to protect the lens from damage and dirt. Buttons with no explanation function in the same way as the corresponding buttons on the remote control. Refer to "Remote control" for further details on these buttons. Top control panel Side control panel • Power button p.14, 15 p.15 • Source button Displays a list of input sources and switches to your desired input source. • Menu button p.26 • Esc button p.18, 20, 26 • Warning indicator Flashes or lights in different colors to indicate problems with the projector. p.37 6 • Enter/Line menu button p.18, 24, 26 • button p.18, 20, 22, 26
分享到:
收藏