TinyOS Tutorial
TinyOS 2.0 Tutorials
Last updated 30 Aug 2007
These brief tutorials are intended to get you started with TinyOS. They show you the basics of writing,
compiling, and installing TinyOS applications. They introduce the basic TinyOS abstractions:
computation, communication, sensing, and storage. The later tutorials go a little deeper into some of the
more advanced areas of TinyOS, such as handling interrupts, power management, and how platforms are
organized.
Lesson 1: TinyOS
Lesson 1 introduces the major concepts of TinyOS: components, modules, configurations and
interfaces. It shows you how to compile and install a TinyOS program on a mote.
Lesson 2: Modules and the TinyOS Execution Model
Lesson 2 explains the TinyOS execution model, looking more closely at modules. It explains
events, commands and their relationships to interfaces in greater depth, introducing split-phase
operations. It explains tasks, the basic mechanism in TinyOS for components to cooperatively share the
processor.
Lesson 3: Mote-mote radio communication
Lesson 3 introduces the TinyOS communication model. There is an exercise that illustrates
sending and receiving messages.
Lesson 4: Mote-PC serial communication and SerialForwarder
Lesson 4 introduces the the TinyOS toolchain for PCs and laptops to communicate with motes. It
describes the concept of a packet source, the mig tool, and SerialForwarder.
Lesson 5: Sensing
Lesson 5 explains how to sample sensors in TinyOS. There is an exercise that periodically
samples a sensor and displays the value on the leds.
Lesson 6: Boot Sequence
http://www.tinyos.net/tinyos-2.x/doc/html/tutorial/index.html (1 of 3)2007-9-15 7:38:14
�
TinyOS Tutorial
Lesson 6 details the boot sequence and, in doing so, answers the question, "But where is main
()?".
Lesson 7: Storage
Lesson 7 introduces the TinyOS storage model. Sample applications illustrate the use of the
Mount, ConfigStorage, LogRead and LogWrite interfaces.
Lesson 8: Resource Arbitration and Power Management
Lesson 8 introduces the TinyOS resource arbitration and power management model. There are
two exercises in this tutorial. The first one illustrates how to gain access to predefined shared resources.
The second one illustrates how to create your own shared resource. In both tutorials, the process for
controlling the power states of the resource is presented.
Lesson 9: Concurrency
Lesson 9 introduces the TinyOS concurrency model. Tasks are revisited and async code is
introduced. This tutorial is currently unfinished.
Lesson 10: Platforms
Lesson 10 provides a better understanding of the difference between "make micaz" and "make
telosb," including how these commands map into underlying files, directories, and definitions. It is not
necessary for most TinyOS developers, but is included as a starter's guide for people who wish to
understand the make system better or wish to design a new platform.
Lesson 11: TOSSIM
Lesson 11 introduces TOSSIM, a TinyOS simulator. TOSSIM allows you to compile your
TinyOS applications into a simulation framework, where you can perform reproducible tests and debug
your code with standard development tools.
Lesson 12: Network Protocols
Lesson 12 introduces two basic multihop protocols, Dissemination and Collection. Dissemination
reliably delivers small data items to every node in a network, while collection delivers small data items
from every node in a network to designated collection roots.
http://www.tinyos.net/tinyos-2.x/doc/html/tutorial/index.html (2 of 3)2007-9-15 7:38:14
�
TinyOS Tutorial
Lesson 13: TinyOS Toolchain
Lesson 13 describes the details of the TinyOS toolchain, including the build system, how to
create your own Makefile, and how to find out more information on the various tools included with
TinyOS.
Lesson 14: Building a simple but full-featured application
Lesson 14 goes through the process of building a simple anti-theft application using many of the
features and services of TinyOS 2. Lesson 14 is found in the tinyos-2.x/apps/AntiTheft directory. The
powerpoint slides found there (also available in pdf form) go over the basic principles of TinyOS, and
show how to build the accompanying AntiTheft application. Please start by reading the README.txt
file in the AntiTheft directory.
To run the AntiTheft demo you will need mica2 or micaz motes, and some mts310 sensor boards (you
can also use mts300 boards, though you will lose the movement detection functionality). If you do not
have this hardware, the slides and AntiTheft code should still provide a good overview of TinyOS 2.
Lesson 15: The TinyOS printf Library
Lesson 15 describes the details of using the TinyOS printf library to print debug messages to
your PC from a TinyOS application running on a mote.
Lesson 16: Writing Low Power Sensing Applications
This lesson demonstrates how to write low power sensing applications in TinyOS. At any given
moment, the power consumption of a wireless sensor node is a function of its microcontroller power
state, whether the radio, flash, and sensor peripherals are on, and what operations active peripherals are
performing. This tutorial shows you how to best utilize the features provided by TinyOS to keep the
power consumption of applications that use these devices to a minumum.
http://www.tinyos.net/tinyos-2.x/doc/html/tutorial/index.html (3 of 3)2007-9-15 7:38:14
�
TinyOS Tutorial Lesson 1: TinyOS Component Model
Lesson 1: Getting Started with TinyOS and nesC
Last updated April 8 2007
Introduction
This lesson shows you how to compile a TinyOS program and install it on a mote, introduces the basic concepts and syntax of
the TinyOS component model, and shows you how to generate and navigate TinyOS's source code documentation.
Compiling and Installing
As a first exercise, you'll compile and install a very simple TinyOS application called Blink. If you don't have mote hardware,
you can compile it for TOSSIM, the TinyOS simulator.
You compile TinyOS applications with the program make. TinyOS uses a powerful and extensible make system that allows
you to easily add new platforms and compilation options. The makefile system definitions are located in tinyos-2.x/support/
make.
The first step is to check that your environment is set up correctly. Run the tos-check-env command:
$ tos-check-env
This script checks pretty much everything that the TinyOS environment needs. Most of the warnings should be somewhat self-
explanatory, if you are at all accustomed to a UNIX environment. If you are having trouble with warnings, your best bet is to
join and ask questions on the tinyos-help email list. It's almost always the case that if you've run into a problem, someone else
has too. Searching the help archives can therefore be useful.
If your system says some command is not available, then chances are you need to install the TinyOS tools (tos-*) RPM. Please
refer to your installation instructions. If you have installed the RPM, then look in /usr/bin and /usr/local/bin for tos-check-env.
If you have downloaded from CVS rather than used RPMs, then you need to compile and build the tools. Go to tinyos-2.
x/tools/tinyos and type:
$ configure
$ make
$ make install
On Linux systems, you will either need superuser abilities or access to sudo for the last command.
The second thing to check is that you have the TinyOS build system enabled. This involves the MAKERULES environment
variable. In a shell, type
printenv MAKERULES
You should see /opt/tinyos-2.x/support/make/Makerules. If your TinyOS tree is installed somewhere besides
the standard place, you might not see /opt, but rather a different initial path. If MAKERULES is not set (printenv prints
nothing), you need to set it. Depending on your shell, this involves using either export (bash) or setenv (csh, tcsh). If you
don't know about shell environment variables, this tutorial should help.
http://www.tinyos.net/tinyos-2.x/doc/html/tutorial/lesson1.html (1 of 14)2007-9-15 7:38:30
�
TinyOS Tutorial Lesson 1: TinyOS Component Model
The make command to compile a TinyOS application is make [platform], executed from the application's directory. To
compile Blink, go the apps/Blink directory and depending on which hardware you have, type make micaz, make
mica2, make telosb, or, for simulation, type make micaz sim.
You should see output such as this:
dark /root/src/tinyos-2.x/apps/Blink -4-> make telosb
mkdir -p build/telosb
compiling BlinkAppC to a telosb binary
ncc -o build/telosb/main.exe -Os -O -mdisable-hwmul -Wall -Wshadow
-DDEF_TOS_AM_GROUP=0x7d -Wnesc-all -target=telosb -fnesc-cfile=build/telosb/app.c
-board= BlinkAppC.nc -lm
compiled BlinkAppC to build/telosb/main.exe
2782 bytes in ROM
61 bytes in RAM
msp430-objcopy --output-target=ihex build/telosb/main.exe build/telosb/main.ihex
writing TOS image
If you compile for TOSSIM, you will see a much longer message, as building TOSSIM requires several steps, such as building
shared libraries and scripting support.
If you are running Cygwin and see the error message "The procedure entry point basename could not be located in the
dynamic link library cygwin1.dll" then you need to install the other Cygwin nesC RPM (step 4 of the install instructions or
step 2 of the upgrade instructions)
Making sure you're invoking the right version of the nesC compiler
If you see an error message along the lines of this:
BlinkAppC.nc:46: syntax error before `new'
make: *** [exe0] Error 1
Then you are invoking an older version of the nesc compiler. Check by typing ncc --version. You should see:
ncc: 1.2.1
nescc: 1.2.6
Followed by some information on what version of the C compiler is being used. If you see different versions than those above,
your compilation problems are most probably due to the fact that make is invoking the wrong version. This can easily happen
if you are upgrading from TinyOS 1.x. You might have passed the tos-check-env because you have the right compiler on your
system, but for some reason make is invoking the wrong one.
ncc is a script that invokes the full compiler, nescc. It lives in tinyos-2.x/tools/tinyos/ncc. If you've installed
from an RPM, then the RPM put the new version of ncc in /usr/bin. You can see which version make is invoking by
typing which ncc:
$ which ncc
/usr/local/bin/ncc
$ /usr/local/bin/ncc --version
http://www.tinyos.net/tinyos-2.x/doc/html/tutorial/lesson1.html (2 of 14)2007-9-15 7:38:30
�
TinyOS Tutorial Lesson 1: TinyOS Component Model
Unknown target mica
Known targets for TinyOS directory /opt/tinyos-2.x/tos
and the specified include directories are:
none.
In this case, the version of ncc is so old that it doesn't even respond to the --version flag. In contrast,
$ /usr/bin/ncc --version
ncc: 1.2.1
nescc: 1.2.5
The best solution to this problem is to move the old ncc to a different name (keep in around in case you need to go back to
your old setup):
$ mv /usr/local/bin/ncc /usr/local/bin/ncc.old
$ which ncc
/usr/bin/ncc
You can apply the same process for nescc:
$ nescc --version
ncc: 1.1.2
$ which nescc
/usr/local/bin/nescc
$ /usr/bin/nescc --version
nescc: 1.2.5
$ mv /usr/local/bin/nescc /usr/local/bin/nescc.old
$ which nescc
/usr/bin/nescc
Now that we've compiled the application it's time to program the mote and run it. The next step depends on what family of
mote you are programming.
l Installing on a mica-family mote
l Installing on a telos-family mote
l Installing on a tinynode mote
l Installing on an eyesIFX-family mote
l Installing on an IntelMote2
Installing on a mica-family mote (micaz, mica2, mica2dot)
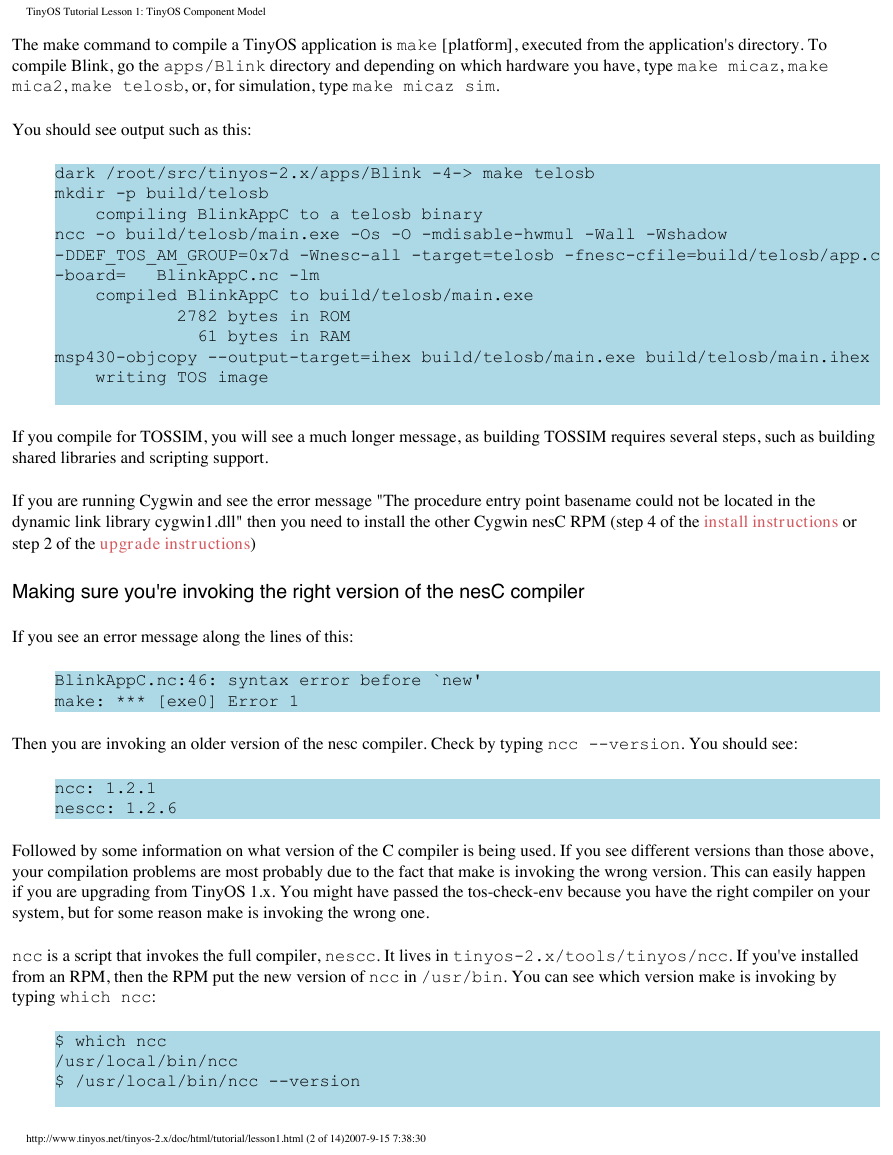
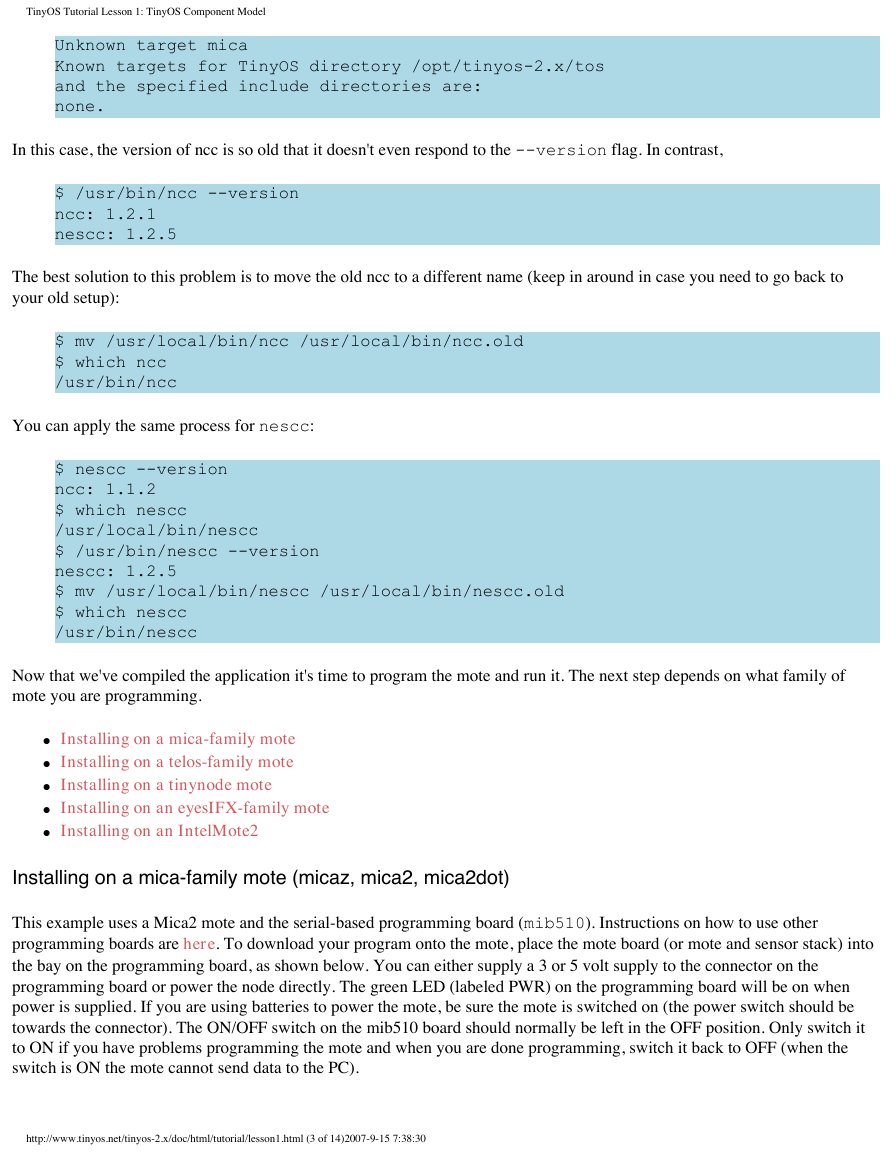
This example uses a Mica2 mote and the serial-based programming board (mib510). Instructions on how to use other
programming boards are here. To download your program onto the mote, place the mote board (or mote and sensor stack) into
the bay on the programming board, as shown below. You can either supply a 3 or 5 volt supply to the connector on the
programming board or power the node directly. The green LED (labeled PWR) on the programming board will be on when
power is supplied. If you are using batteries to power the mote, be sure the mote is switched on (the power switch should be
towards the connector). The ON/OFF switch on the mib510 board should normally be left in the OFF position. Only switch it
to ON if you have problems programming the mote and when you are done programming, switch it back to OFF (when the
switch is ON the mote cannot send data to the PC).
http://www.tinyos.net/tinyos-2.x/doc/html/tutorial/lesson1.html (3 of 14)2007-9-15 7:38:30
�
TinyOS Tutorial Lesson 1: TinyOS Component Model
Plug the 9-pin connector into the serial port of a computer configured with the TinyOS tools, using a pass-through (not null-
modem!) DB9 serial cable. If your computer does not have a serial port, you can easily obtain DB9-serial-to-USB cables.
Mica2 mote next to the programming board
Mica2 mote connected to the programming board
Type:
make mica2 reinstall mib510,serialport
where serialport is the serial port device name. Under Windows, if your serial port is COMn:, you must use /dev/ttySn-1
as the device name. On Linux, the device name is typically /dev/ttySn for a regular serial port and /dev/ttyUSBn or /
dev/usb/tts/n for a USB-serial cable (the name depends on the Linux distribution). Additionally, on Linux, you will
typically need to make this serial port world writeable. As superuser, execute the following command:
chmod 666 serialport
If the installation is successful you should see something like the following (if you don't, try repeating the make command):
cp build/mica2/main.srec build/mica2/main.srec.out
installing mica2 binary using mib510
uisp -dprog=mib510 -dserial=/dev/ttyUSB1 --wr_fuse_h=0xd9 -dpart=ATmega128
--wr_fuse_e=ff --erase --upload if=build/mica2/main.srec.out
Firmware Version: 2.1
Atmel AVR ATmega128 is found.
Uploading: flash
Fuse High Byte set to 0xd9
Fuse Extended Byte set to 0xff
rm -f build/mica2/main.exe.out build/mica2/main.srec.out
Installing on telos-family mote (telosa, telosb)
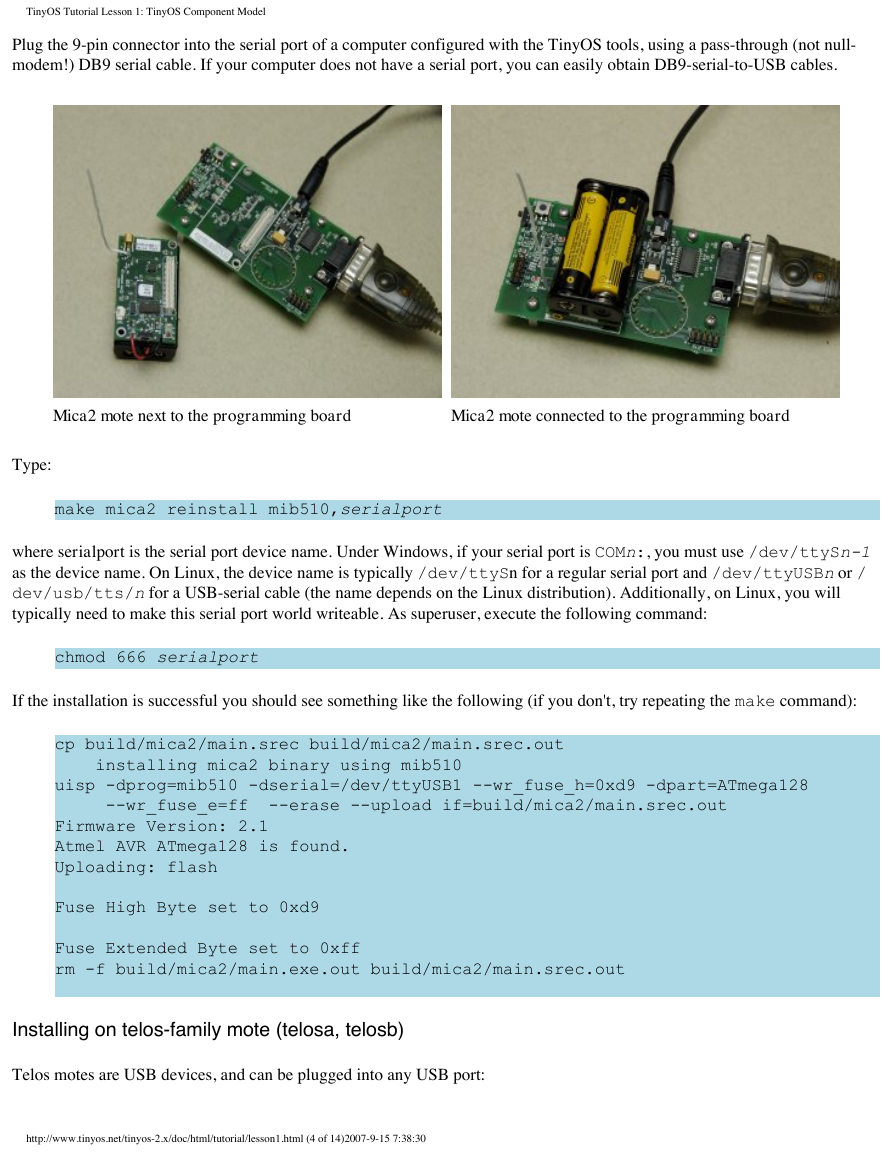
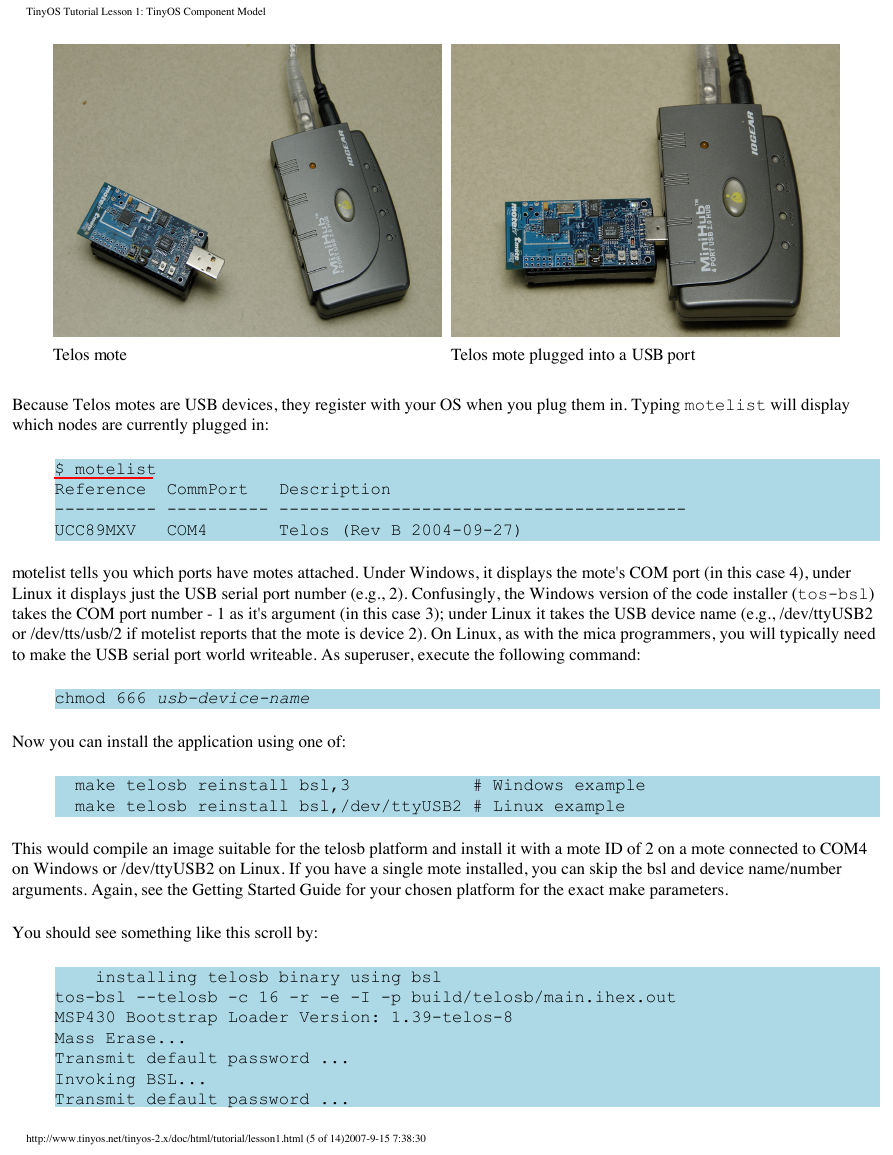
Telos motes are USB devices, and can be plugged into any USB port:
http://www.tinyos.net/tinyos-2.x/doc/html/tutorial/lesson1.html (4 of 14)2007-9-15 7:38:30
�
TinyOS Tutorial Lesson 1: TinyOS Component Model
Telos mote
Telos mote plugged into a USB port
Because Telos motes are USB devices, they register with your OS when you plug them in. Typing motelist will display
which nodes are currently plugged in:
$ motelist
Reference CommPort Description
---------- ---------- ----------------------------------------
UCC89MXV COM4 Telos (Rev B 2004-09-27)
motelist tells you which ports have motes attached. Under Windows, it displays the mote's COM port (in this case 4), under
Linux it displays just the USB serial port number (e.g., 2). Confusingly, the Windows version of the code installer (tos-bsl)
takes the COM port number - 1 as it's argument (in this case 3); under Linux it takes the USB device name (e.g., /dev/ttyUSB2
or /dev/tts/usb/2 if motelist reports that the mote is device 2). On Linux, as with the mica programmers, you will typically need
to make the USB serial port world writeable. As superuser, execute the following command:
chmod 666 usb-device-name
Now you can install the application using one of:
make telosb reinstall bsl,3 # Windows example
make telosb reinstall bsl,/dev/ttyUSB2 # Linux example
This would compile an image suitable for the telosb platform and install it with a mote ID of 2 on a mote connected to COM4
on Windows or /dev/ttyUSB2 on Linux. If you have a single mote installed, you can skip the bsl and device name/number
arguments. Again, see the Getting Started Guide for your chosen platform for the exact make parameters.
You should see something like this scroll by:
installing telosb binary using bsl
tos-bsl --telosb -c 16 -r -e -I -p build/telosb/main.ihex.out
MSP430 Bootstrap Loader Version: 1.39-telos-8
Mass Erase...
Transmit default password ...
Invoking BSL...
Transmit default password ...
http://www.tinyos.net/tinyos-2.x/doc/html/tutorial/lesson1.html (5 of 14)2007-9-15 7:38:30
�


 2023年江西萍乡中考道德与法治真题及答案.doc
 2012年重庆南川中考生物真题及答案.doc
 2013年江西师范大学地理学综合及文艺理论基础考研真题.doc
 2020年四川甘孜小升初语文真题及答案I卷.doc
 2020年注册岩土工程师专业基础考试真题及答案.doc
 2023-2024学年福建省厦门市九年级上学期数学月考试题及答案.doc
 2021-2022学年辽宁省沈阳市大东区九年级上学期语文期末试题及答案.doc
 2022-2023学年北京东城区初三第一学期物理期末试卷及答案.doc
 2018上半年江西教师资格初中地理学科知识与教学能力真题及答案.doc
 2012年河北国家公务员申论考试真题及答案-省级.doc
 2020-2021学年江苏省扬州市江都区邵樊片九年级上学期数学第一次质量检测试题及答案.doc
 2022下半年黑龙江教师资格证中学综合素质真题及答案.doc