7. Level 2 Repair
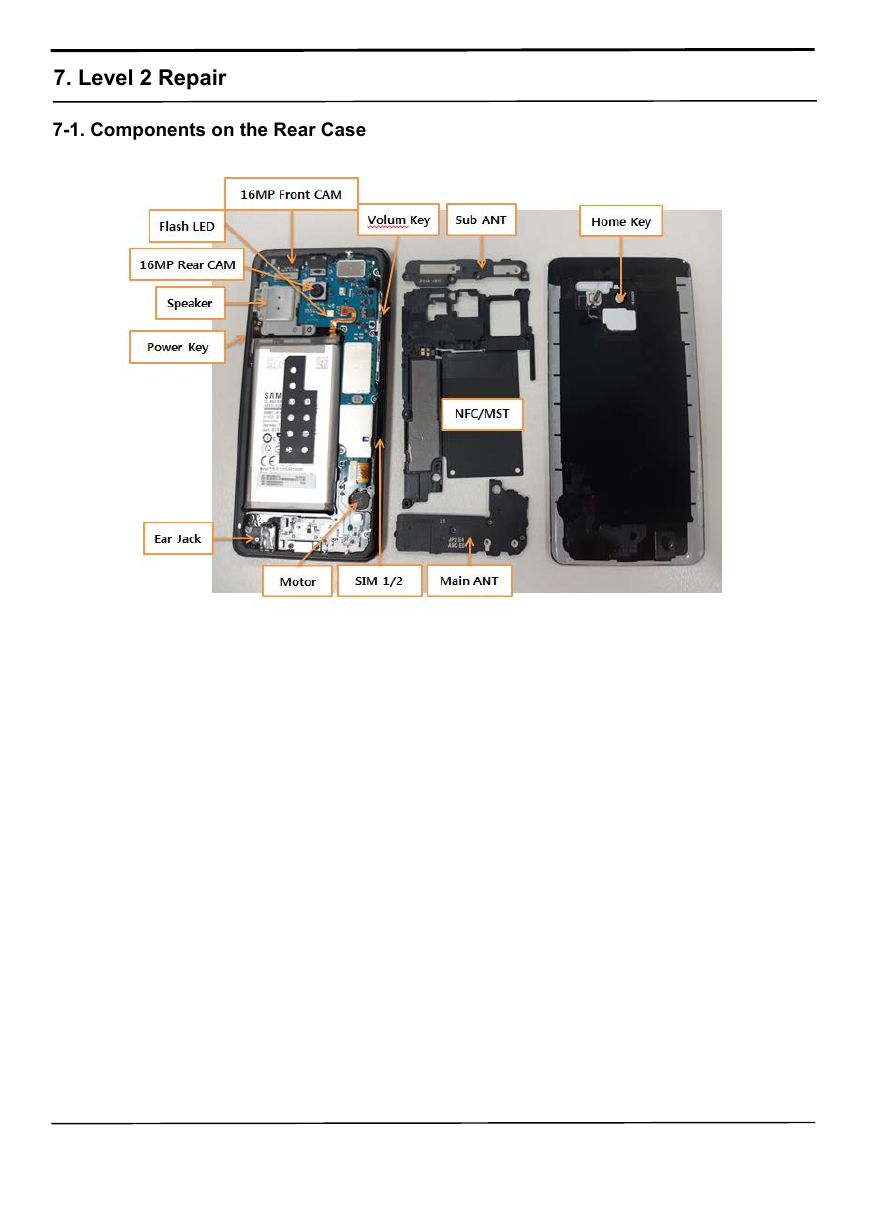
7-1. Components on the Rear Case
�
7. Level 2 Repair
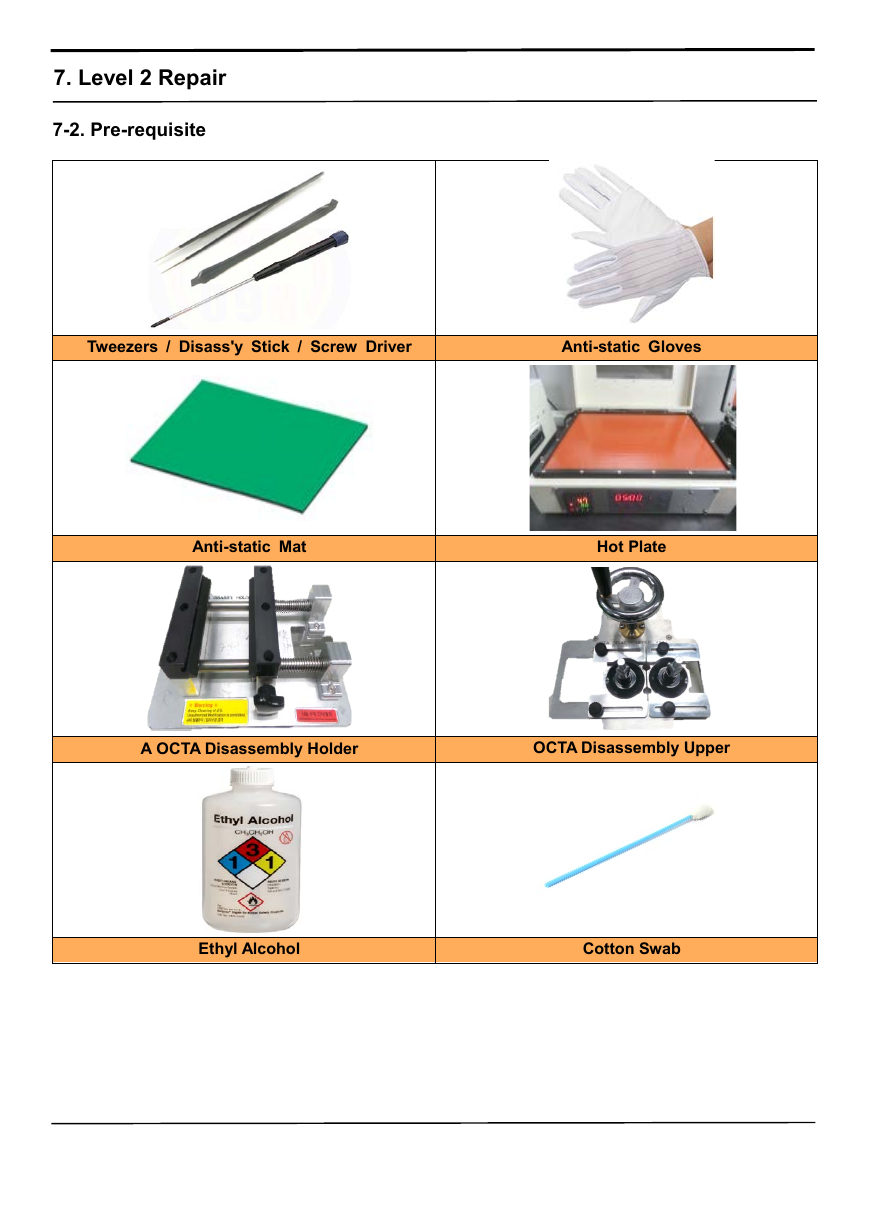
7-2. Pre-requisite
Tweezers / Disass'y Stick / Screw Driver
Anti-static Gloves
Anti-static Mat
Hot Plate
A OCTA Disassembly Holder
Ethyl Alcohol
OCTA Disassembly Upper
Cotton Swab
�
7. Level 2 Repair
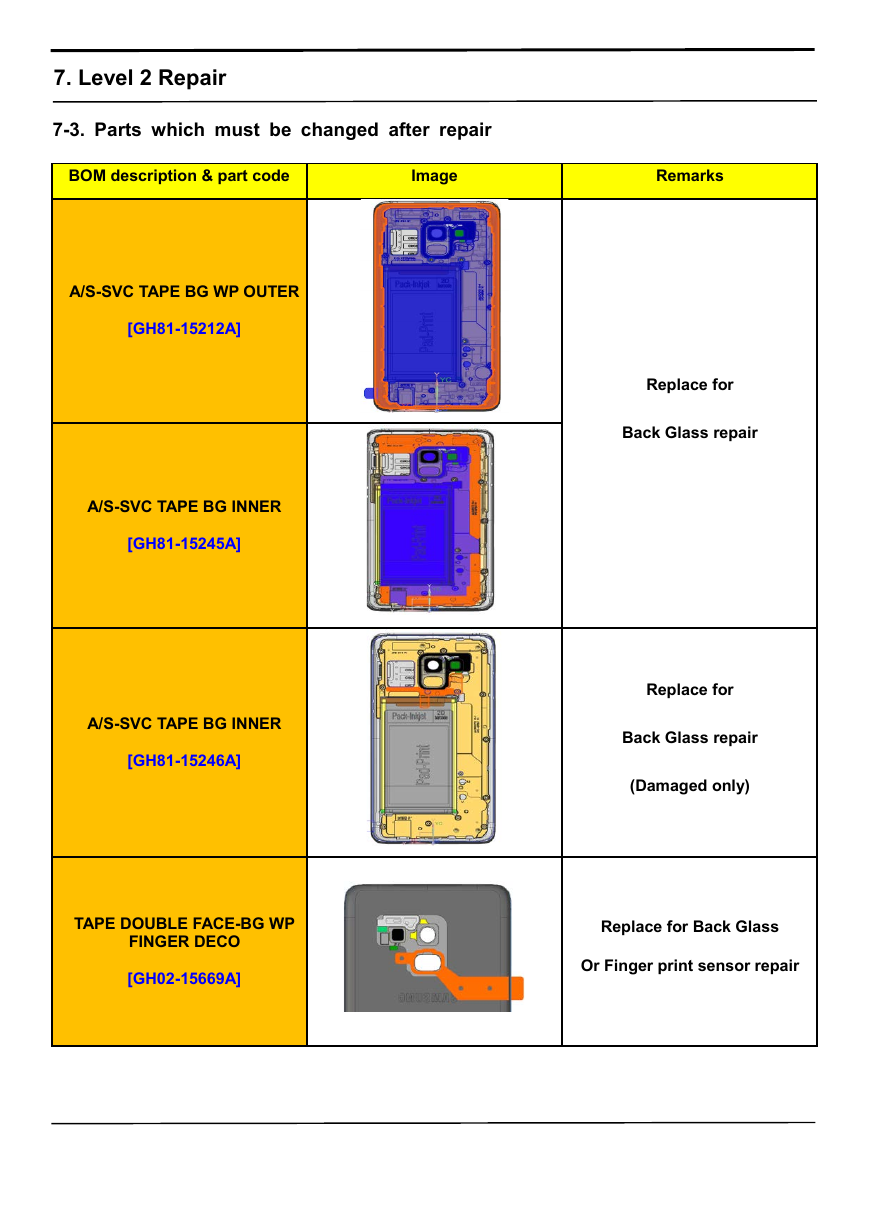
7-3. Parts which must be changed after repair
BOM description & part code
Image
A/S-SVC TAPE BG WP OUTER
[GH81-15212A]
Remarks
Replace for
Back Glass repair
Replace for
Back Glass repair
(Damaged only)
Replace for Back Glass
Or Finger print sensor repair
A/S-SVC TAPE BG INNER
[GH81-15245A]
A/S-SVC TAPE BG INNER
[GH81-15246A]
TAPE DOUBLE FACE-BG WP
FINGER DECO
[GH02-15669A]
�
7. Level 2 Repair
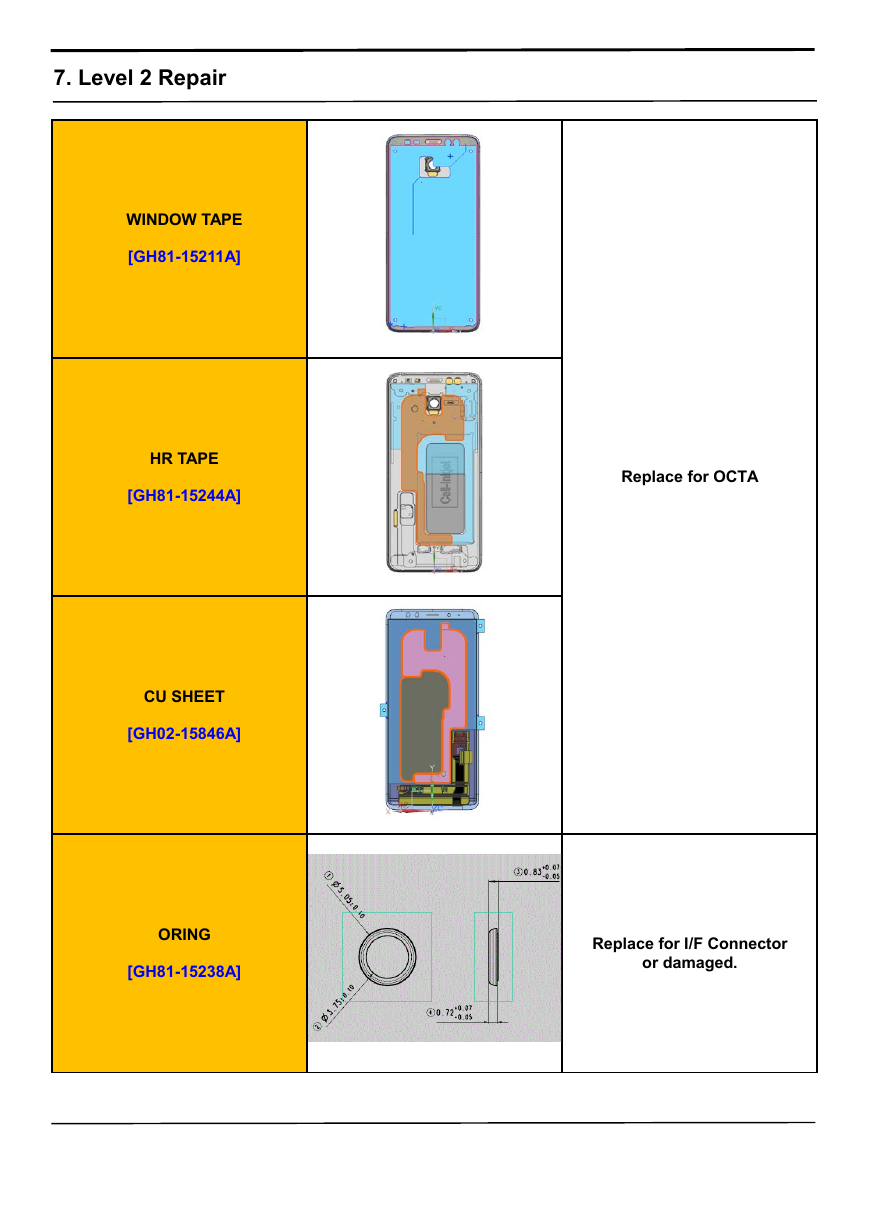
WINDOW TAPE
[GH81-15211A]
HR TAPE
[GH81-15244A]
CU SHEET
[GH02-15846A]
ORING
[GH81-15238A]
Replace for OCTA
Replace for I/F Connector
or damaged.
�
7. Level 2 Repair
7-4. Disassembly
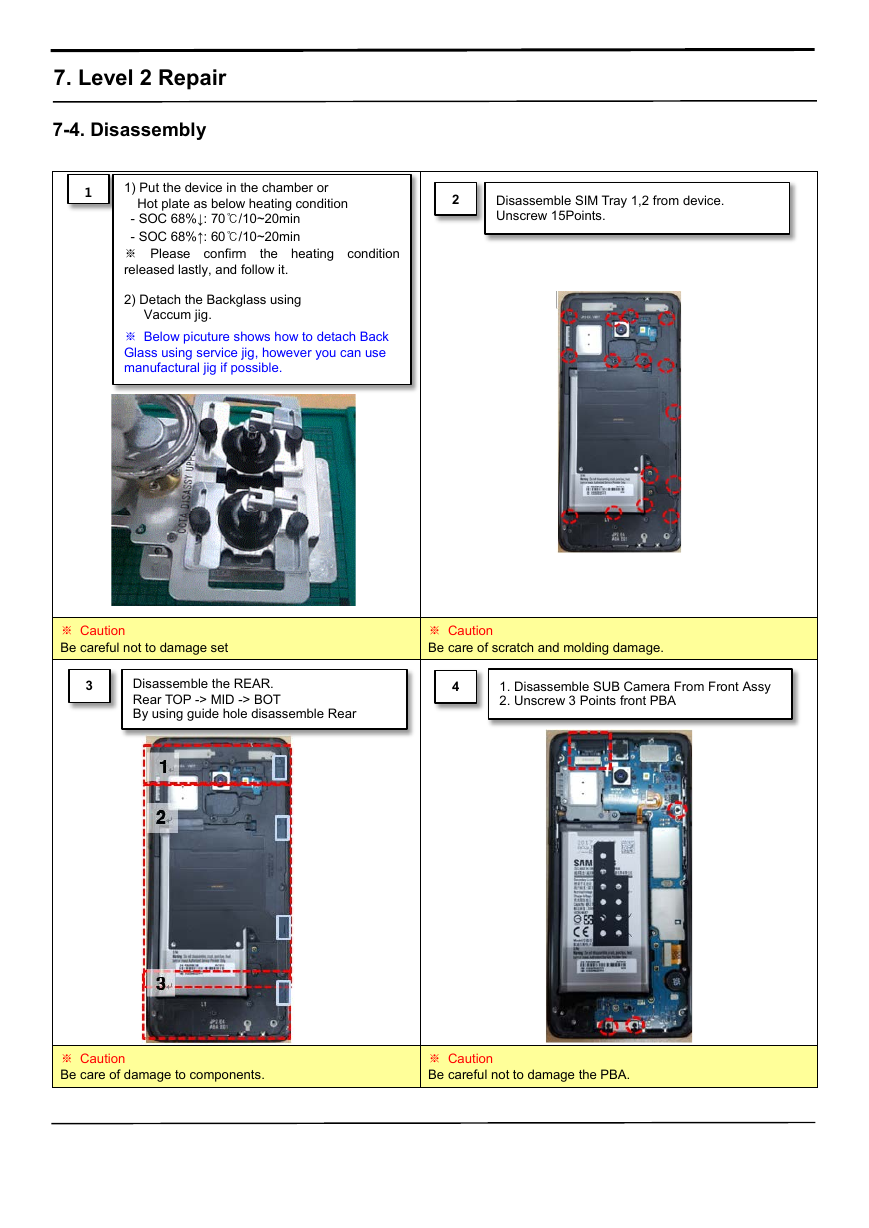
1
1) Put the device in the chamber or
Hot plate as below heating condition
- SOC 68%↓: 70℃/10~20min
- SOC 68%↑: 60℃/10~20min
※ Please confirm
released lastly, and follow it.
2) Detach the Backglass using
Vaccum jig.
the heating condition
※ Below picuture shows how to detach Back
Glass using service jig, however you can use
manufactural jig if possible.
※ Caution
Be careful not to damage set
3
Disassemble the REAR.
Rear TOP -> MID -> BOT
By using guide hole disassemble Rear
2
Disassemble SIM Tray 1,2 from device.
Unscrew 15Points.
※ Caution
Be care of scratch and molding damage.
4
1. Disassemble SUB Camera From Front Assy
2. Unscrew 3 Points front PBA
※ Caution
Be care of damage to components.
※ Caution
Be careful not to damage the PBA.
�
7. Level 2 Repair
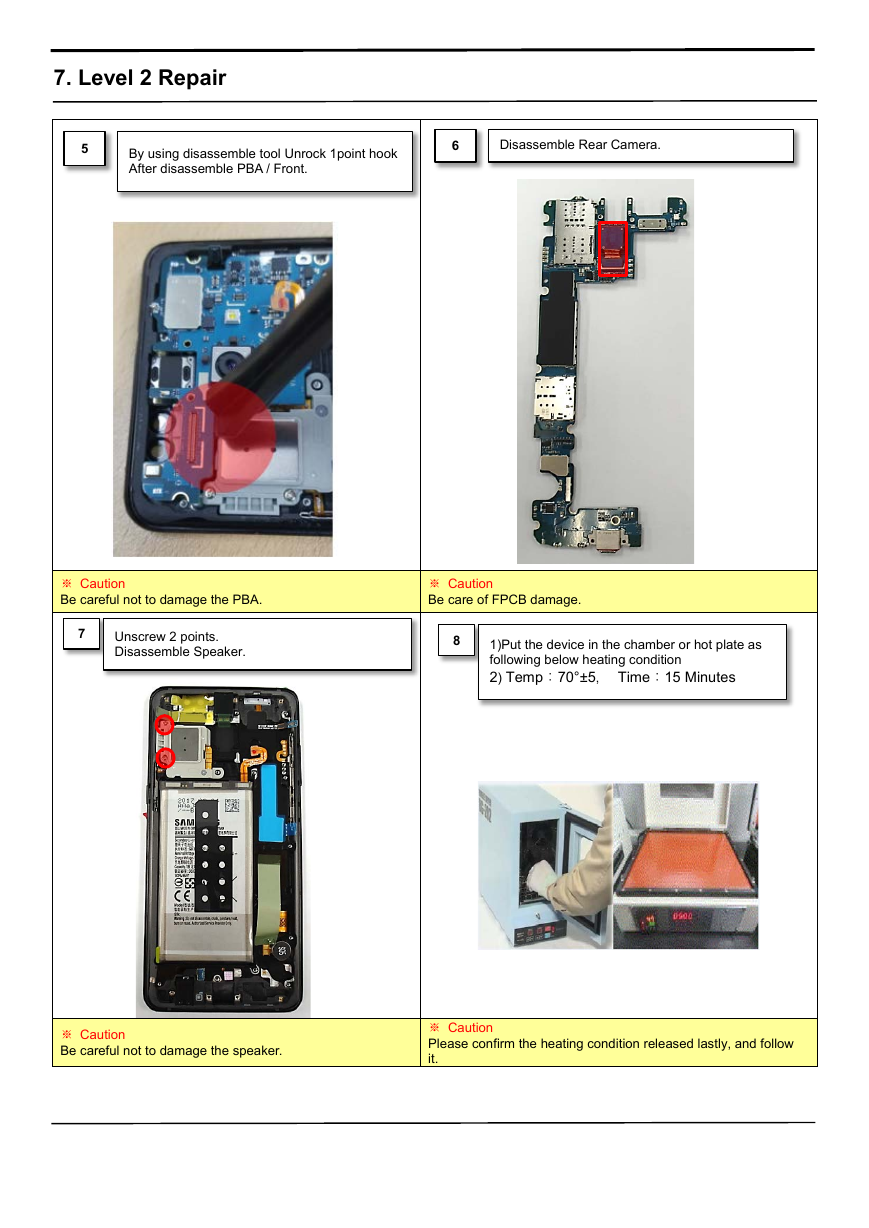
5
By using disassemble tool Unrock 1point hook
After disassemble PBA / Front.
6
Disassemble Rear Camera.
※ Caution
Be careful not to damage the PBA.
7
Unscrew 2 points.
Disassemble Speaker.
※ Caution
Be care of FPCB damage.
8
1)Put the device in the chamber or hot plate as
following below heating condition
2) Temp:70°±5, Time:15 Minutes
※ Caution
Be careful not to damage the speaker.
※ Caution
Please confirm the heating condition released lastly, and follow
it.
�
7. Level 2 Repair
9
Separate the OCTA
※ Caution
Be careful not to damage set and OCTA
�
7. Level 2 Repair
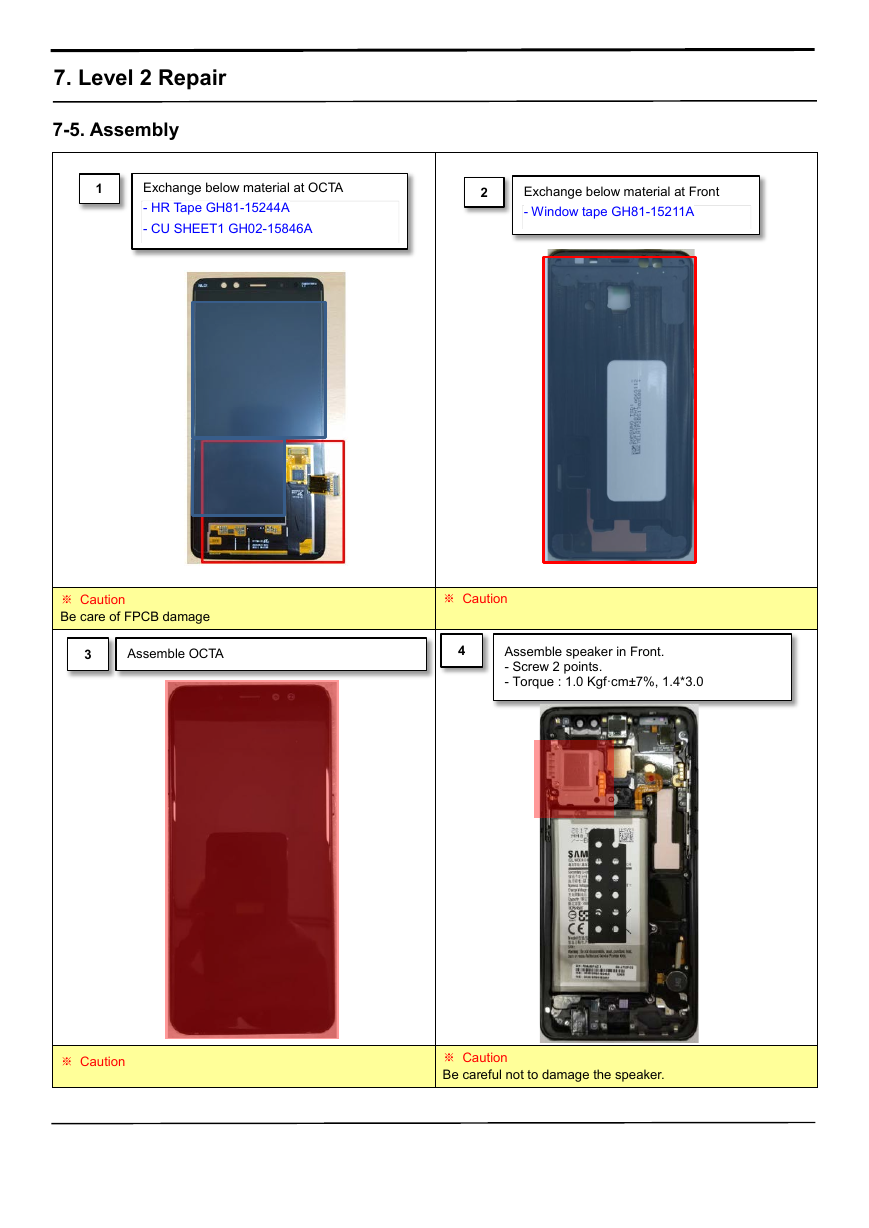
7-5. Assembly
1
Exchange below material at OCTA
- HR Tape GH81-15244A
- CU SHEET1 GH02-15846A
2
Exchange below material at Front
- Window tape GH81-15211A
※ Caution
Be care of FPCB damage
Assemble OCTA
3
※ Caution
4
Assemble speaker in Front.
- Screw 2 points.
- Torque : 1.0 Kgf·cm±7%, 1.4*3.0
※ Caution
※ Caution
Be careful not to damage the speaker.
�



 2023年江西萍乡中考道德与法治真题及答案.doc
 2012年重庆南川中考生物真题及答案.doc
 2013年江西师范大学地理学综合及文艺理论基础考研真题.doc
 2020年四川甘孜小升初语文真题及答案I卷.doc
 2020年注册岩土工程师专业基础考试真题及答案.doc
 2023-2024学年福建省厦门市九年级上学期数学月考试题及答案.doc
 2021-2022学年辽宁省沈阳市大东区九年级上学期语文期末试题及答案.doc
 2022-2023学年北京东城区初三第一学期物理期末试卷及答案.doc
 2018上半年江西教师资格初中地理学科知识与教学能力真题及答案.doc
 2012年河北国家公务员申论考试真题及答案-省级.doc
 2020-2021学年江苏省扬州市江都区邵樊片九年级上学期数学第一次质量检测试题及答案.doc
 2022下半年黑龙江教师资格证中学综合素质真题及答案.doc