Contents
Startup
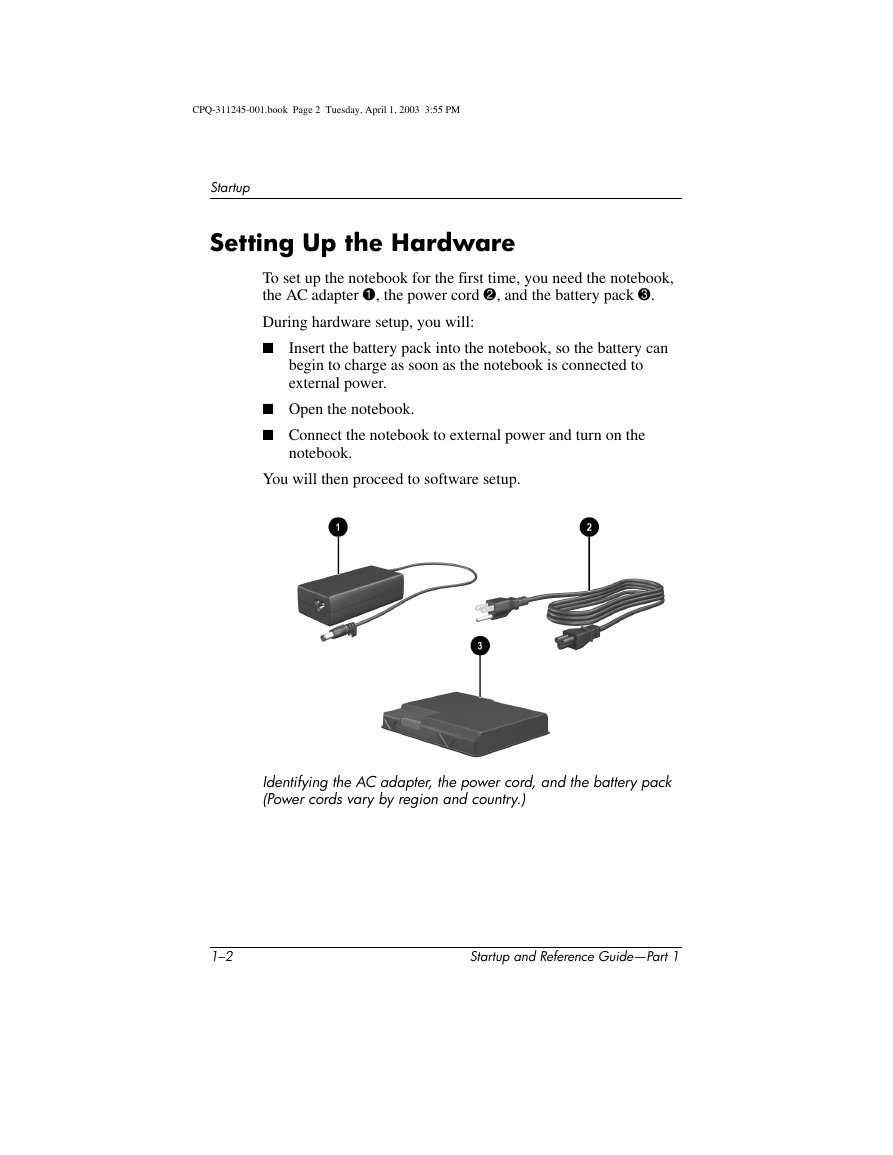
Setting Up the Hardware
Inserting a Battery Pack
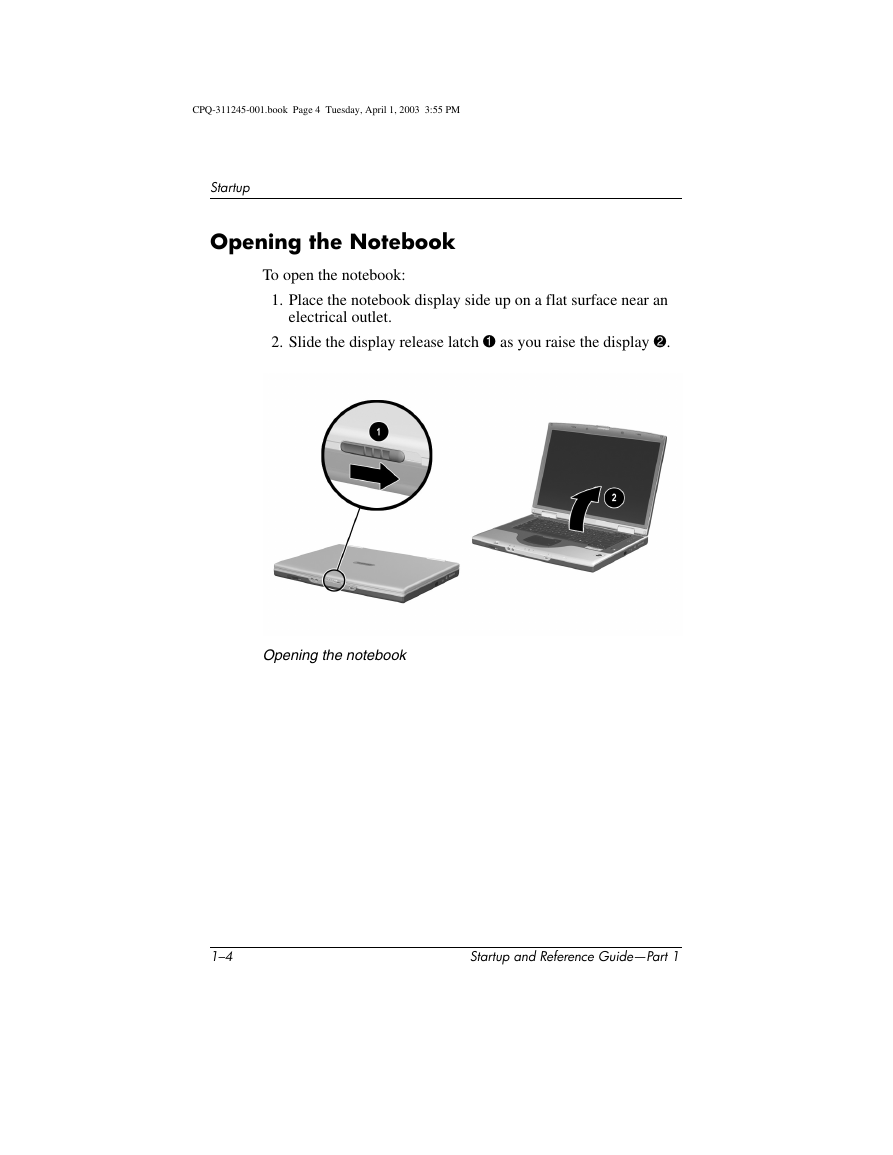
Opening the Notebook
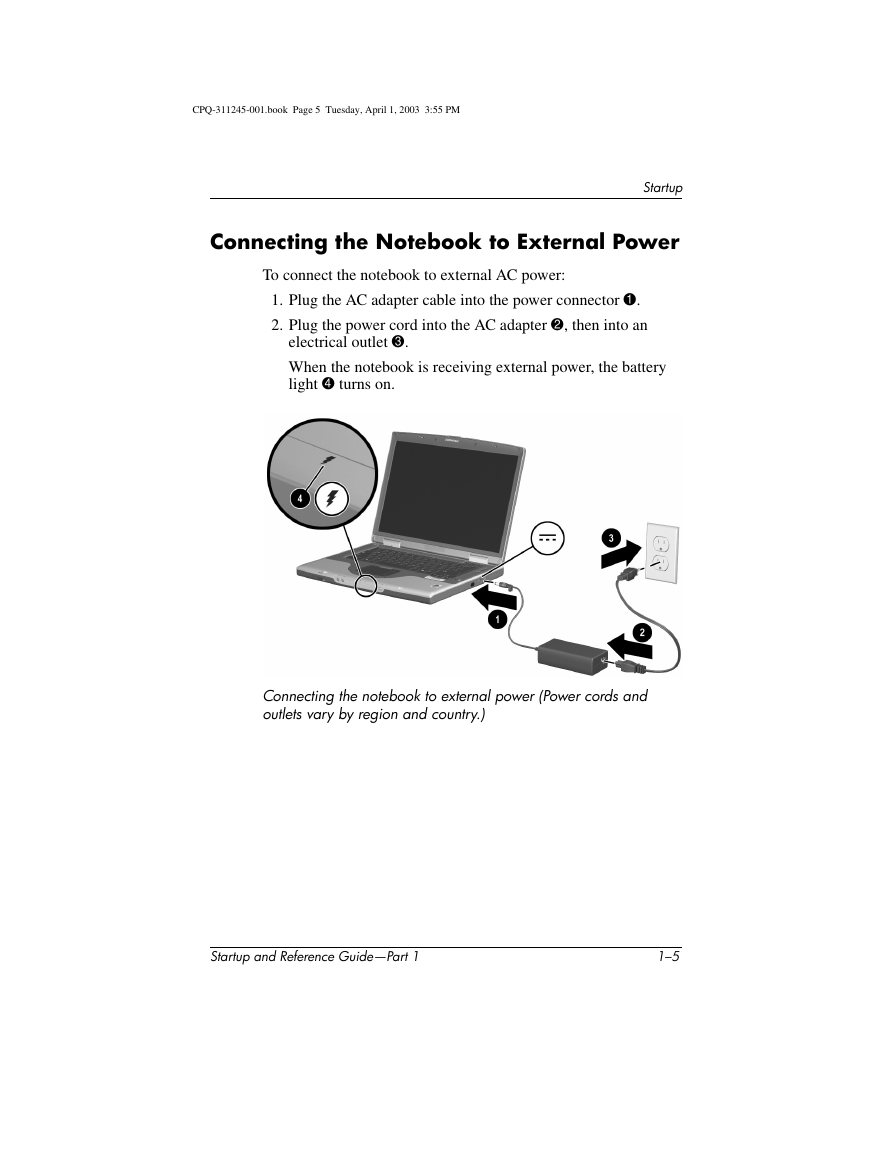
Connecting the Notebook to External Power
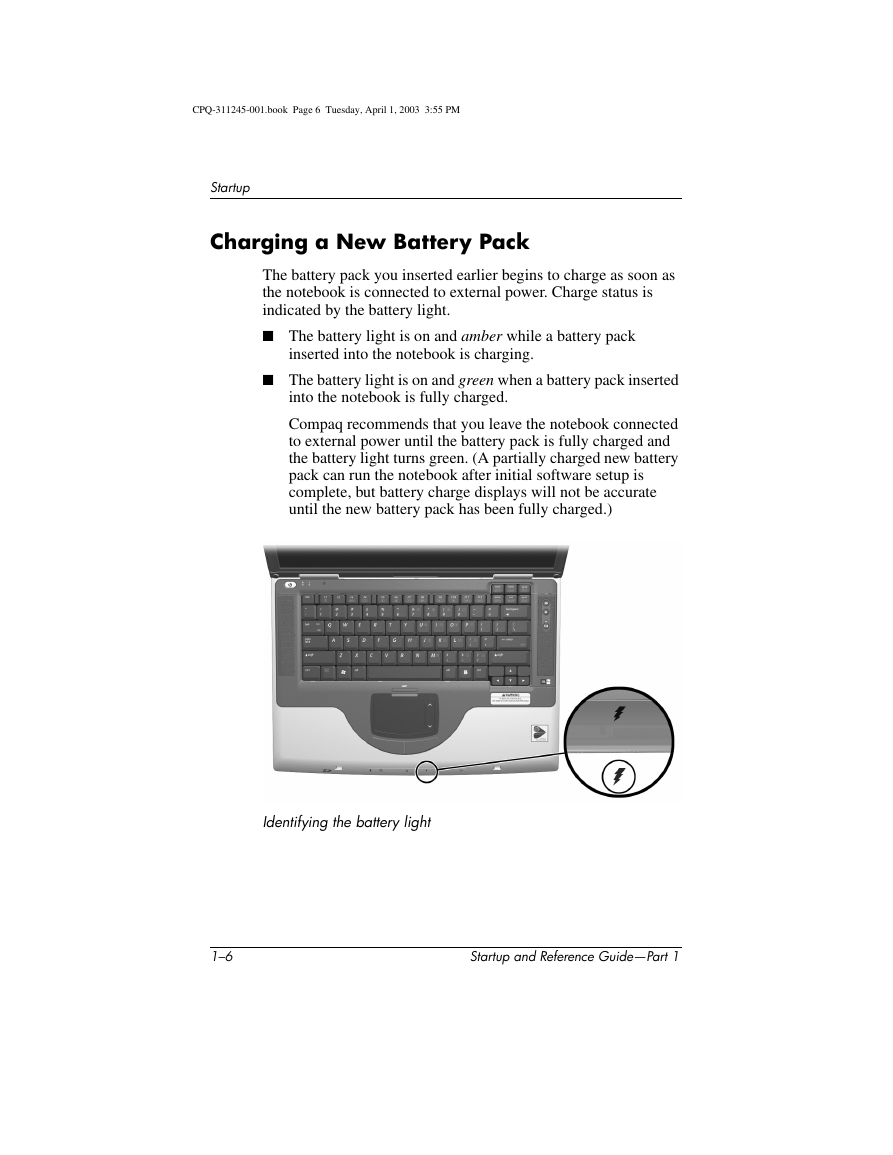
Charging a New Battery Pack
Turning On the Notebook
Setting Up the Software
Installing Basic Software
Installing Optional Software
Setting Regional and Display Preferences
Turning Off the Notebook
Protecting the Notebook from Power�Surges
Protecting the Notebook Against Viruses
Using the Notebook Safely
Hardware
Display
Top
TouchPad
Keys and Antenna
Power Controls
Lights
Audio Buttons and Speakers
Front Panel
Rear Panel
Connectors and Jacks
Vent
Left Side
Right Side
Underside
Bays and Memory Compartment
Docking Connector and Vents
Labels
Additional Standard Components
Cables and Cord
Adapters and Battery Pack
Restoration and Documentation CDs
Keyboard
TouchPad
Identifying TouchPad Components
Using the TouchPad
Setting TouchPad Preferences
Hotkeys
Identifying Hotkeys
Hotkey Quick Reference
Hotkey Procedures
Hotkey Commands
Open Help and Support Window (Fn+F1)
Open Internet Explorer (Fn+F3)
Switch Image (Fn+F4)
Initiate Standby (Fn+F5)
Initiate QuickLock (Fn+F6)
Decrease Brightness (Fn+F7)
Increase Brightness (Fn+F8)
Play, Pause, or Resume an Audio CD or DVD (Fn+F9)
Stop an Audio CD or DVD (Fn+F10)
Play Previous Track of an Audio CD or DVD (Fn+F11)
Play Next Track of an Audio CD or DVD (Fn+F12)
Keypad
Turning the Keypad On and Off
Switching the Functions of Keypad Keys
Power
Understanding Standby, Hibernation and Shutdown
Standby
Hibernation
Shutdown
Choosing Standby, Hibernation or Shutdown
Using Standby, Hibernation and Shutdown Procedures
Identifying Power Controls and Indicators
Turning the Notebook or Display On or Off
Using Emergency Shutdown Procedures
Initiating or Resuming from Standby
Initiating or Restoring from Hibernation
Setting Power Control Preferences
Using Battery Power
Identifying the Battery and Power/Standby Lights
Switching Between Battery and External Power
Charging a Battery Pack
Monitoring the Charge in a Battery Pack
Obtaining Accurate Charge Information
Displaying Charge Information
Managing Low-Battery Conditions
Identifying Low-Battery Conditions
Resolving Low-Battery Conditions
Calibrating a Battery Pack
When to Calibrate
How to Calibrate
Storing a Battery Pack
Battery Conservation Settings and Procedures
Replacing a Battery Pack
Recycling or Disposing of a Used Battery Pack
Drives and Drive Media
Understanding Drive and Drive Media Terms
Caring for Drives and Drive Media
Adding a Drive to the System
Using the IDE Drive Light
Inserting or Removing a Disc
Inserting a Disc
Removing a Disc (With Power)
Removing a Disc (Without Power)
Playing a Disc
Displaying Media Contents
Protecting Playback
Observing the Copyright Warning
Setting the Boot Order
Replacing the Internal Hard Drive
Multimedia
Adjusting Volume
Using the Internal Speakers
Connecting an Audio Device
Connecting an S-Video Device
Connecting the Audio
Connecting the Video
Turning a Video Device On and Off
Changing the Color Television Format
Using Multimedia Software
Using Windows Media Player
Using WinDVD
Playing a DVD or Video CD
Managing DVD Region Settings
Using Easy CD Creator
Understanding Easy CD Creator Features
Preparing to Use Easy CD Creator
Selecting Easy CD Creator Settings
Communications
Modem
Connecting the Modem
Selecting Connectors
Connecting a Modem to an RJ-11 Jack
Connecting a Modem with an Adapter
Using the Modem While Traveling Internationally
Displaying the Current Country Configuration
Adding a Country Configuration
Solving Travel Connection Problems
Accessing Communication Software
Finding AT Command Information
Network
Connecting the Network Cable
Turning a Network Connection Off and On
Accessing the Network at Startup
Infrared
Setting Up an Infrared Transmission
Avoiding Standby While Using Infrared
Hardware Options and Upgrades
Connecting a Powered Device
Connecting a USB Device
Using a PC Card
Selecting a PC Card
Configuring a PC Card
Inserting a PC Card
Stopping and Removing a PC Card
Using an SD Card or MMC
Using the SD Card Light
Inserting an SD Card or MMC
Removing an SD Card or MMC
Disabling or Restarting an SD Card or MMC
Increasing Memory
Displaying Memory Information
Removing or Inserting a Memory Module
Connecting an Optional Cable Lock
Software Updates, Restorations and Utilities
Updating Software
Preparing for a Software Update
Accessing Notebook Product Information
Accessing Notebook ROM Information
Downloading and Installing an Update
Downloading and Installing a ROM Update
Downloading and Installing a Non-ROM SoftPaq
Backing Up and Restoring Data
Setting a System Restore Point
Restoring to a System Restore Point
Repairing or Reinstalling the Operating System
Repairing the Operating System
Reinstalling the Operating System
Reinstalling Device Drivers and Other Software
Installing a Retail Version of an Operating System
Using the Setup Utility
Opening the Setup Utility
Navigating and Selecting in the Setup Utility
Restoring Setup Utility Default Settings
Exiting the Setup Utility
Using the Support Utilities
Using the Help and Support Window
Using Support Telephone Numbers
Obtaining Support Telephone Numbers
Preparing to Call Technical Support
Notebook Dimensions
Operating Environment
Rated Input Power
Finding More Environmental Information
Index




 2023年江西萍乡中考道德与法治真题及答案.doc
 2012年重庆南川中考生物真题及答案.doc
 2013年江西师范大学地理学综合及文艺理论基础考研真题.doc
 2020年四川甘孜小升初语文真题及答案I卷.doc
 2020年注册岩土工程师专业基础考试真题及答案.doc
 2023-2024学年福建省厦门市九年级上学期数学月考试题及答案.doc
 2021-2022学年辽宁省沈阳市大东区九年级上学期语文期末试题及答案.doc
 2022-2023学年北京东城区初三第一学期物理期末试卷及答案.doc
 2018上半年江西教师资格初中地理学科知识与教学能力真题及答案.doc
 2012年河北国家公务员申论考试真题及答案-省级.doc
 2020-2021学年江苏省扬州市江都区邵樊片九年级上学期数学第一次质量检测试题及答案.doc
 2022下半年黑龙江教师资格证中学综合素质真题及答案.doc