PUB.DIE-202
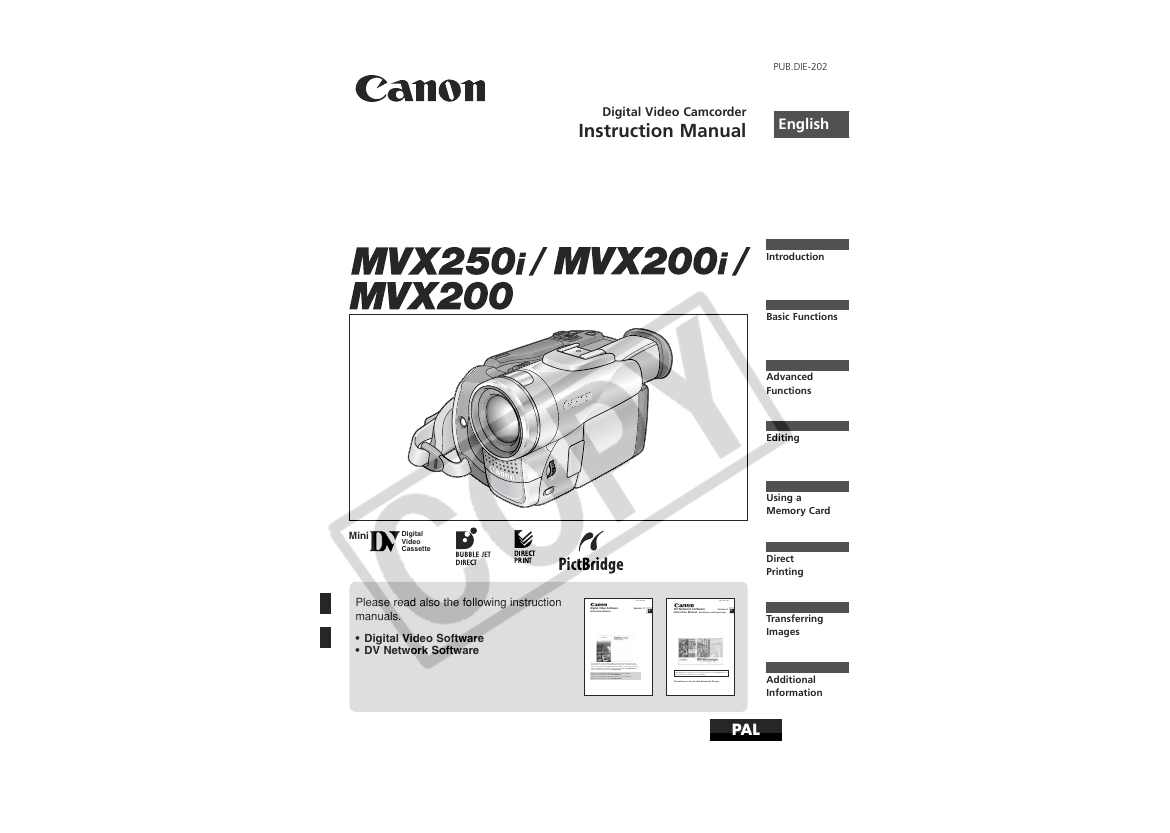
Digital Video Camcorder
Instruction Manual
English
Introduction
Basic Functions
Advanced
Functions
Editing
Using a
Memory Card
Direct
Printing
Transferring
Images
Additional
Information
Mini
Digital
Video
Cassette
Please read also the following instruction
manuals.
Digital Video Software
Instruction Manual
PUB. DIE-203
Version 11
E
PUB. DIE-195
DV Network Software
Instruction Manual (Installation and Preparation)
Version 2
E
• Digital Video Software
• DV Network Software
This instruction manual explains how to install the software, connect the
camcorder to a computer, and download images from a memory card to a
computer. For more detailed operational instructions, refer to the PDF format
manual provided on the DIGITAL VIDEO SOLUTION DISK For Windows or
DIGITAL VIDEO SOLUTION
DISK For Macintosh
.
If you are using Windows operating system, use the supplied
DIGITAL VIDEO SOLUTION DISK For Windows.
If you are using Macintosh operating system, use the supplied
DIGITAL VIDEO SOLUTION DISK For Macintosh.
This manual covers the installation and the connection procedures only.For
more operating instructions, refer to the PDF format manual provided on the
DIGITAL VIDEO SOLUTION DISK For Windows.
This software is for use with Windows® XP only.
PAL
�
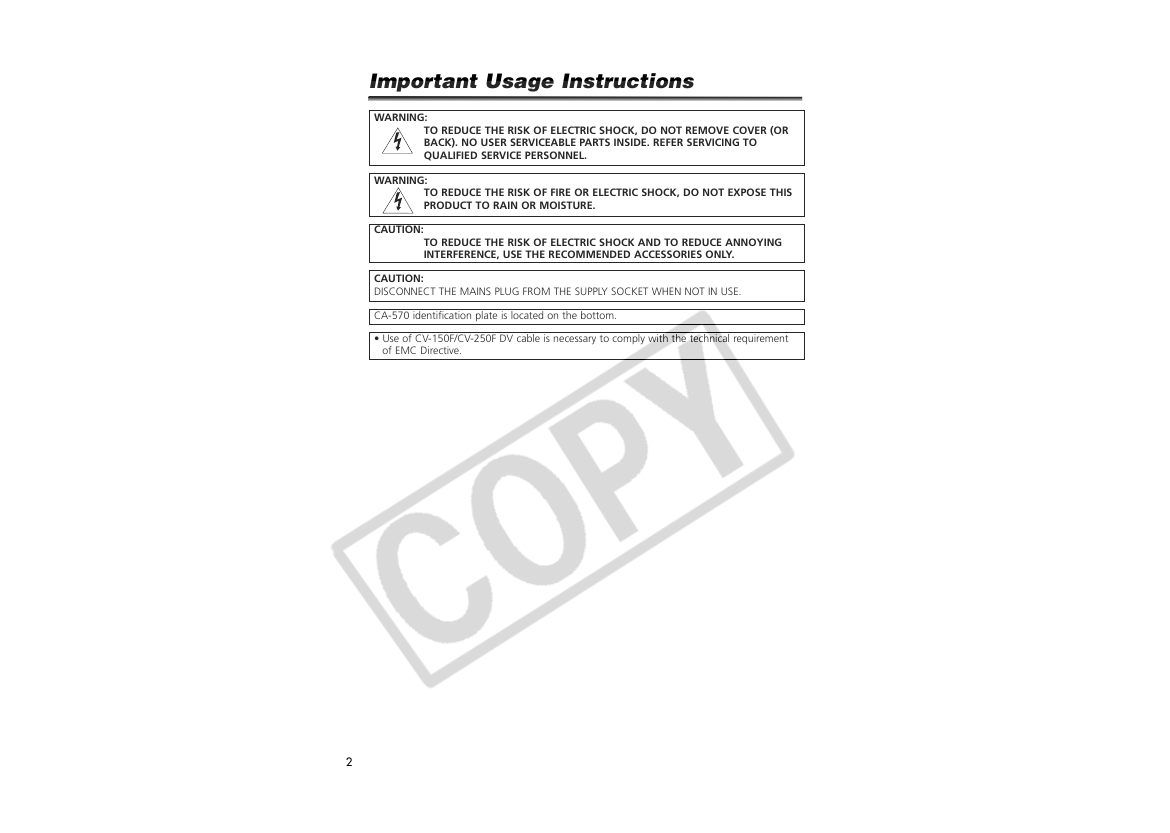
Important Usage Instructions
WARNING:
TO REDUCE THE RISK OF ELECTRIC SHOCK, DO NOT REMOVE COVER (OR
BACK). NO USER SERVICEABLE PARTS INSIDE. REFER SERVICING TO
QUALIFIED SERVICE PERSONNEL.
WARNING:
TO REDUCE THE RISK OF FIRE OR ELECTRIC SHOCK, DO NOT EXPOSE THIS
PRODUCT TO RAIN OR MOISTURE.
CAUTION:
TO REDUCE THE RISK OF ELECTRIC SHOCK AND TO REDUCE ANNOYING
INTERFERENCE, USE THE RECOMMENDED ACCESSORIES ONLY.
CAUTION:
DISCONNECT THE MAINS PLUG FROM THE SUPPLY SOCKET WHEN NOT IN USE.
CA-570 identification plate is located on the bottom.
• Use of CV-150F/CV-250F DV cable is necessary to comply with the technical requirement
of EMC Directive.
2
�
Using this Manual
Thank you for purchasing the Canon MVX250i/MVX200i/MVX200. Please read this
manual carefully before you use the camcorder and retain it for future reference.
E
Change the display language before you begin (
75).
Symbols and References Used in This Manual
❍
: Precautions related to the camcorder operation.
❍
: Additional topics that complement the basic operating procedures.
: Reference page number.
❍
❍ Capital letters are used to refer to buttons on the camcorder or the wireless controller.
❍ [ ] are used to refer to menu items displayed on the screen.
❍ “Screen” refers to the LCD and the viewfinder screen.
❍ Please note that the illustrations mainly refer to the MVX250i.
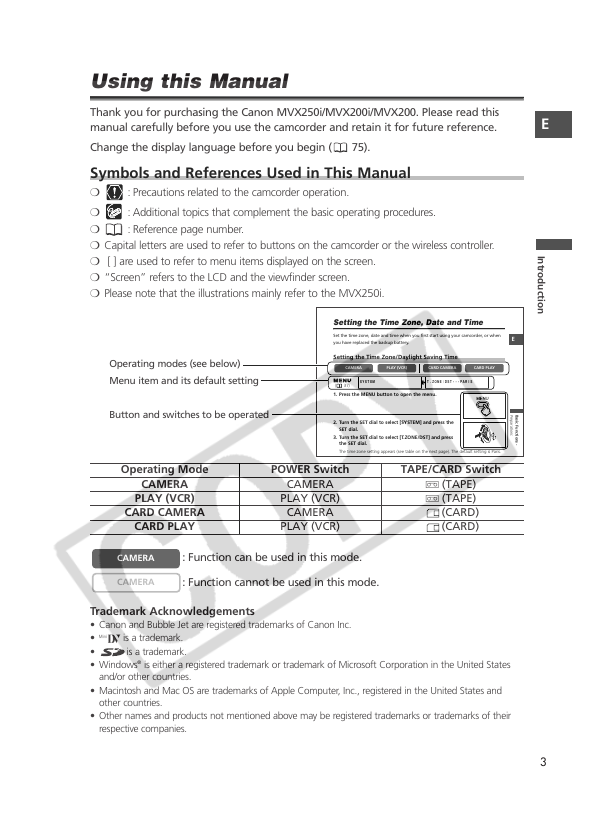
Operating modes (see below)
Menu item and its default setting
Button and switches to be operated
Setting the Time Zone, Date and Time
Set the time zone, date and time when you first start using your camcorder, or when
you have replaced the backup battery.
E
Setting the Time Zone/Daylight Saving Time
CAMERA
PLAY (VCR)
CARD CAMERA
CARD PLAY
SYSTEM
T.ZONE/DST•••PARIS
(
37)
1. Press the MENU button to open the menu.
2. Turn the SET dial to select [SYSTEM] and press the
SET dial.
3. Turn the SET dial to select [T.ZONE/DST] and press
the SET dial.
The time zone setting appears (see table on the next page). The default setting is Paris.
P
r
e
p
a
r
a
t
i
o
n
s
B
a
s
i
c
F
u
n
c
t
i
o
n
s
-
Operating Mode
CAMERA
PLAY (VCR)
CARD CAMERA
CARD PLAY
POWER Switch
TAPE/CARD Switch
CAMERA
PLAY (VCR)
CAMERA
PLAY (VCR)
b (TAPE)
b (TAPE)
(CARD)
(CARD)
CAMERA
: Function can be used in this mode.
CAMERA
: Function cannot be used in this mode.
Trademark Acknowledgements
• Canon and Bubble Jet are registered trademarks of Canon Inc.
• D is a trademark.
•
is a trademark.
• Windows® is either a registered trademark or trademark of Microsoft Corporation in the United States
and/or other countries.
• Macintosh and Mac OS are trademarks of Apple Computer, Inc., registered in the United States and
other countries.
• Other names and products not mentioned above may be registered trademarks or trademarks of their
respective companies.
I
n
t
r
o
d
u
c
t
i
o
n
3
�
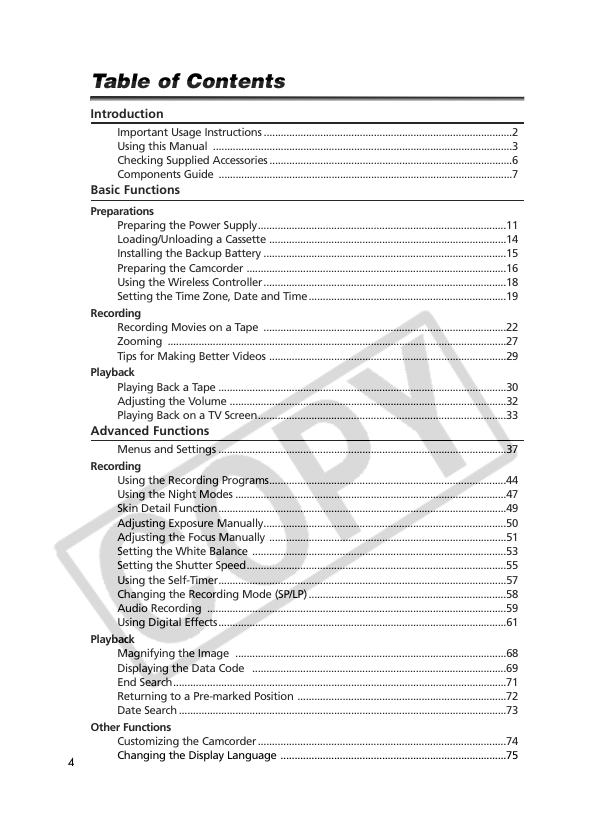
Table of Contents
Introduction
Important Usage Instructions ........................................................................................2
Using this Manual ..........................................................................................................3
Checking Supplied Accessories ......................................................................................6
Components Guide ........................................................................................................7
Basic Functions
Preparations
Preparing the Power Supply........................................................................................11
Loading/Unloading a Cassette ....................................................................................14
Installing the Backup Battery ......................................................................................15
Preparing the Camcorder ............................................................................................16
Using the Wireless Controller......................................................................................18
Setting the Time Zone, Date and Time......................................................................19
Recording
Recording Movies on a Tape ......................................................................................22
Zooming ........................................................................................................................27
Tips for Making Better Videos ....................................................................................29
Playback
Playing Back a Tape ......................................................................................................30
Adjusting the Volume ..................................................................................................32
Playing Back on a TV Screen........................................................................................33
Advanced Functions
Menus and Settings ......................................................................................................37
Recording
Using the Recording Programs....................................................................................44
Using the Night Modes ................................................................................................47
Skin Detail Function......................................................................................................49
Adjusting Exposure Manually......................................................................................50
Adjusting the Focus Manually ....................................................................................51
Setting the White Balance ..........................................................................................53
Setting the Shutter Speed............................................................................................55
Using the Self-Timer......................................................................................................57
Changing the Recording Mode (SP/LP)......................................................................58
Audio Recording ..........................................................................................................59
Using Digital Effects......................................................................................................61
Playback
Magnifying the Image ................................................................................................68
Displaying the Data Code ..........................................................................................69
End Search......................................................................................................................71
Returning to a Pre-marked Position ..........................................................................72
Date Search ....................................................................................................................73
Other Functions
Customizing the Camcorder........................................................................................74
Changing the Display Language ................................................................................75
4
�
E
I
n
t
r
o
d
u
c
t
i
o
n
Changing the Remote Sensor Mode..........................................................................76
Other Camcorder Settings ..........................................................................................77
Using the VFL-1 Video Flash Light (Optional)..........................................79
Editing
Recording to a VCR or Digital Video Device ............................................................81
Recording from Analog Video Devices
(VCR, TV or Camcorder)............................................................................................83
Recording from Digital Video Devices (DV Dubbing)..............84
Converting Analog Signals into Digital Signals
(Analog-Digital Converter) ......................................................................................86
Audio Dubbing..............................................................................................................88
Connecting to a Computer Using a DV (IEEE1394) Cable ......................................91
Using a Memory Card
Inserting and Removing a Memory Card ..................................................................92
Selecting the Image Quality/Size ................................................................................93
File Numbers ..................................................................................................................95
Recording Still Images on a Memory Card................................................................96
Reviewing a Still Image Right after Recording ......................................................100
Recording Motion JPEG Movies on a Memory Card..............................................101
Selecting the Focusing Point ....................................................................................103
Selecting the Drive Mode ..........................................................................................104
Recording Panoramic Images (Stitch Assist Mode) ................................................106
Playing Back a Memory Card ....................................................................................108
Protecting Images ......................................................................................................111
Erasing Images ............................................................................................................112
Combining Images (Card Mix) ..................................................................................113
Formatting a Memory Card ......................................................................................117
Creating a Start-up Image ........................................................................................118
Direct Printing
Printing Still Images ....................................................................................................119
Selecting the Print Settings........................................................................................122
Trimming Settings ......................................................................................................127
Printing with Print Order Settings............................................................................128
Transferring Images
Connecting to a Computer Using a USB Cable ......................................................130
Direct Transfer
..............................................................................131
Selecting Images for Transfer (Transfer Order) ......................................................134
Windows OS Only
Additional Information
About the NETWORK Mode ....................................................................................135
Screen Displays ............................................................................................................136
List of Messages ..........................................................................................................139
Maintenance/Others ..................................................................................................142
Troubleshooting ..........................................................................................................148
System Diagram ..........................................................................................................151
Optional Accessories ..................................................................................................152
Specifications ..............................................................................................................155
Index ............................................................................................................................157
5
�
Checking Supplied Accessories
CA-570 Compact
Power Adapter
(incl. power cord)
NB-2LH Battery Pack
Lithium Button
Battery CR1616
WL-D83 Wireless
Controller
Two AA (R6) Batteries
Lens Cap and Lens
Cap Cord
SS-900 Shoulder Strap
STV-250N Stereo
Video Cable
PC-A10 SCART
Adapter*
IFC-300PCU USB Cable SDC-8M SD Memory
Card (containing
sample images)
DIGITAL VIDEO
SOLUTION DISK
For Windows
For Macintosh
WA-34 Wide
Attachment
* Not supplied in Oceania and China.
6
�
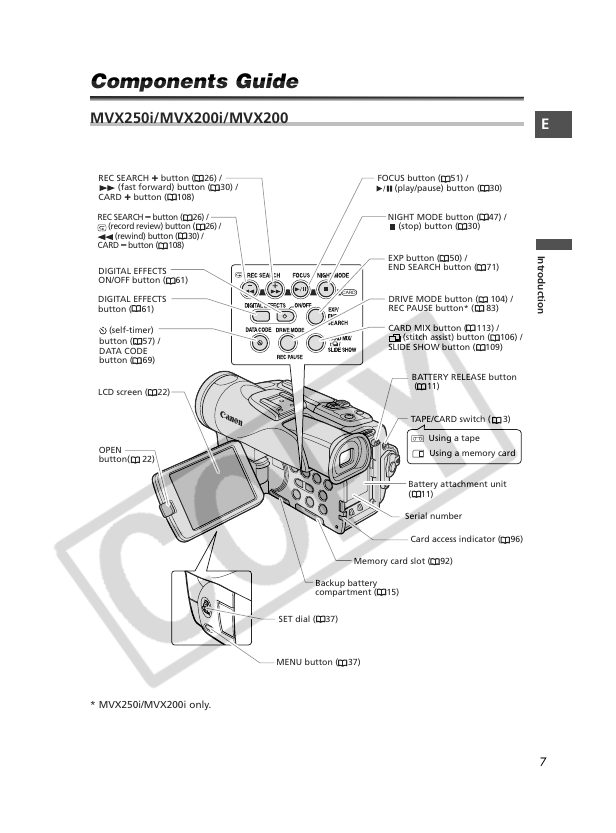
Components Guide
MVX250i/MVX200i/MVX200
REC SEARCH + button ( 26) /
(fast forward) button ( 30) /
CARD + button ( 108)
REC SEARCH – button ( 26) /
(record review) button ( 26) /
CARD – button ( 108)
(rewind) button ( 30) /
DIGITAL EFFECTS
ON/OFF button ( 61)
DIGITAL EFFECTS
button ( 61)
(self-timer)
button ( 57) /
DATA CODE
button ( 69)
LCD screen ( 22)
OPEN
button( 22)
FOCUS button ( 51) /
(play/pause) button ( 30)
NIGHT MODE button ( 47) /
(stop) button ( 30)
EXP button ( 50) /
END SEARCH button ( 71)
CARD
DRIVE MODE button ( 104) /
REC PAUSE button* ( 83)
CARD MIX button ( 113) /
(stitch assist) button ( 106) /
SLIDE SHOW button ( 109)
BATTERY RELEASE button
( 11)
TAPE/CARD switch ( 3)
b
Using a tape
Using a memory card
Battery attachment unit
( 11)
Serial number
Card access indicator ( 96)
Memory card slot ( 92)
Backup battery
compartment ( 15)
SET dial ( 37)
MENU button ( 37)
* MVX250i/MVX200i only.
E
I
n
t
r
o
d
u
c
t
i
o
n
7
�
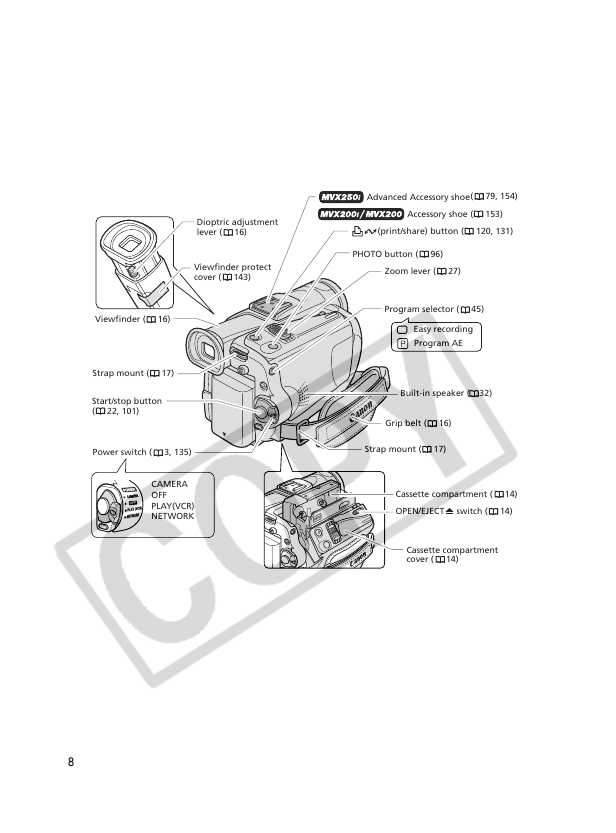
Dioptric adjustment
lever ( 16)
Viewfinder protect
cover ( 143)
Advanced Accessory shoe ( 79, 154)
Accessory shoe ( 153)
(print/share) button ( 120, 131)
PHOTO button ( 96)
Zoom lever ( 27)
Program selector ( 45)
Easy recording
Program AE
Built-in speaker ( 32)
Grip belt ( 16)
Strap mount ( 17)
Cassette compartment ( 14)
OPEN/EJECT switch ( 14)
Cassette compartment
cover ( 14)
Viewfinder ( 16)
Strap mount ( 17)
Start/stop button
( 22, 101)
Power switch ( 3, 135)
O W E
P
C
A
M
R
E
R
A
(VCR)
PLAY
PLAY
NETWORK
NETWORK
CAMERA
OFF
PLAY(VCR)
NETWORK
8
�




 2023年江西萍乡中考道德与法治真题及答案.doc
 2012年重庆南川中考生物真题及答案.doc
 2013年江西师范大学地理学综合及文艺理论基础考研真题.doc
 2020年四川甘孜小升初语文真题及答案I卷.doc
 2020年注册岩土工程师专业基础考试真题及答案.doc
 2023-2024学年福建省厦门市九年级上学期数学月考试题及答案.doc
 2021-2022学年辽宁省沈阳市大东区九年级上学期语文期末试题及答案.doc
 2022-2023学年北京东城区初三第一学期物理期末试卷及答案.doc
 2018上半年江西教师资格初中地理学科知识与教学能力真题及答案.doc
 2012年河北国家公务员申论考试真题及答案-省级.doc
 2020-2021学年江苏省扬州市江都区邵樊片九年级上学期数学第一次质量检测试题及答案.doc
 2022下半年黑龙江教师资格证中学综合素质真题及答案.doc