用用opencv实现实现yolov4中的中的mosaic数据增强
数据增强
简单看了一个yolov4的介绍,mosaic数据增强简单说就是四张图片合一,长宽随机变化。理想的实现是结合图片集和标签集,对单张图片标注过之后,四张合一的图片就不用再
标注。这里只做一个简单的实现,仅仅把四张图片随机合一,生成mosaic图片集,后面需要对这个生成的图片标注。
c++程序:
#include
#include
#include
#include
#include
using namespace std;
using namespace cv;
int main()
{
//读入四幅图片
string imageFile = "D:/work_place/第二批图片/";//图片集文件夹
string imgName = imageFile + "imgName.txt";
ifstream fin(imgName, ios::in);
//char line[1024] = { 0 };
string line;
while (1)
{
vector inputImg;
for (int i = 0; i < 4; i++)
{
getline(fin, line);
cout << "Image Name: " << line << endl;
string imgRoad = imageFile + line;//图片的绝对路径名
inputImg.push_back(imread(imgRoad));
}
Mat image_1 = inputImg[0];
Mat image_2 = inputImg[1];
Mat image_3 = inputImg[2];
Mat image_4 = inputImg[3];
Size sz = Size(image_1.cols, image_1.rows); //最终要生成的图片大小,我设置成和原来一张图片大小相等
srand((unsigned int)time(NULL));
int randomNumX = (rand() % 3 + 4);//[4,6]中随机数
int randomNumY = (rand() % 3 + 4);
Size sz1 = Size(sz.width * randomNumX / 10, sz.height * randomNumY / 10);
resize(image_1, image_1, sz1, 0, 0);
Size sz2 = Size(sz.width - sz1.width, sz1.height);
resize(image_2, image_2, sz2, 0, 0);
Size sz3 = Size(sz1.width, sz.height - sz1.height);
resize(image_3, image_3, sz3, 0, 0);
Size sz4 = Size(sz.width - sz1.width, sz.height - sz1.height);
resize(image_4, image_4, sz4, 0, 0);
//创建连接后存入的图像
Mat result(sz.height + 1, sz.width + 1, image_1.type());
//第1幅,拷贝到左上角
Rect roi_rect = Rect(0, 0, sz1.width, sz1.height);
image_1.copyTo(result(roi_rect));
//第2幅,拷贝到右上角
roi_rect = Rect(sz1.width + 1, 0, sz2.width, sz2.height);
image_2.copyTo(result(roi_rect));
//第3幅,拷贝到左下角
roi_rect = Rect(0, sz1.height + 1, sz3.width, sz3.height);
image_3.copyTo(result(roi_rect));
//第4幅,拷贝到右下角
roi_rect = Rect(sz1.width + 1, sz1.height + 1, sz4.width, sz4.height);
image_4.copyTo(result(roi_rect));
//显示四幅图像连接后的图像
namedWindow("result", WINDOW_NORMAL);
imshow("result", result);
//保存拼接后的图片
static int imageName = 0;
string imageRoad = "result/" + to_string(imageName) + ".jpg";
imwrite(imageRoad, result);
imageName++;
waitKey(0);
}
return 0;
}
图片是从指定的文件夹中读取的,这里要先在图片集文件夹中生成一个txt文件,里面每一行是一个图片的名称。可运行下面这个python程序,自动生成:(图片集路径换成自己
的),运行完这个程序,再运行上面的c++程序
# -*- coding: cp936 -*-
import os
def ListFilesToTxt(dir, file, wildcard, recursion):
exts = wildcard.split(" ")
files = os.listdir(dir)
for name in files:
fullname = os.path.join(dir, name)
if (os.path.isdir(fullname) & recursion):
ListFilesToTxt(fullname, file, wildcard, recursion)
else:
for ext in exts:
�
if (name.endswith(ext)):
file.write(name + "\n")
break
def Test():
dir = "D:/work_place/第二批图片" #在这里修改图片集路径
outfile = "D:/work_place/第二批图片/imgName.txt"
wildcard = ".txt .exe .dll .lib .bmp .jpg"
file = open(outfile, "w")
if not file:
print ("cannot open the file %s for writing" % outfile)
ListFilesToTxt(dir, file, wildcard, 1)
file.close()
Test()
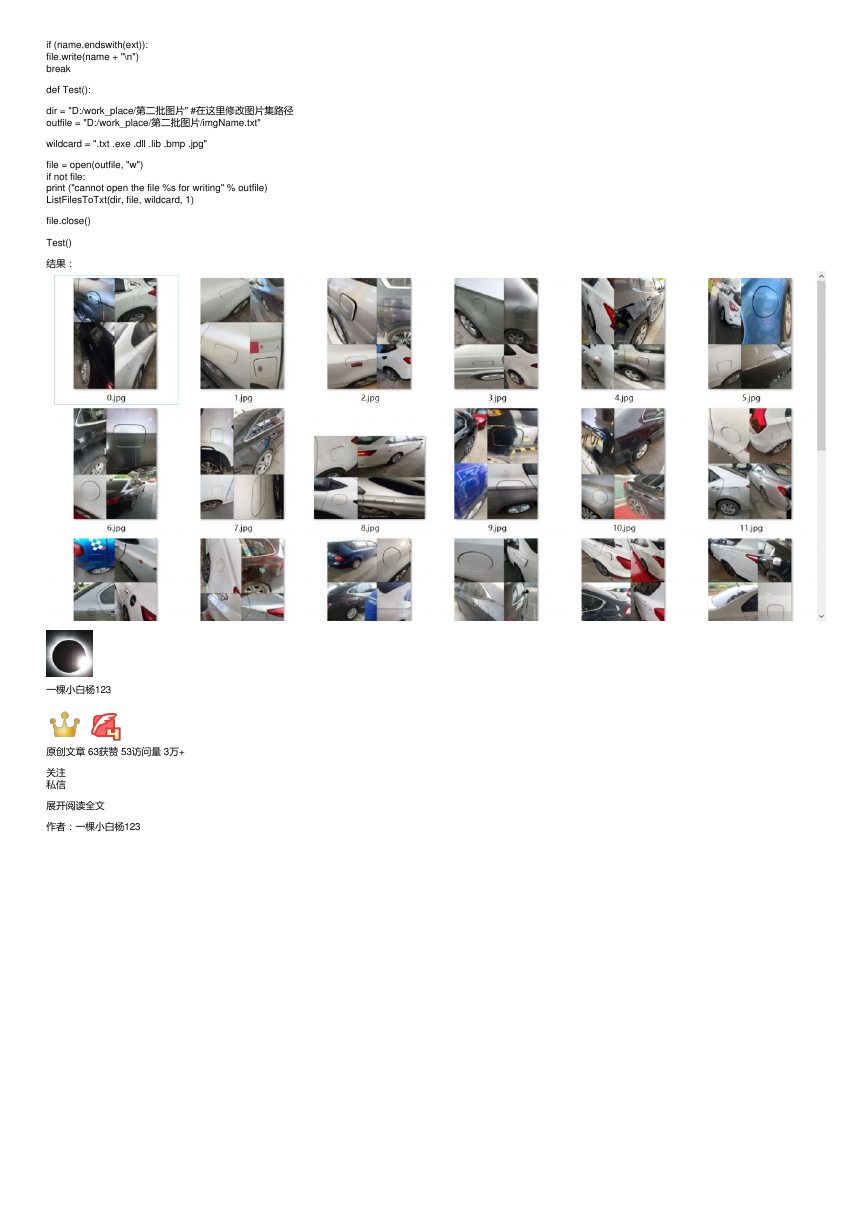
结果:
一棵小白杨123
原创文章 63获赞 53访问量 3万+
关注
私信
展开阅读全文
作者:一棵小白杨123
�


 2023年江西萍乡中考道德与法治真题及答案.doc
 2012年重庆南川中考生物真题及答案.doc
 2013年江西师范大学地理学综合及文艺理论基础考研真题.doc
 2020年四川甘孜小升初语文真题及答案I卷.doc
 2020年注册岩土工程师专业基础考试真题及答案.doc
 2023-2024学年福建省厦门市九年级上学期数学月考试题及答案.doc
 2021-2022学年辽宁省沈阳市大东区九年级上学期语文期末试题及答案.doc
 2022-2023学年北京东城区初三第一学期物理期末试卷及答案.doc
 2018上半年江西教师资格初中地理学科知识与教学能力真题及答案.doc
 2012年河北国家公务员申论考试真题及答案-省级.doc
 2020-2021学年江苏省扬州市江都区邵樊片九年级上学期数学第一次质量检测试题及答案.doc
 2022下半年黑龙江教师资格证中学综合素质真题及答案.doc