Table of contents
Package contents...................................................................................................................................
2
Getting started........................................................................................................................................
3
Description of the device.....................................................................................................................
4
Inserting SIM & Micro-SD cards.........................................................................................................
5
3G & WiFi connection...........................................................................................................................
6
The AndroidTM interface.......................................................................................................................
8
Getting familiar with AndroidTM......................................................................................................
12
Troubleshooting...................................................................................................................................
14
For more information, please consult the FAQs on www.archos.com. Make sure to read them before considering any
product return. Your deal may be no big deal. As we are often updating and improving our products, your device’s
software may have a slightly different appearance or modified functionality than presented in this Quick Start Guide.
Consult the declaration of conformity on http://www.archos.com/products/declaration_conformity.html
ARCHOS_101_Xenon_Lite_QSG_book.indd 1
1
22/05/2015 17:54:09
ENEN�
Package Contents
Warranty
Warranty
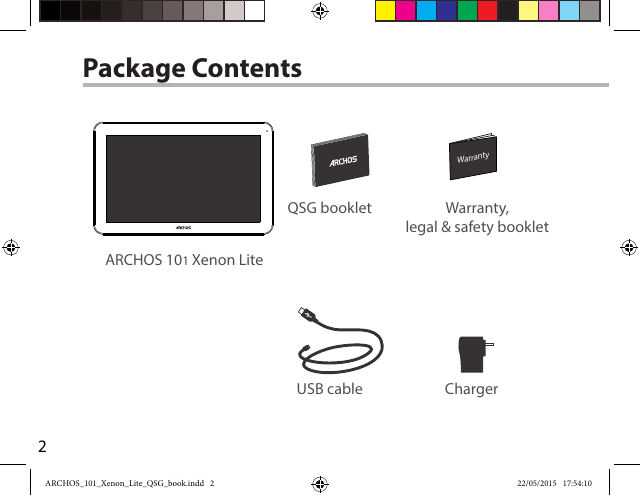
QSG booklet
Warranty,
legal & safety booklet
ARCHOS 101 Xenon Lite
USB cable
Charger
2
ARCHOS_101_Xenon_Lite_QSG_book.indd 2
22/05/2015 17:54:10
�
Getting Started
Charging
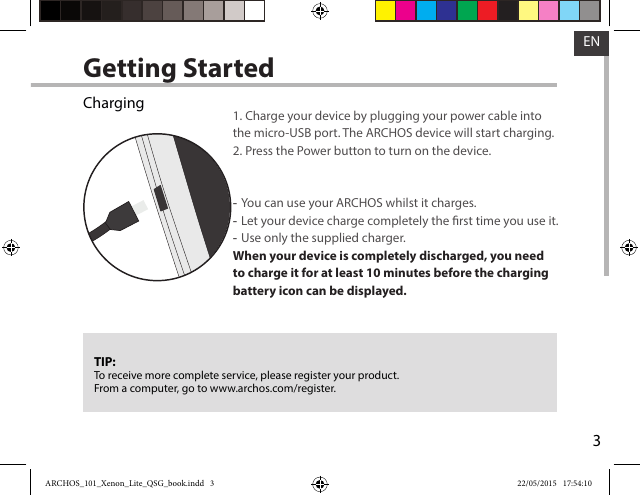
1. Charge your device by plugging your power cable into
the micro-USB port. The ARCHOS device will start charging.
2. Press the Power button to turn on the device.
- You can use your ARCHOS whilst it charges.
- Let your device charge completely the first time you use it.
- Use only the supplied charger.
When your device is completely discharged, you need
to charge it for at least 10 minutes before the charging
battery icon can be displayed.
TIP:
To receive more complete service, please register your product.
From a computer, go to www.archos.com/register.
EN
3
ARCHOS_101_Xenon_Lite_QSG_book.indd 3
22/05/2015 17:54:10
�
Description of the device
Webcam
Notch
Camera
Micro-USB port
1
2
3
4
Headphone jack
ON/OFF button
Volume buttons
Reset button
5
6
7
8
Loudspeaker
9
4
ARCHOS_101_Xenon_Lite_QSG_book.indd 4
22/05/2015 17:54:10
735864912�
Inserting SIM & Micro-SD cards
WARNING: Make sure to turn off your device before inserting the SIM & memory cards.
Opening
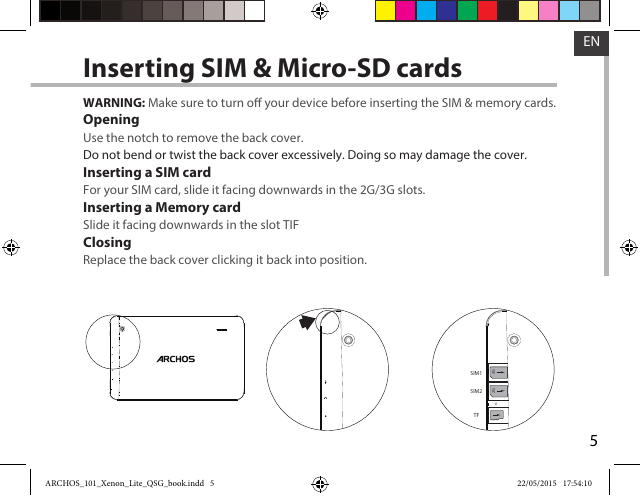
Use the notch to remove the back cover.
Do not bend or twist the back cover excessively. Doing so may damage the cover.
Inserting a SIM card
For your SIM card, slide it facing downwards in the 2G/3G slots.
Inserting a Memory card
Slide it facing downwards in the slot TIF
Closing
Replace the back cover clicking it back into position.
ARCHOS_101_Xenon_Lite_QSG_book.indd 5
22/05/2015 17:54:10
5
Remove the back coverInsert SIM card and memory cardSIM1SIM2TF3G2GEN�
3G & WiFi connection
3G connection
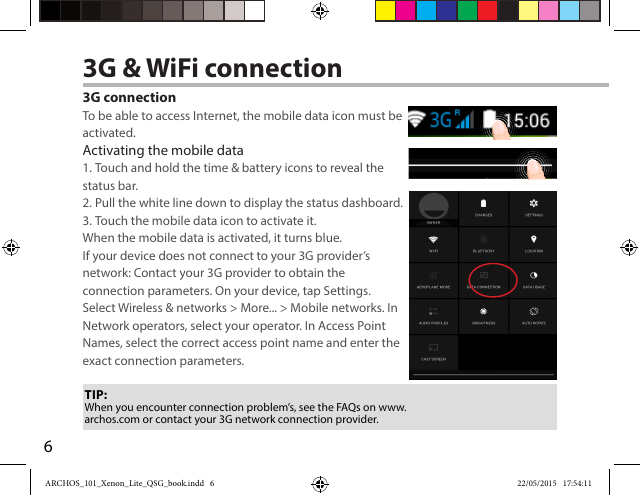
To be able to access Internet, the mobile data icon must be
activated.
Activating the mobile data
1. Touch and hold the time & battery icons to reveal the
status bar.
2. Pull the white line down to display the status dashboard.
3. Touch the mobile data icon to activate it.
When the mobile data is activated, it turns blue.
If your device does not connect to your 3G provider’s
network: Contact your 3G provider to obtain the
connection parameters. On your device, tap Settings.
Select Wireless & networks > More... > Mobile networks. In
Network operators, select your operator. In Access Point
Names, select the correct access point name and enter the
exact connection parameters.
TIP:
When you encounter connection problem’s, see the FAQs on www.
archos.com or contact your 3G network connection provider.
6
ARCHOS_101_Xenon_Lite_QSG_book.indd 6
22/05/2015 17:54:11
�
WiFi connection
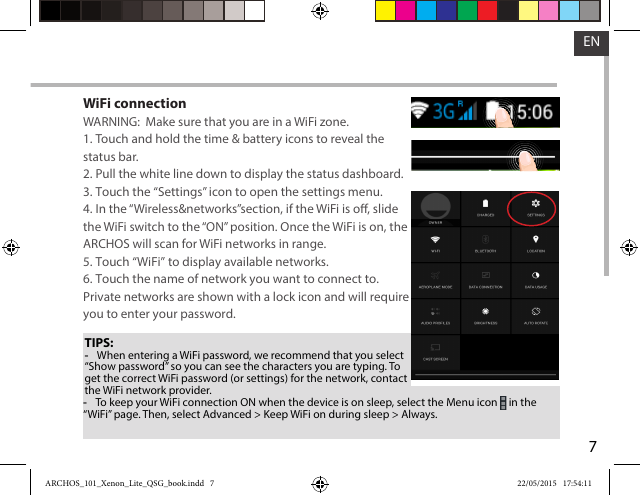
WARNING: Make sure that you are in a WiFi zone.
1. Touch and hold the time & battery icons to reveal the
status bar.
2. Pull the white line down to display the status dashboard.
3. Touch the “Settings” icon to open the settings menu.
4. In the “Wireless&networks”section, if the WiFi is off, slide
the WiFi switch to the “ON” position. Once the WiFi is on, the
ARCHOS will scan for WiFi networks in range.
5. Touch “WiFi” to display available networks.
6. Touch the name of network you want to connect to.
Private networks are shown with a lock icon and will require
you to enter your password.
TIPS:
- When entering a WiFi password, we recommend that you select
“Show password” so you can see the characters you are typing. To
get the correct WiFi password (or settings) for the network, contact
the WiFi network provider.
- To keep your WiFi connection ON when the device is on sleep, select the Menu icon
“WiFi” page. Then, select Advanced > Keep WiFi on during sleep > Always.
in the
ARCHOS_101_Xenon_Lite_QSG_book.indd 7
7
22/05/2015 17:54:11
EN�
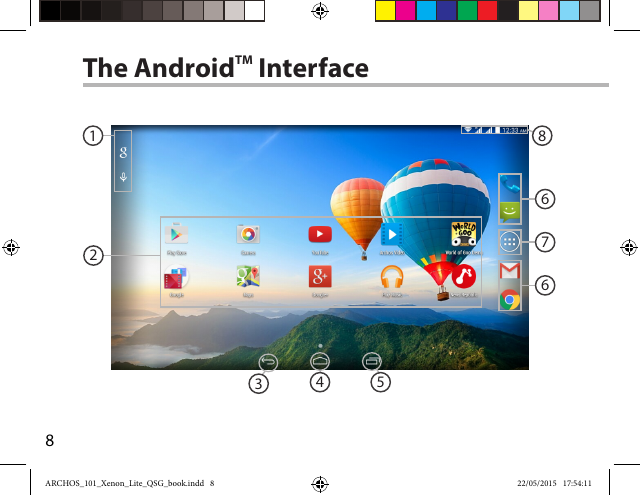
The AndroidTM Interface
8
ARCHOS_101_Xenon_Lite_QSG_book.indd 8
22/05/2015 17:54:11
421835676�



 2023年江西萍乡中考道德与法治真题及答案.doc
 2012年重庆南川中考生物真题及答案.doc
 2013年江西师范大学地理学综合及文艺理论基础考研真题.doc
 2020年四川甘孜小升初语文真题及答案I卷.doc
 2020年注册岩土工程师专业基础考试真题及答案.doc
 2023-2024学年福建省厦门市九年级上学期数学月考试题及答案.doc
 2021-2022学年辽宁省沈阳市大东区九年级上学期语文期末试题及答案.doc
 2022-2023学年北京东城区初三第一学期物理期末试卷及答案.doc
 2018上半年江西教师资格初中地理学科知识与教学能力真题及答案.doc
 2012年河北国家公务员申论考试真题及答案-省级.doc
 2020-2021学年江苏省扬州市江都区邵樊片九年级上学期数学第一次质量检测试题及答案.doc
 2022下半年黑龙江教师资格证中学综合素质真题及答案.doc