Development Quick Start Guide
NXP BSP19.0 - BlueBox
NXP Confidential
29-Nov-2018
Page 1 of 14
�
Contents
1 Introduction
2 Accessing the BSP19.0 release
3 Booting with the provided binaries
4 Building the BlueBox software components
5 Deploying other optional components
3
4
5
7
11
NXP Confidential
Page 2 of 14
�
1 Introduction
This is the Development Quick Start Guide covering the Board Support Package 19.0 (BSP19.0) software
package for the NXP BlueBox 2.0 (also called the "BlueBox Mini") ECU development system. The purpose of this
document is to explain how to:
• Install and configure the software environment provided by the BSP
• Build the required images for the SoC devices used on the BlueBox
• Deploy these images on to the BlueBox development platform
The end goal is to boot a fully running Linux image on each device and enable communication between the
devices. The BlueBox platform contains two Linux-capable NXP SoCs, each with ARMv8 cores and multiple IP
blocks that provide hardware acceleration:
• The S32V234, a quad-core safety-capable ARMv8 SoC providing vision sensor input and processing
• The LS2084A, an octal-core ARMv8 SoC for high-volume data and network processing
These SoCs are interconnected using a PCIe link and provide multiple standard and Automotive-specific periph-
erals. The enablement software on top of both SoCs is built using Yocto. More detail about the project can be found
at the Yocto project homepage.
The build steps described in the following chapters require a Linux host machine. Ubuntu 14.04 LTS, Ubuntu
16.04 LTS, CentOS 6.9 and CentOS 7 have been used successfully to build the BlueBox software.
The following abbreviations are used throughout this document and are explained here for convenience:
Abbreviation
BSP
PCIe
Meaning
The Board Support Package, which provides software enablement for the
S32V234 and LS2084A SoCs inside the BlueBox development target, through
a Linux OS and driver suite
PCI Express connection used for direct communication between the QorIQ
LS2084A and S32V234 SoCs
Note: All software features and functionalities from BSP19.0 related to the BlueBox target are considered
at EAR quality level.
NXP Confidential
Page 3 of 14
�
2 Accessing the BSP19.0 release
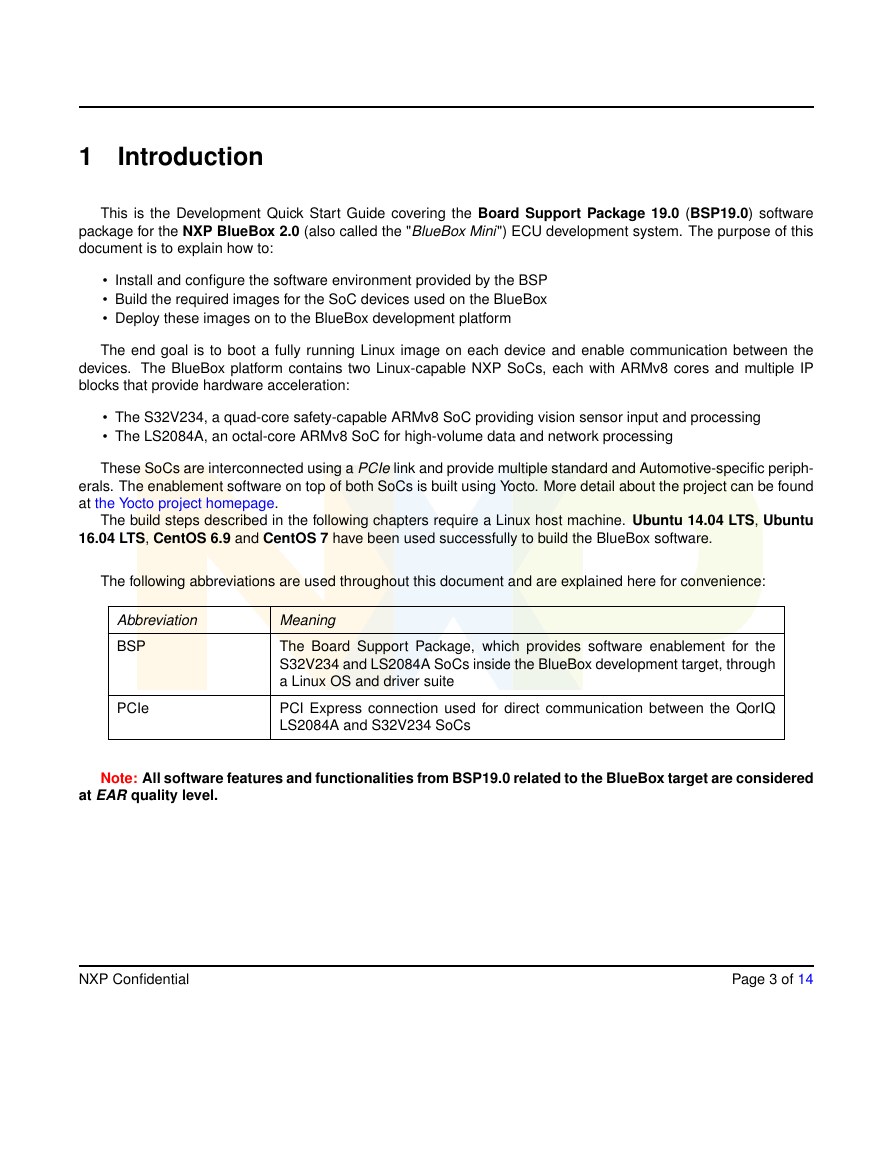
This chapter explains how to access the contents of the BSP19.0 release. Firstly, navigate to your personal
account on the NXP website. After logging in, go to nxp.com/s32v234 and then select the Software & Tools page.
There, identify the Automotive SW - Linux BSP entry and select Download:
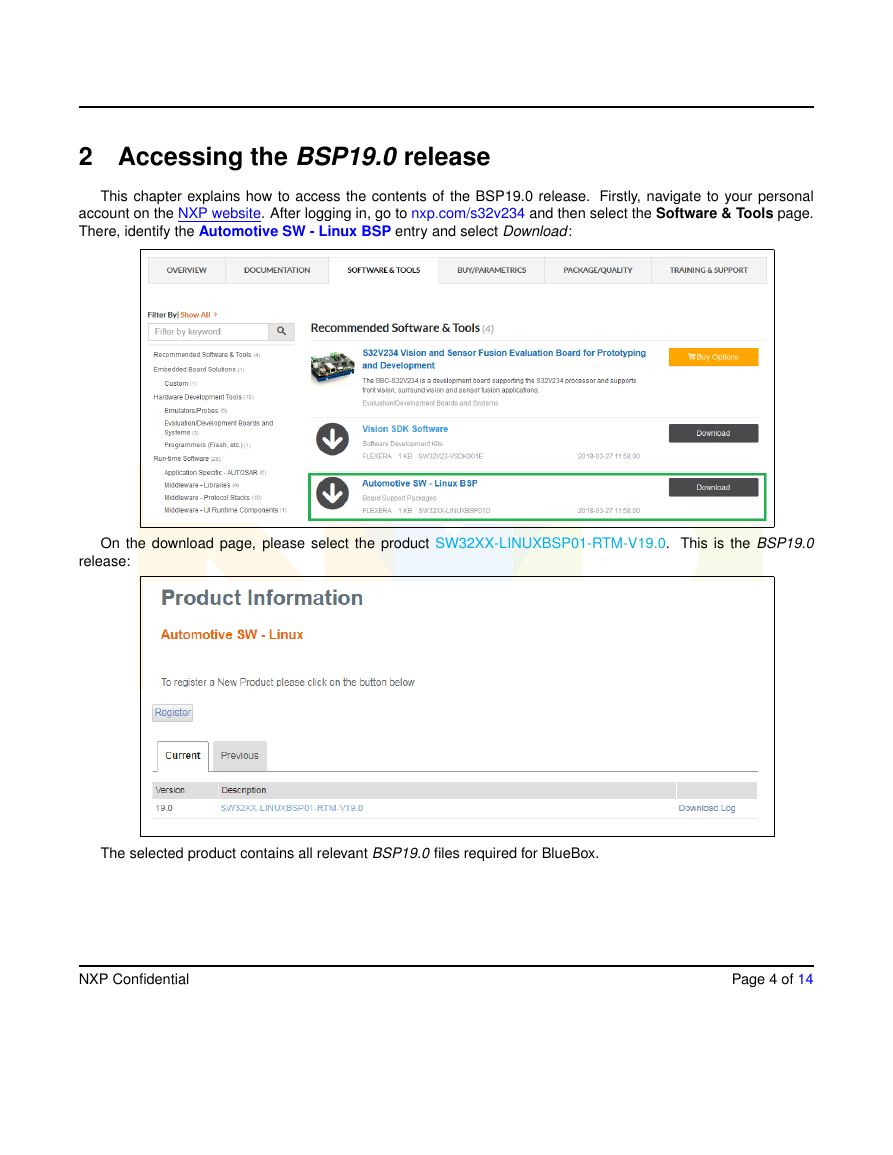
On the download page, please select the product SW32XX-LINUXBSP01-RTM-V19.0. This is the BSP19.0
release:
The selected product contains all relevant BSP19.0 files required for BlueBox.
NXP Confidential
Page 4 of 14
�
3 Booting with the provided binaries
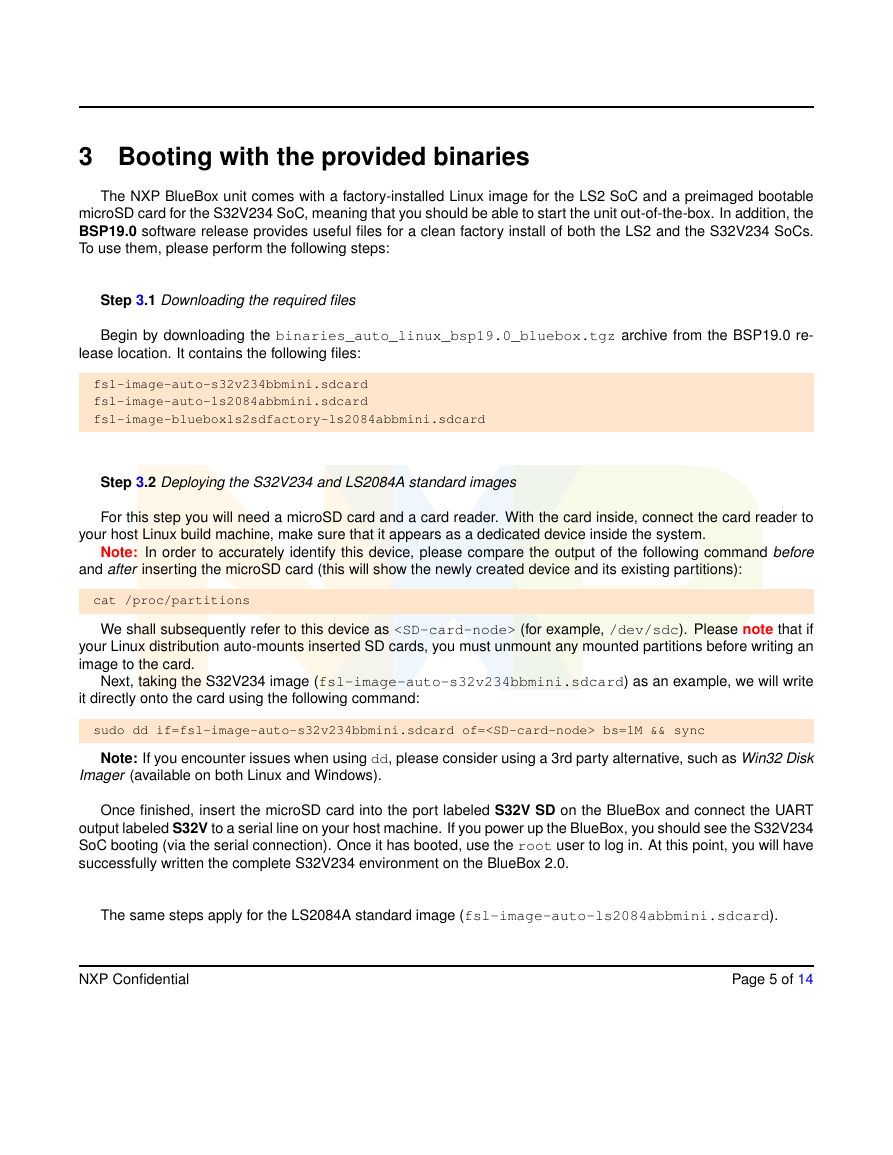
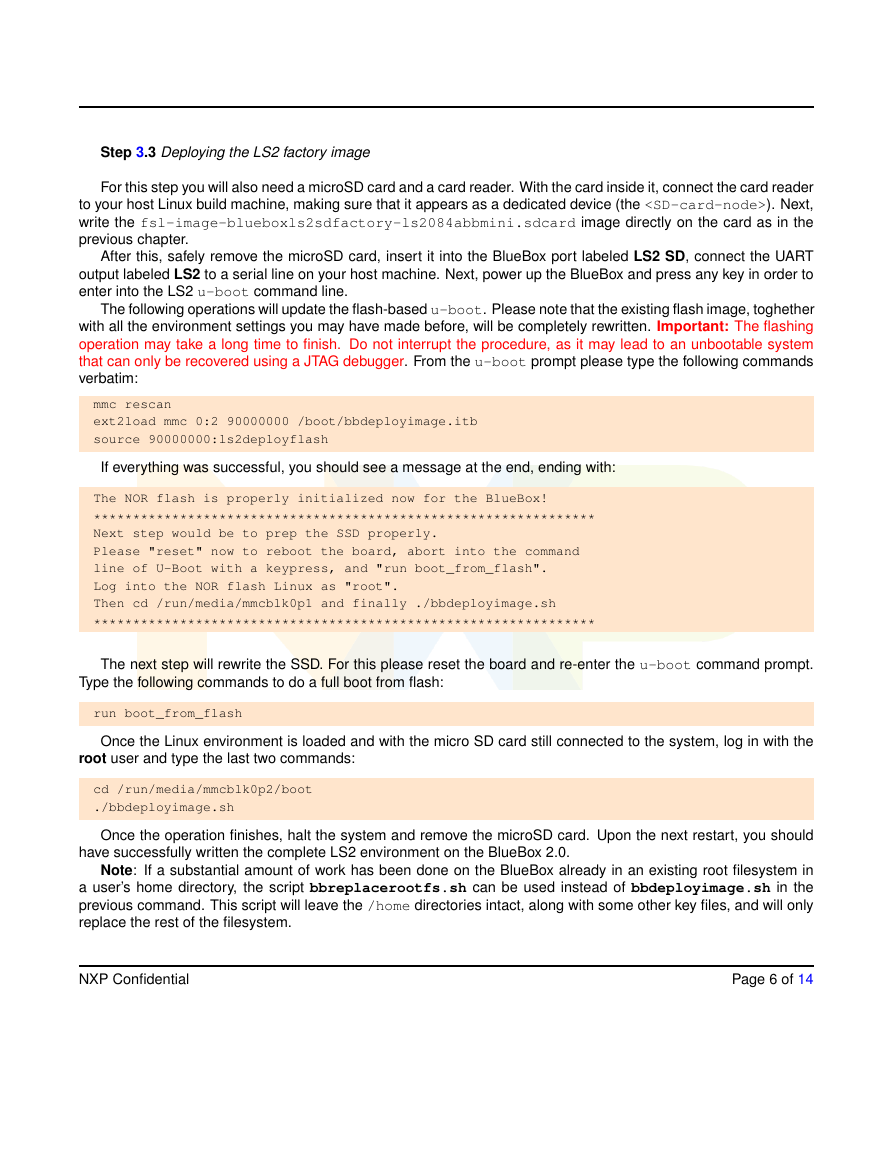
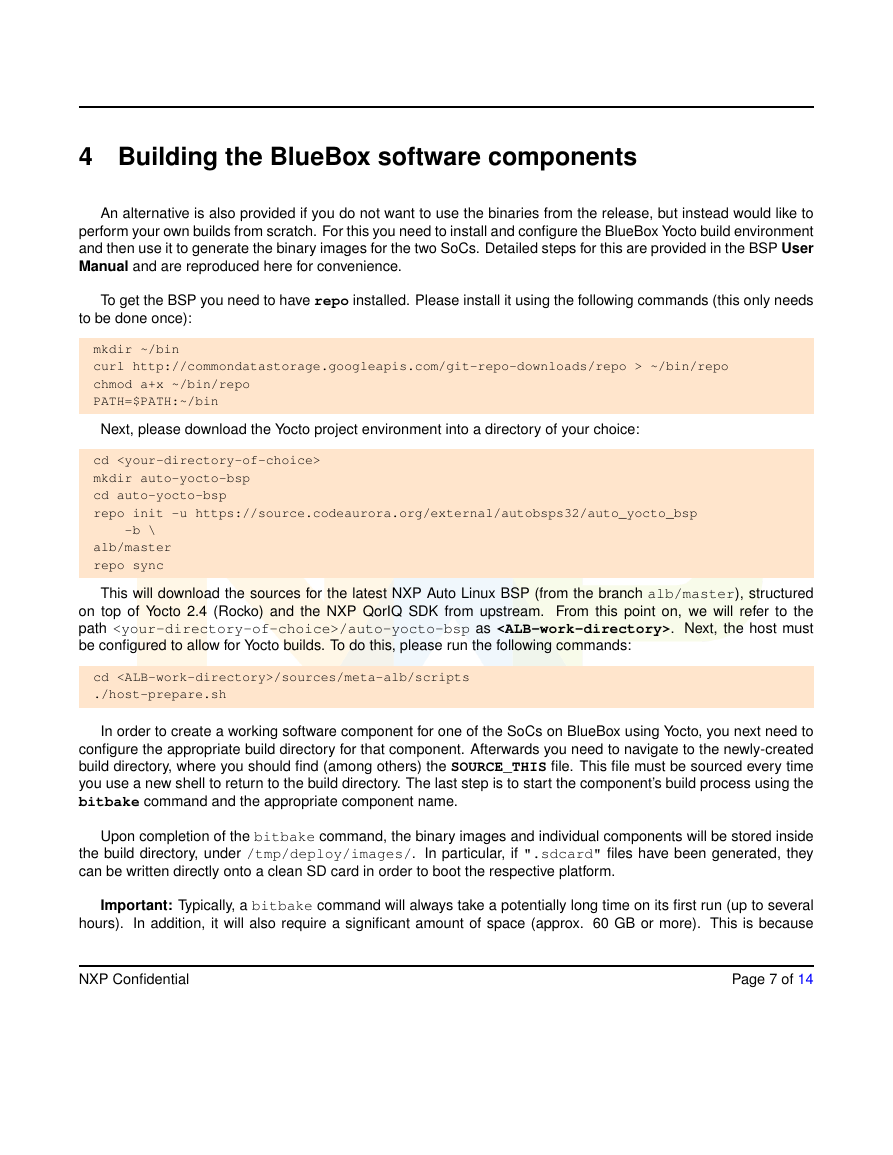
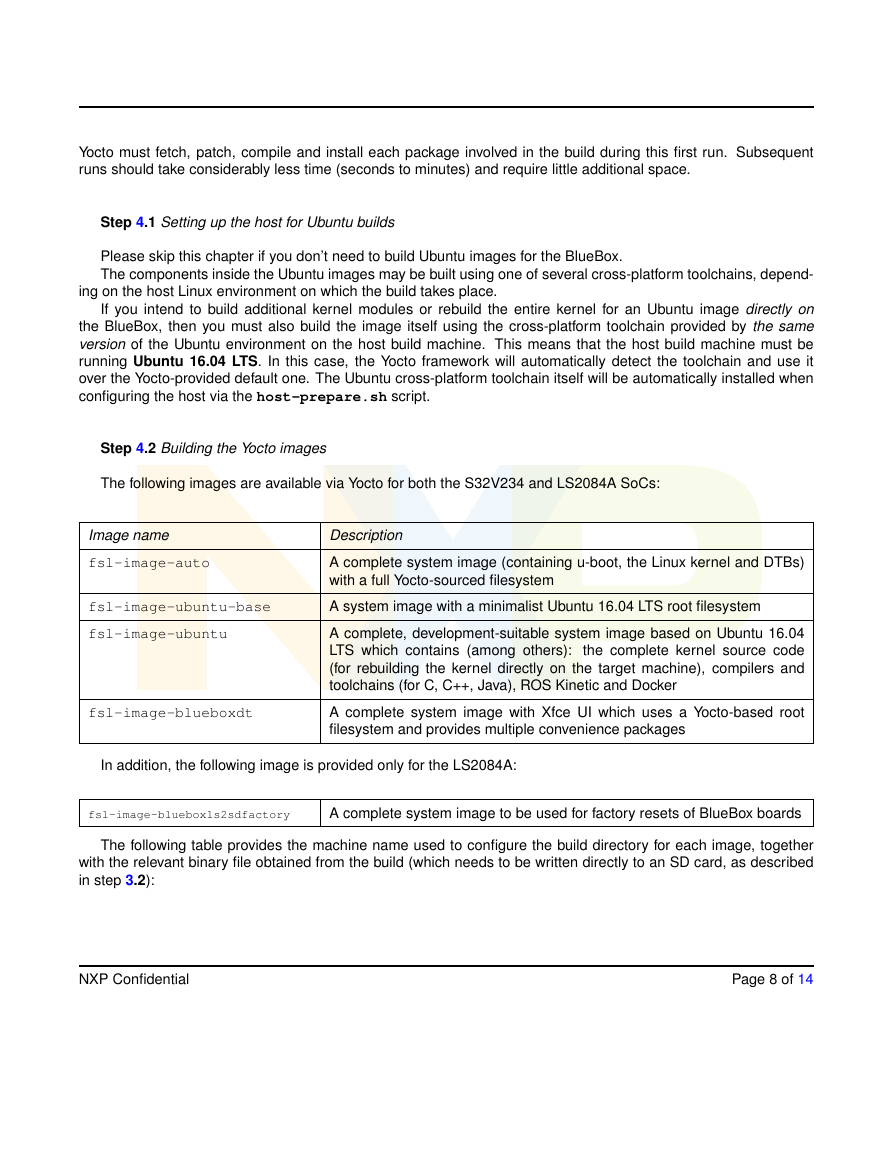
The NXP BlueBox unit comes with a factory-installed Linux image for the LS2 SoC and a preimaged bootable
microSD card for the S32V234 SoC, meaning that you should be able to start the unit out-of-the-box. In addition, the
BSP19.0 software release provides useful files for a clean factory install of both the LS2 and the S32V234 SoCs.
To use them, please perform the following steps:
Step 3.1 Downloading the required files
Begin by downloading the binaries_auto_linux_bsp19.0_bluebox.tgz archive from the BSP19.0 re-
lease location. It contains the following files:
fsl-image-auto-s32v234bbmini.sdcard
fsl-image-auto-ls2084abbmini.sdcard
fsl-image-blueboxls2sdfactory-ls2084abbmini.sdcard
Step 3.2 Deploying the S32V234 and LS2084A standard images
For this step you will need a microSD card and a card reader. With the card inside, connect the card reader to
your host Linux build machine, make sure that it appears as a dedicated device inside the system.
Note: In order to accurately identify this device, please compare the output of the following command before
and after inserting the microSD card (this will show the newly created device and its existing partitions):
cat /proc/partitions
We shall subsequently refer to this device as (for example, /dev/sdc). Please note that if
your Linux distribution auto-mounts inserted SD cards, you must unmount any mounted partitions before writing an
image to the card.
Next, taking the S32V234 image (fsl-image-auto-s32v234bbmini.sdcard) as an example, we will write
it directly onto the card using the following command:
sudo dd if=fsl-image-auto-s32v234bbmini.sdcard of= bs=1M && sync
Note: If you encounter issues when using dd, please consider using a 3rd party alternative, such as Win32 Disk
Imager (available on both Linux and Windows).
Once finished, insert the microSD card into the port labeled S32V SD on the BlueBox and connect the UART
output labeled S32V to a serial line on your host machine. If you power up the BlueBox, you should see the S32V234
SoC booting (via the serial connection). Once it has booted, use the root user to log in. At this point, you will have
successfully written the complete S32V234 environment on the BlueBox 2.0.
The same steps apply for the LS2084A standard image (fsl-image-auto-ls2084abbmini.sdcard).
NXP Confidential
Page 5 of 14
�
Step 3.3 Deploying the LS2 factory image
For this step you will also need a microSD card and a card reader. With the card inside it, connect the card reader
to your host Linux build machine, making sure that it appears as a dedicated device (the ). Next,
write the fsl-image-blueboxls2sdfactory-ls2084abbmini.sdcard image directly on the card as in the
previous chapter.
After this, safely remove the microSD card, insert it into the BlueBox port labeled LS2 SD, connect the UART
output labeled LS2 to a serial line on your host machine. Next, power up the BlueBox and press any key in order to
enter into the LS2 u-boot command line.
The following operations will update the flash-based u-boot. Please note that the existing flash image, toghether
with all the environment settings you may have made before, will be completely rewritten. Important: The flashing
operation may take a long time to finish. Do not interrupt the procedure, as it may lead to an unbootable system
that can only be recovered using a JTAG debugger. From the u-boot prompt please type the following commands
verbatim:
mmc rescan
ext2load mmc 0:2 90000000 /boot/bbdeployimage.itb
source 90000000:ls2deployflash
If everything was successful, you should see a message at the end, ending with:
The NOR flash is properly initialized now for the BlueBox!
****************************************************************
Next step would be to prep the SSD properly.
Please "reset" now to reboot the board, abort into the command
line of U-Boot with a keypress, and "run boot_from_flash".
Log into the NOR flash Linux as "root".
Then cd /run/media/mmcblk0p1 and finally ./bbdeployimage.sh
****************************************************************
The next step will rewrite the SSD. For this please reset the board and re-enter the u-boot command prompt.
Type the following commands to do a full boot from flash:
run boot_from_flash
Once the Linux environment is loaded and with the micro SD card still connected to the system, log in with the
root user and type the last two commands:
cd /run/media/mmcblk0p2/boot
./bbdeployimage.sh
Once the operation finishes, halt the system and remove the microSD card. Upon the next restart, you should
have successfully written the complete LS2 environment on the BlueBox 2.0.
Note: If a substantial amount of work has been done on the BlueBox already in an existing root filesystem in
a user’s home directory, the script bbreplacerootfs.sh can be used instead of bbdeployimage.sh in the
previous command. This script will leave the /home directories intact, along with some other key files, and will only
replace the rest of the filesystem.
NXP Confidential
Page 6 of 14
�
4 Building the BlueBox software components
An alternative is also provided if you do not want to use the binaries from the release, but instead would like to
perform your own builds from scratch. For this you need to install and configure the BlueBox Yocto build environment
and then use it to generate the binary images for the two SoCs. Detailed steps for this are provided in the BSP User
Manual and are reproduced here for convenience.
To get the BSP you need to have repo installed. Please install it using the following commands (this only needs
to be done once):
mkdir ~/bin
curl http://commondatastorage.googleapis.com/git-repo-downloads/repo > ~/bin/repo
chmod a+x ~/bin/repo
PATH=$PATH:~/bin
Next, please download the Yocto project environment into a directory of your choice:
cd
mkdir auto-yocto-bsp
cd auto-yocto-bsp
repo init -u https://source.codeaurora.org/external/autobsps32/auto_yocto_bsp
-b \
alb/master
repo sync
This will download the sources for the latest NXP Auto Linux BSP (from the branch alb/master), structured
on top of Yocto 2.4 (Rocko) and the NXP QorIQ SDK from upstream. From this point on, we will refer to the
path /auto-yocto-bsp as . Next, the host must
be configured to allow for Yocto builds. To do this, please run the following commands:
cd /sources/meta-alb/scripts
./host-prepare.sh
In order to create a working software component for one of the SoCs on BlueBox using Yocto, you next need to
configure the appropriate build directory for that component. Afterwards you need to navigate to the newly-created
build directory, where you should find (among others) the SOURCE_THIS file. This file must be sourced every time
you use a new shell to return to the build directory. The last step is to start the component’s build process using the
bitbake command and the appropriate component name.
Upon completion of the bitbake command, the binary images and individual components will be stored inside
In particular, if ".sdcard" files have been generated, they
the build directory, under /tmp/deploy/images/.
can be written directly onto a clean SD card in order to boot the respective platform.
Important: Typically, a bitbake command will always take a potentially long time on its first run (up to several
In addition, it will also require a significant amount of space (approx. 60 GB or more). This is because
hours).
NXP Confidential
Page 7 of 14
�Yocto must fetch, patch, compile and install each package involved in the build during this first run. Subsequent
runs should take considerably less time (seconds to minutes) and require little additional space.
Step 4.1 Setting up the host for Ubuntu builds
Please skip this chapter if you don’t need to build Ubuntu images for the BlueBox.
The components inside the Ubuntu images may be built using one of several cross-platform toolchains, depend-
ing on the host Linux environment on which the build takes place.
If you intend to build additional kernel modules or rebuild the entire kernel for an Ubuntu image directly on
the BlueBox, then you must also build the image itself using the cross-platform toolchain provided by the same
version of the Ubuntu environment on the host build machine. This means that the host build machine must be
running Ubuntu 16.04 LTS. In this case, the Yocto framework will automatically detect the toolchain and use it
over the Yocto-provided default one. The Ubuntu cross-platform toolchain itself will be automatically installed when
configuring the host via the host-prepare.sh script.
Step 4.2 Building the Yocto images
The following images are available via Yocto for both the S32V234 and LS2084A SoCs:
Image name
fsl-image-auto
fsl-image-ubuntu-base
fsl-image-ubuntu
fsl-image-blueboxdt
Description
A complete system image (containing u-boot, the Linux kernel and DTBs)
with a full Yocto-sourced filesystem
A system image with a minimalist Ubuntu 16.04 LTS root filesystem
A complete, development-suitable system image based on Ubuntu 16.04
LTS which contains (among others):
the complete kernel source code
(for rebuilding the kernel directly on the target machine), compilers and
toolchains (for C, C++, Java), ROS Kinetic and Docker
A complete system image with Xfce UI which uses a Yocto-based root
filesystem and provides multiple convenience packages
In addition, the following image is provided only for the LS2084A:
fsl-image-blueboxls2sdfactory
A complete system image to be used for factory resets of BlueBox boards
The following table provides the machine name used to configure the build directory for each image, together
with the relevant binary file obtained from the build (which needs to be written directly to an SD card, as described
in step 3.2):
NXP Confidential
Page 8 of 14
�


 2023年江西萍乡中考道德与法治真题及答案.doc
 2012年重庆南川中考生物真题及答案.doc
 2013年江西师范大学地理学综合及文艺理论基础考研真题.doc
 2020年四川甘孜小升初语文真题及答案I卷.doc
 2020年注册岩土工程师专业基础考试真题及答案.doc
 2023-2024学年福建省厦门市九年级上学期数学月考试题及答案.doc
 2021-2022学年辽宁省沈阳市大东区九年级上学期语文期末试题及答案.doc
 2022-2023学年北京东城区初三第一学期物理期末试卷及答案.doc
 2018上半年江西教师资格初中地理学科知识与教学能力真题及答案.doc
 2012年河北国家公务员申论考试真题及答案-省级.doc
 2020-2021学年江苏省扬州市江都区邵樊片九年级上学期数学第一次质量检测试题及答案.doc
 2022下半年黑龙江教师资格证中学综合素质真题及答案.doc