CMSIS-RTOS Tutorial
Introduction
This tutorial is an excerpt from “The Designers Guide to the Cortex-M Processor
Family” by Trevor Martin and is reproduced with permission of Elsevier. For
more details please see the Further Reading section at the end of this tutorial.
In this tutorial we are going to look at using a small footprint RTOS running on a
Cortex-M based microcontroller. Specifically we are going to use an RTOS that
meets
the ‘Cortex Microcontroller Interface Standard’ (CMSIS) RTOS
Specification. This specification defines a standard RTOS API for use with
Cortex-M based microcontrollers. The CMSIS-RTOS API provides us with all
the features we will need to develop with an RTOS, we only need to learn it once
and then can use it across a very wide range of devices. CMSIS-RTOS also
provides a standard interface for more complex frameworks (Java Virtual
Machine, UML). It is also a standard interface for anyone wanting to develop
reusable software components. If you are new to using an RTOS it takes a bit of
practice to get used to working with an RTOS but once you have made the leap
the advantages are such that you will not want to return to writing bare metal
code.
Getting Started- Installing the tools
To run the examples in this tutorial, it is first necessary to install the MDK-ARM
toolchain. First download the MDK-Core Version 5 using the embedded URL
below and run the installation file.
http://www.keil.com/mdk5/install
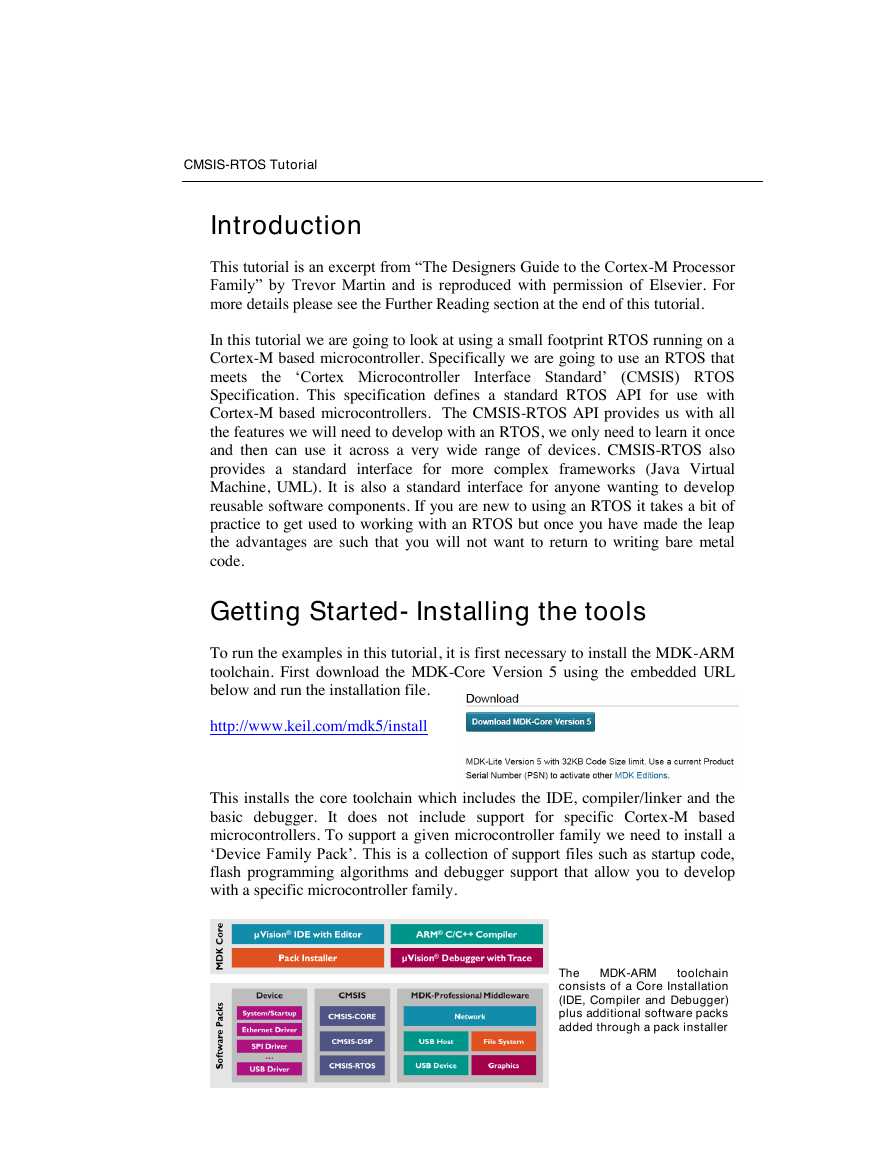
This installs the core toolchain which includes the IDE, compiler/linker and the
basic debugger. It does not include support for specific Cortex-M based
microcontrollers. To support a given microcontroller family we need to install a
‘Device Family Pack’. This is a collection of support files such as startup code,
flash programming algorithms and debugger support that allow you to develop
with a specific microcontroller family.
The MDK-ARM
toolchain
consists of a Core Installation
(IDE, Compiler and Debugger)
plus additional software packs
added through a pack installer
�
2
CMSIS-RTOS Tutorial
In the exercises we are going to use an STM32F103RB so we need to install
support for this device using the ‘Pack Installer’ within the µVision IDE. When
the MDK-Core finishes installing the pack installer will start automatically,
alternatively you can start the µVision IDE and access Pack Installer from the
toolbar by pressing the icon shown below
Pack Installer Icon
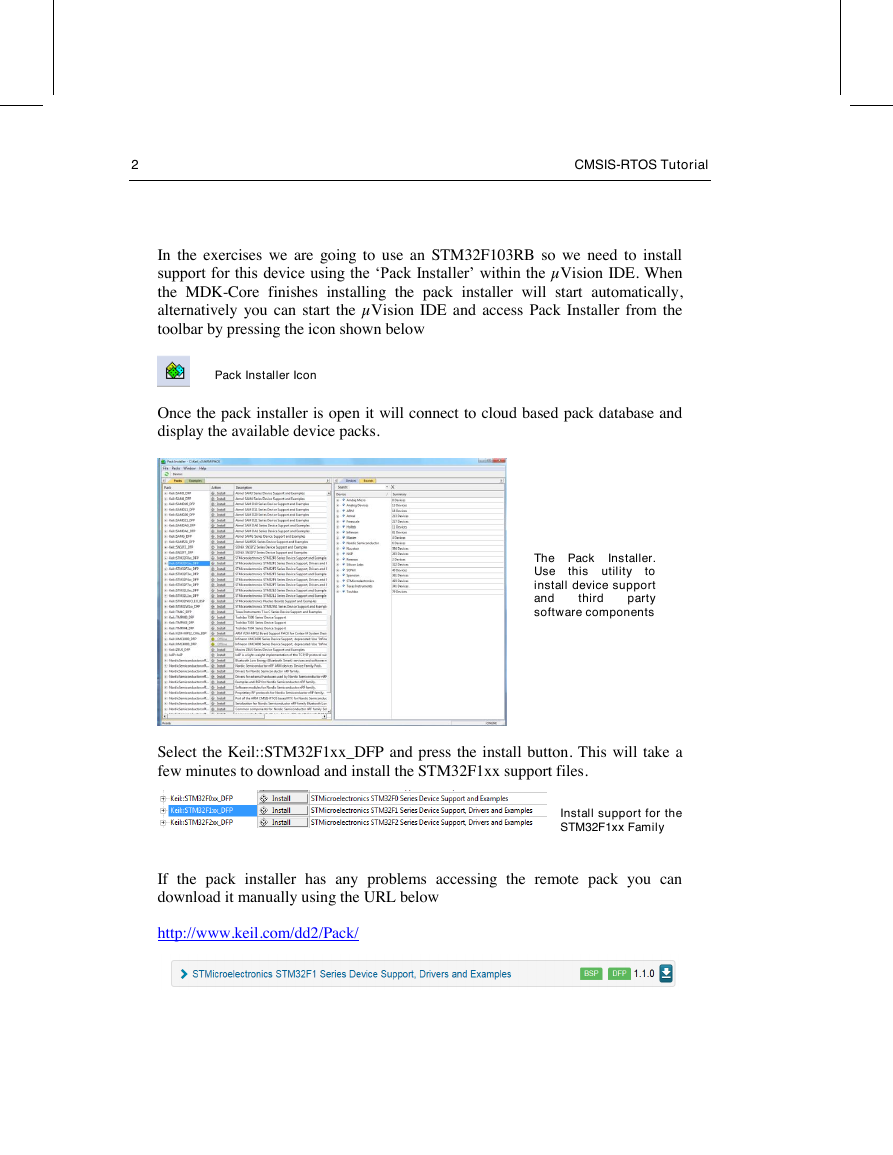
Once the pack installer is open it will connect to cloud based pack database and
display the available device packs.
this utility
Installer.
The Pack
Use
to
install device support
and
party
software components
third
Select the Keil::STM32F1xx_DFP and press the install button. This will take a
few minutes to download and install the STM32F1xx support files.
Install support for the
STM32F1xx Family
If the pack installer has any problems accessing the remote pack you can
download it manually using the URL below
http://www.keil.com/dd2/Pack/
�
CMSIS-RTOS Tutorial
Again select the STM32F1xx pack and save it to your hard disk. The file may be
saved as a .zip file depending on the browser you are using. If it is saved as a .zip
change the .zip extension to .pack, you can then install it locally by double
clicking on the STM32F1xx.pack file.
Installing the examples
The examples for this tutorial are provided as a CMSIS pack. You can install the
pack into the MDK-ARM by simply double clicking on the
Hitex.CMSIS_RTOS_Tutorial.1.0.3. pack file.
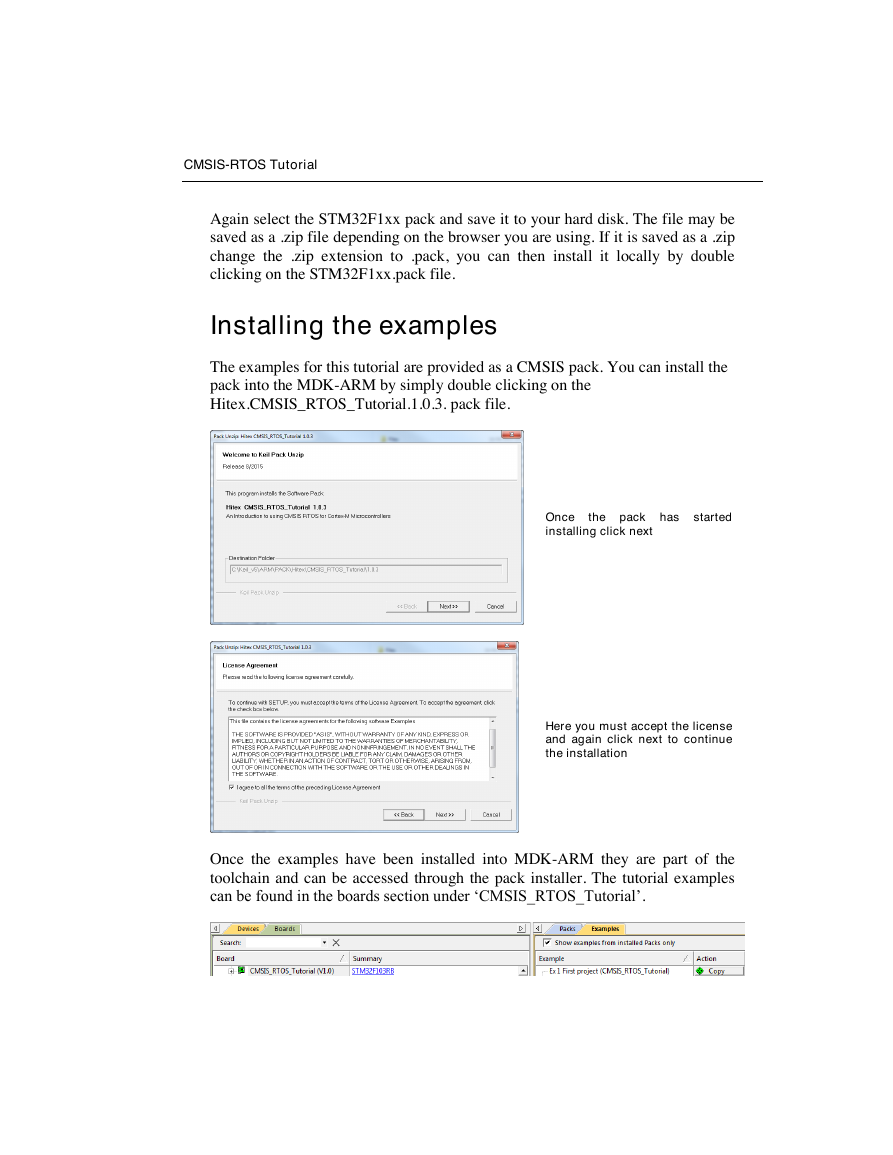
Once
installing click next
the pack has started
Here you must accept the license
and again click next to continue
the installation
Once the examples have been installed into MDK-ARM they are part of the
toolchain and can be accessed through the pack installer. The tutorial examples
can be found in the boards section under ‘CMSIS_RTOS_Tutorial’.
�
4
CMSIS-RTOS Tutorial
What Hardware do I need?
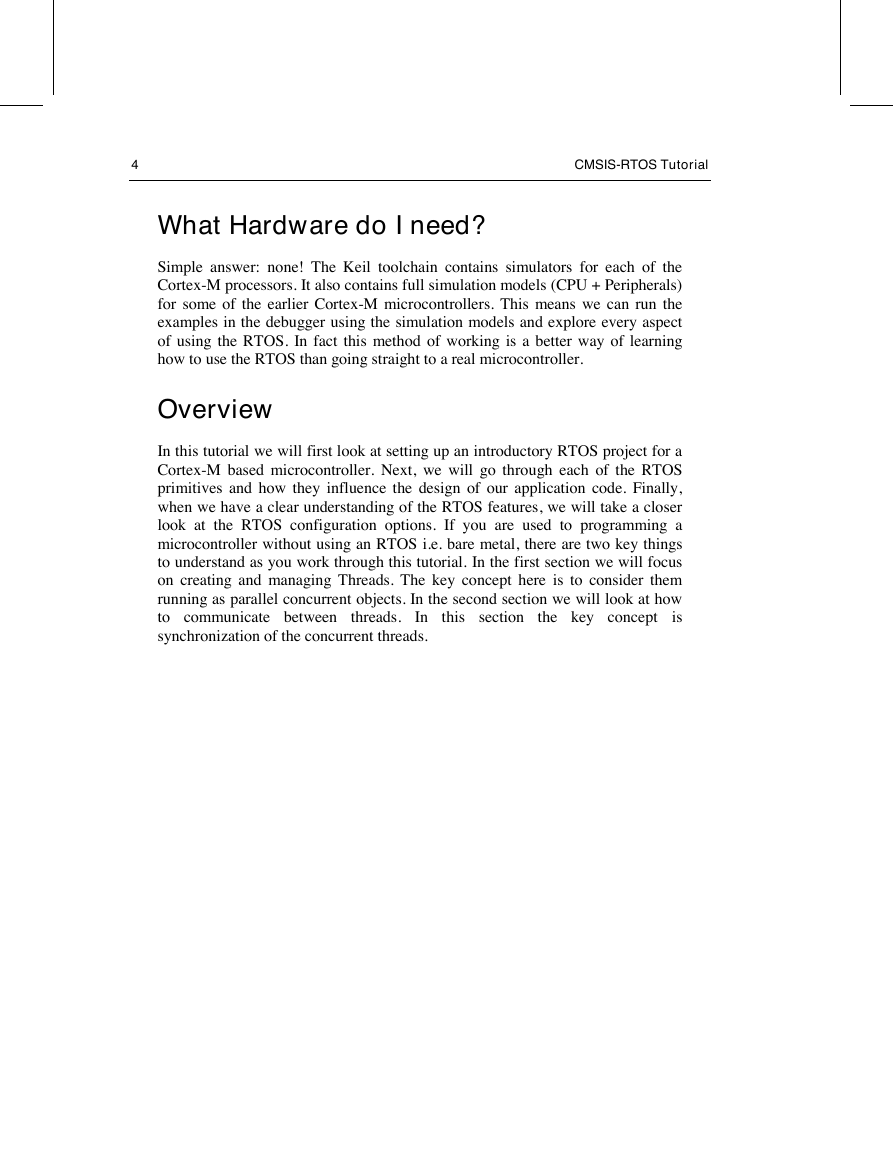
Simple answer: none! The Keil toolchain contains simulators for each of the
Cortex-M processors. It also contains full simulation models (CPU + Peripherals)
for some of the earlier Cortex-M microcontrollers. This means we can run the
examples in the debugger using the simulation models and explore every aspect
of using the RTOS. In fact this method of working is a better way of learning
how to use the RTOS than going straight to a real microcontroller.
Overview
In this tutorial we will first look at setting up an introductory RTOS project for a
Cortex-M based microcontroller. Next, we will go through each of the RTOS
primitives and how they influence the design of our application code. Finally,
when we have a clear understanding of the RTOS features, we will take a closer
look at the RTOS configuration options. If you are used to programming a
microcontroller without using an RTOS i.e. bare metal, there are two key things
to understand as you work through this tutorial. In the first section we will focus
on creating and managing Threads. The key concept here is to consider them
running as parallel concurrent objects. In the second section we will look at how
threads. In
to communicate between
is
synchronization of the concurrent threads.
the key concept
this section
�
CMSIS-RTOS Tutorial
First steps with CMSIS-RTOS
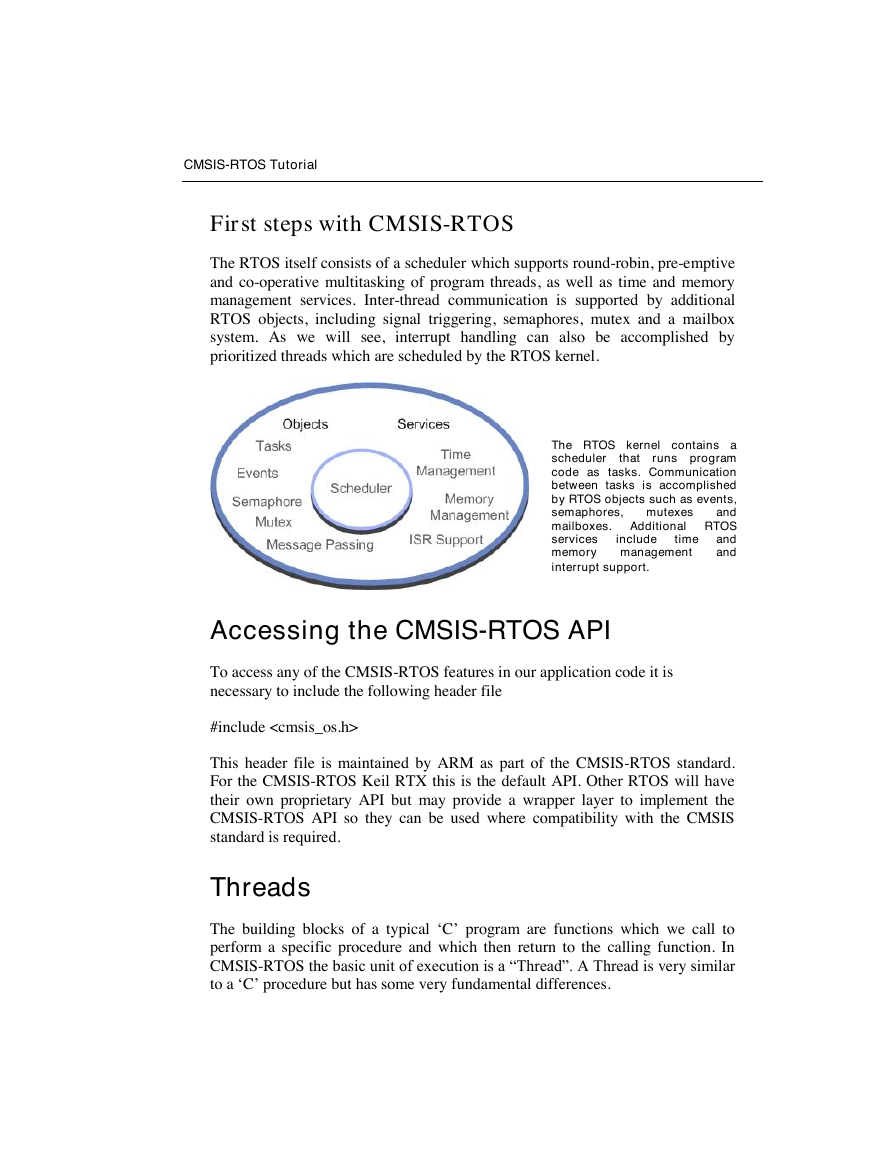
The RTOS itself consists of a scheduler which supports round-robin, pre-emptive
and co-operative multitasking of program threads, as well as time and memory
management services. Inter-thread communication is supported by additional
RTOS objects, including signal triggering, semaphores, mutex and a mailbox
system. As we will see, interrupt handling can also be accomplished by
prioritized threads which are scheduled by the RTOS kernel.
The RTOS kernel contains a
scheduler
that runs program
code as tasks. Communication
between tasks is accomplished
by RTOS objects such as events,
semaphores, mutexes
and
mailboxes. Additional RTOS
and
services
memory management
and
interrupt support.
include
time
Accessing the CMSIS-RTOS API
To access any of the CMSIS-RTOS features in our application code it is
necessary to include the following header file
#include
This header file is maintained by ARM as part of the CMSIS-RTOS standard.
For the CMSIS-RTOS Keil RTX this is the default API. Other RTOS will have
their own proprietary API but may provide a wrapper layer to implement the
CMSIS-RTOS API so they can be used where compatibility with the CMSIS
standard is required.
Threads
The building blocks of a typical ‘C’ program are functions which we call to
perform a specific procedure and which then return to the calling function. In
CMSIS-RTOS the basic unit of execution is a “Thread”. A Thread is very similar
to a ‘C’ procedure but has some very fundamental differences.
�
6
CMSIS-RTOS Tutorial
return(ch);
unsigned int procedure (void)
{
……
}
While we always return from our ‘C’ function, once started an RTOS thread must
contain a loop so that it never terminates and thus runs forever. You can think of
a thread as a mini self-contained program that runs within the RTOS.
void thread (void)
while(1)
{
……
{
}
}
An RTOS program is made up of a number of threads, which are controlled by
the RTOS scheduler. This scheduler uses the SysTick timer to generate a periodic
interrupt as a time base. The scheduler will allot a certain amount of execution
time to each thread. So thread1 will run for 5ms then be de-scheduled to allow
thread2 to run for a similar period; thread 2 will give way to thread3 and finally
control passes back to thread1. By allocating these slices of runtime to each
thread in a round-robin fashion, we get the appearance of all three threads
running in parallel to each other.
Conceptually we can think of each thread as performing a specific functional unit
of our program with all threads running simultaneously. This leads us to a more
object-orientated design, where each functional block can be coded and tested in
isolation and then integrated into a fully running program. This not only imposes
a structure on the design of our final application but also aids debugging, as a
particular bug can be easily isolated to a specific thread. It also aids code reuse
in later projects. When a thread is created, it is also allocated its own thread ID.
This is a variable which acts as a handle for each thread and is used when we
want to manage the activity of the thread.
osThreadId id1,id2,id3;
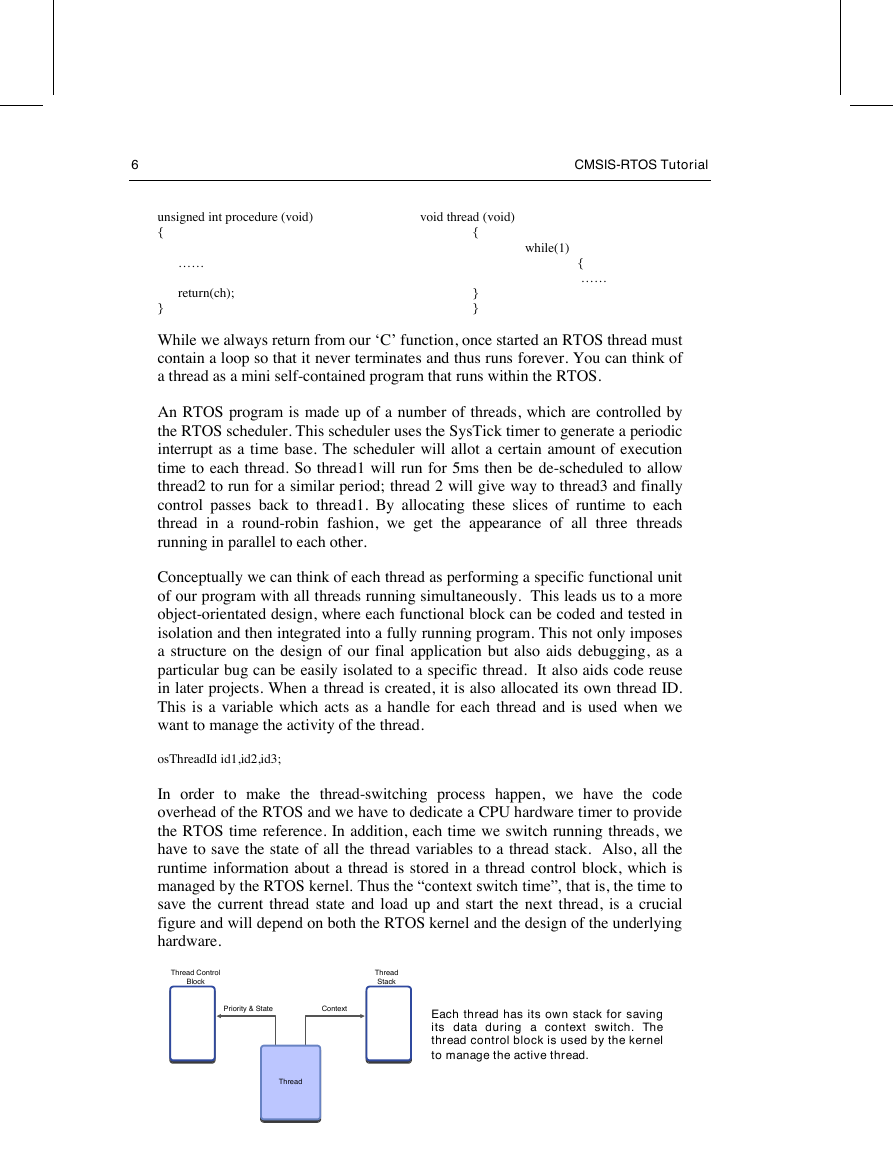
In order to make the thread-switching process happen, we have the code
overhead of the RTOS and we have to dedicate a CPU hardware timer to provide
the RTOS time reference. In addition, each time we switch running threads, we
have to save the state of all the thread variables to a thread stack. Also, all the
runtime information about a thread is stored in a thread control block, which is
managed by the RTOS kernel. Thus the “context switch time”, that is, the time to
save the current thread state and load up and start the next thread, is a crucial
figure and will depend on both the RTOS kernel and the design of the underlying
hardware.
Each thread has its own stack for saving
its data during a context switch. The
thread control block is used by the kernel
to manage the active thread.
ThreadThread Control BlockThread StackPriority & StateContext�
CMSIS-RTOS Tutorial
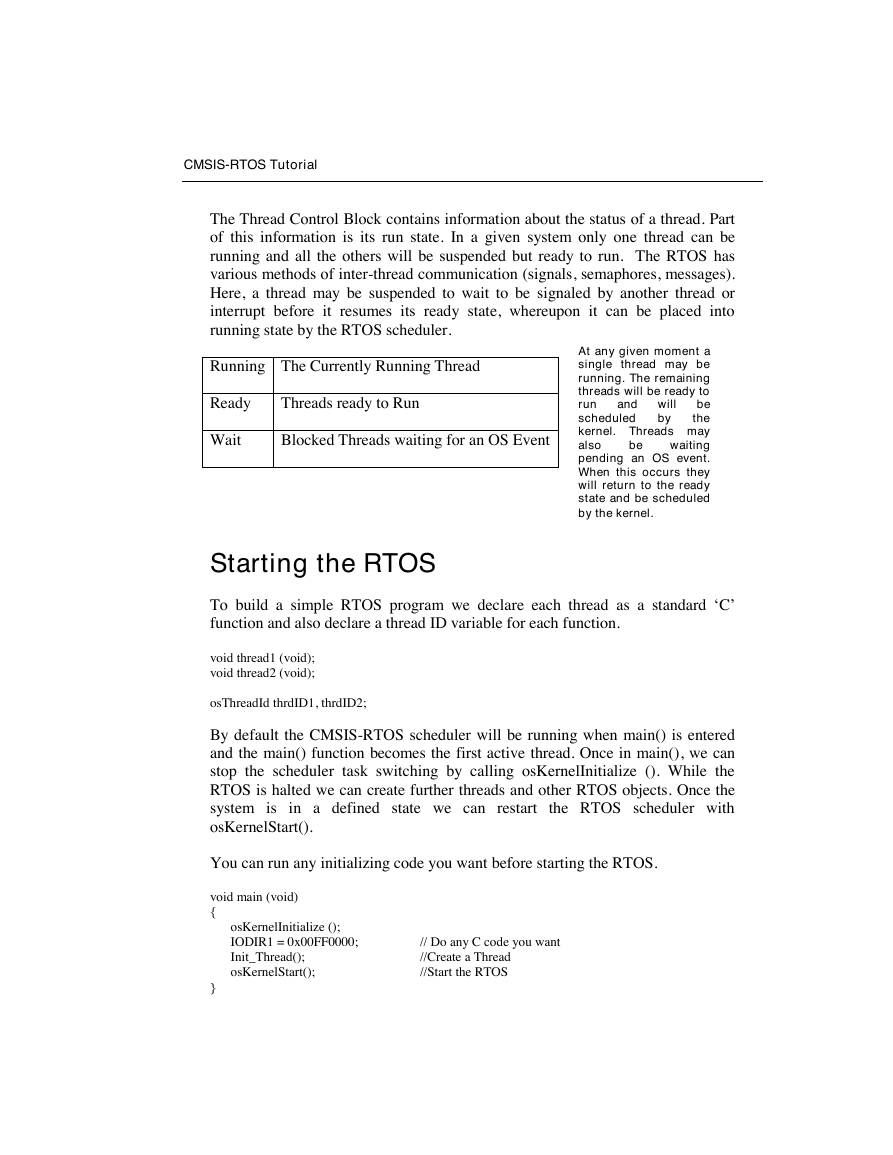
The Thread Control Block contains information about the status of a thread. Part
of this information is its run state. In a given system only one thread can be
running and all the others will be suspended but ready to run. The RTOS has
various methods of inter-thread communication (signals, semaphores, messages).
Here, a thread may be suspended to wait to be signaled by another thread or
interrupt before it resumes its ready state, whereupon it can be placed into
running state by the RTOS scheduler.
Running The Currently Running Thread
Ready
Threads ready to Run
Wait
Blocked Threads waiting for an OS Event
by
and will
At any given moment a
single thread may be
running. The remaining
threads will be ready to
run
be
scheduled
the
kernel. Threads may
also
waiting
pending an OS event.
When this occurs they
will return to the ready
state and be scheduled
by the kernel.
be
Starting the RTOS
To build a simple RTOS program we declare each thread as a standard ‘C’
function and also declare a thread ID variable for each function.
void thread1 (void);
void thread2 (void);
osThreadId thrdID1, thrdID2;
By default the CMSIS-RTOS scheduler will be running when main() is entered
and the main() function becomes the first active thread. Once in main(), we can
stop the scheduler task switching by calling osKernelInitialize (). While the
RTOS is halted we can create further threads and other RTOS objects. Once the
system is in a defined state we can restart the RTOS scheduler with
osKernelStart().
You can run any initializing code you want before starting the RTOS.
void main (void)
{
}
osKernelInitialize ();
IODIR1 = 0x00FF0000;
Init_Thread();
osKernelStart();
// Do any C code you want
//Create a Thread
//Start the RTOS
�
8
CMSIS-RTOS Tutorial
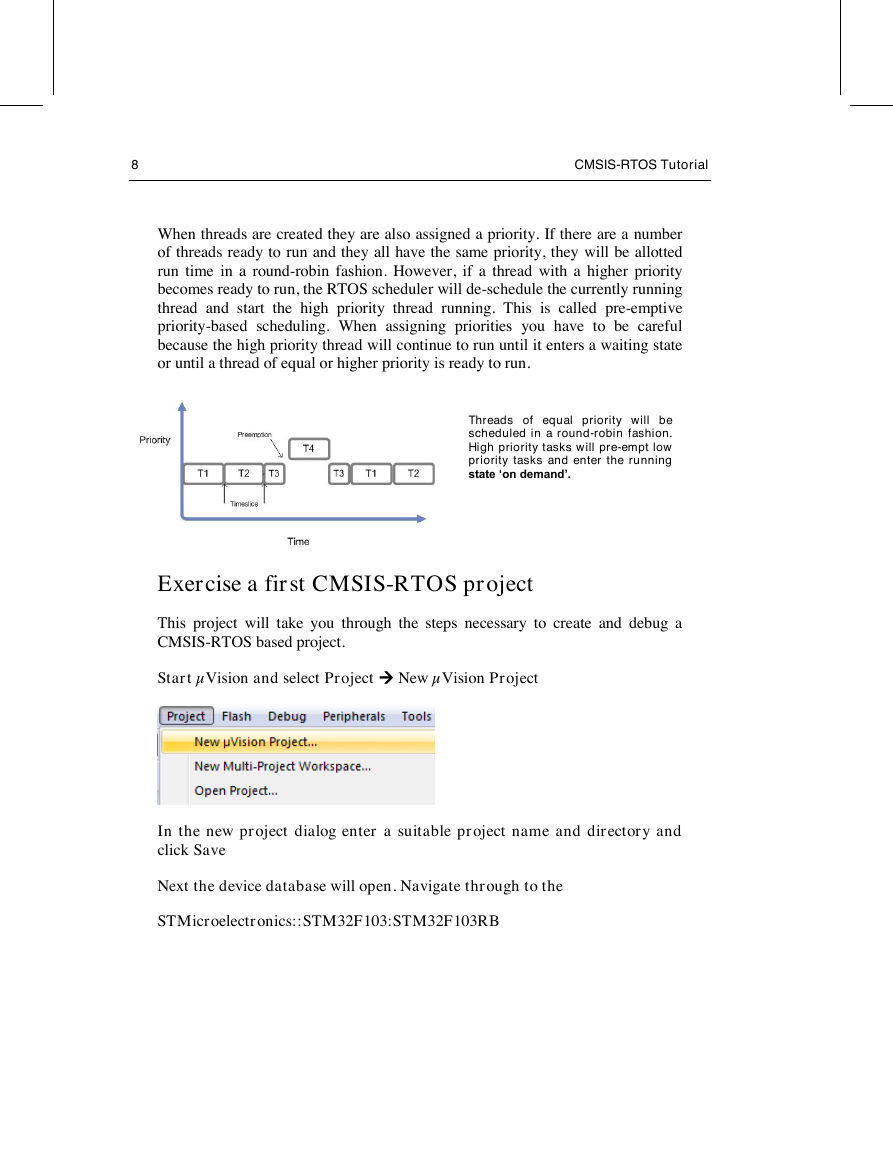
When threads are created they are also assigned a priority. If there are a number
of threads ready to run and they all have the same priority, they will be allotted
run time in a round-robin fashion. However, if a thread with a higher priority
becomes ready to run, the RTOS scheduler will de-schedule the currently running
thread and start the high priority thread running. This is called pre-emptive
priority-based scheduling. When assigning priorities you have to be careful
because the high priority thread will continue to run until it enters a waiting state
or until a thread of equal or higher priority is ready to run.
Threads of equal priority will be
scheduled in a round-robin fashion.
High priority tasks will pre-empt low
priority tasks and enter the running
state ‘on demand’.
Exercise a first CMSIS-RTOS project
This project will take you through the steps necessary to create and debug a
CMSIS-RTOS based project.
Start µVision and select Project New µVision Project
In the new project dialog enter a suitable project name and directory and
click Save
Next the device database will open. Navigate through to the
STMicroelectronics::STM32F103:STM32F103RB
�


 2023年江西萍乡中考道德与法治真题及答案.doc
 2012年重庆南川中考生物真题及答案.doc
 2013年江西师范大学地理学综合及文艺理论基础考研真题.doc
 2020年四川甘孜小升初语文真题及答案I卷.doc
 2020年注册岩土工程师专业基础考试真题及答案.doc
 2023-2024学年福建省厦门市九年级上学期数学月考试题及答案.doc
 2021-2022学年辽宁省沈阳市大东区九年级上学期语文期末试题及答案.doc
 2022-2023学年北京东城区初三第一学期物理期末试卷及答案.doc
 2018上半年江西教师资格初中地理学科知识与教学能力真题及答案.doc
 2012年河北国家公务员申论考试真题及答案-省级.doc
 2020-2021学年江苏省扬州市江都区邵樊片九年级上学期数学第一次质量检测试题及答案.doc
 2022下半年黑龙江教师资格证中学综合素质真题及答案.doc