关于 Centos7 安装 Oracle
By fw
目录
关于 Centos7 安装 Oracle................................................................................................................. 1
一、准备工作 ............................................................................................................................ 2
1. 服务器一台,这里选用了腾讯云服务器......................................................................2
2. 系统为 Centos7,64 位................................................................................................2
3. Oracle 安装包,下载地址:........................................................................................ 2
4. 准备 Xstart,Xftp,Xshell,用来连接服务器。 .................................................................2
二、连接工作 ............................................................................................................................ 2
1.使用 Xshell 连接服务器。 ............................................................................................. 2
2. 使用 Xftp 连接服务器............................................................................................... 4
三、配置工作 ............................................................................................................................ 4
1. 创建运行 oracle 数据库的系统用户和用户组 ........................................................4
2. 创建 oracle 数据库安装目录....................................................................................5
3. 修改 OS 标识..............................................................................................................6
4. 修改 linux 内核(root 下)............................................................................................6
5.修改用户的 SHELL 限制(root 下)................................................................................. 7
6.修改/etc/pam.d/login 文件(root 下)....................................................................... 7
7.编辑 /etc/profile(root 下)........................................................................................8
8.安装包(root 下)...........................................................................................................9
9.关闭防火墙,CentOS7 防火墙默认是 firewall,低于 7 的为 iptables.............. 9
10.关闭 selinux(root 下,需要重启生效)............................................................10
11.配置用户环境变量 ..................................................................................................10
12.这里使用 xftp 传输 oracle 的 2 个安装包。上传到/usr/local/src.......................... 11
13.Swap 分配 ................................................................................................................... 11
①查看 Swap 空间,free -h............................................................................................ 11
③接下来需要设置为交换分区(路径与上面的路径一致)。 ................................. 12
14.图形化参数设置(root)................................................................................................12
15.使用 Xstart 连接服务器 xstart 下远程报错"已拒绝 X11 转移申请"的解决方法:
.......................................................................................................................................... 13
四、安装 Oracle.......................................................................................................................14
�
一、准备工作
1. 服务器一台,这里选用了腾讯云服务器
2. 系统为 Centos7,64 位
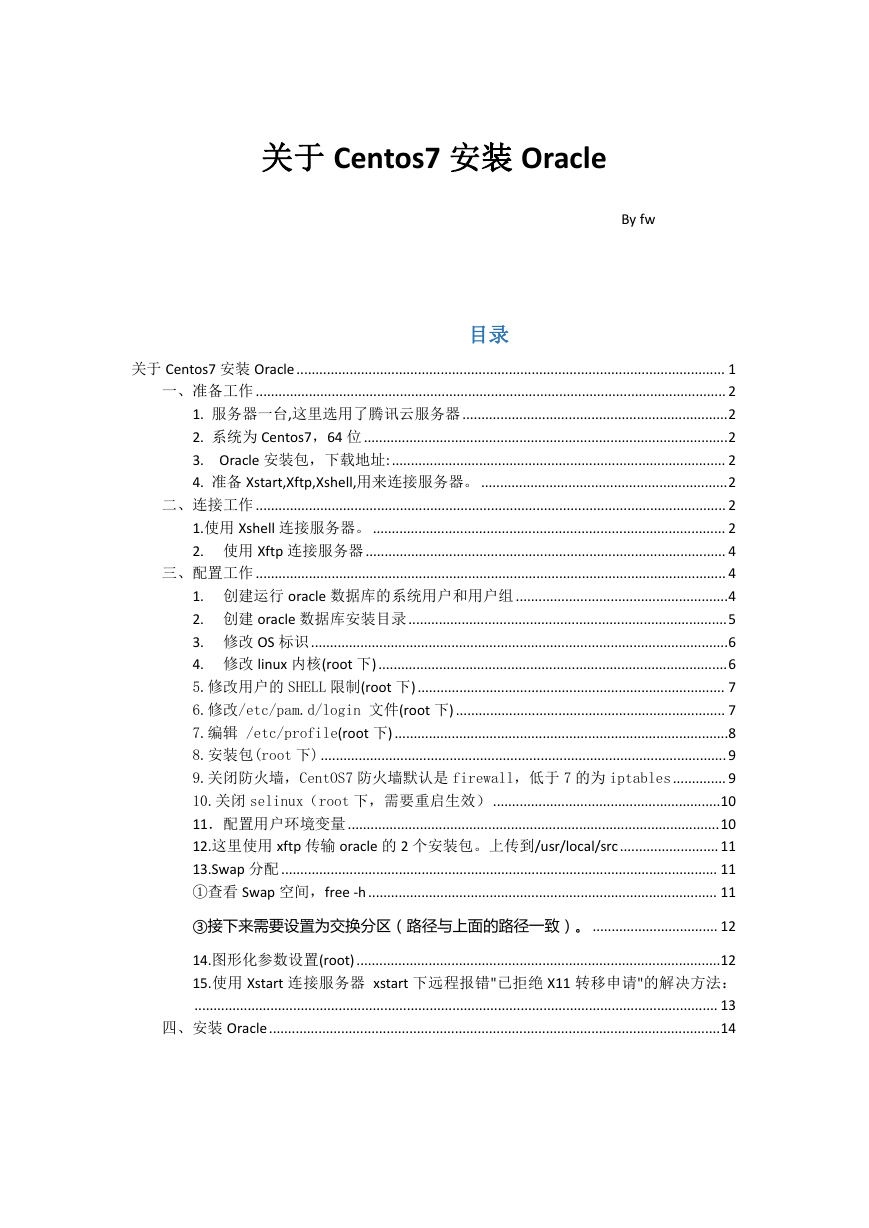
3. Oracle 安装包,下载地址:
http://www.oracle.com/technetwork/database/enterprise-edition/downloads/112010-linx8
664soft-100572.html (下载以下 2 个安装包)
4. 准备 Xstart,Xftp,Xshell,用来连接服务器。
二、连接工作
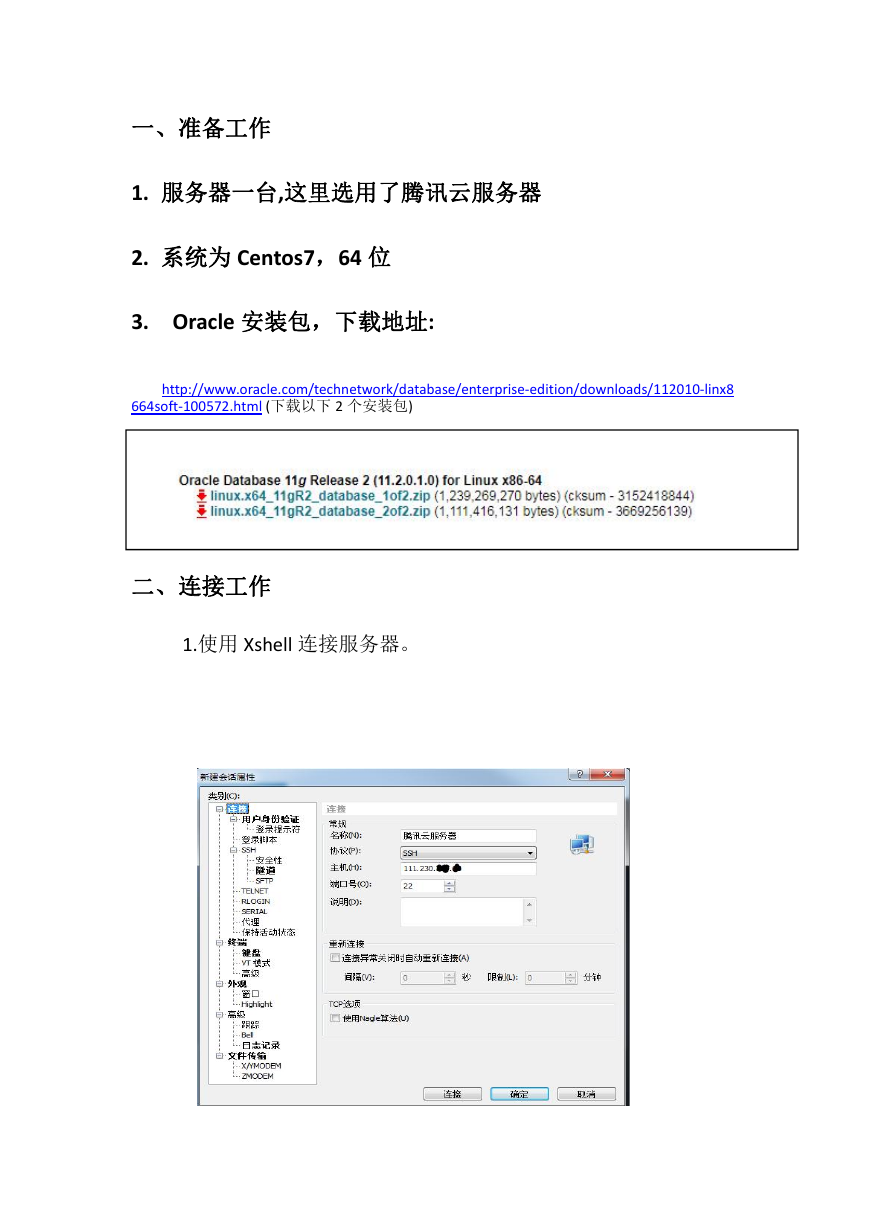
1.使用 Xshell 连接服务器。
�
�
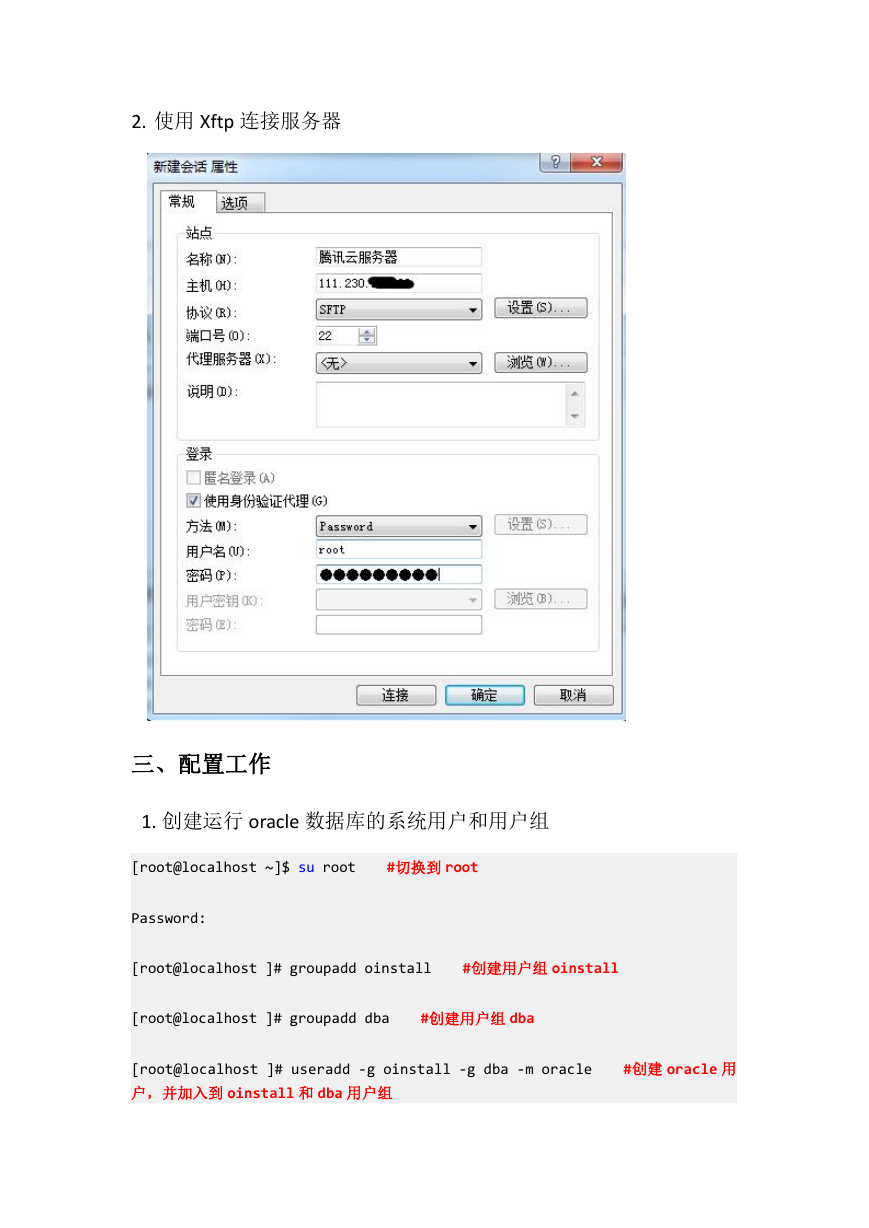
2. 使用 Xftp 连接服务器
三、配置工作
1. 创建运行 oracle 数据库的系统用户和用户组
[root@localhost ~]$ su root
#切换到 root
Password:
[root@localhost ]# groupadd oinstall
#创建用户组 oinstall
[root@localhost ]# groupadd dba
#创建用户组 dba
[root@localhost ]# useradd -g oinstall -g dba -m oracle
户,并加入到 oinstall 和 dba 用户组
#创建 oracle 用
�
[root@localhost ]# passwd oracle
在 CentOS 的图形登陆界面没法登陆
#设置用户 oracle 的登陆密码,不设置密码,
Changing password for user oracle.
New password:
# 密码
BAD PASSWORD: The password is shorter than 8 characters
Retype new password:
# 确认密码
passwd: all authentication tokens updated successfully.
[root@localhost ]# id oracle # 查看新建的 oracle 用户
uid=1001(oracle) gid=1002(dba) groups=1002(dba)
[root@localhost]#
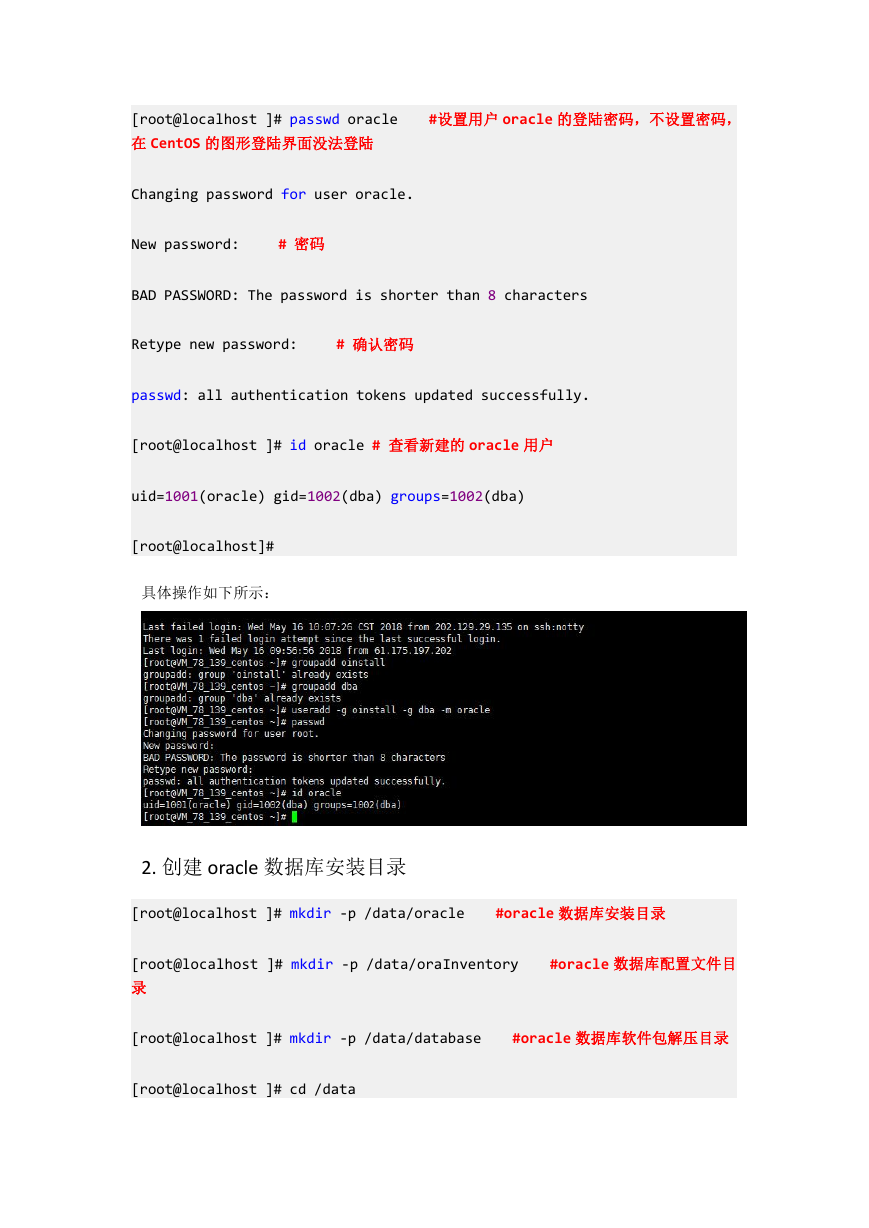
具体操作如下所示:
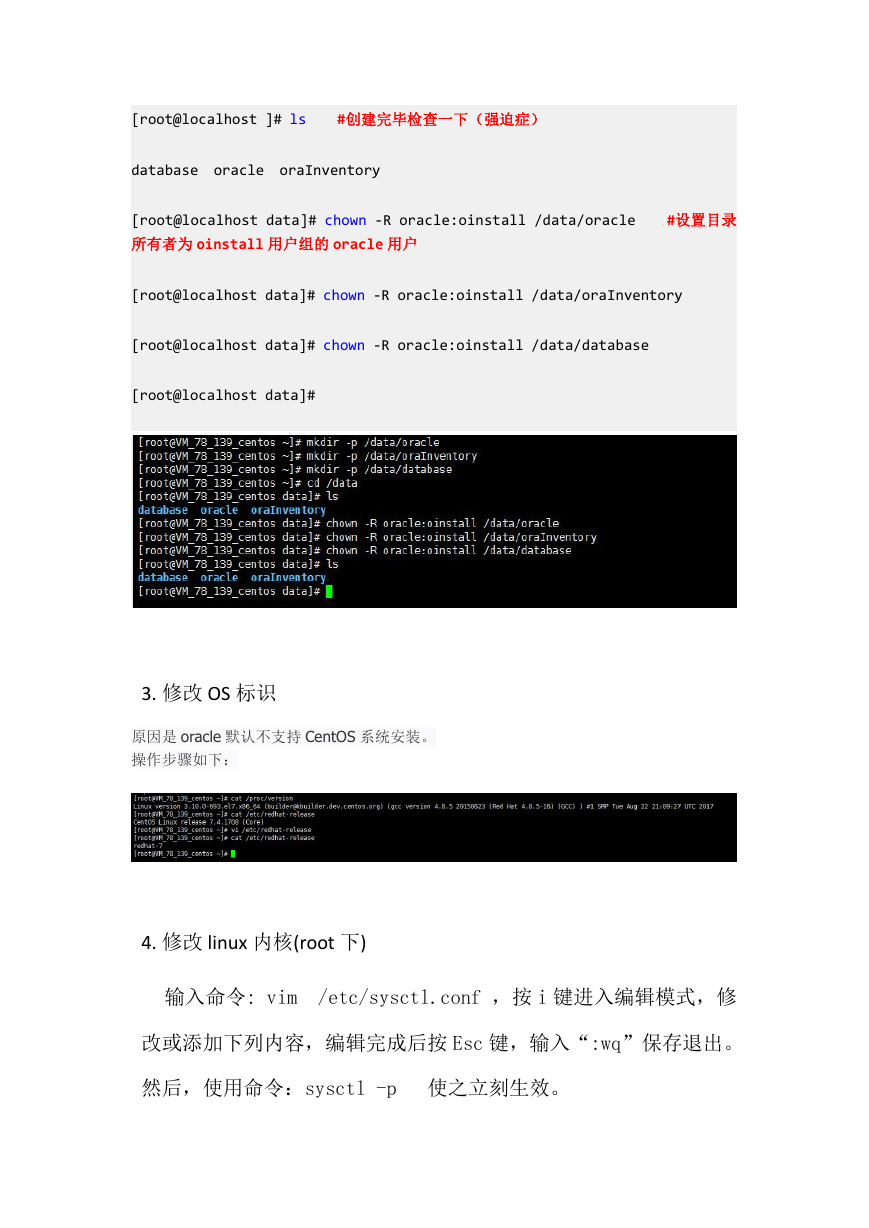
2. 创建 oracle 数据库安装目录
[root@localhost ]# mkdir -p /data/oracle
#oracle 数据库安装目录
[root@localhost ]# mkdir -p /data/oraInventory
录
#oracle 数据库配置文件目
[root@localhost ]# mkdir -p /data/database
#oracle 数据库软件包解压目录
[root@localhost ]# cd /data
�
[root@localhost ]# ls
#创建完毕检查一下(强迫症)
database oracle oraInventory
[root@localhost data]# chown -R oracle:oinstall /data/oracle
所有者为 oinstall 用户组的 oracle 用户
#设置目录
[root@localhost data]# chown -R oracle:oinstall /data/oraInventory
[root@localhost data]# chown -R oracle:oinstall /data/database
[root@localhost data]#
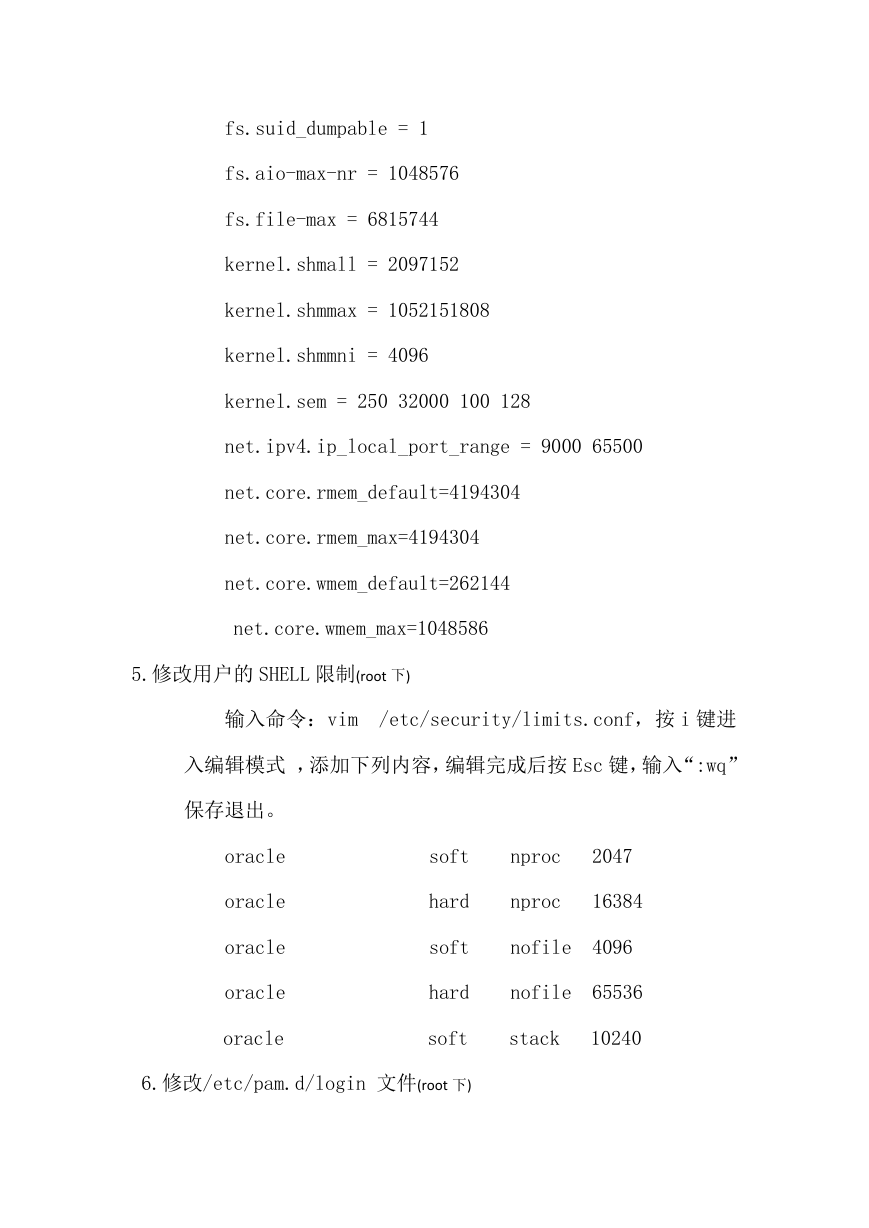
3. 修改 OS 标识
原因是 oracle 默认不支持 CentOS 系统安装。
操作步骤如下:
4. 修改 linux 内核(root 下)
输入命令: vim /etc/sysctl.conf ,按 i 键进入编辑模式,修
改或添加下列内容,编辑完成后按 Esc 键,输入“:wq”保存退出。
然后,使用命令:sysctl -p 使之立刻生效。
�
fs.suid_dumpable = 1
fs.aio-max-nr = 1048576
fs.file-max = 6815744
kernel.shmall = 2097152
kernel.shmmax = 1052151808
kernel.shmmni = 4096
kernel.sem = 250 32000 100 128
net.ipv4.ip_local_port_range = 9000 65500
net.core.rmem_default=4194304
net.core.rmem_max=4194304
net.core.wmem_default=262144
net.core.wmem_max=1048586
5.修改用户的 SHELL 限制(root 下)
输入命令:vim
/etc/security/limits.conf,按 i 键进
入编辑模式 ,添加下列内容,编辑完成后按 Esc 键,输入“:wq”
保存退出。
oracle
oracle
oracle
oracle
oracle
soft
nproc
2047
hard
nproc
16384
soft
nofile 4096
hard
nofile 65536
soft
stack
10240
6.修改/etc/pam.d/login 文件(root 下)
�
输入命令:vim /etc/pam.d/login,按 i 键进入编辑模式,
添加下列内容,编辑完成后按 Esc 键,输入“:wq”保存退出。
session
required
/lib/security/pam_limits.so
session
required
pam_limits.so
7.编辑 /etc/profile(root 下)
输入命令:vim /etc/profile,添加下列内容,编辑完成
后按 Esc 键,输入“:wq”存盘退出。
if [ $USER = "oracle" ]; then
if [ $SHELL = "/bin/ksh" ]; then
ulimit -p 16384
ulimit -n 65536
else
ulimit -u 16384 -n 65536
fi
fi
�



 2023年江西萍乡中考道德与法治真题及答案.doc
 2012年重庆南川中考生物真题及答案.doc
 2013年江西师范大学地理学综合及文艺理论基础考研真题.doc
 2020年四川甘孜小升初语文真题及答案I卷.doc
 2020年注册岩土工程师专业基础考试真题及答案.doc
 2023-2024学年福建省厦门市九年级上学期数学月考试题及答案.doc
 2021-2022学年辽宁省沈阳市大东区九年级上学期语文期末试题及答案.doc
 2022-2023学年北京东城区初三第一学期物理期末试卷及答案.doc
 2018上半年江西教师资格初中地理学科知识与教学能力真题及答案.doc
 2012年河北国家公务员申论考试真题及答案-省级.doc
 2020-2021学年江苏省扬州市江都区邵樊片九年级上学期数学第一次质量检测试题及答案.doc
 2022下半年黑龙江教师资格证中学综合素质真题及答案.doc