logo资料库

宾得数码相机-Optio S5i 说明书.pdf

第1页 / 共151页
第2页 / 共151页
第3页 / 共151页
第4页 / 共151页
第5页 / 共151页
第6页 / 共151页
第7页 / 共151页
第8页 / 共151页
资料共151页,剩余部分请下载后查看
FOR SAFE USE OF YOUR CAMERA
Care to be Taken During Handling
Contents of the Operating Manual
Checking the Contents of the Package
Names of Parts
Names of Operating Parts
Getting Started
Attaching the Strap
Powering the Camera
Installing the Battery
Removing the Battery
Charging the Battery
Using the AC Adapter (optional)
Installing the SD Memory Card
Image Size and Quality
Initial Settings
Setting the Display Language
Setting the Date and Time
Quick Start
Taking Still Pictures
Playing Back Still Pictures
Playing Back an Image
Playing Back the Previous or Next Image
Rotating the Displayed Image
Common Operations
Turning the Camera On and Off
Playback Mode
Voice Recording Mode
Using the Button Functions
Capture Mode
Playback Mode
Voice Recording Mode
Setting the Menus
How to Set the Menus
Menu List
Taking Pictures
Taking Pictures
Taking Pictures by the Simplest Procedure (Green Mode)
Setting the Functions (Program Mode)
Selecting the Picture Mode According to the Shooting Scene (Picture Mode)
Taking Pictures of Dark Scenes (Night Scene Mode)
Taking Movies (Movie Mode)
Taking Panorama Pictures (Panorama Assist Mode)
Taking Soft-Contoured Pictures (Soft Focus Mode)
Taking Pictures with Digital Filters (Digital Filter Mode)
Using Preset Function Settings (User Mode)
Taking Underwater Pictures (Marine Mode)
Taking 3D Pictures (3D Image Mode)
Using the Self-Timer
Using the Remote Control Unit (optional)
Continuous Shooting (Continuous Shooting Mode)
Using the Zoom to Change the Subject Size
Taking Time-lapse Movies
Setting the Shooting Functions
Changing the Mode
Selecting the Capture Mode
Displaying Shooting Information in Capture Mode
Selecting the Focus Mode
Selecting the Flash Mode
Selecting the Recorded Pixels
Selecting the Quality Level
Adjusting the White Balance
Changing the Focusing Area
Setting the Light Metering Range to Determine the Exposure
Setting the Sensitivity
Setting the Instant Review Time
Setting the Image Sharpness
Setting the Color Saturation
Setting the Image Contrast
Setting the Exposure (EV Compensation)
Saving the Settings
Saving the Menu Items (Memory)
Registering Functions in User Mode
Recording and Playback
Recording Sound (Voice Recording Mode)
Playing Back Sound
Adding a Voice Memo
Setting the Record Voice Memo to [Off]
Playback/Deleting/Editing
Playing Back Images
Playing Back Still Pictures
Zoom Display
Playing Back Movies
Displaying Shooting Information in Playback Mode
Nine Image Display
Slideshow
Deleting Images, Movies and Sound
Deleting a Single Image or Sound
Deleting All Images
Protecting Images and Sounds from Deletion (Protect)
Viewing Images on a TV
Playing Back an Image Using the Remote Control Unit (optional)
Setting the Printing Service (DPOF)
Printing Single Images
Printing All Images
Direct Printing Using PictBridge
Connecting the Camera to the Printer
Printing Single Images
Printing All Images
Printing Using the DPOF Settings
Disconnecting the Camera from the Printer
Editing Images
Changing the Image Size and Quality
Trimming Images
Copying Files
Settings
Camera Settings
Setting Up the Screen
Formatting an SD Memory Card or the Built-in Memory
Changing the Sound Settings
Changing the Date and Time
Setting the World Time
Changing the Display Language
Changing the Video Output Format
Changing the USB Connection Mode
Sleep Timeout
Setting Auto Power Off
Registering a Function (Custom Function)
Setting the QUICK Button
Resetting to Default Settings
Setting the Alarm
Checking the Alarm
Setting the Alarm
Turning the Alarm Off
Appendix
List of City Codes
Optional Accessories
Messages
Troubleshooting
Main Specifications
WARRANTY POLICY
Index
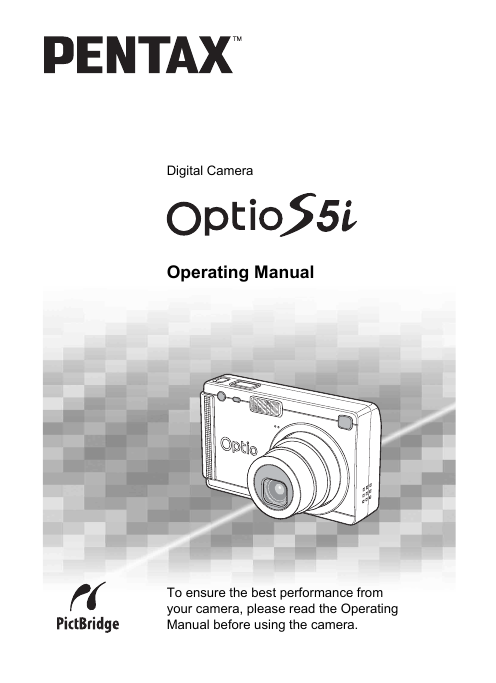
Digital Camera Operating Manual To ensure the best performance from your camera, please read the Operating Manual before using the camera.
Thank you for buying the PENTAX Digital Camera. Please read this manual before using the camera in order to get the most out of all the features and functions. Keep this manual safe, as it can be a valuable tool in helping you to understand all the camera's capabilities. Regarding copyrights Images taken using the PENTAX Digital Camera that are for anything other than personal enjoyment cannot be used without permission according to the rights as specified in the Copyright Act. Please take care, as there are even cases where limitations are placed on taking pictures even for personal enjoyment during demonstrations, industrial enterprise or as items for display. Images taken with the purpose of obtaining copyrights also cannot be used outside the scope of use of the copyright as laid out in the Copyright Act, and care should be taken here also. To users of this camera • There is a possibility that recorded data may be erased or that the camera may not function correctly when used in surroundings such as installations generating strong electromagnetic radiation or magnetic fields. • The liquid crystal panel used in the LCD display is manufactured using extremely high precision technology. Although the level of functioning pixels is 99.99% or better, you should be aware that 0.01% or fewer of the pixels may not illuminate or may illuminate when they should not. However, this has no effect on the recorded image. Regarding trademarks • PENTAX, Optio and smc PENTAX are trademarks of PENTAX Corporation. • The SD logo • All other brands or product names are trademarks or registered trademarks of is a trademark. their respective companies. This product supports PRINT Image Matching III. PRINT Image Matching enabled digital still cameras, printers and software help photographers to produce images more faithful to their intentions. Some functions are not available on printers that are not PRINT Image Matching III compliant. Copyright 2001 Seiko Epson Corporation. All Rights Reserved. PRINT Image Matching is a trademark of Seiko Epson Corporation. The PRINT Image Matching logo is a trademark of Seiko Epson Corporation. Regarding PictBridge PictBridge allows the user to connect the printer and digital camera directly, using the unified standard for the direct printout of images. You can print images directly from the camera through a few simple operations. • There is a possibility that the illustrations and the display screen of the LCD monitor in this manual are different from the actual product.
FOR SAFE USE OF YOUR CAMERA Sufficient attention has been paid to the safety of this product but please pay particular attention to the warnings indicated by the following symbols during use. Warning These symbols indicate that it is possible that the user may experience serious difficulties if the warnings are not heeded. These symbols indicate that it is possible that the user may experience minor or middling difficulties or physical difficulties if the warnings are not heeded. Caution About the Camera Warning • Do not attempt to take the camera apart or remodel the camera. High voltages are present within the camera, and there is therefore a danger of electric shocks. • If the inside of the camera should become exposed as a result of, for example, the camera being dropped, please do not under any circumstances touch such exposed portions, as there is a danger of receiving an electric shock. • Wrapping the strap of the camera around your neck is also dangerous. Please take care that small children do not hang the strap around their necks. • To avoid the risk of it being swallowed by mistake, keep the SD Memory Card out of the reach of small children. Seek medical attention immediately if accidentally swallowed. • Use an AC adapter that is of the power and voltage specified for exclusive use with this product. The use of an AC adapter other than that specified exclusively for use with this product may cause fire or electric shocks. • If the camera emits smoke or a strange smell, or in the event of any other irregularity, stop using the camera immediately, remove the battery or disconnect the AC adapter and contact your nearest PENTAX service center. Continued use of the camera may result in fire or electric shock. 1
Caution risk of burns. risk of discoloring. • Never try to disassemble or short the battery. Also, do not dispose of the battery in fire, as it may explode. • Do not charge any batteries other than rechargeable lithium-ion battery D- LI8. The battery could explode or catch fire. • Do not place your finger on the flash when it is discharging as there is a • Do not discharge the flash while it is touching your clothing as there is a • If any of the battery leakage should come in contact with your eyes, do not rub them. Flush your eyes with clean water and get medical attention immediately. • If any of the battery leakage should come in contact with skin or clothes, wash the affected areas thoroughly with water. • Remove the battery from the camera immediately if it becomes hot or begins to smoke. Be careful not to burn yourself during removal. • Some portions of the camera heat up during use, so please take care, as there is a risk of low temperature burns if such portions are held for long periods of time. • Should the LCD be damaged, be careful of glass fragments. Also, be careful not to allow the liquid crystal to get on your skin or eyes or in your mouth. About the Battery Charging Stand and the AC Adapter Warning • Do not use the product at a voltage other than the specified voltage. Use with a power source or voltage other than that designed can cause a fire or electrical shock. The specified voltage is 100-240 V AC. • Do not disassemble or modify the product. This can cause a fire or electrical shock. • If the generation of smoke or strange odor from the product or other abnormality occurs, immediately discontinue using and consult a PENTAX Service Center. Continuing to use the product can cause a fire or electrical shock. • If water should happen to get inside the product, consult a PENTAX Service Center. Continuing to use the product can cause a fire or electrical shock. 2
• If lightning should be present during using, unplug the power cord and discontinue using. Continuing to use the product can cause damage to the equipment, fire or electrical shock. • Wipe off the plug of the power cord if it should become covered with dust. This can cause a fire. Caution • Do not place heavy objects on the AC plug cord, allow heavy objects to drop onto it or allow the AC plug cord to become damaged due to excessive bending. If the AC plug cord becomes damaged, consult a PENTAX Service Center. • Do not short or touch the output terminals of the product while it is still • Remove the battery and unplug the AC plug cord when not using the • Do not plug in the AC plug cord with wet hands. This can cause an plugged in. battery charging stand. electrical shock. • Do not subject the product to strong impacts or allow it to drop onto a hard surface. This can cause a malfunction. • To reduce the risk of hazards, use only CSA/UL Certified power supply cord set, cord is Type SPT-2 or heavier, minimum NO.18 AWG copper, one end with a molded-on male attachment plug cap (with a specified NEMA configuration), and the other is provided with a molded-on female connector body (with a specified IEC nonindustrial type configuration) or the equivalent. • Do not use the battery charging stand to charge batteries other than the ones specified. This can cause overheating or malfunctions. 3
Care to be Taken During Handling • Take the international warranty card with you when you travel abroad. Also take the Worldwide Service Network that is included in the package. This will be useful if you experience problems abroad. • When the camera has not been used for a long time, confirm that it is still working properly, particularly prior to taking important pictures (such as at a wedding or during travelling). Contents of a recording such as images and sounds cannot be guaranteed if recording, playback or data transfer from your camera to a computer, etc. is not possible due to a malfunction of your camera or recording medium (SD Memory Card), etc. • The lens on this camera is not exchangeable. The lens is not removable. • Do not clean the product with organic solvents such as thinner or alcohol benzene. • Places of high temperature and humidity should be avoided. Particular care should be taken regarding vehicles, which can become very hot inside. • Storing the camera where pesticides and chemicals are handled should be avoided. Remove from case and store in a well-ventilated place to prevent the camera from becoming moldy during storage. • Do not use the camera where it may come in contact with rain, water or any other liquid, because the camera is not weather, water, or liquid resistant. Should the camera get wet from rain, splashing water, or any other liquid, wipe it off immediately with a dry soft cloth. • Ensure that the camera is not subjected to substantial vibrations, shocks or pressure. Place the camera on a cushion for protection when the camera is subjected to the vibrations of a motorbike, car, or ship, etc. • The temperature range in which the camera can be used is 0°C to 40°C (32°F to 104°F). • The liquid crystal display will become black at temperatures of approximately 60°C (140°F) but will return to normal when normal temperatures are returned to. • The response speed of the liquid crystal display becomes slow at low temperatures. This is due to the properties of the liquid crystal and is not a fault. • Periodic checks are recommended every 1 to 2 years in order to maintain high-performance. 4
• If the camera is subjected to rapid temperature changes, condensation may form on the inside and outside of the camera. Therefore put the camera in a bag or plastic bag, and take the camera out when the difference in temperature has subsided. • Avoid contact with garbage, dirt, sand, dust, water, toxic gases, salt, etc. as this may cause damage to the camera. If rain or drops of water get onto the camera, please wipe dry. • Refer to “Precautions when using an SD Memory Card” (p.21) regarding • Be careful not to sit down with the camera in your back pocket as this may damage the exterior of the camera or the LCD monitor. • When using a tripod with the camera, be careful not to overtighten the screw in the tripod socket on the camera. • Please do not press forcefully on the LCD monitor. This could cause the SD Memory Card. breakage or malfunction. 5
Contents Getting Started Taking Pictures 6 Quick Start Common Operations FOR SAFE USE OF YOUR CAMERA .................................................... 1 Care to be Taken During Handling.......................................................... 4 Contents of the Operating Manual .......................................................... 9 Checking the Contents of the Package ................................................. 10 Names of Parts...................................................................................... 11 Names of Operating Parts..................................................................... 12 13 Attaching the Strap .................................................................................... 13 Powering the Camera ................................................................................ 14 Installing the Battery.............................................................................. 14 Removing the Battery............................................................................ 14 Charging the Battery ............................................................................. 15 Using the AC Adapter (optional)............................................................ 19 Installing the SD Memory Card ................................................................. 21 Image Size and Quality ......................................................................... 23 Initial Settings............................................................................................. 25 Setting the Display Language ............................................................... 25 Setting the Date and Time..................................................................... 26 28 Taking Still Pictures................................................................................... 28 Playing Back Still Pictures ........................................................................ 30 Playing Back an Image.......................................................................... 30 Playing Back the Previous or Next Image ............................................. 30 Rotating the Displayed Image ............................................................... 31 32 Turning the Camera On and Off................................................................ 32 Playback Mode...................................................................................... 33 Voice Recording Mode .......................................................................... 33 Using the Button Functions ...................................................................... 34 Capture Mode........................................................................................ 34 Playback Mode...................................................................................... 36 Voice Recording Mode .......................................................................... 37 Setting the Menus ...................................................................................... 38 How to Set the Menus ........................................................................... 38 Menu List............................................................................................... 40 42 Taking Pictures .......................................................................................... 42 Taking Pictures by the Simplest Procedure (Green Mode) ................... 42 Setting the Functions (Program Mode).................................................. 43 Selecting the Picture Mode According to the Shooting Scene (Picture Mode) ................................................................................................ 44 Taking Pictures of Dark Scenes (Night Scene Mode) .......................................................................... 46
分享到:
收藏