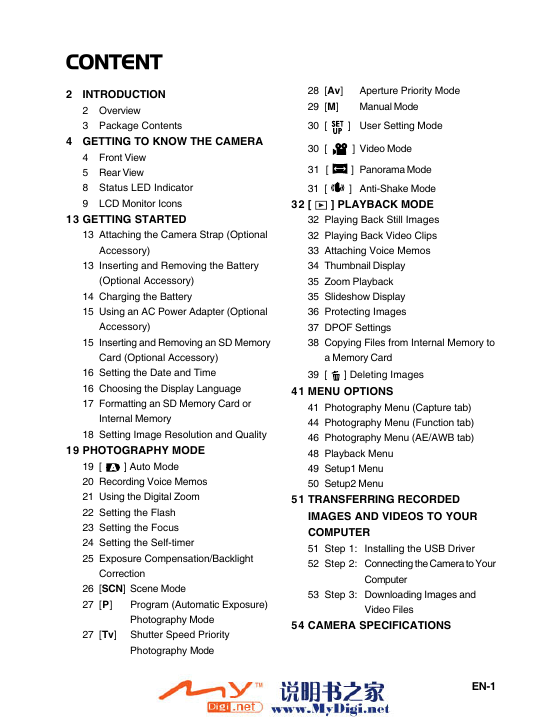
CONTENT
2 INTRODUCTION
2 Overview
3 Package Contents
4 GETTING TO KNOW THE CAMERA
4 Front View
5 Rear View
8 Status LED Indicator
9 LCD Monitor Icons
13 GETTING STARTED
13 Attaching the Camera Strap (Optional
Accessory)
13 Inserting and Removing the Battery
(Optional Accessory)
14 Charging the Battery
15 Using an AC Power Adapter (Optional
Accessory)
15 Inserting and Removing an SD Memory
Card (Optional Accessory)
16 Setting the Date and Time
16 Choosing the Display Language
17 Formatting an SD Memory Card or
Internal Memory
18 Setting Image Resolution and Quality
19 PHOTOGRAPHY MODE
] Auto Mode
19 [
20 Recording Voice Memos
21 Using the Digital Zoom
22 Setting the Flash
23 Setting the Focus
24 Setting the Self-timer
25 Exposure Compensation/Backlight
Correction
26 [SCN] Scene Mode
27 [P]
Program (Automatic Exposure)
Photography Mode
27 [Tv] Shutter Speed Priority
Photography Mode
28 [Av]
29 [M]
30 [
Aperture Priority Mode
Manual Mode
] User Setting Mode
30 [
] Video Mode
31 [
] Panorama Mode
32 [
31 [
] Anti-Shake Mode
] PLAYBACK MODE
32 Playing Back Still Images
32 Playing Back Video Clips
33 Attaching Voice Memos
34 Thumbnail Display
35 Zoom Playback
35 Slideshow Display
36 Protecting Images
37 DPOF Settings
38 Copying Files from Internal Memory to
a Memory Card
39 [
] Deleting Images
41 MENU OPTIONS
41 Photography Menu (Capture tab)
44 Photography Menu (Function tab)
46 Photography Menu (AE/AWB tab)
48 Playback Menu
49 Setup1 Menu
50 Setup2 Menu
51 TRANSFERRING RECORDED
IMAGES AND VIDEOS TO YOUR
COMPUTER
51 Step 1:
52 Step 2: Connecting the Camera to Your
Installing the USB Driver
Computer
53 Step 3: Downloading Images and
Video Files
54 CAMERA SPECIFICATIONS
EN-1
�
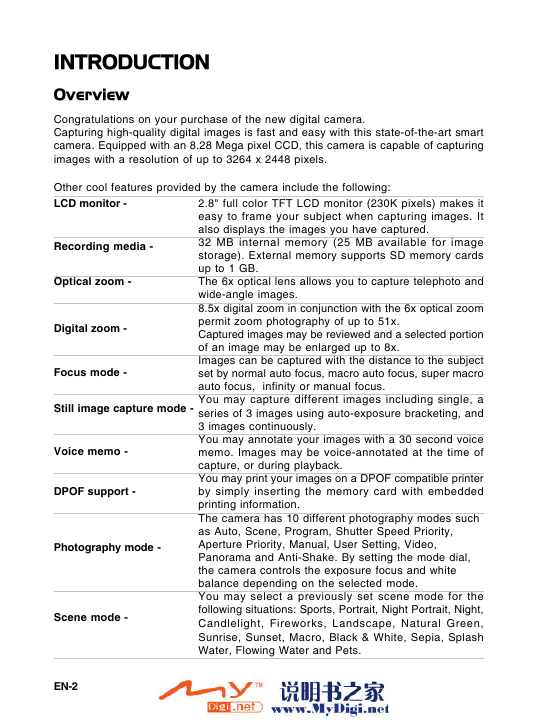
INTRODUCTION
Overview
Congratulations on your purchase of the new digital camera.
Capturing high-quality digital images is fast and easy with this state-of-the-art smart
camera. Equipped with an 8.28 Mega pixel CCD, this camera is capable of capturing
images with a resolution of up to 3264 x 2448 pixels.
Other cool features provided by the camera include the following:
LCD monitor -
2.8" full color TFT LCD monitor (230K pixels) makes it
easy to frame your subject when capturing images. It
also displays the images you have captured.
32 MB internal memory (25 MB available for image
storage). External memory supports SD memory cards
up to 1 GB.
The 6x optical lens allows you to capture telephoto and
wide-angle images.
8.5x digital zoom in conjunction with the 6x optical zoom
permit zoom photography of up to 51x.
Captured images may be reviewed and a selected portion
of an image may be enlarged up to 8x.
Images can be captured with the distance to the subject
set by normal auto focus, macro auto focus, super macro
auto focus, infinity or manual focus.
You may capture different images including single, a
series of 3 images using auto-exposure bracketing, and
3 images continuously.
You may annotate your images with a 30 second voice
memo. Images may be voice-annotated at the time of
capture, or during playback.
You may print your images on a DPOF compatible printer
by simply inserting the memory card with embedded
printing information.
The camera has 10 different photography modes such
as Auto, Scene, Program, Shutter Speed Priority,
Aperture Priority, Manual, User Setting, Video,
Panorama and Anti-Shake. By setting the mode dial,
the camera controls the exposure focus and white
balance depending on the selected mode.
You may select a previously set scene mode for the
following situations: Sports, Portrait, Night Portrait, Night,
Candlelight, Fireworks, Landscape, Natural Green,
Sunrise, Sunset, Macro, Black & White, Sepia, Splash
Water, Flowing Water and Pets.
Recording media -
Optical zoom -
Digital zoom -
Focus mode -
Still image capture mode -
Voice memo -
DPOF support -
Photography mode -
Scene mode -
EN-2
�
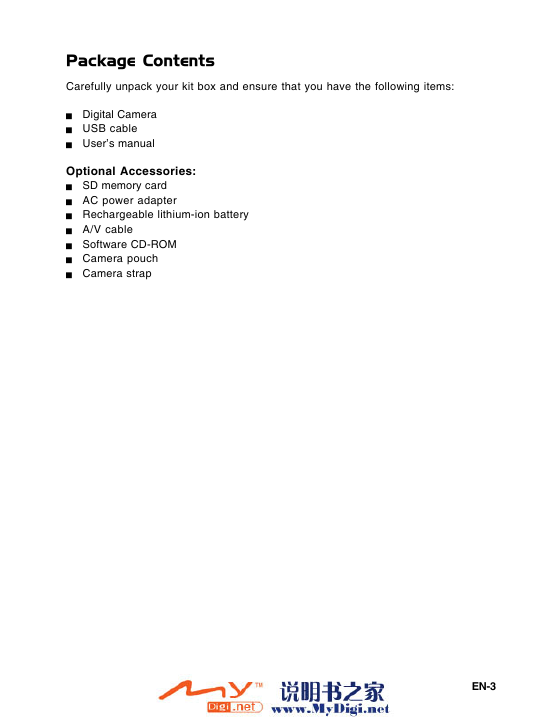
Package Contents
Carefully unpack your kit box and ensure that you have the following items:
Digital Camera
USB cable
User’s manual
Optional Accessories:
SD memory card
AC power adapter
Rechargeable lithium-ion battery
A/V cable
Software CD-ROM
Camera pouch
Camera strap
EN-3
�
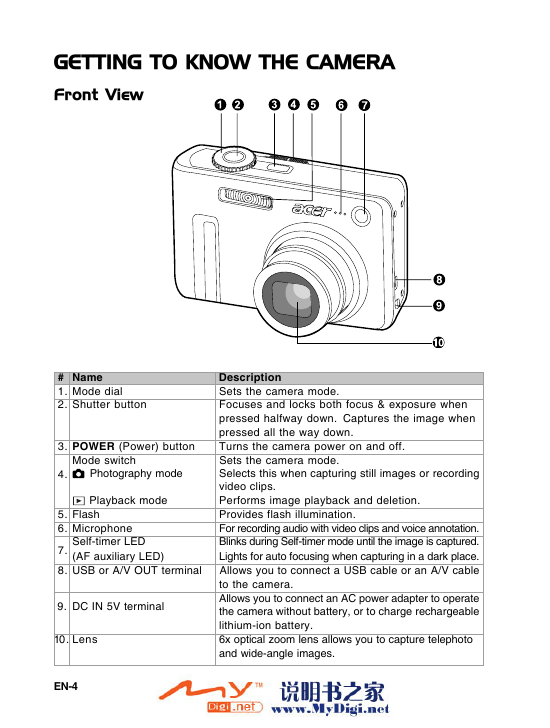
GETTING TO KNOW THE CAMERA
Front View
# Name
1. Mode dial
2. Shutter button
3. POWER (Power) button
Mode switch
Photography mode
4.
Playback mode
5. Flash
6. Microphone
7.
Self-timer LED
(AF auxiliary LED)
8. USB or A/V OUT terminal
9. DC IN 5V terminal
10. Lens
EN-4
Description
Sets the camera mode.
Focuses and locks both focus & exposure when
pressed halfway down. Captures the image when
pressed all the way down.
Turns the camera power on and off.
Sets the camera mode.
Selects this when capturing still images or recording
video clips.
Performs image playback and deletion.
Provides flash illumination.
For recording audio with video clips and voice annotation.
Blinks during Self-timer mode until the image is captured.
Lights for auto focusing when capturing in a dark place.
Allows you to connect a USB cable or an A/V cable
to the camera.
Allows you to connect an AC power adapter to operate
the camera without battery, or to charge rechargeable
lithium-ion battery.
6x optical zoom lens allows you to capture telephoto
and wide-angle images.
�
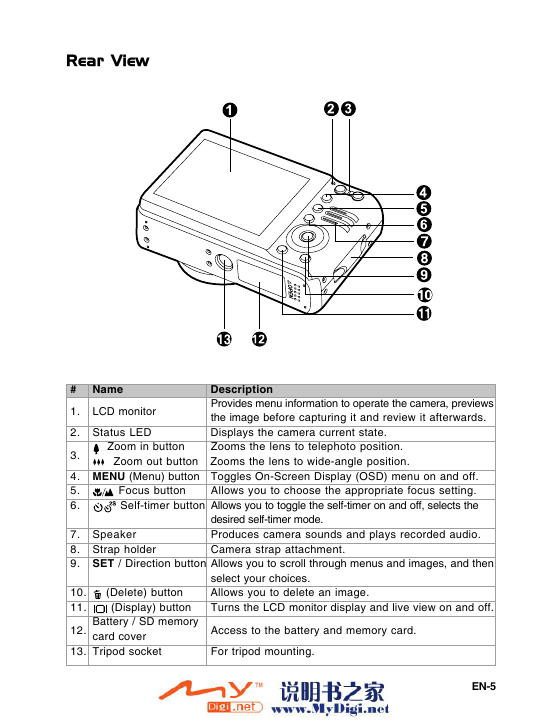
Rear View
#
1.
LCD monitor
2. Status LED
Name
Description
Provides menu information to operate the camera, previews
the image before capturing it and review it afterwards.
Displays the camera current state.
Zoom in button
Zooms the lens to telephoto position.
Zoom out button Zooms the lens to wide-angle position.
3.
4. MENU (Menu) button Toggles On-Screen Display (OSD) menu on and off.
5.
Allows you to choose the appropriate focus setting.
Focus button
Self-timer button Allows you to toggle the self-timer on and off, selects the
6.
7. Speaker
8. Strap holder
9. SET / Direction button Allows you to scroll through menus and images, and then
desired self-timer mode.
Produces camera sounds and plays recorded audio.
Camera strap attachment.
10.
11.
12.
(Delete) button
(Display) button
Battery / SD memory
card cover
13. Tripod socket
select your choices.
Allows you to delete an image.
Turns the LCD monitor display and live view on and off.
Access to the battery and memory card.
For tripod mounting.
EN-5
�
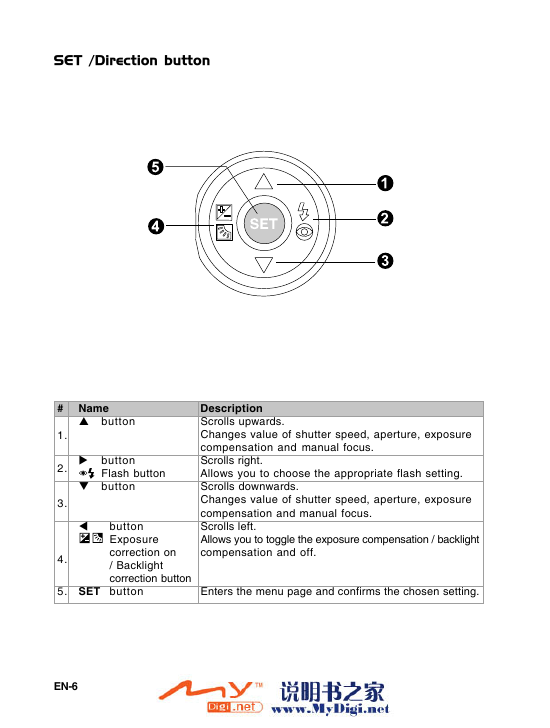
SET /Direction button
Description
Scrolls upwards.
Changes value of shutter speed, aperture, exposure
compensation and manual focus.
Scrolls right.
Allows you to choose the appropriate flash setting.
Scrolls downwards.
Changes value of shutter speed, aperture, exposure
compensation and manual focus.
Scrolls left.
Allows you to toggle the exposure compensation / backlight
compensation and off.
Enters the menu page and confirms the chosen setting.
# Name
button
button
Flash button
button
button
Exposure
correction on
/ Backlight
correction button
5. SET button
1.
2.
3.
4.
EN-6
�
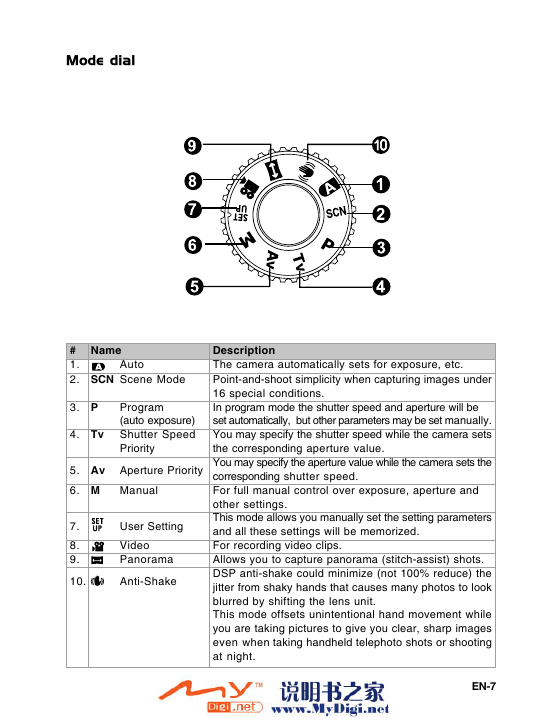
Mode dial
# Name
1.
2. SCN Scene Mode
Auto
3. P
4. Tv
Program
(auto exposure)
Shutter Speed
Priority
5. Av
6. M
Aperture Priority
Manual
7.
8.
9.
10.
User Setting
Video
Panorama
Anti-Shake
Description
The camera automatically sets for exposure, etc.
Point-and-shoot simplicity when capturing images under
16 special conditions.
In program mode the shutter speed and aperture will be
set automatically, but other parameters may be set manually.
You may specify the shutter speed while the camera sets
the corresponding aperture value.
You may specify the aperture value while the camera sets the
corresponding shutter speed.
For full manual control over exposure, aperture and
other settings.
This mode allows you manually set the setting parameters
and all these settings will be memorized.
For recording video clips.
Allows you to capture panorama (stitch-assist) shots.
DSP anti-shake could minimize (not 100% reduce) the
jitter from shaky hands that causes many photos to look
blurred by shifting the lens unit.
This mode offsets unintentional hand movement while
you are taking pictures to give you clear, sharp images
even when taking handheld telephoto shots or shooting
at night.
EN-7
�
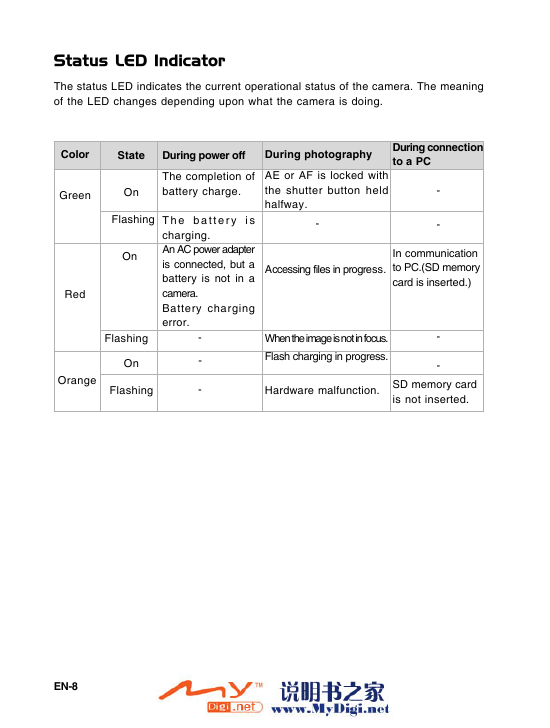
Status LED Indicator
The status LED indicates the current operational status of the camera. The meaning
of the LED changes depending upon what the camera is doing.
Color
State
During power off
During photography
During connection
to a PC
Green
On
Flashing
On
Red
Flashing
On
The completion of
battery charge.
T h e b a t t e r y i s
charging.
An AC power adapter
is connected, but a
battery is not in a
camera.
Battery charging
error.
-
-
AE or AF is locked with
the shutter button held
halfway.
-
-
-
Accessing files in progress.
In communication
to PC.(SD memory
card is inserted.)
When the image is not in focus.
Flash charging in progress.
-
-
Orange
Flashing
-
Hardware malfunction.
SD memory card
is not inserted.
EN-8
�


 2023年江西萍乡中考道德与法治真题及答案.doc
 2012年重庆南川中考生物真题及答案.doc
 2013年江西师范大学地理学综合及文艺理论基础考研真题.doc
 2020年四川甘孜小升初语文真题及答案I卷.doc
 2020年注册岩土工程师专业基础考试真题及答案.doc
 2023-2024学年福建省厦门市九年级上学期数学月考试题及答案.doc
 2021-2022学年辽宁省沈阳市大东区九年级上学期语文期末试题及答案.doc
 2022-2023学年北京东城区初三第一学期物理期末试卷及答案.doc
 2018上半年江西教师资格初中地理学科知识与教学能力真题及答案.doc
 2012年河北国家公务员申论考试真题及答案-省级.doc
 2020-2021学年江苏省扬州市江都区邵樊片九年级上学期数学第一次质量检测试题及答案.doc
 2022下半年黑龙江教师资格证中学综合素质真题及答案.doc