STK X Tutorial - MATLAB with GUIDE
In this exercise you will gain hands-on experience using STK X to embed STK
functionality in a container application created with MATLAB 7.0 with GUIDE.
Note that the syntax examples in this tutorial occasionally wrap over to additional
lines, but in MATLAB they should be entered all on one line.
CONTENTS
CREATE THE PROJECT ............................................................................ 1
ADD THE STK X CONTROLS TO THE FORM ................................................ 2
SEND COMMANDS TO STK X ................................................................... 6
ADD ZOOM IN/OUT TO THE MAP CONTROL ............................................. 10
RESPOND TO EVENTS RAISED BY STK X ................................................. 12
ADD MAP PICKING............................................................................... 15
SET STK X PROPERTIES ....................................................................... 18
ADD CONNECT COMMAND INTERFACE.................................................... 22
Create the project
1) Start MATLAB (version 7 or later)
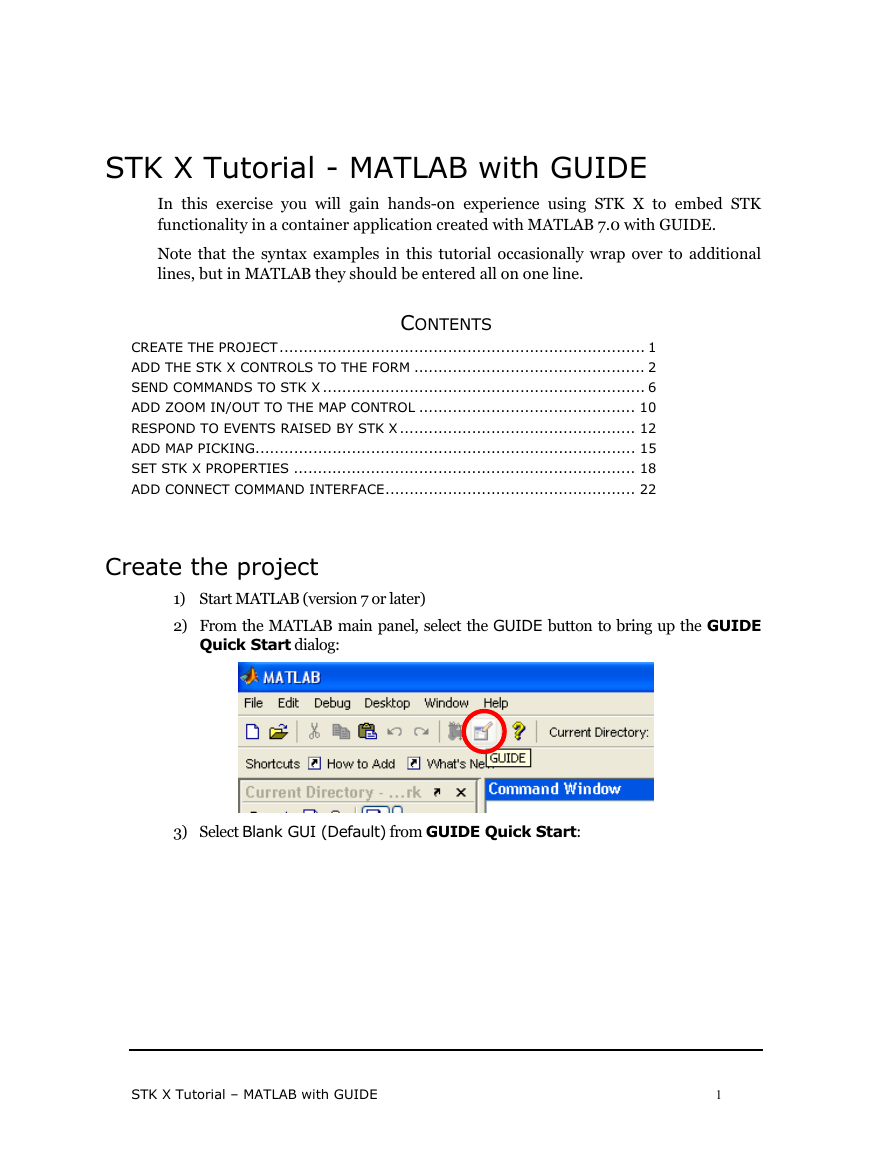
2) From the MATLAB main panel, select the GUIDE button to bring up the GUIDE
Quick Start dialog:
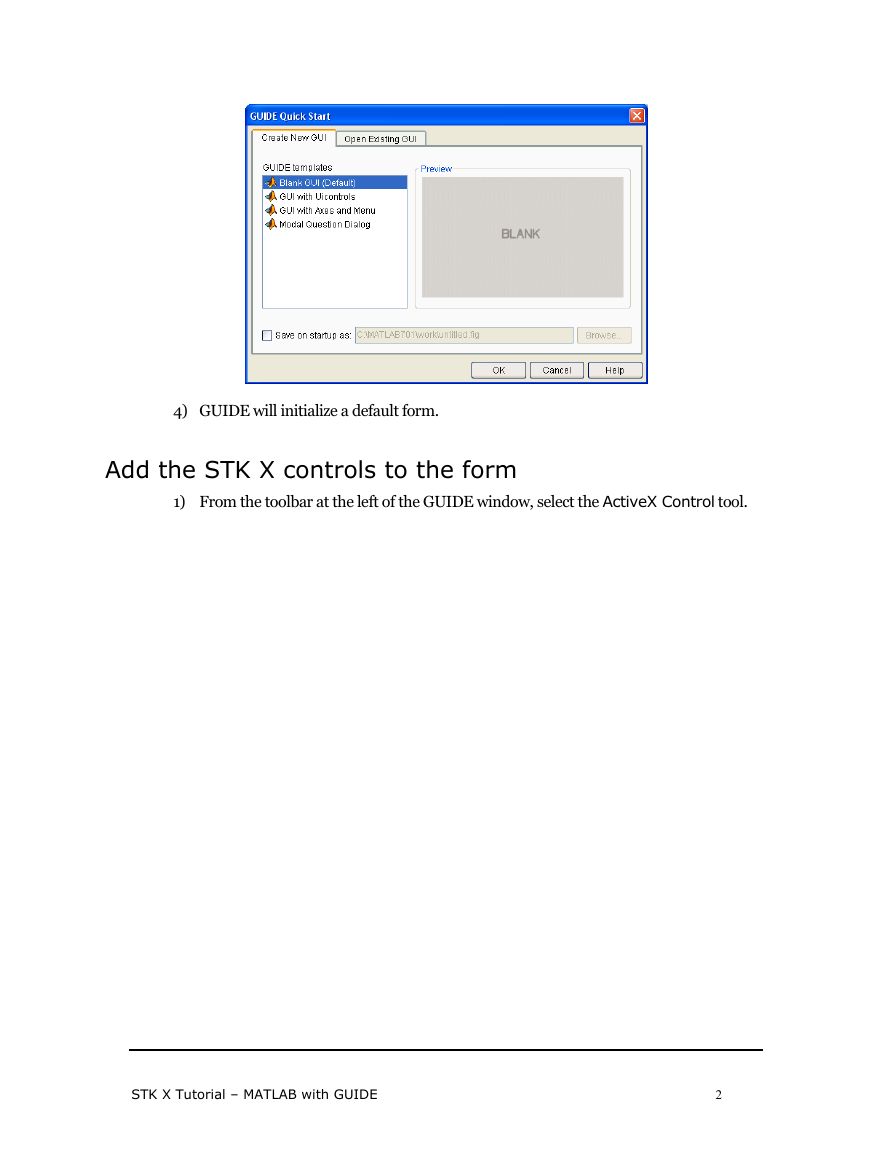
3) Select Blank GUI (Default) from GUIDE Quick Start:
STK X Tutorial – MATLAB with GUIDE
1
�
4) GUIDE will initialize a default form.
Add the STK X controls to the form
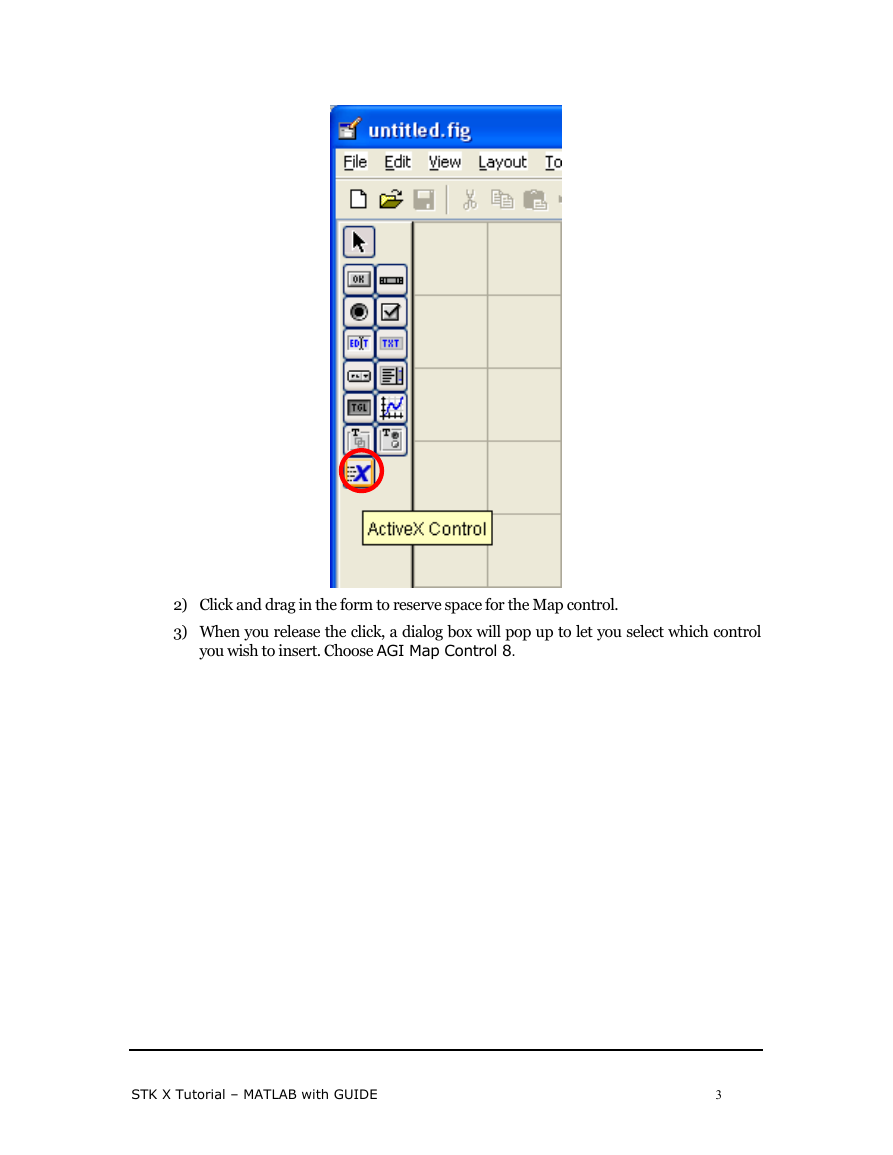
1) From the toolbar at the left of the GUIDE window, select the ActiveX Control tool.
STK X Tutorial – MATLAB with GUIDE
2
�
2) Click and drag in the form to reserve space for the Map control.
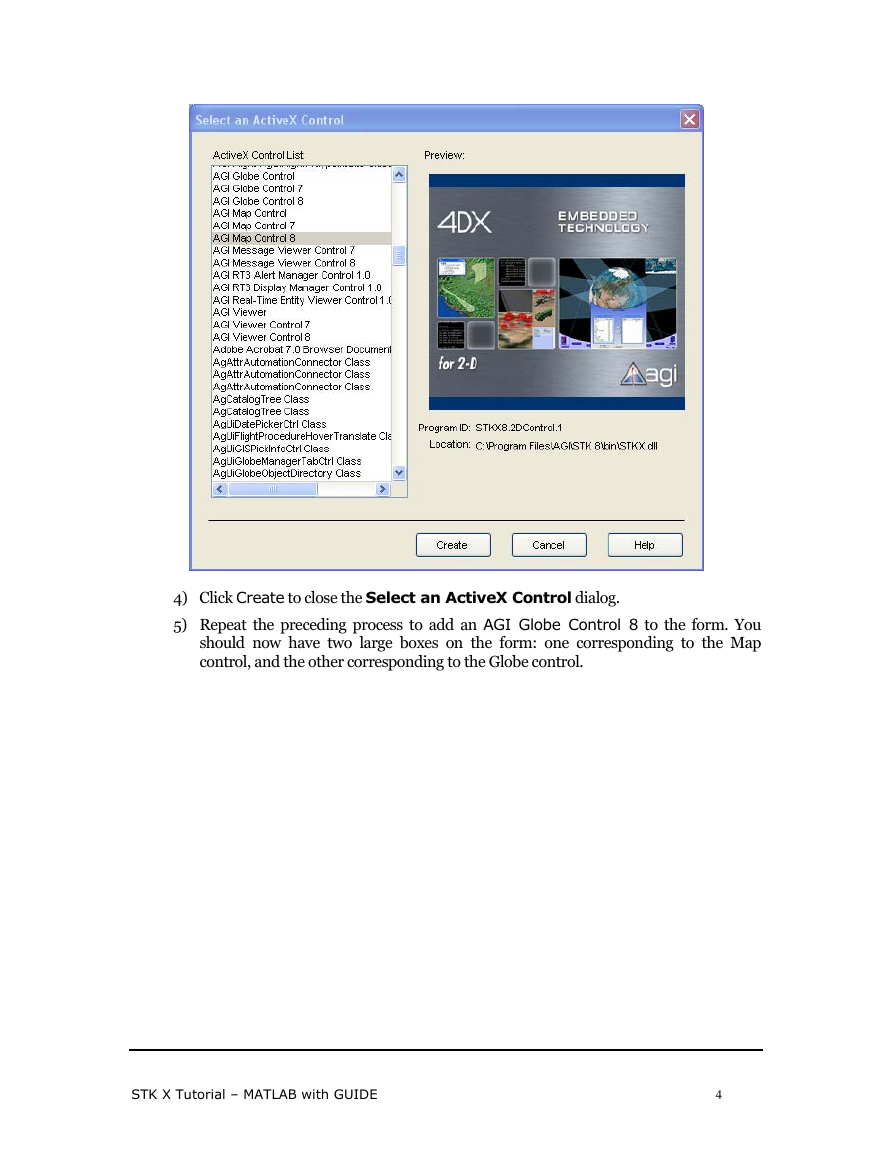
3) When you release the click, a dialog box will pop up to let you select which control
you wish to insert. Choose AGI Map Control 8.
STK X Tutorial – MATLAB with GUIDE
3
�
4) Click Create to close the Select an ActiveX Control dialog.
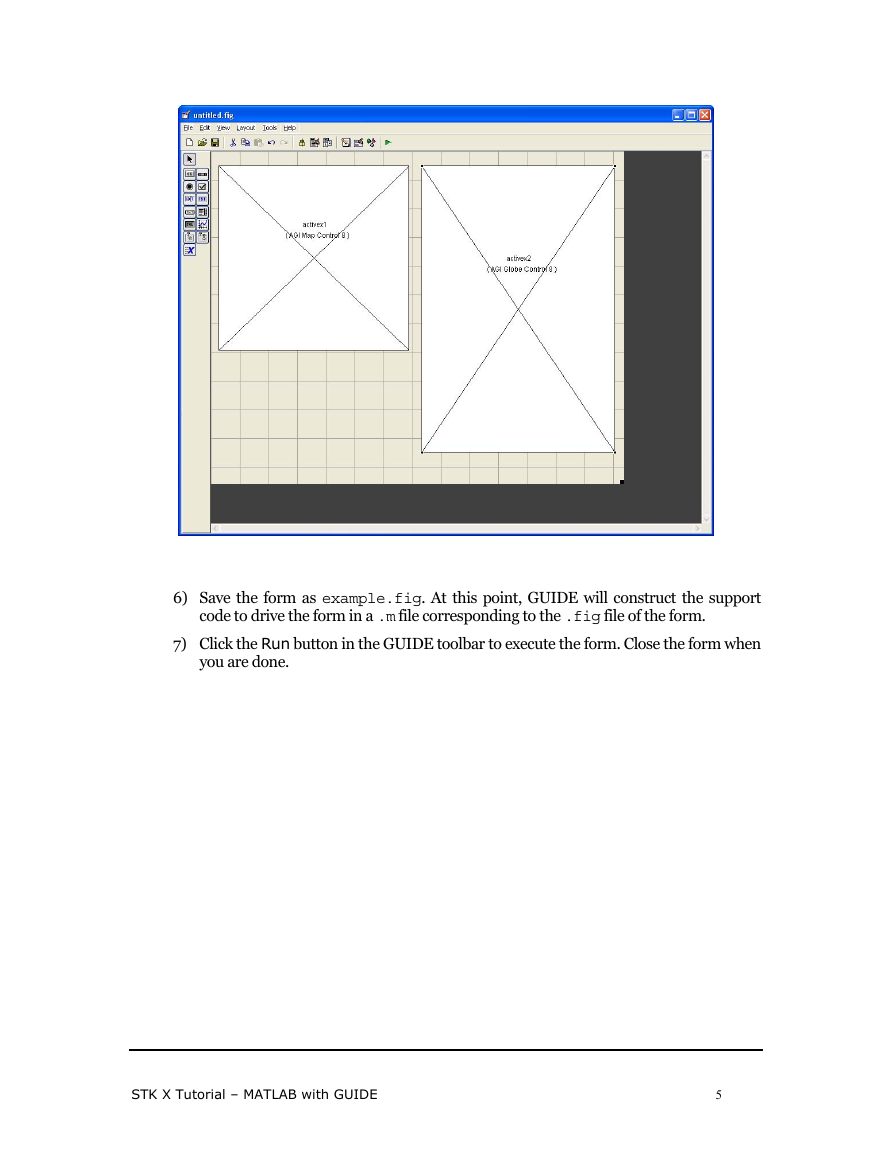
5) Repeat the preceding process to add an AGI Globe Control 8 to the form. You
should now have two large boxes on the form: one corresponding to the Map
control, and the other corresponding to the Globe control.
STK X Tutorial – MATLAB with GUIDE
4
�
6) Save the form as example.fig. At this point, GUIDE will construct the support
code to drive the form in a .m file corresponding to the .fig file of the form.
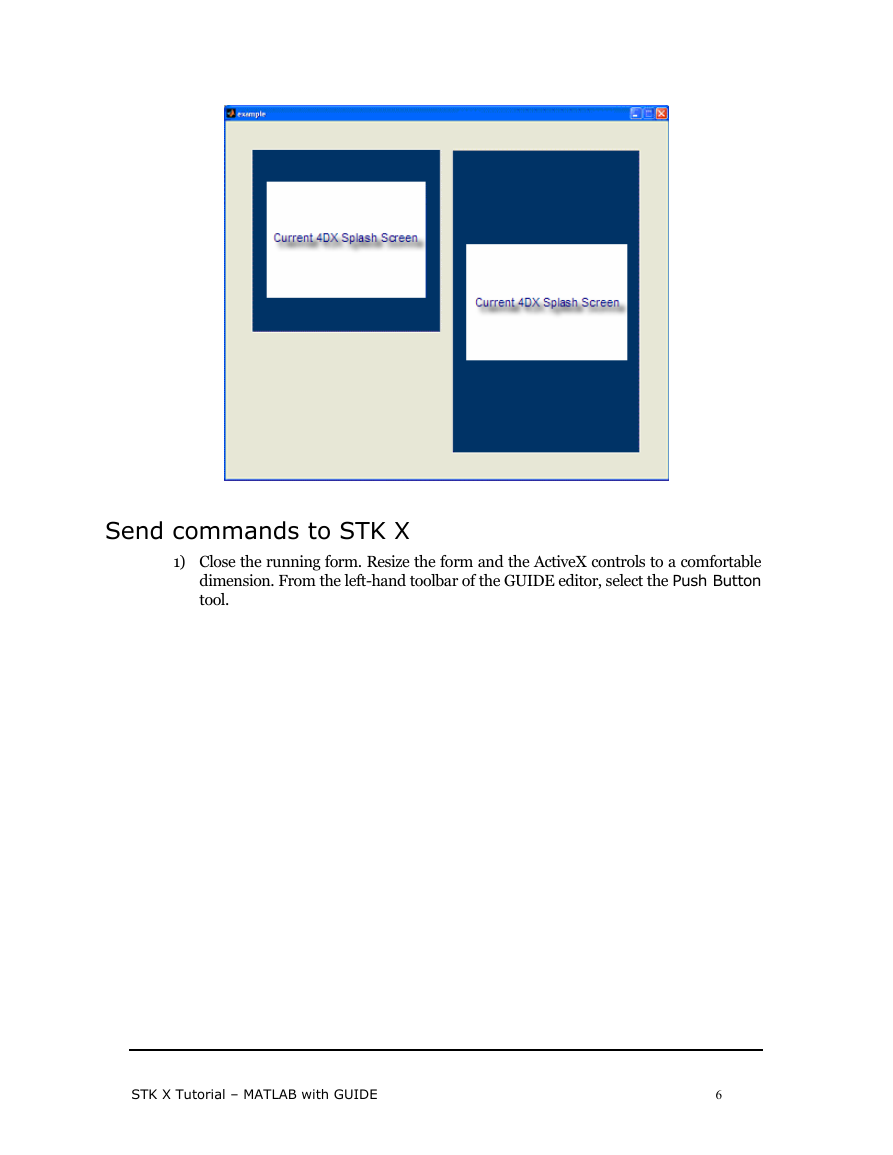
7) Click the Run button in the GUIDE toolbar to execute the form. Close the form when
you are done.
STK X Tutorial – MATLAB with GUIDE
5
�
Send commands to STK X
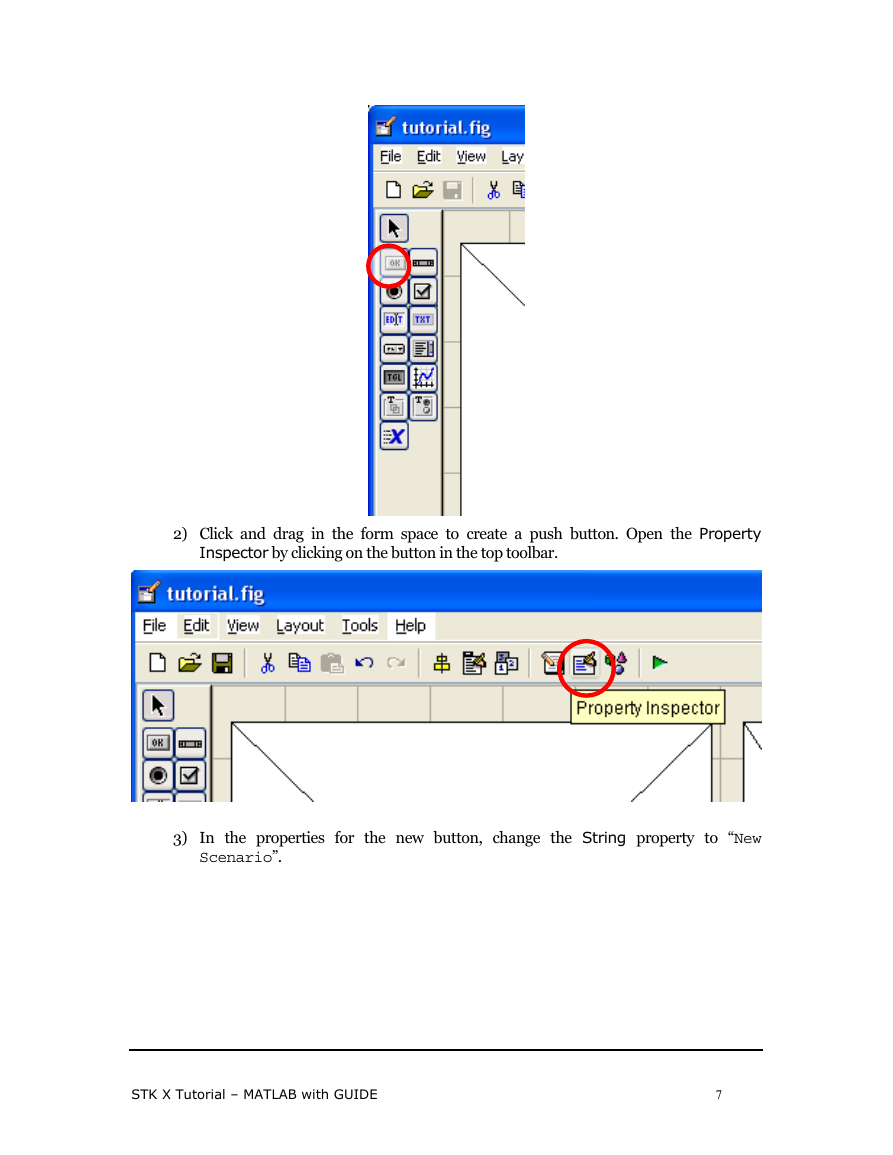
1) Close the running form. Resize the form and the ActiveX controls to a comfortable
dimension. From the left-hand toolbar of the GUIDE editor, select the Push Button
tool.
STK X Tutorial – MATLAB with GUIDE
6
�
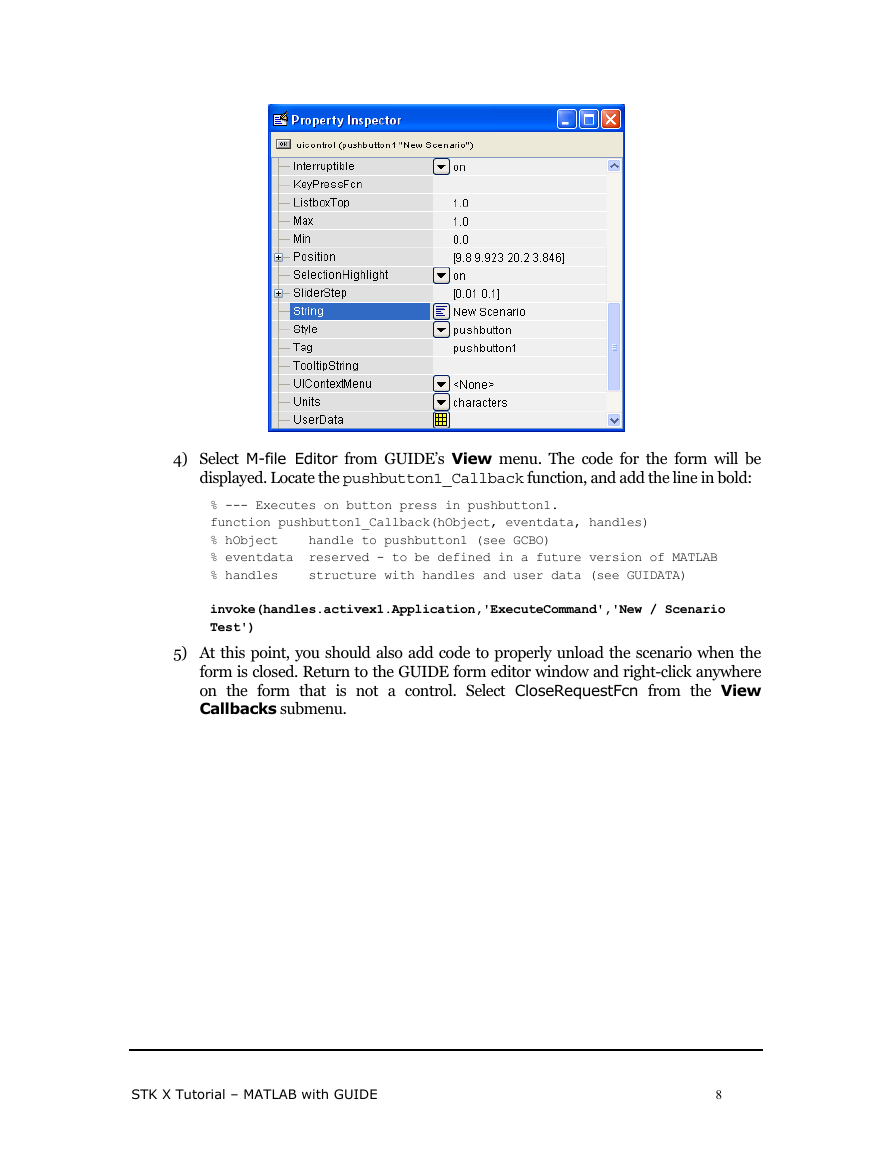
2) Click and drag in the form space to create a push button. Open the Property
Inspector by clicking on the button in the top toolbar.
3) In the properties for the new button, change the String property to “New
Scenario”.
STK X Tutorial – MATLAB with GUIDE
7
�
4) Select M-file Editor from GUIDE’s View menu. The code for the form will be
displayed. Locate the pushbutton1_Callback function, and add the line in bold:
% --- Executes on button press in pushbutton1.
function pushbutton1_Callback(hObject, eventdata, handles)
% hObject handle to pushbutton1 (see GCBO)
% eventdata reserved - to be defined in a future version of MATLAB
% handles structure with handles and user data (see GUIDATA)
invoke(handles.activex1.Application,'ExecuteCommand','New / Scenario
Test')
5) At this point, you should also add code to properly unload the scenario when the
form is closed. Return to the GUIDE form editor window and right-click anywhere
on the form that is not a control. Select CloseRequestFcn from the View
Callbacks submenu.
STK X Tutorial – MATLAB with GUIDE
8
�


 2023年江西萍乡中考道德与法治真题及答案.doc
 2012年重庆南川中考生物真题及答案.doc
 2013年江西师范大学地理学综合及文艺理论基础考研真题.doc
 2020年四川甘孜小升初语文真题及答案I卷.doc
 2020年注册岩土工程师专业基础考试真题及答案.doc
 2023-2024学年福建省厦门市九年级上学期数学月考试题及答案.doc
 2021-2022学年辽宁省沈阳市大东区九年级上学期语文期末试题及答案.doc
 2022-2023学年北京东城区初三第一学期物理期末试卷及答案.doc
 2018上半年江西教师资格初中地理学科知识与教学能力真题及答案.doc
 2012年河北国家公务员申论考试真题及答案-省级.doc
 2020-2021学年江苏省扬州市江都区邵樊片九年级上学期数学第一次质量检测试题及答案.doc
 2022下半年黑龙江教师资格证中学综合素质真题及答案.doc