Download source files - 381 Kb
Download demo projects - 200 Kb
Download control binaries - 72 Kb
Introduction
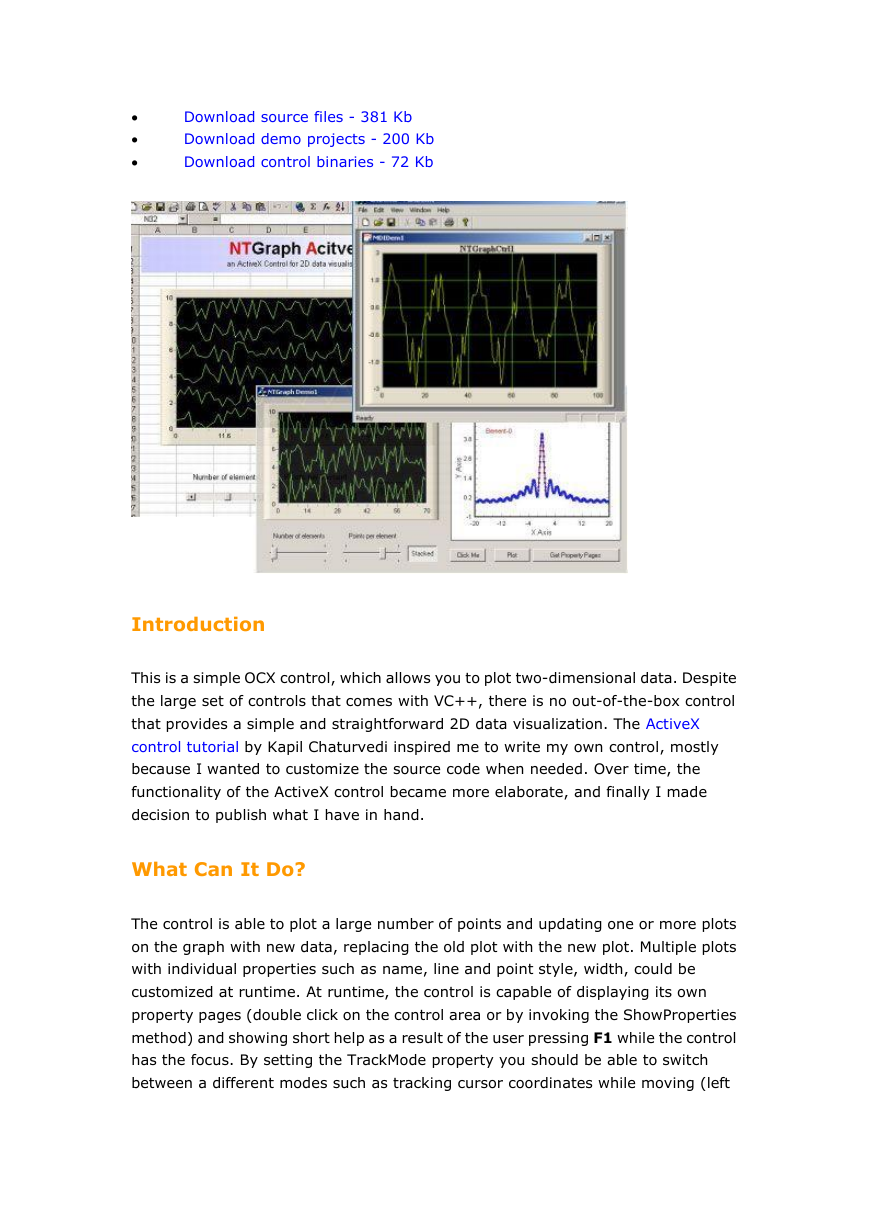
This is a simple OCX control, which allows you to plot two-dimensional data. Despite
the large set of controls that comes with VC++, there is no out-of-the-box control
that provides a simple and straightforward 2D data visualization. The ActiveX
control tutorial by Kapil Chaturvedi inspired me to write my own control, mostly
because I wanted to customize the source code when needed. Over time, the
functionality of the ActiveX control became more elaborate, and finally I made
decision to publish what I have in hand.
What Can It Do?
The control is able to plot a large number of points and updating one or more plots
on the graph with new data, replacing the old plot with the new plot. Multiple plots
with individual properties such as name, line and point style, width, could be
customized at runtime. At runtime, the control is capable of displaying its own
property pages (double click on the control area or by invoking the ShowProperties
method) and showing short help as a result of the user pressing F1 while the control
has the focus. By setting the TrackMode property you should be able to switch
between a different modes such as tracking cursor coordinates while moving (left
�
mouse button pressed), zooming, XY-, X-, and Y-panning. Finally the control
snapshot could be copied to the clipboard, printed, or saved as a bitmap file.
Whatdoesn'tit do?
You cannot plot 3D data, but you can use the NTGraph3D ATL/STL/OpenGL
activeX control to do that :-)!
What'sNew?
The Log Axes Mode works now, showing the log10 grid, and appropriated
labels, it also converts the graph element's data
The control's snapshot could be now saved as a bitmap file, many thanks to
Robert Harber for providing the code!
Added abilities to dynamically creating annotation labels, that can be on
different colors, orientations, and also could be hidden or visible.
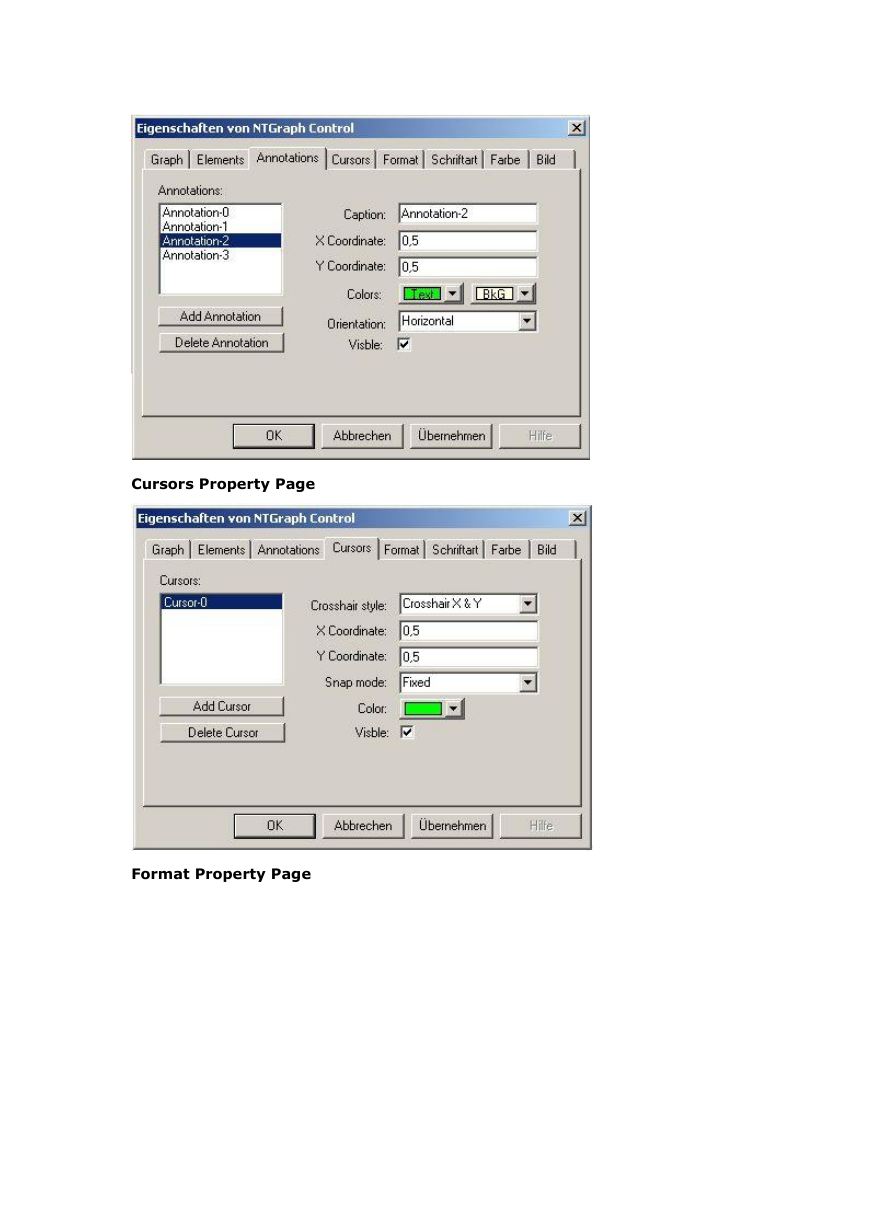
Added "Annotations" property page that provides fully access to the
annotation list in the real/design mode.
Added abilities to dynamically drawing of multiply cursors, with a different
colors, crosshair styles, floating/fixed, or snapped to the currently selected
element!
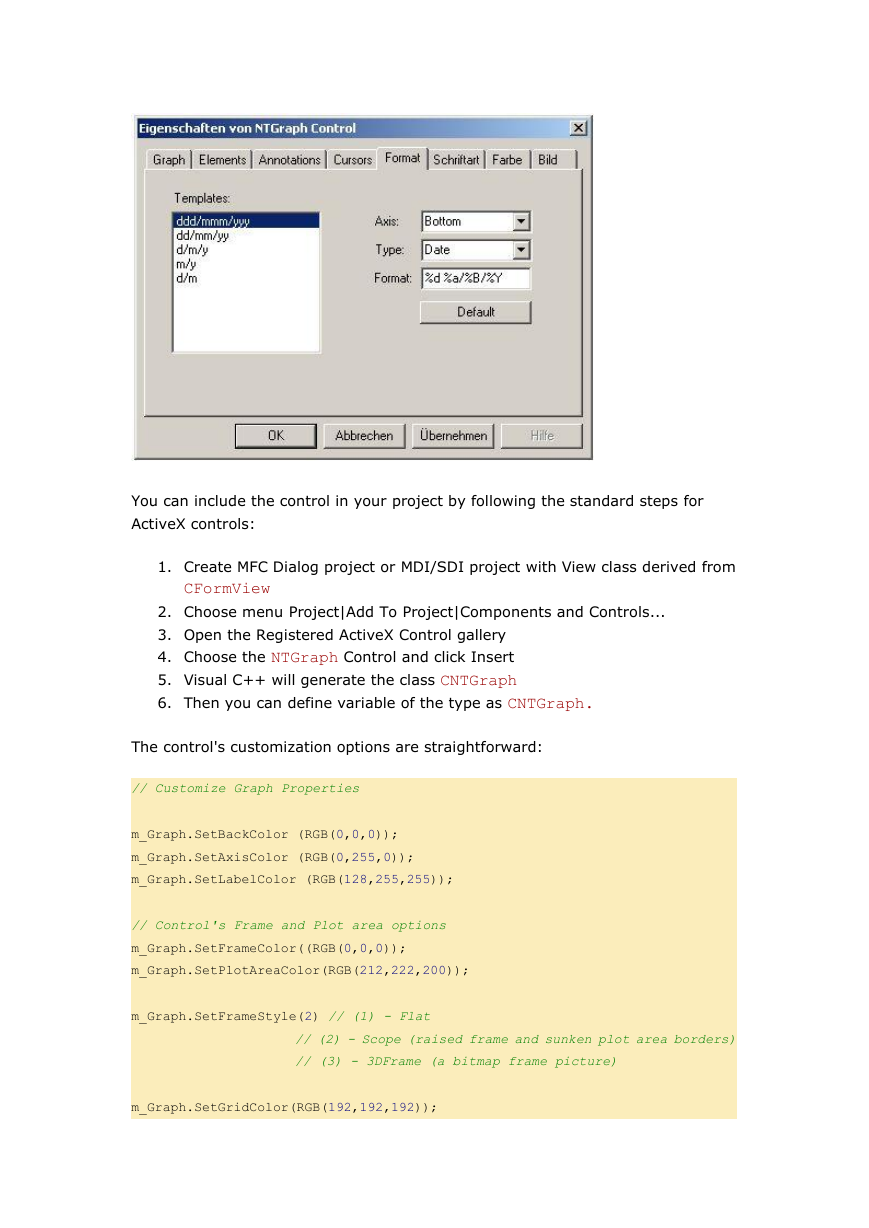
Added "Cursors" property page that provides fully access to the cursor list in
the real/design mode.
Added axis formatting, that allows a customization of the bottom and left
axis labels.
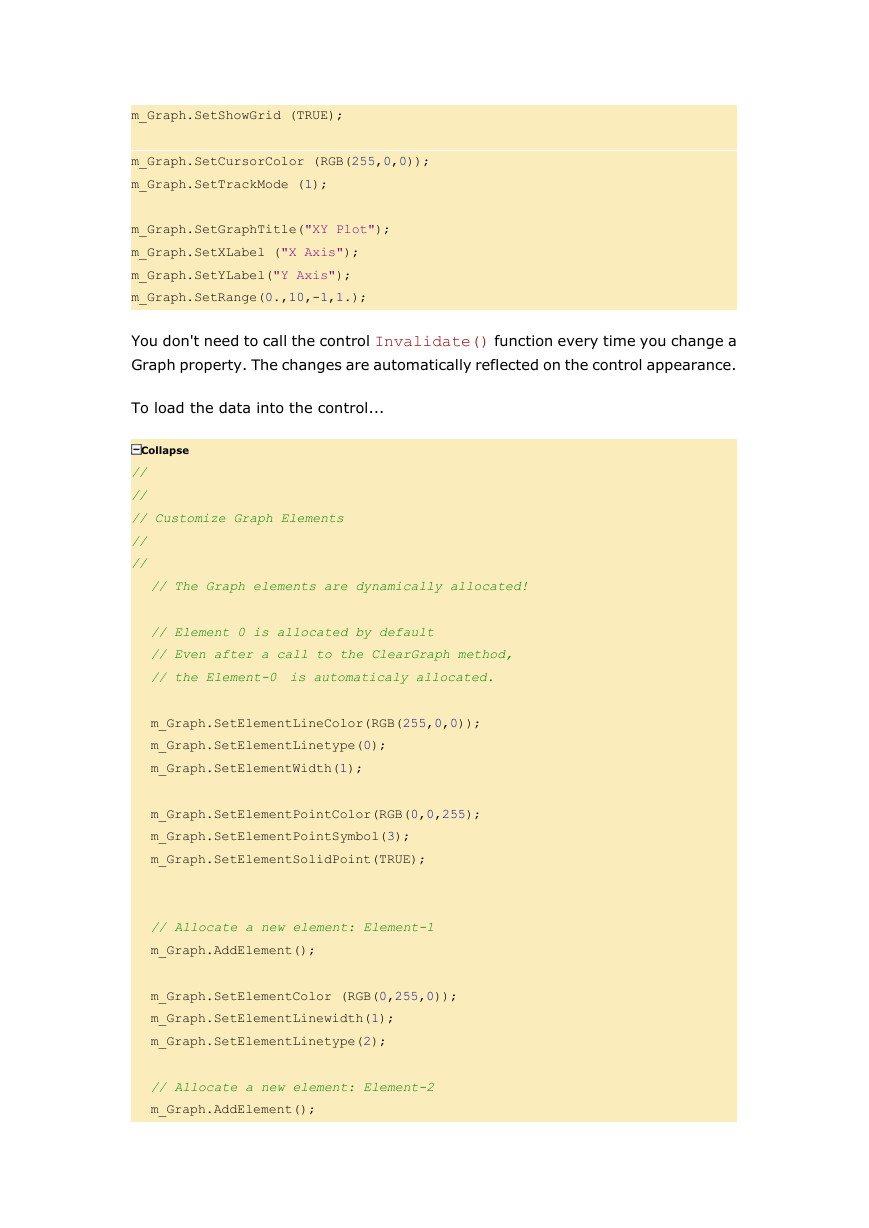
Added "Format" property page that provides access to the axis format
properties, and a templates for of commonly used data formats such a:
Numbers, Exponential, Symbolic, Date, and Time!
Added Time format for the graph axes. To use it, you should set the
XTime/YTime property to True.
You also have to convert the date/time data to double format. The
Date/Time format is implemented as a as a floating-point value, measuring
days from midnight, 30 December 1899. So, midnight, 31 December 1899 is
represented by 1.0. Similarly, 6 AM, 1 January 1900 is represented by 2.25,
and midnight, 29 December 1899 is 1.0. However, 6 AM, 29 December 1899
is 1.25.
For more info refer to MSDN for the class:COleDateTime!
Howtotest thecontrol
You can use the ActiveX Control Test Container, and load the Test.dsm macro from
the menu Tools\Macros... You can write your own routines to test the control
behavior (look at Test.dsm macro)
�
How to use the control
To use this OCX control, embed it in an application that supports the use of OCX
controls. Microsoft Visual Basic applications, Office applications and applications
created with the Microsoft Developer Studio’s AppWizard can support the use of
OCX controls. There are two files required to use this control. They are:
NTGraph.hlp -The help file for this control.
NTGraph.ocx -The NTGraph controls code and data.
Before the ActiveX control can be used in your application, it must be registered as
a COM Component in the system registry. This is a self registering control. This
means that to register the control in the system registry you only need to have an
application load the control and call the control’s exported function
DllRegisterServer. You can use the REGSVR32 utility or have your setup program do
this.
HowtousetheREGSVR32 utility?
Copy NTGraph.ocx to your directory and type:
regsvr32 NTGraph.ocx
regsvr32 /u NTGraph.ocx (Unregister server)
Customizing The Control
You can change the properties of this control during design time, or in run time to
affect how the control will plot the data.
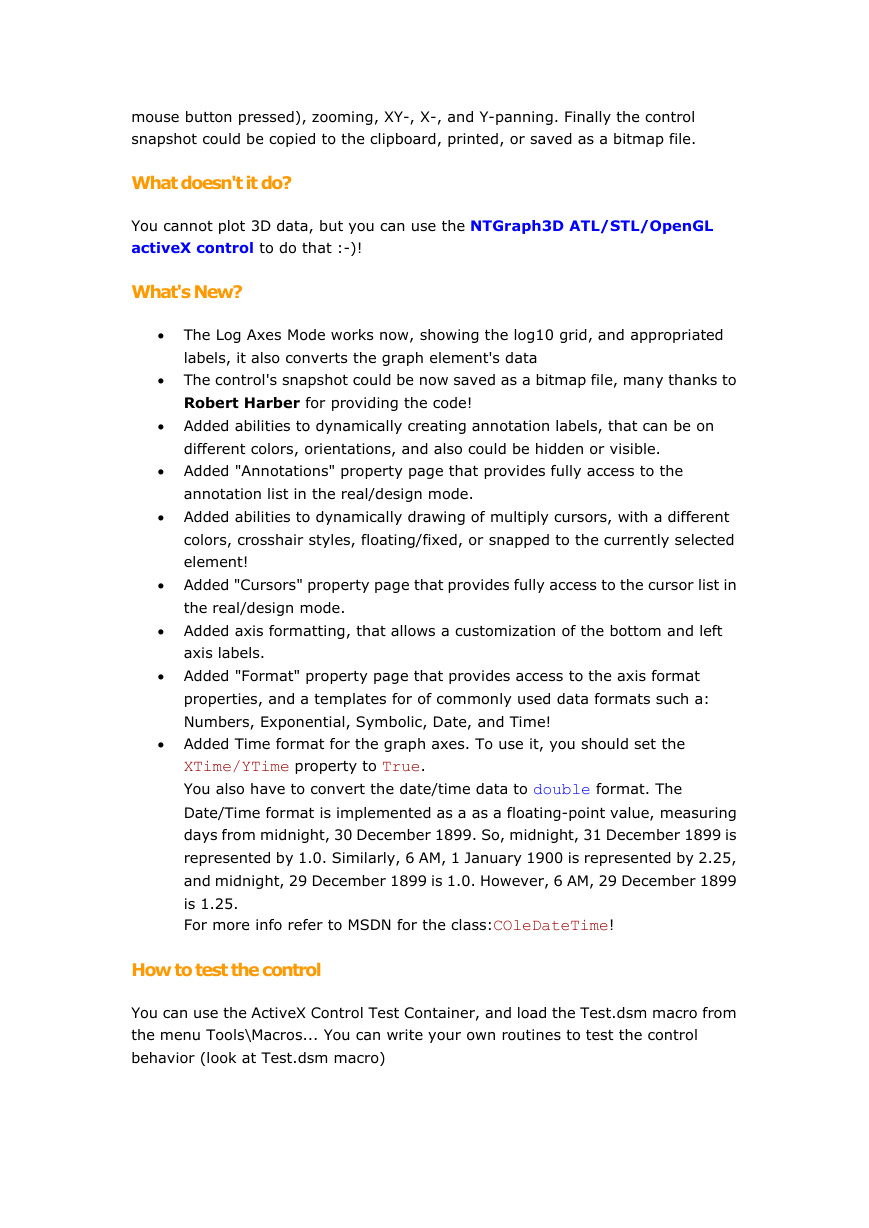
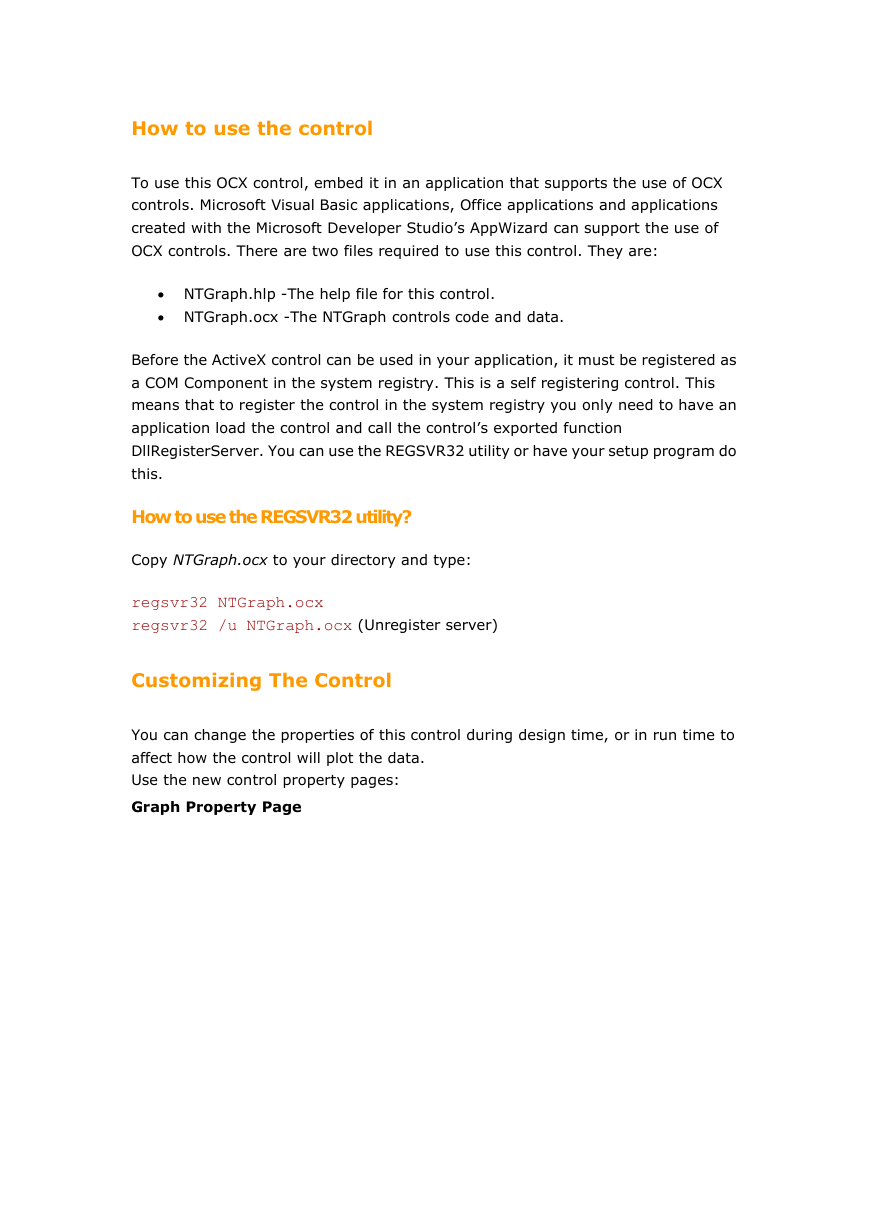
Use the new control property pages:
Graph Property Page
�
Elements Property Page
Annotations Property Page
�
Cursors Property Page
Format Property Page
�
You can include the control in your project by following the standard steps for
ActiveX controls:
1. Create MFC Dialog project or MDI/SDI project with View class derived from
CFormView
2. Choose menu Project|Add To Project|Components and Controls...
3. Open the Registered ActiveX Control gallery
4. Choose the NTGraph Control and click Insert
5. Visual C++ will generate the class CNTGraph
6. Then you can define variable of the type as CNTGraph.
The control's customization options are straightforward:
// Customize Graph Properties
m_Graph.SetBackColor (RGB(0,0,0));
m_Graph.SetAxisColor (RGB(0,255,0));
m_Graph.SetLabelColor (RGB(128,255,255));
// Control's Frame and Plot area options
m_Graph.SetFrameColor((RGB(0,0,0));
m_Graph.SetPlotAreaColor(RGB(212,222,200));
m_Graph.SetFrameStyle(2) // (1) - Flat
// (2) - Scope (raised frame and sunken plot area borders)
// (3) - 3DFrame (a bitmap frame picture)
m_Graph.SetGridColor(RGB(192,192,192));
�
m_Graph.SetShowGrid (TRUE);
m_Graph.SetCursorColor (RGB(255,0,0));
m_Graph.SetTrackMode (1);
m_Graph.SetGraphTitle("XY Plot");
m_Graph.SetXLabel ("X Axis");
m_Graph.SetYLabel("Y Axis");
m_Graph.SetRange(0.,10,-1,1.);
You don't need to call the control Invalidate() function every time you change a
Graph property. The changes are automatically reflected on the control appearance.
To load the data into the control...
Collapse
//
//
// Customize Graph Elements
//
//
// The Graph elements are dynamically allocated!
// Element 0 is allocated by default
// Even after a call to the ClearGraph method,
// the Element-0 is automaticaly allocated.
m_Graph.SetElementLineColor(RGB(255,0,0));
m_Graph.SetElementLinetype(0);
m_Graph.SetElementWidth(1);
m_Graph.SetElementPointColor(RGB(0,0,255);
m_Graph.SetElementPointSymbol(3);
m_Graph.SetElementSolidPoint(TRUE);
// Allocate a new element: Element-1
m_Graph.AddElement();
m_Graph.SetElementColor (RGB(0,255,0));
m_Graph.SetElementLinewidth(1);
m_Graph.SetElementLinetype(2);
// Allocate a new element: Element-2
m_Graph.AddElement();
�
m_Graph.SetElementColor (RGB(0,0,255));
m_Graph.SetElementLinetype(3);
// Now change again the properties of Element-1
m_Graph.SetElement(1);
m_Graph.SetElementColor (RGB(0,0,255));
...
//
// Load Data int the Graph Elements
//
double y;
for (int i = 0; i < NumberOfElements; i++)
{
for (int x = 0; x < NumberOfPoints; x++)
{
y = (double)rand() / RAND_MAX * 10.0;
y = y / 3 + 10.0 / 2 * i + 1;
m_Graph.PlotXY(x, y, i);
// or PlotY(double data, long ElementID)
}
}
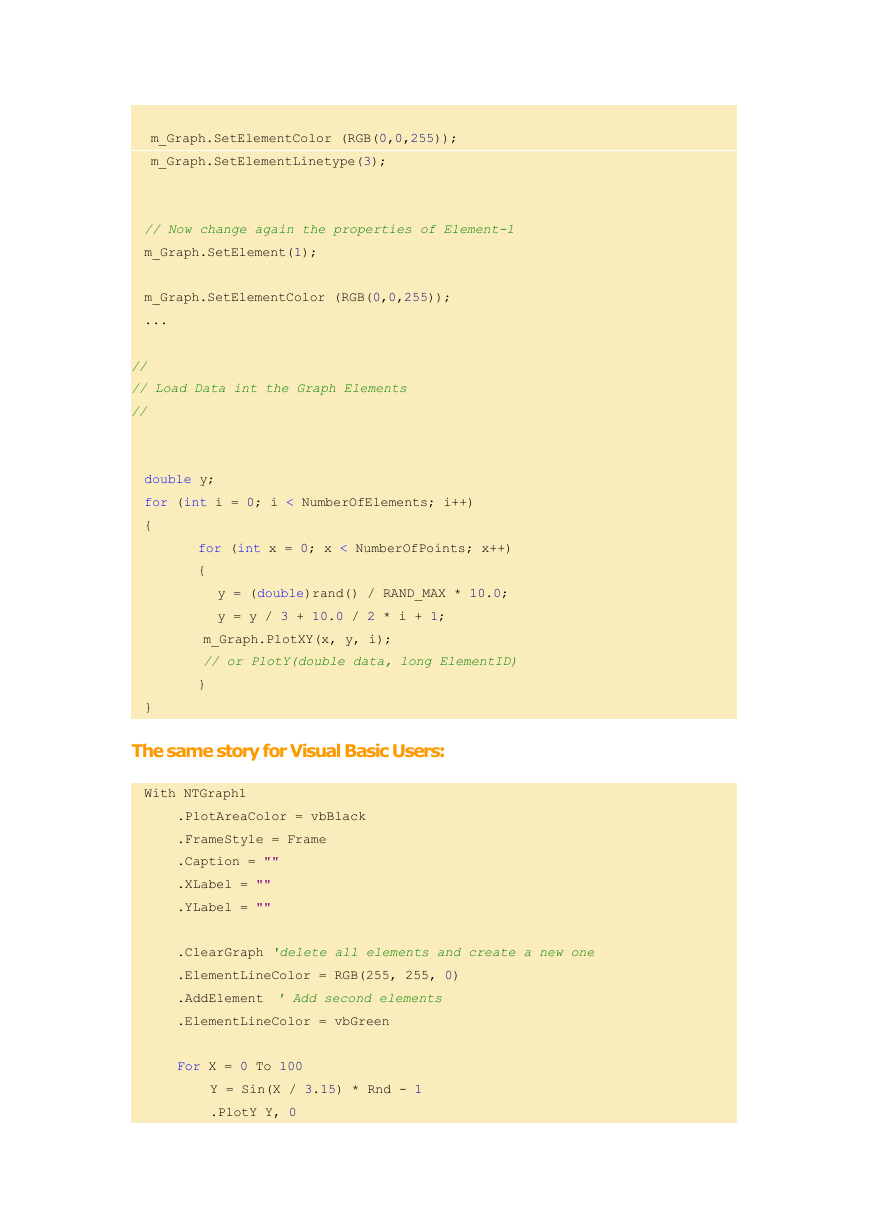
Thesamestory forVisual Basic Users:
With NTGraph1
.PlotAreaColor = vbBlack
.FrameStyle = Frame
.Caption = ""
.XLabel = ""
.YLabel = ""
.ClearGraph 'delete all elements and create a new one
.ElementLineColor = RGB(255, 255, 0)
.AddElement ' Add second elements
.ElementLineColor = vbGreen
For X = 0 To 100
Y = Sin(X / 3.15) * Rnd - 1
.PlotY Y, 0
�


 2023年江西萍乡中考道德与法治真题及答案.doc
 2012年重庆南川中考生物真题及答案.doc
 2013年江西师范大学地理学综合及文艺理论基础考研真题.doc
 2020年四川甘孜小升初语文真题及答案I卷.doc
 2020年注册岩土工程师专业基础考试真题及答案.doc
 2023-2024学年福建省厦门市九年级上学期数学月考试题及答案.doc
 2021-2022学年辽宁省沈阳市大东区九年级上学期语文期末试题及答案.doc
 2022-2023学年北京东城区初三第一学期物理期末试卷及答案.doc
 2018上半年江西教师资格初中地理学科知识与教学能力真题及答案.doc
 2012年河北国家公务员申论考试真题及答案-省级.doc
 2020-2021学年江苏省扬州市江都区邵樊片九年级上学期数学第一次质量检测试题及答案.doc
 2022下半年黑龙江教师资格证中学综合素质真题及答案.doc