Windows 下的 pixhawk 环境搭建
官网详细介绍:http://ardupilot.org/dev/docs/editing-the-code-with-eclipse.html
一、安装前系统环境配置
1.安 装 JDK, 下 载 地 址 https://www.java.com/en/ 。 配 置 JDK 环 境 变 量 , 参 见 网 址 :
http://jingyan.baidu.com/article/6dad5075d1dc40a123e36ea3.html.
2.安装 eclipse 选择 C/C++编译环境
二、下载源码并使用 make 搭建 Pixhawk 的 ArduPilot
1.安装 github,在本地创建源码开发目录
2.从 https://github.com/ArduPilot/ardupilot 克隆源码到本地磁盘仓库
3.安装 gitbash,打开后使用命令进入源码目录输入以下命令
git config --global core.autocrlf false(是两个横线)
git submodule update --init --recursive(是两个横线)
4 安 装 PX4
tools/pixhawk_toolchain_installer_latest.exe
toolchain , 下 载 网 址 http://firmware.ap.ardupilot.org/Tools/PX4-
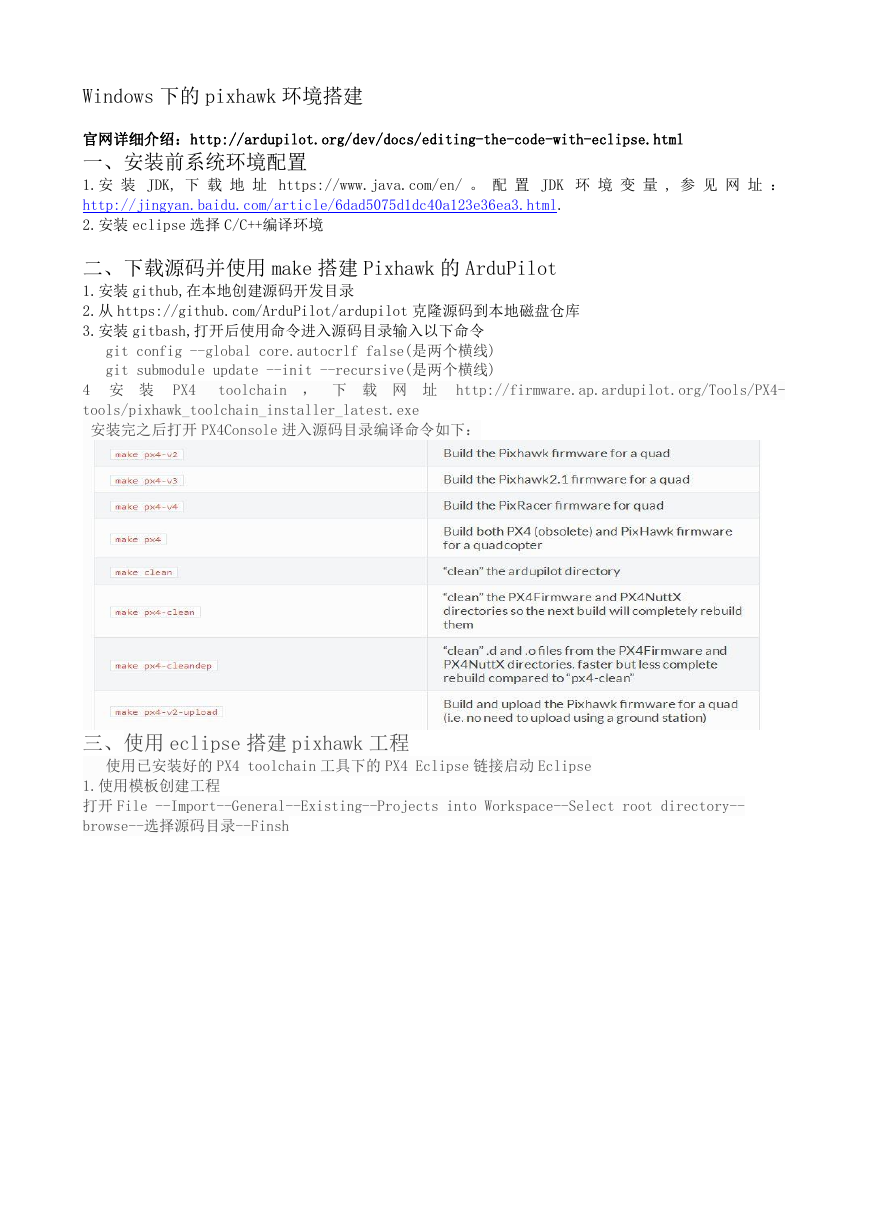
安装完之后打开 PX4Console 进入源码目录编译命令如下:
三、使用 eclipse 搭建 pixhawk 工程
使用已安装好的 PX4 toolchain 工具下的 PX4 Eclipse 链接启动 Eclipse
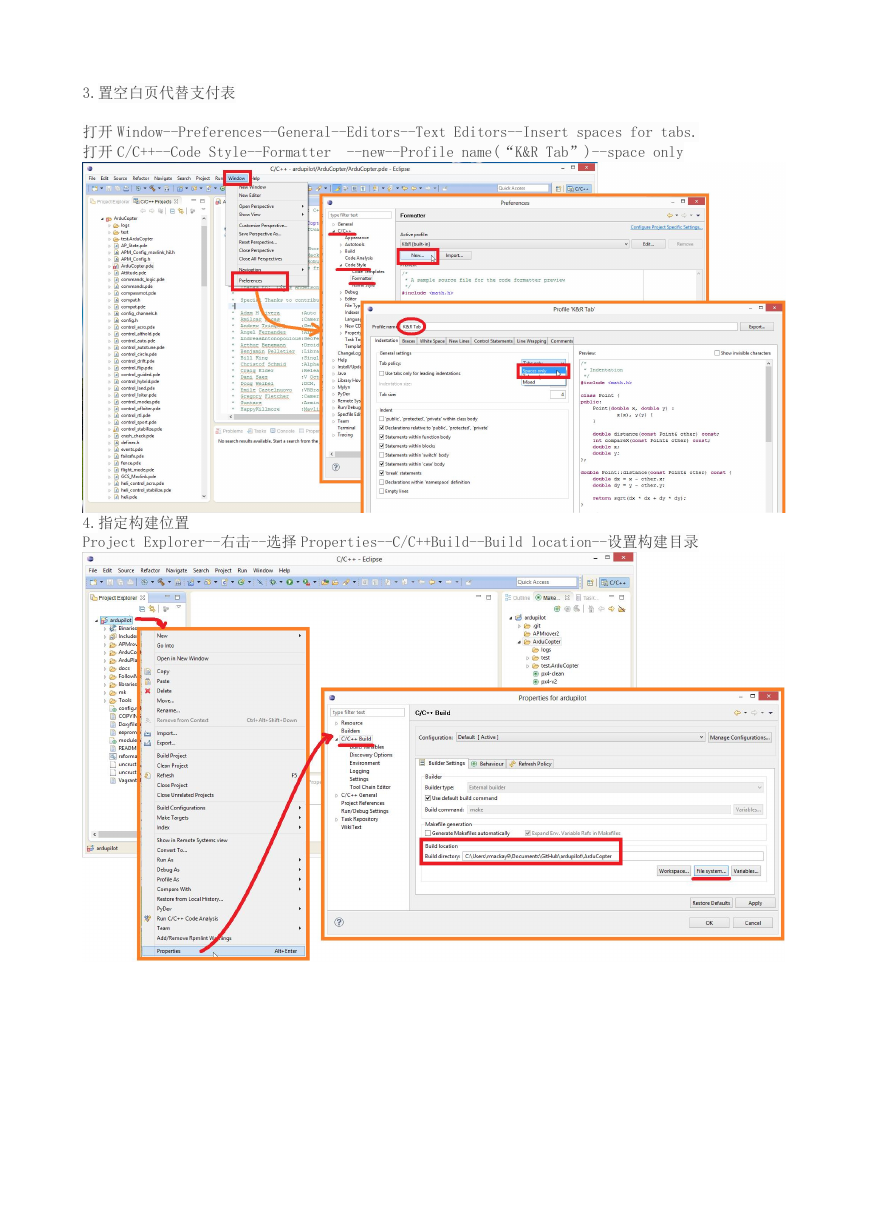
1.使用模板创建工程
打开 File --Import--General--Existing--Projects into Workspace--Select root directory--
browse--选择源码目录--Finsh
�
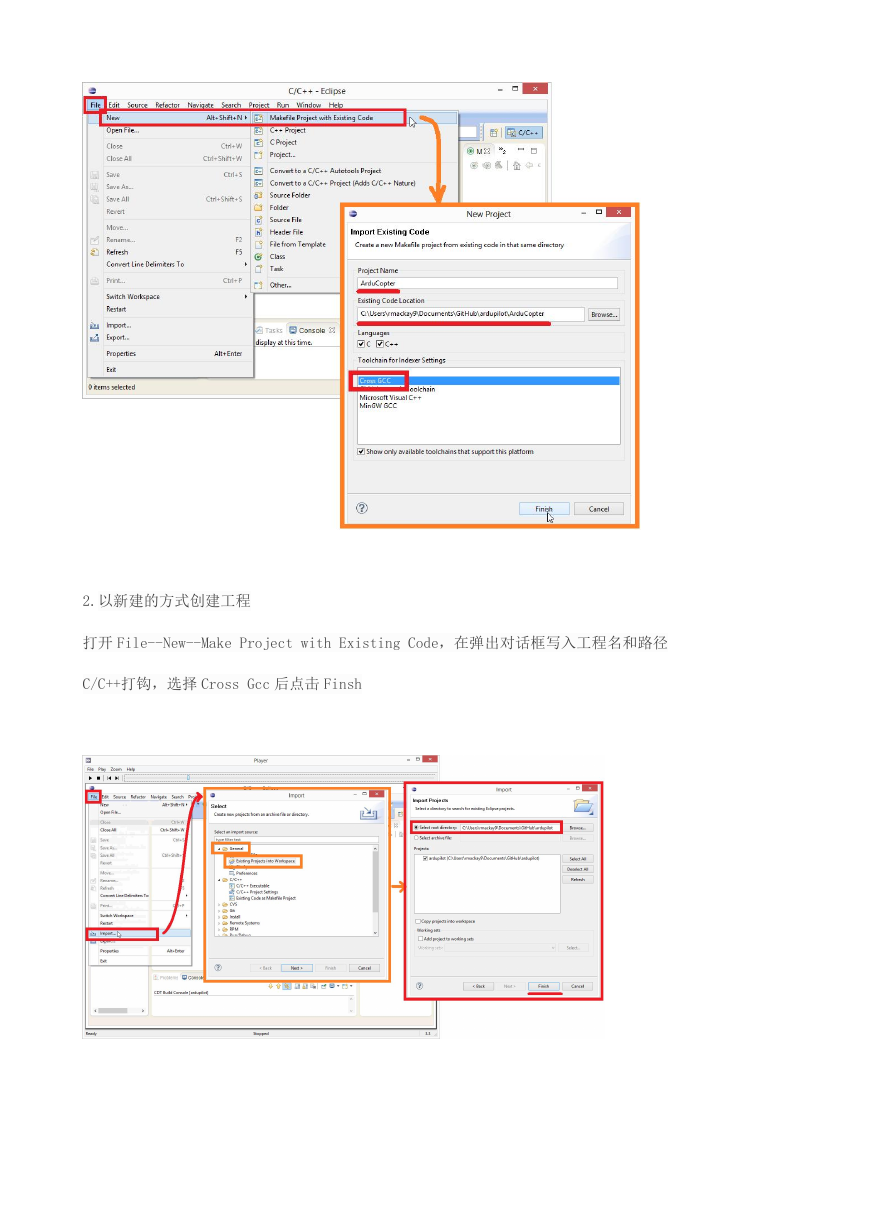
2.以新建的方式创建工程
打开 File--New--Make Project with Existing Code,在弹出对话框写入工程名和路径
C/C++打钩,选择 Cross Gcc 后点击 Finsh
�
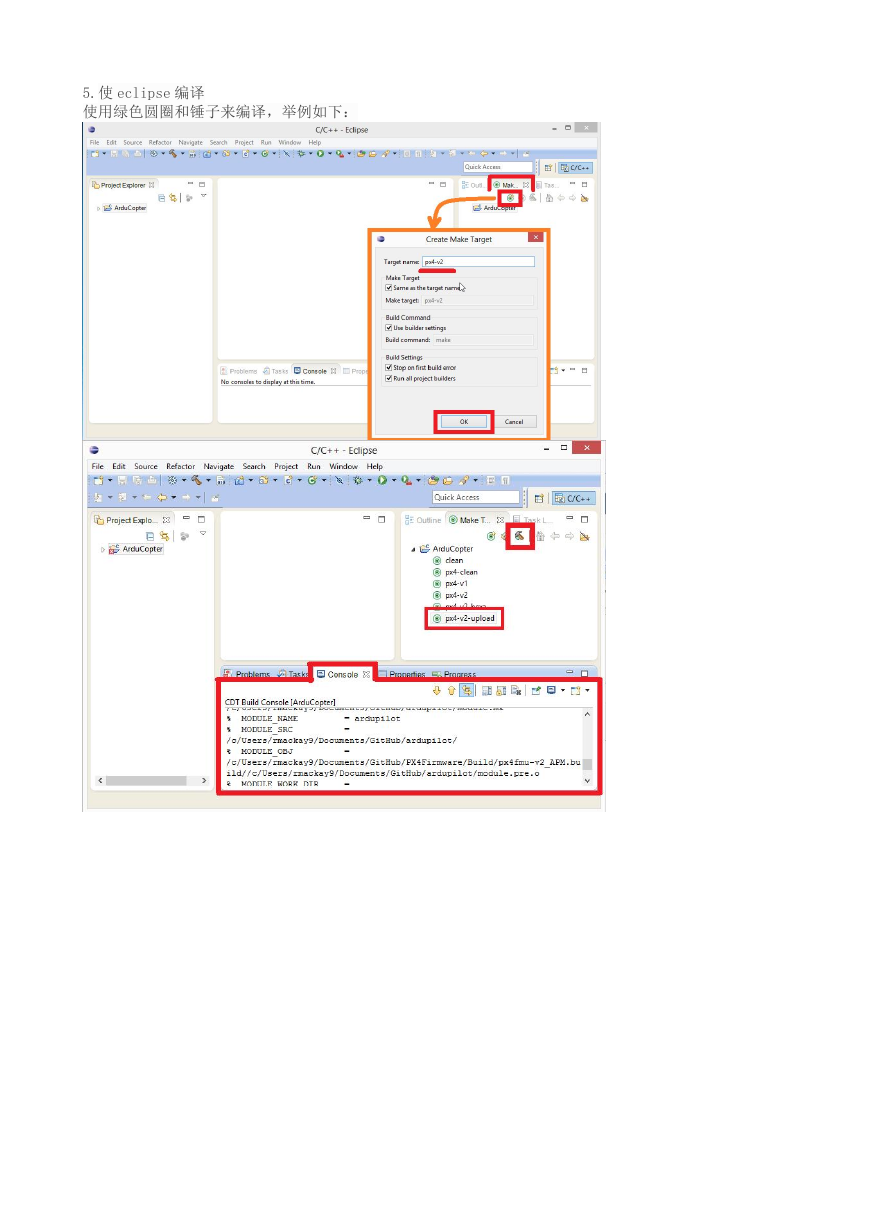
3.置空白页代替支付表
打开 Window--Preferences--General--Editors--Text Editors--Insert spaces for tabs.
打开 C/C++--Code Style--Formatter
--new--Profile name(“K&R Tab”)--space only
4.指定构建位置
Project Explorer--右击--选择 Properties--C/C++Build--Build location--设置构建目录
�
5.使 eclipse 编译
使用绿色圆圈和锤子来编译,举例如下:
�


 2023年江西萍乡中考道德与法治真题及答案.doc
 2012年重庆南川中考生物真题及答案.doc
 2013年江西师范大学地理学综合及文艺理论基础考研真题.doc
 2020年四川甘孜小升初语文真题及答案I卷.doc
 2020年注册岩土工程师专业基础考试真题及答案.doc
 2023-2024学年福建省厦门市九年级上学期数学月考试题及答案.doc
 2021-2022学年辽宁省沈阳市大东区九年级上学期语文期末试题及答案.doc
 2022-2023学年北京东城区初三第一学期物理期末试卷及答案.doc
 2018上半年江西教师资格初中地理学科知识与教学能力真题及答案.doc
 2012年河北国家公务员申论考试真题及答案-省级.doc
 2020-2021学年江苏省扬州市江都区邵樊片九年级上学期数学第一次质量检测试题及答案.doc
 2022下半年黑龙江教师资格证中学综合素质真题及答案.doc