logo资料库

精英ECS笔记本电脑-Y10PT0说明书.pdf

第1页 / 共37页
第2页 / 共37页
第3页 / 共37页
第4页 / 共37页
第5页 / 共37页
第6页 / 共37页
第7页 / 共37页
第8页 / 共37页
资料共37页,剩余部分请下载后查看
Y Book Series Manual_E_1
Y Book Series Manual_E_2
Y Book Series Manual_E_3
Y Book Series Manual_E_4
Y Book Series Manual_E_5
Y Book Series Manual_E_6
Y Book Series Manual_E_7
Y Book Series Manual_E_8-1
Y Book Series Manual_E_9-1
Y Book Series Manual_E_10-1
Y Book Series Manual_E_11-1
Y Book Series Manual_E_12
Y Book Series Manual_E_13
Y Book Series Manual_E_14
Y Book Series Manual_E_15
Y Book Series Manual_E_16
Y Book Series Manual_E_17
Y Book Series Manual_E_18
Y Book Series Manual_E_19
Y Book Series Manual_E_20
Y Book Series Manual_E_21
Y Book Series Manual_E_22
Y Book Series Manual_E_23
Y Book Series Manual_E_24
Y Book Series Manual_E_25
Y Book Series Manual_E_26
Y Book Series Manual_E_27
Y Book Series Manual_E_28
Y Book Series Manual_E_29
Y Book Series Manual_E_30
Y Book Series Manual_E_31
Y Book Series Manual_E_32
Y Book Series Manual_E_33
Y Book Series Manual_E_34
Y Book Series Manual_E_35
Y Book Series Manual_E_36
Y Book Series Manual_E_37
Netbook Series User Manual
Table of Contents Overview About this book Typographics Getting started Package contents Getting your Netbook ready for use Saving power of your Netbook Expanding the capabilities of your Netbook Touring your Netbook Front view Left side view Right side view Bottom view Indicators Using your Netbook Using the touchpad Function hotkeys Windows key shortcuts and other keys Using built-in wireless connectivity (select models only) Connecting to a wireless network Using Bluetooth (available on select models) BIOS Setup Menu Main menu Security Menu Default Set User Password / Set Supervisor Password Boot Menu Default Exit Menu Multi-Boot Menu Replacingthe memory Appendix Netbook User Manual Table of Contents ii
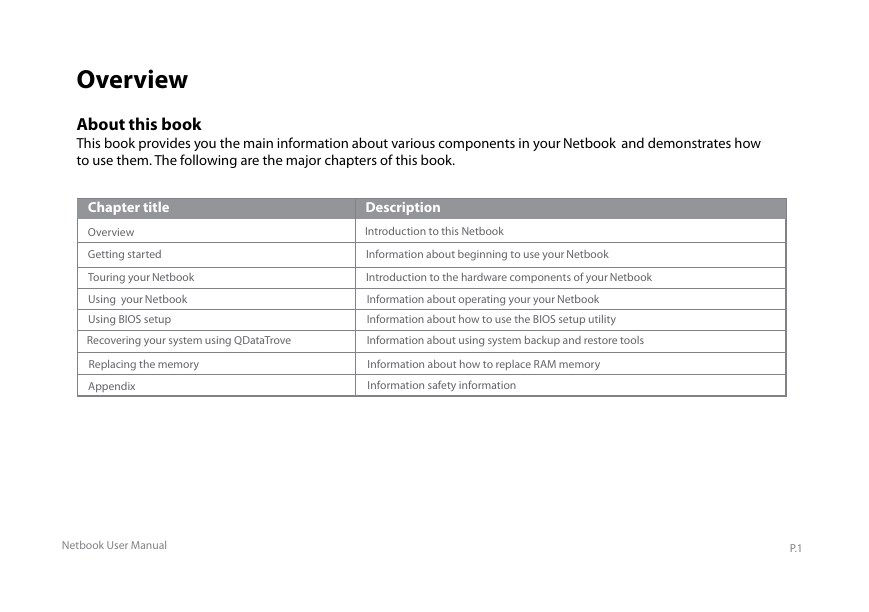
Overview About this book This book provides you the main information about various components in your Netbook and demonstrates how to use them. The following are the major chapters of this book. Chapter title Overview Getting started Touring your Netbook Using your Netbook Using BIOS setup Recovering your system using QDataTrove Replacing the memory Appendix Description Introduction to this Netbook Information about beginning to use your Netbook Introduction to the hardware components of your Netbook Information about operating your your Netbook Information about how to use the BIOS setup utility Information about using system backup and restore tools Information about how to replace RAM memory Information safety information Netbook User Manual P.1
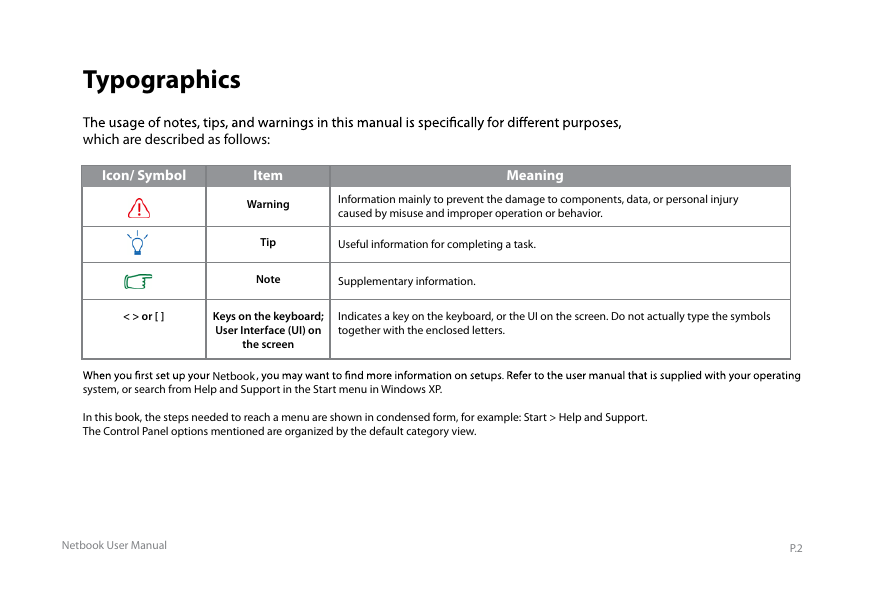
Typographics which are described as follows: Icon/ Symbol Item Warning Tip Note Meaning Information mainly to prevent the damage to components, data, or personal injury caused by misuse and improper operation or behavior. Useful information for completing a task. Supplementary information. < > or [ ] Keys on the keyboard; User Interface (UI) on the screen Indicates a key on the keyboard, or the UI on the screen. Do not actually type the symbols together with the enclosed letters. system, or search from Help and Support in the Start menu in Windows XP. Netbook In this book, the steps needed to reach a menu are shown in condensed form, for example: Start > Help and Support. The Control Panel options mentioned are organized by the default category view. Netbook User Manual P.2
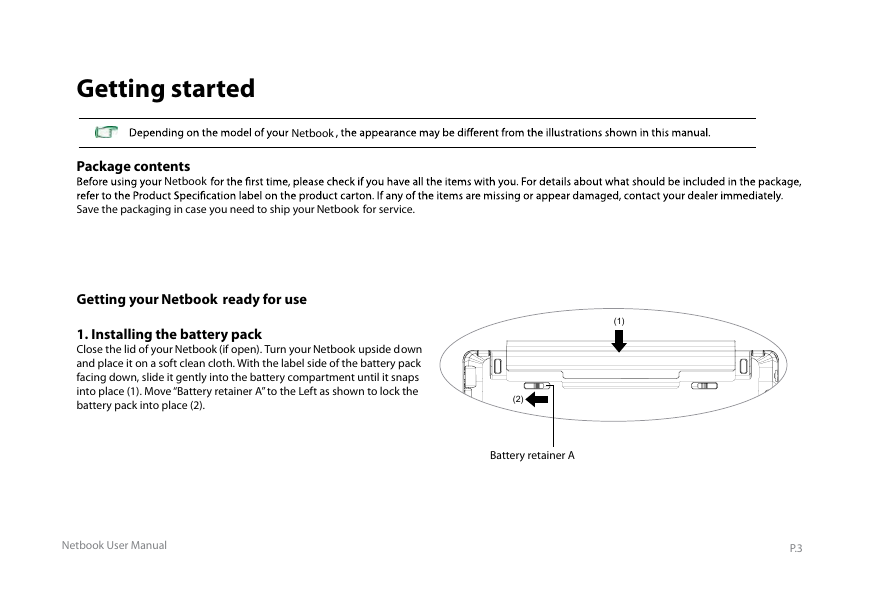
Getting started Netbook Package contents Netbook Save the packaging in case you need to ship your Netbook for service. Getting your Netbook ready for use 1. Installing the battery pack Close the lid of your Netbook (if open). Turn your Netbook upside down and place it on a soft clean cloth. With the label side of the battery pack facing down, slide it gently into the battery compartment until it snaps into place (1). Move “Battery retainer A” to the Left as shown to lock the battery pack into place (2). (1) (2) Battery retainer A Netbook User Manual P.3
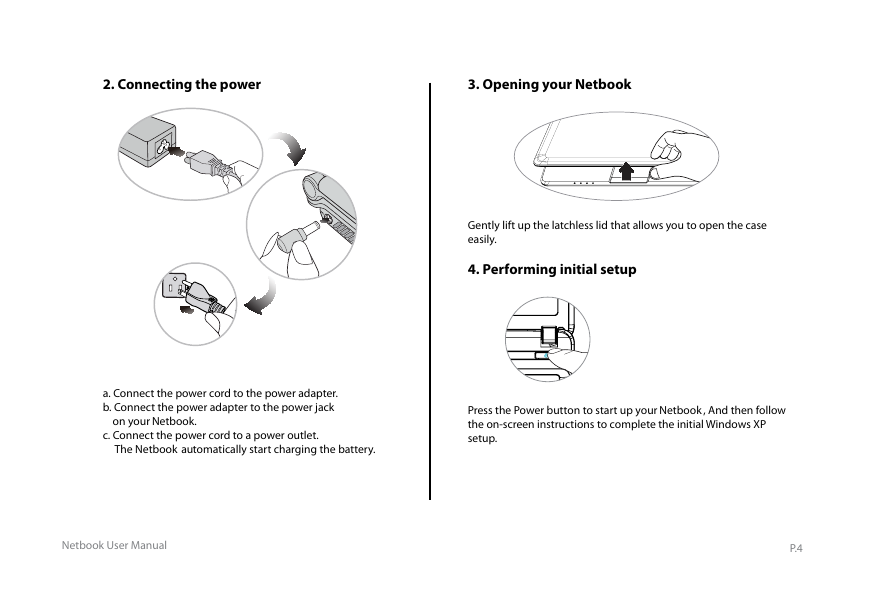
2. Connecting the power 3. Opening your Netbook Gently lift up the latchless lid that allows you to open the case easily. 4. Performing initial setup Press the Power button to start up your Netbook , And then follow the on-screen instructions to complete the initial Windows XP setup. a. Connect the power cord to the power adapter. b. Connect the power adapter to the power jack on your Netbook. c. Connect the power cord to a power outlet. The Netbook automatically start charging the battery. Netbook User Manual P.4
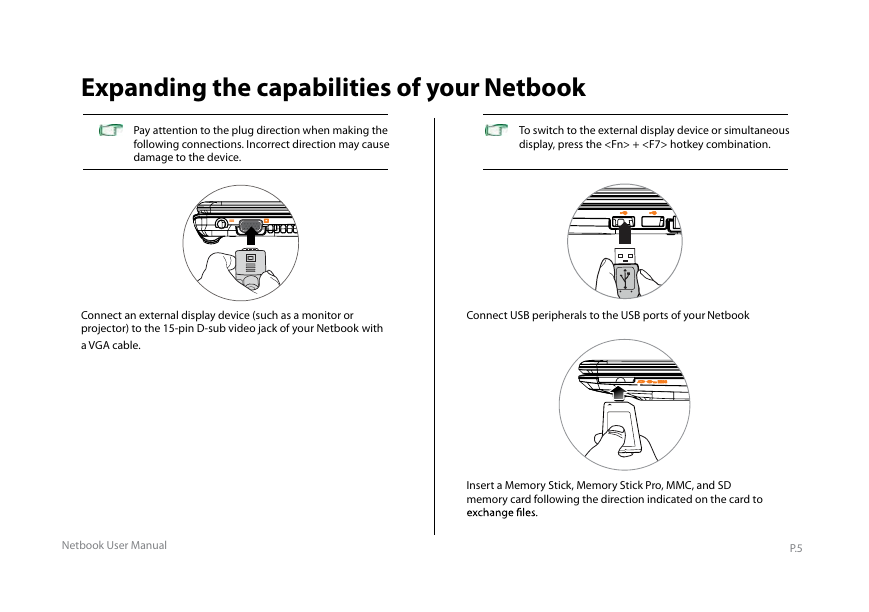
Expanding the capabilities of your Netbook Pay attention to the plug direction when making the following connections. Incorrect direction may cause damage to the device. To switch to the external display device or simultaneous display, press the + hotkey combination. Connect an external display device (such as a monitor or projector) to the 15-pin D-sub video jack of your Netbook a VGA cable. with Connect USB peripherals to the USB ports of your Netbook Netbook User Manual P.5 Insert a Memory Stick, Memory Stick Pro, MMC, and SD memory card following the direction indicated on the card to
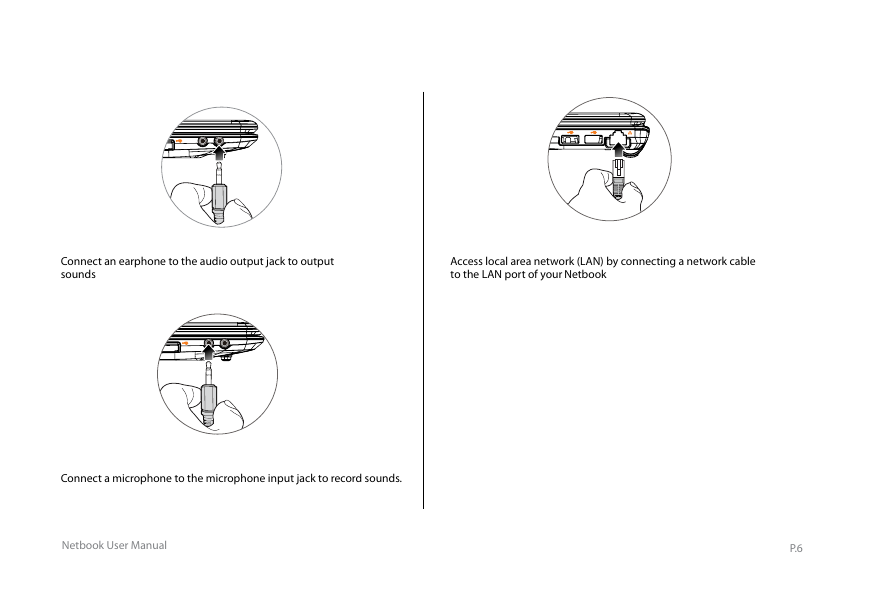
Connect an earphone to the audio output jack to output sounds Access local area network (LAN) by connecting a network cable to the LAN port of your Netbook Connect a microphone to the microphone input jack to record sounds. Netbook User Manual P.6
分享到:
收藏