logo资料库

柯达数码相机-Kodak EasyShare DX7630说明书.pdf

第1页 / 共67页
第2页 / 共67页
第3页 / 共67页
第4页 / 共67页
第5页 / 共67页
第6页 / 共67页
第7页 / 共67页
第8页 / 共67页
资料共67页,剩余部分请下载后查看
Kodak EasyShare DX7630 zoom digital camera
Product features
Table of contents
Getting started
Package contents
Installing the software first
Charging the battery
Inserting the battery
Important battery information
Kodak battery replacement types/battery life
Extending battery life
Battery safety and handling
Turning the camera on and off
Changing the camera screen in Auto mode
Setting the date and time
Setting the date & time, first time
Setting the date & time, anytime
Checking camera and picture status
Capture mode screen
Review screen
Storing pictures on an SD/MMC card
Taking pictures and videos
Taking a picture
Using the auto-focus framing marks
Taking a video
Reviewing the picture or video just taken
Using optical zoom
Using digital zoom
Camera modes
Scene modes
P, A, S, M, and C mode
Settings apply only in P, A, S, M, and C modes
Using the jog dial to change P, A, S, M, or C mode settings
Using the flash
Turning on the flash
Flash settings in each mode
Shooting close-up and landscape pictures
Close-up pictures
Landscape pictures
Using exposure bracketing
Using exposure compensation with exposure bracketing
Using burst
Changing picture-taking settings
Using setup to customize your camera
Pre-tagging for album names
First-on your computer
Second-on your camera
Third-transfer to your computer
Reviewing pictures and videos
Viewing single pictures and videos
Changing the camera screen
Viewing multiple pictures and videos
Playing a video
Deleting pictures and videos
Magnifying pictures
Changing optional review settings
Protecting pictures and videos from deletion
Tagging pictures/videos for albums
First-on your computer
Second-on your camera
Third-transfer to your Computer
Running a slide show
Starting the slide show
Changing the slide show display interval
Running a continuous slide show loop
Displaying pictures and videos on a television
Copying pictures and videos
Viewing picture/video information
Installing the software
Minimum system requirements
Install the software
Sharing pictures and videos
When can I tag my pictures and videos?
Tagging pictures for printing
Printing tagged pictures
Tagging pictures and videos for emailing
First-on your computer
Second-tag pictures/videos on your camera
Third-transfer and email
Tagging pictures as favorites
Optional settings
Removing all favorites from your camera
Preventing favorites from transferring to the camera
Printing and emailing favorites
Transferring and printing pictures
Transferring pictures/videos with the USB cable
Also available for transferring
Printing pictures from your computer
Ordering prints online
Printing from an optional SD/MMC card
Printing without a computer
Troubleshooting
Camera problems
Computer/connectivity problems
Picture quality problems
Camera ready light status
Getting help
Helpful links
Software help
Telephone customer support
Before you call
Appendix
Camera specifications
Tips, safety, maintenance
Storage capacities
Picture storage capacity - fine compression
Picture storage capacity - standard compression
Video storage capacity
Power-saving features
Upgrading your software and firmware
Regulatory compliance
FCC compliance and advisory
Canadian DOC statement
VCCI Class B ITE
MPEG-4
Index
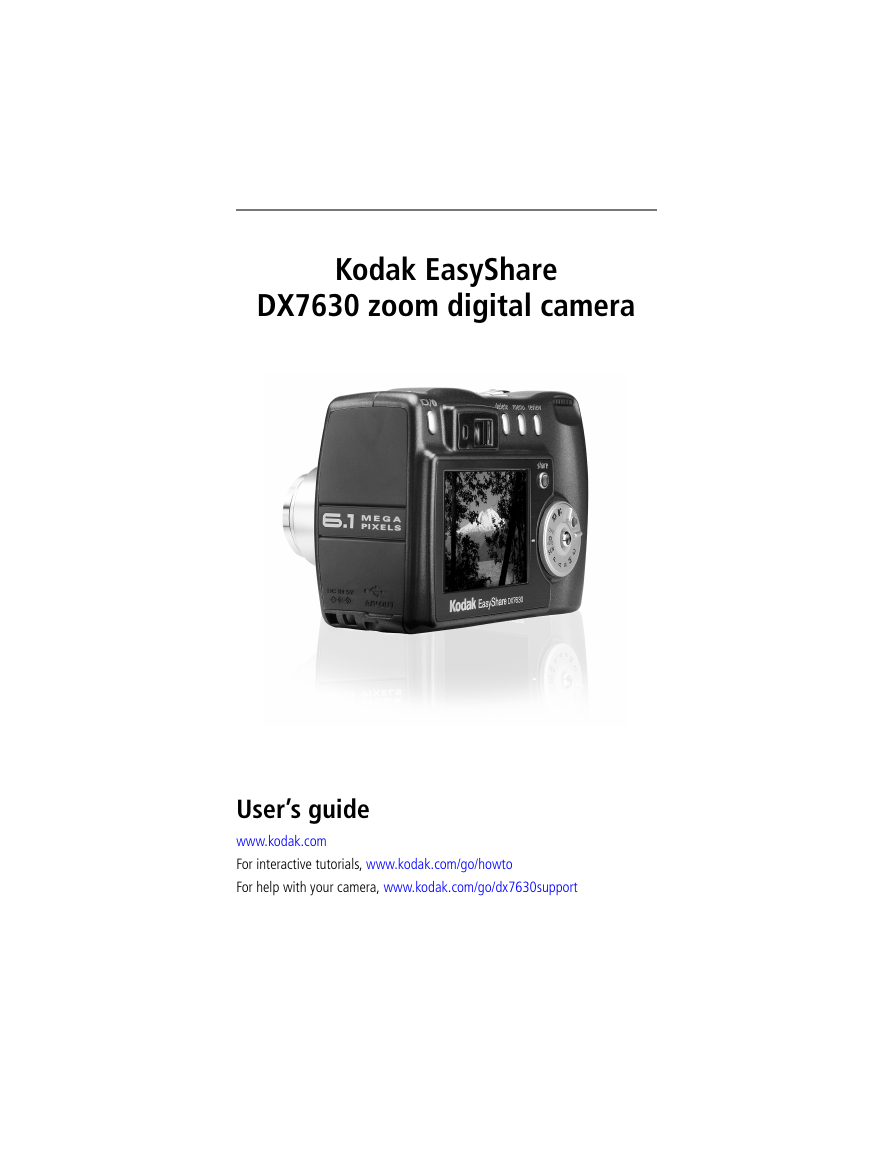
Kodak EasyShare DX7630 zoom digital camera User’s guide www.kodak.com For interactive tutorials, www.kodak.com/go/howto For help with your camera, www.kodak.com/go/dx7630support
Eastman Kodak Company 343 State Street Rochester, New York 14650 © Eastman Kodak Company, 2004 All screen images are simulated. Kodak and EasyShare are trademarks of Eastman Kodak Company. P/N 4J1082
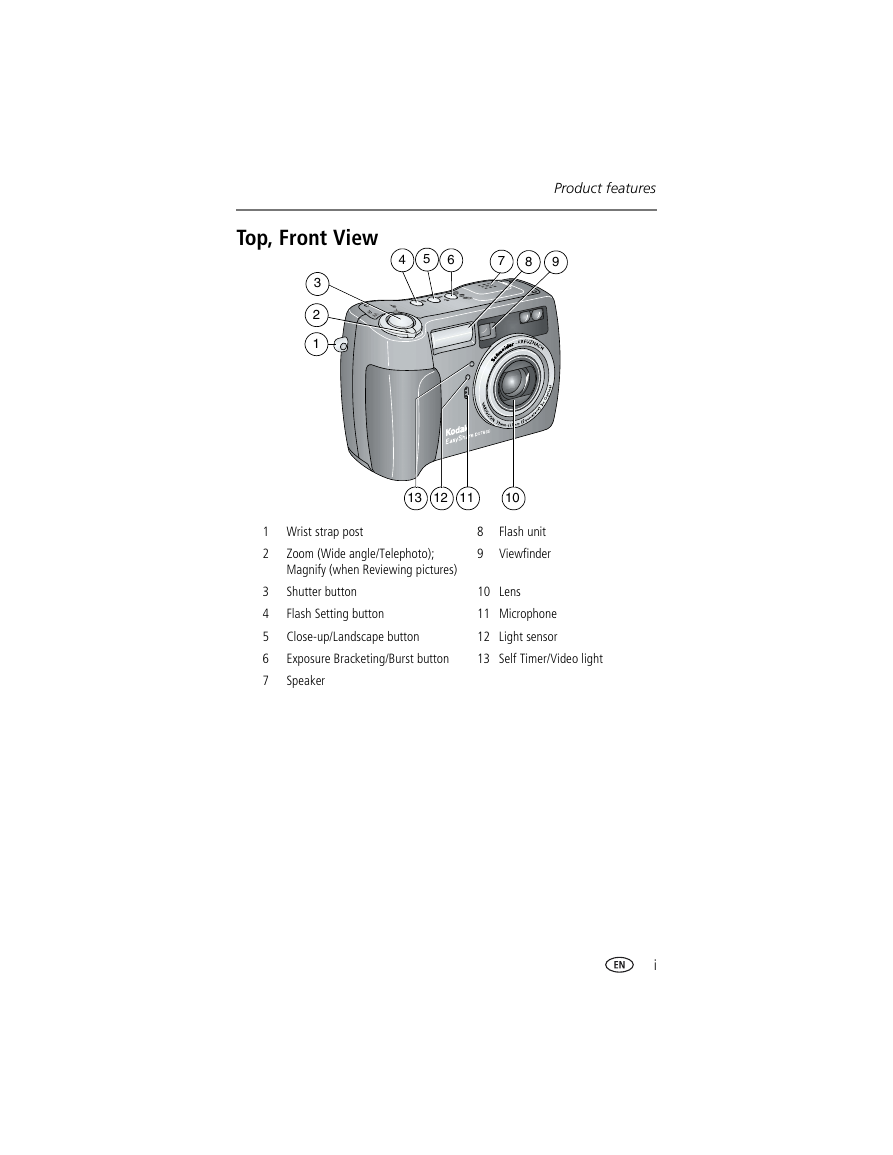
Product features Top, Front View 4 5 6 7 8 9 3 2 1 13 12 11 10 1 Wrist strap post 2 Zoom (Wide angle/Telephoto); Magnify (when Reviewing pictures) Shutter button Flash Setting button Close-up/Landscape button Exposure Bracketing/Burst button Speaker 3 4 5 6 7 8 9 Flash unit Viewfinder 10 Lens 11 Microphone 12 Light sensor 13 Self Timer/Video light i
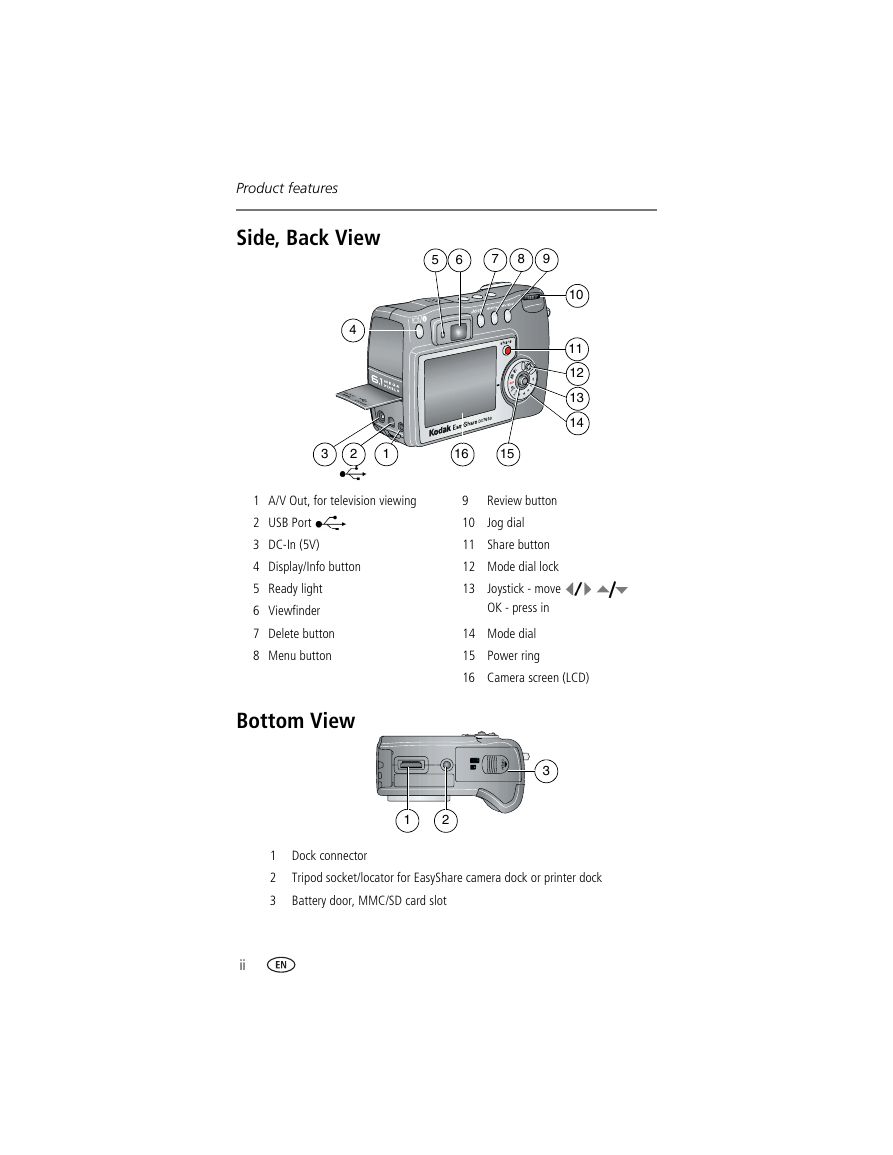
Product features Side, Back View 4 5 6 7 8 9 10 11 12 13 14 3 2 1 16 15 1 A/V Out, for television viewing 2 USB Port 3 DC-In (5V) 4 Display/Info button 5 Ready light 6 Viewfinder 7 Delete button 8 Menu button Bottom View Review button 9 10 Jog dial 11 Share button 12 Mode dial lock 13 Joystick - move OK - press in 14 Mode dial 15 Power ring 16 Camera screen (LCD) 3 1 2 1 2 3 Dock connector Tripod socket/locator for EasyShare camera dock or printer dock Battery door, MMC/SD card slot ii
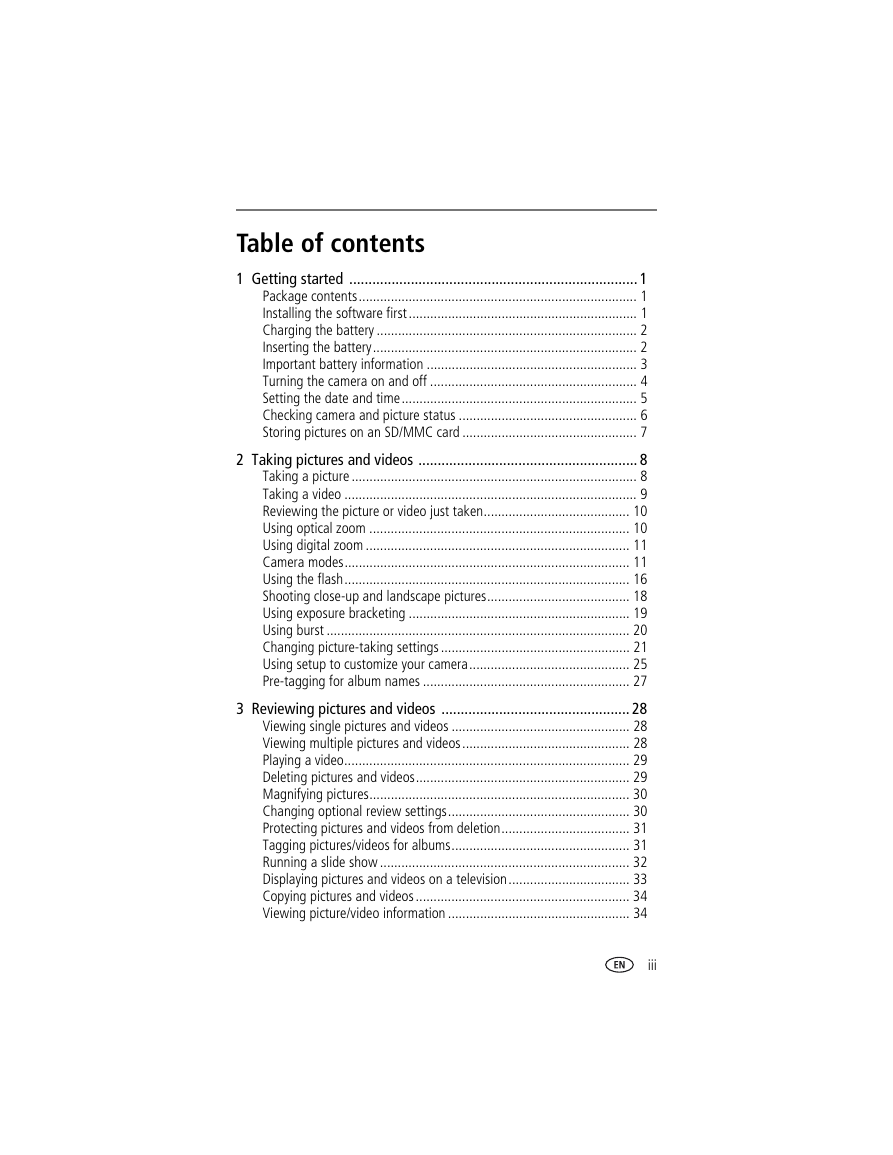
1 Table of contents 1 Getting started ........................................................................... 1 Package contents.............................................................................. 1 Installing the software first ................................................................ 1 Charging the battery ......................................................................... 2 Inserting the battery.......................................................................... 2 Important battery information ........................................................... 3 Turning the camera on and off .......................................................... 4 Setting the date and time.................................................................. 5 Checking camera and picture status .................................................. 6 Storing pictures on an SD/MMC card ................................................. 7 2 Taking pictures and videos ......................................................... 8 Taking a picture ................................................................................ 8 Taking a video .................................................................................. 9 Reviewing the picture or video just taken......................................... 10 Using optical zoom ......................................................................... 10 Using digital zoom .......................................................................... 11 Camera modes................................................................................ 11 Using the flash................................................................................ 16 Shooting close-up and landscape pictures........................................ 18 Using exposure bracketing .............................................................. 19 Using burst ..................................................................................... 20 Changing picture-taking settings ..................................................... 21 Using setup to customize your camera............................................. 25 Pre-tagging for album names .......................................................... 27 3 Reviewing pictures and videos ................................................. 28 Viewing single pictures and videos .................................................. 28 Viewing multiple pictures and videos............................................... 28 Playing a video................................................................................ 29 Deleting pictures and videos............................................................ 29 Magnifying pictures......................................................................... 30 Changing optional review settings................................................... 30 Protecting pictures and videos from deletion.................................... 31 Tagging pictures/videos for albums.................................................. 31 Running a slide show ...................................................................... 32 Displaying pictures and videos on a television.................................. 33 Copying pictures and videos............................................................ 34 Viewing picture/video information ................................................... 34 iii
4 Installing the software ............................................................. 35 Minimum system requirements ........................................................ 35 Install the software ......................................................................... 36 5 Sharing pictures and videos ..................................................... 37 When can I tag my pictures and videos? .......................................... 37 Tagging pictures for printing............................................................ 38 Tagging pictures and videos for emailing ......................................... 39 Tagging pictures as favorites ........................................................... 40 6 Transferring and printing pictures ............................................ 42 Transferring pictures/videos with the USB cable ............................... 42 Printing pictures from your computer ............................................... 43 Ordering prints online ..................................................................... 43 Printing from an optional SD/MMC card .......................................... 43 Printing without a computer............................................................ 43 7 Troubleshooting ....................................................................... 44 Camera problems............................................................................ 44 Computer/connectivity problems...................................................... 45 Picture quality problems .................................................................. 45 Camera ready light status................................................................ 46 8 Getting help ............................................................................. 48 Helpful links.................................................................................... 48 Software help.................................................................................. 48 Telephone customer support ........................................................... 48 9 Appendix .................................................................................. 50 Camera specifications ..................................................................... 50 Tips, safety, maintenance ................................................................ 53 Storage capacities ........................................................................... 53 Power-saving features..................................................................... 54 Upgrading your software and firmware............................................ 55 Regulatory compliance .................................................................... 55 iv
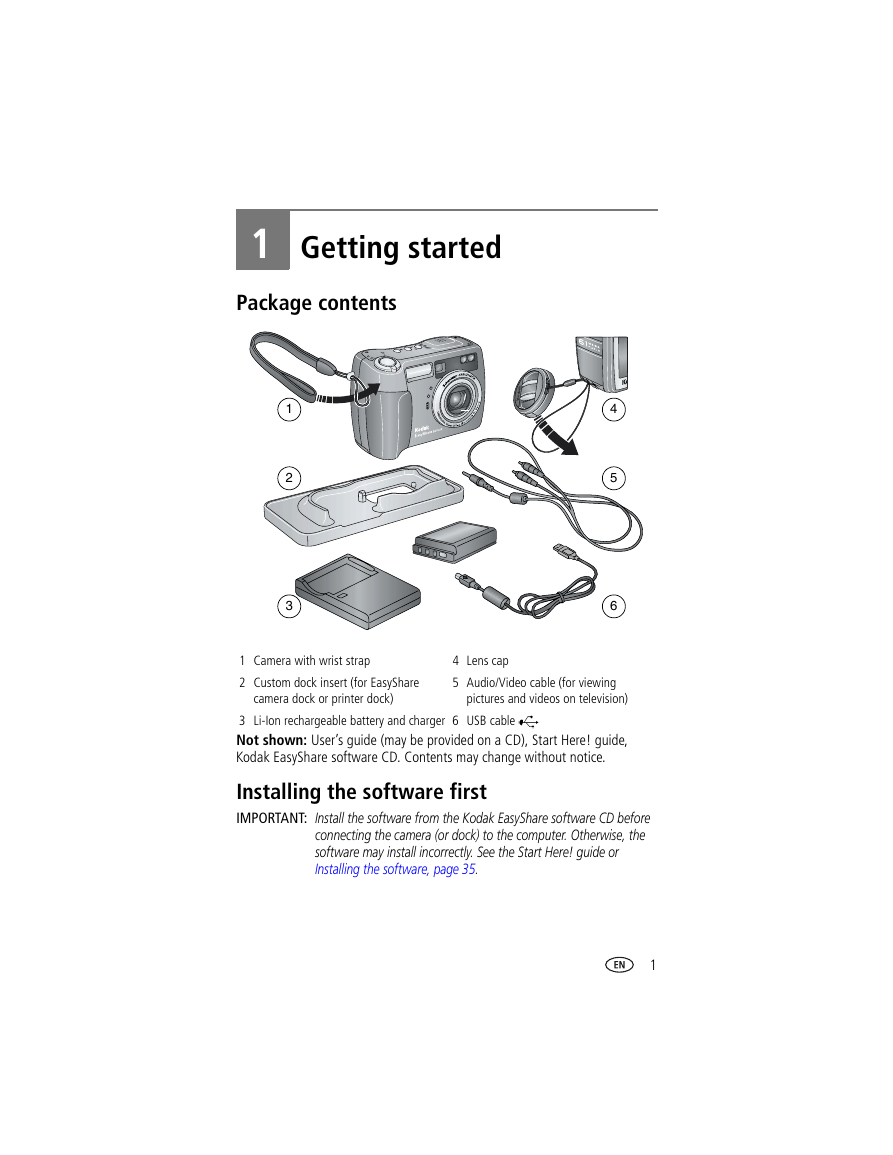
1 Getting started Package contents 1 2 3 4 5 6 1 Camera with wrist strap 2 Custom dock insert (for EasyShare camera dock or printer dock) 4 Lens cap 5 Audio/Video cable (for viewing pictures and videos on television) 3 Li-Ion rechargeable battery and charger 6 USB cable Not shown: User’s guide (may be provided on a CD), Start Here! guide, Kodak EasyShare software CD. Contents may change without notice. Installing the software first IMPORTANT: Install the software from the Kodak EasyShare software CD before connecting the camera (or dock) to the computer. Otherwise, the software may install incorrectly. See the Start Here! guide or Installing the software, page 35. 1
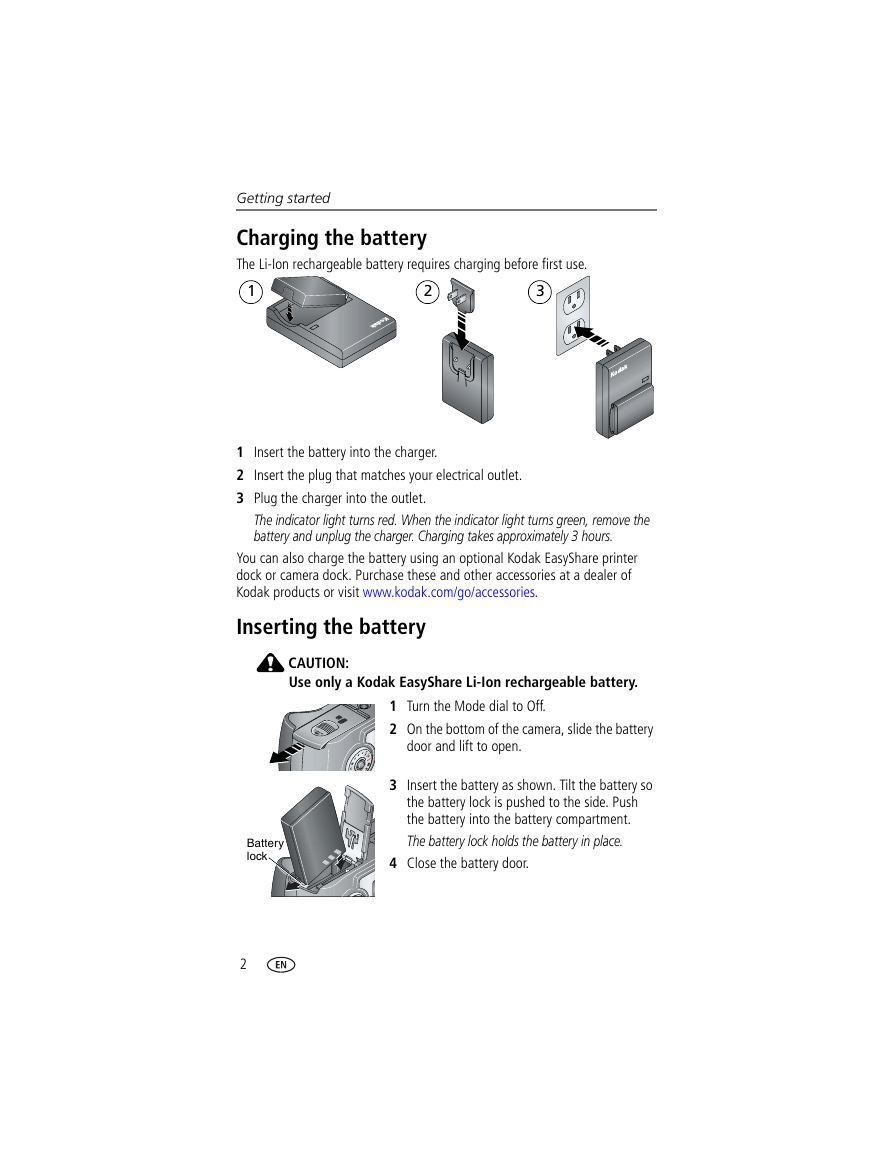
Getting started Charging the battery The Li-Ion rechargeable battery requires charging before first use. 1 2 3 1 Insert the battery into the charger. 2 Insert the plug that matches your electrical outlet. 3 Plug the charger into the outlet. The indicator light turns red. When the indicator light turns green, remove the battery and unplug the charger. Charging takes approximately 3 hours. You can also charge the battery using an optional Kodak EasyShare printer dock or camera dock. Purchase these and other accessories at a dealer of Kodak products or visit www.kodak.com/go/accessories. Inserting the battery CAUTION: Use only a Kodak EasyShare Li-Ion rechargeable battery. 1 Turn the Mode dial to Off. 2 On the bottom of the camera, slide the battery door and lift to open. 3 Insert the battery as shown. Tilt the battery so the battery lock is pushed to the side. Push the battery into the battery compartment. The battery lock holds the battery in place. 4 Close the battery door. Battery lock 2
分享到:
收藏