DCGAN-tensorflow 训练自己的数据集及报错集锦
训练自己的数据集及报错集锦
今天我们利用DC-GAN来做训练一下自己的数据集,想要看看其逼真效果如何,准备用它来做做数据增强的工作。下面我们具
今天我们利用
来做训练一下自己的数据集,想要看看其逼真效果如何,准备用它来做做数据增强的工作。下面我们具
体阐述一下步骤:
体阐述一下步骤:
1.准备好自己的数据集
准备好自己的数据集
通过github下载DCGAN-tensorflow的代码,送上链接:
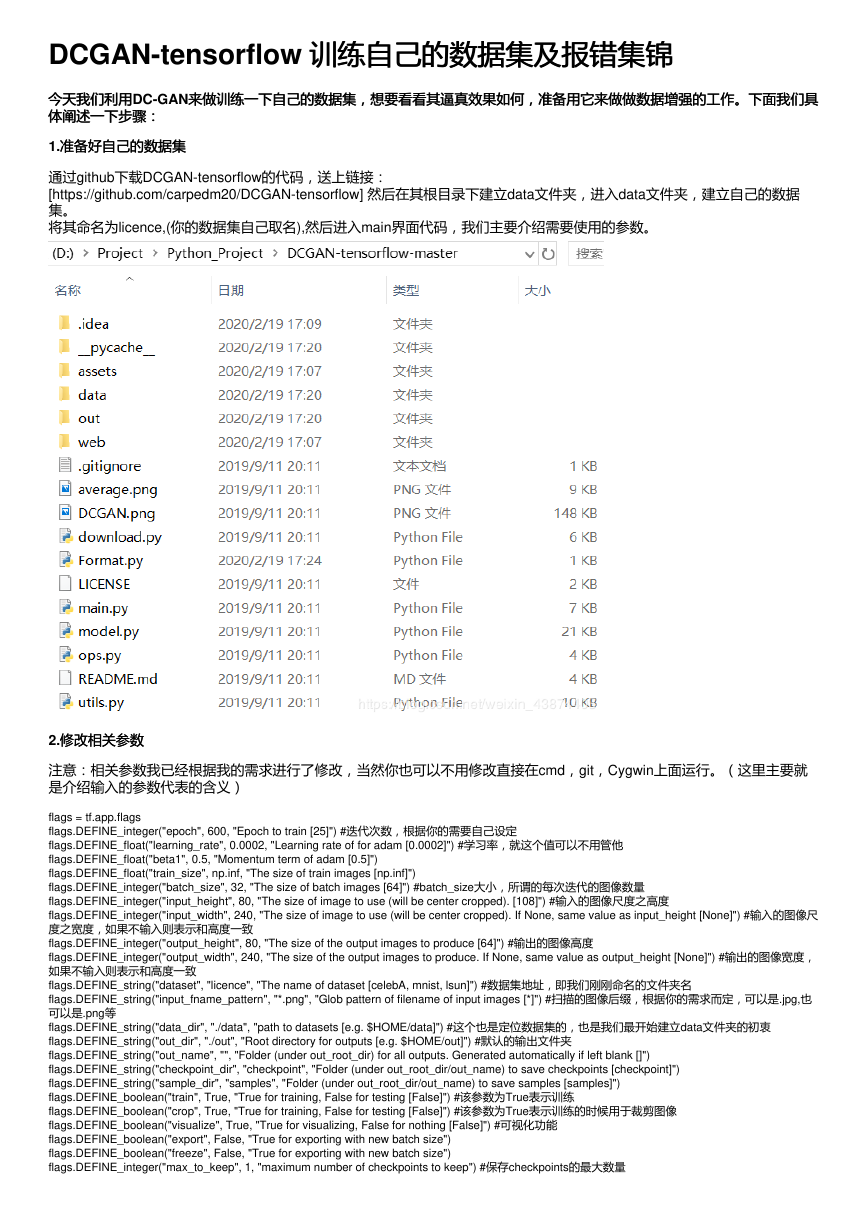
[https://github.com/carpedm20/DCGAN-tensorflow] 然后在其根目录下建立data文件夹,进入data文件夹,建立自己的数据
集。
将其命名为licence,(你的数据集自己取名),然后进入main界面代码,我们主要介绍需要使用的参数。
2.修改相关参数
修改相关参数
注意:相关参数我已经根据我的需求进行了修改,当然你也可以不用修改直接在cmd,git,Cygwin上面运行。(这里主要就
是介绍输入的参数代表的含义)
flags = tf.app.flags
flags.DEFINE_integer("epoch", 600, "Epoch to train [25]") #迭代次数,根据你的需要自己设定
flags.DEFINE_float("learning_rate", 0.0002, "Learning rate of for adam [0.0002]") #学习率,就这个值可以不用管他
flags.DEFINE_float("beta1", 0.5, "Momentum term of adam [0.5]")
flags.DEFINE_float("train_size", np.inf, "The size of train images [np.inf]")
flags.DEFINE_integer("batch_size", 32, "The size of batch images [64]") #batch_size大小,所谓的每次迭代的图像数量
flags.DEFINE_integer("input_height", 80, "The size of image to use (will be center cropped). [108]") #输入的图像尺度之高度
flags.DEFINE_integer("input_width", 240, "The size of image to use (will be center cropped). If None, same value as input_height [None]") #输入的图像尺
度之宽度,如果不输入则表示和高度一致
flags.DEFINE_integer("output_height", 80, "The size of the output images to produce [64]") #输出的图像高度
flags.DEFINE_integer("output_width", 240, "The size of the output images to produce. If None, same value as output_height [None]") #输出的图像宽度,
如果不输入则表示和高度一致
flags.DEFINE_string("dataset", "licence", "The name of dataset [celebA, mnist, lsun]") #数据集地址,即我们刚刚命名的文件夹名
flags.DEFINE_string("input_fname_pattern", "*.png", "Glob pattern of filename of input images [*]") #扫描的图像后缀,根据你的需求而定,可以是.jpg,也
可以是.png等
flags.DEFINE_string("data_dir", "./data", "path to datasets [e.g. $HOME/data]") #这个也是定位数据集的,也是我们最开始建立data文件夹的初衷
flags.DEFINE_string("out_dir", "./out", "Root directory for outputs [e.g. $HOME/out]") #默认的输出文件夹
flags.DEFINE_string("out_name", "", "Folder (under out_root_dir) for all outputs. Generated automatically if left blank []")
flags.DEFINE_string("checkpoint_dir", "checkpoint", "Folder (under out_root_dir/out_name) to save checkpoints [checkpoint]")
flags.DEFINE_string("sample_dir", "samples", "Folder (under out_root_dir/out_name) to save samples [samples]")
flags.DEFINE_boolean("train", True, "True for training, False for testing [False]") #该参数为True表示训练
flags.DEFINE_boolean("crop", True, "True for training, False for testing [False]") #该参数为True表示训练的时候用于裁剪图像
flags.DEFINE_boolean("visualize", True, "True for visualizing, False for nothing [False]") #可视化功能
flags.DEFINE_boolean("export", False, "True for exporting with new batch size")
flags.DEFINE_boolean("freeze", False, "True for exporting with new batch size")
flags.DEFINE_integer("max_to_keep", 1, "maximum number of checkpoints to keep") #保存checkpoints的最大数量
�
flags.DEFINE_integer("sample_freq", 100, "sample every this many iterations")
flags.DEFINE_integer("ckpt_freq", 100, "save checkpoint every this many iterations")
flags.DEFINE_integer("z_dim", 100, "dimensions of z")
flags.DEFINE_string("z_dist", "uniform_signed", "'normal01' or 'uniform_unsigned' or uniform_signed")
flags.DEFINE_boolean("G_img_sum", True, "Save generator image summaries in log")
#flags.DEFINE_integer("generate_test_images", 100, "Number of images to generate during test. [100]")
FLAGS = flags.FLAGS
3.进行训练
进行训练
前述:两种方式,一种方式就是我们上面修改了参数过后,在Pycharm或者或者VScode等上运行,这样便于进行相关内容的调
前述:两种方式,一种方式就是我们上面修改了参数过后,在
等上运行,这样便于进行相关内容的调
试。第二种就是直接在Git或者或者Cmd,Cygwin等上进行。
试。第二种就是直接在
等上进行。
在命令行运行时,输入:
python main.py --input_height 80 --input_width 240 --output_height 80 --output_width 240 --dataset licence --crop --train --epoch 600 --
input_fname_pattern "*.png"
在Pycharm运行就按照上面的操作修改参数然后进行运行
4.错误调试
错误调试
如果你遇到了错误,先进行调试。比如我遇到了这样一个错误:
…DCGAN-tensorflow-master/utils.py”, line 94, in center_crop im =
Image.fromarray(x[j:j+crop_h, i:i+crop_w]) File
“/Library/Frameworks/Python.framework/Versions/3.6/lib/python3.6/site-packages/PIL/Image.py”,
line 2517, in fromarray raise TypeError(“Cannot handle this data
type”) TypeError: Cannot handle this data type
对于这个错误经过调试发现出现的原因是在crop当中,可以参照此处修改
解决方法就是在utils.py中找到get_image()函数注释掉代码块
注释掉代码块
return transform(image, input_height, input_width,
resize_height, resize_width, crop)
改为
return image
重新运行即可。
后来发现还有一个隐藏的很深的错误
后来发现还有一个隐藏的很深的错误:训练很成功,但是却没有保存图片。
"one pic error!..."
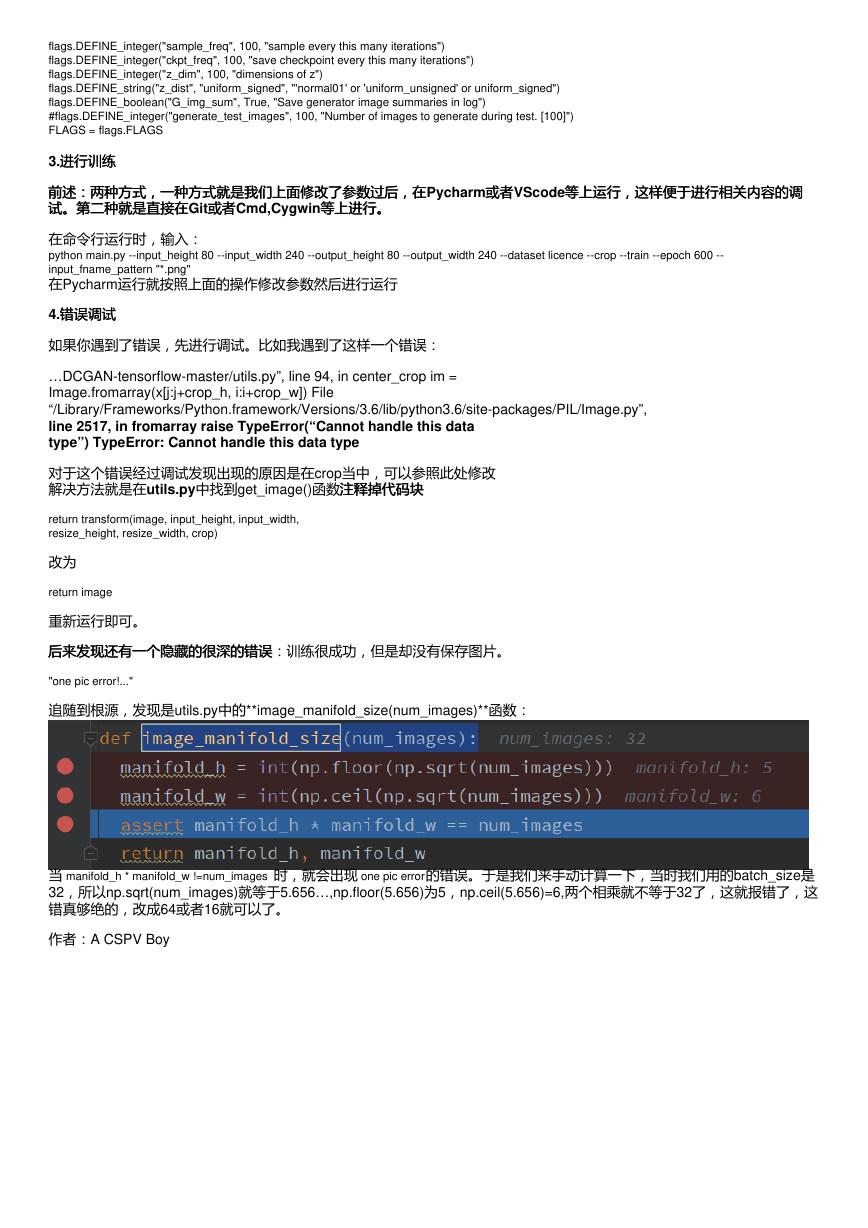
追随到根源,发现是utils.py中的**image_manifold_size(num_images)**函数:
当 manifold_h * manifold_w !=num_images 时,就会出现 one pic error的错误。于是我们来手动计算一下,当时我们用的batch_size是
32,所以np.sqrt(num_images)就等于5.656…,np.floor(5.656)为5,np.ceil(5.656)=6,两个相乘就不等于32了,这就报错了,这
错真够绝的,改成64或者16就可以了。
作者:A CSPV Boy
�


 2023年江西萍乡中考道德与法治真题及答案.doc
 2012年重庆南川中考生物真题及答案.doc
 2013年江西师范大学地理学综合及文艺理论基础考研真题.doc
 2020年四川甘孜小升初语文真题及答案I卷.doc
 2020年注册岩土工程师专业基础考试真题及答案.doc
 2023-2024学年福建省厦门市九年级上学期数学月考试题及答案.doc
 2021-2022学年辽宁省沈阳市大东区九年级上学期语文期末试题及答案.doc
 2022-2023学年北京东城区初三第一学期物理期末试卷及答案.doc
 2018上半年江西教师资格初中地理学科知识与教学能力真题及答案.doc
 2012年河北国家公务员申论考试真题及答案-省级.doc
 2020-2021学年江苏省扬州市江都区邵樊片九年级上学期数学第一次质量检测试题及答案.doc
 2022下半年黑龙江教师资格证中学综合素质真题及答案.doc