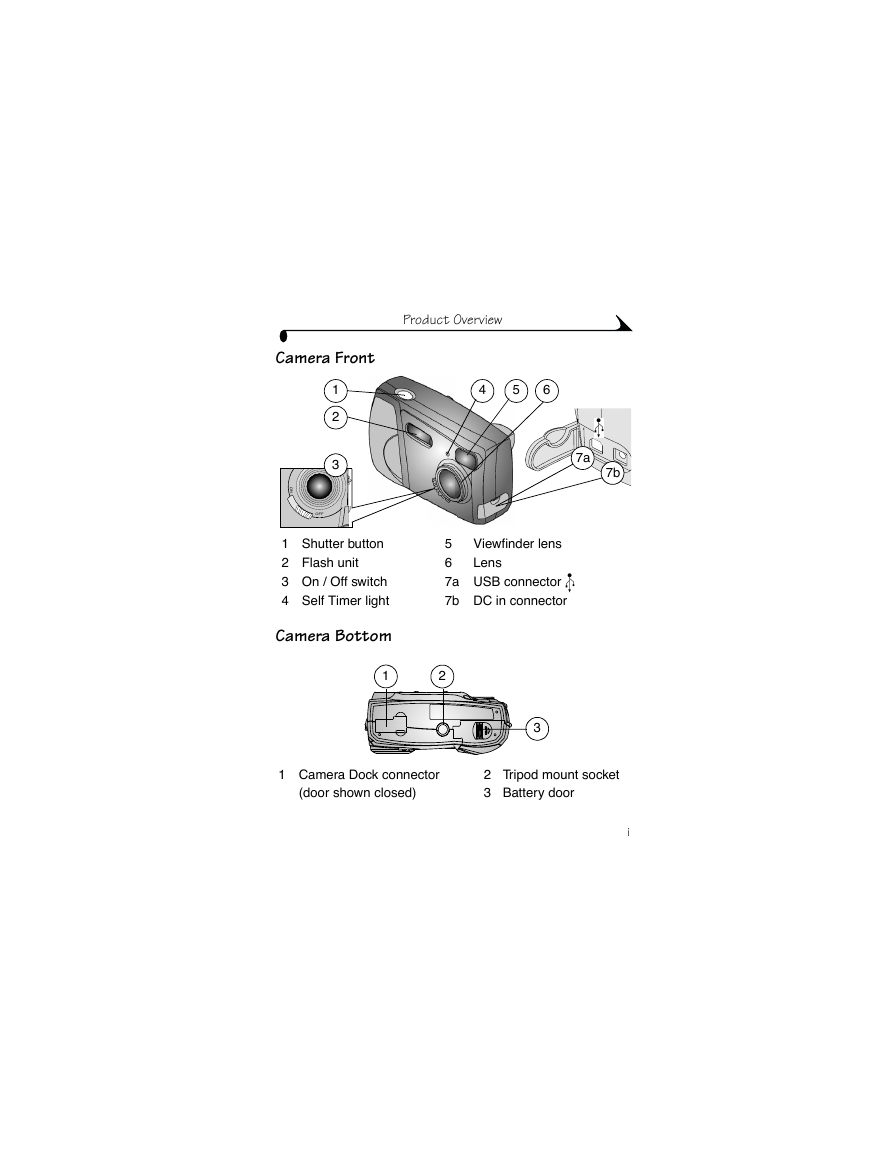
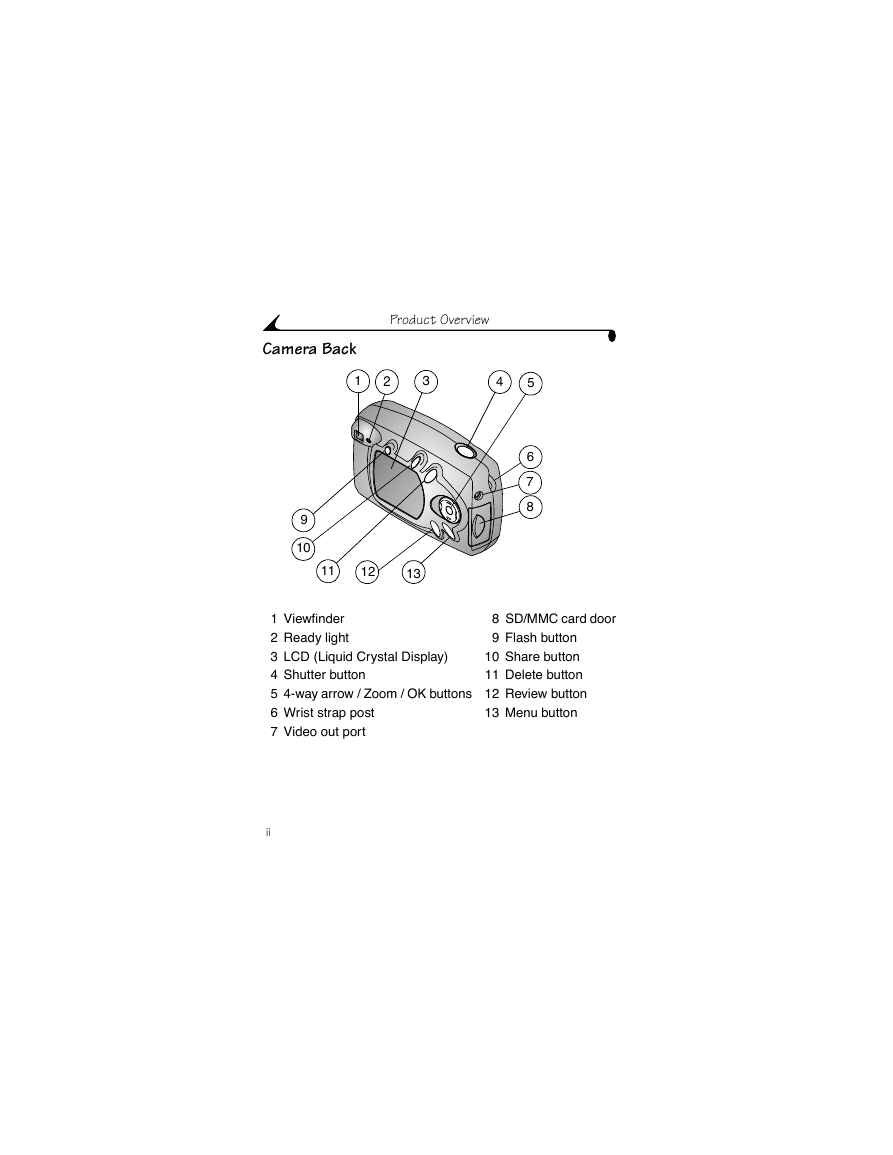
Product Overviews
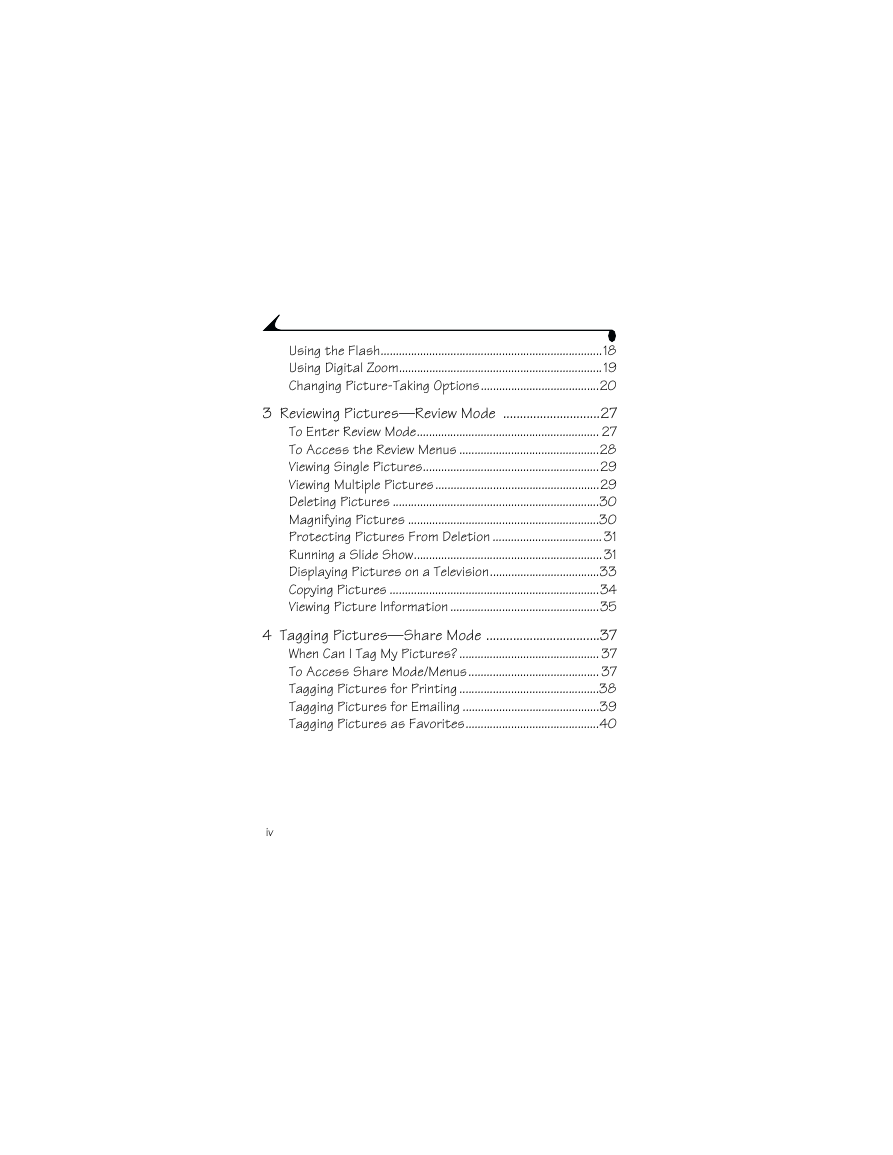
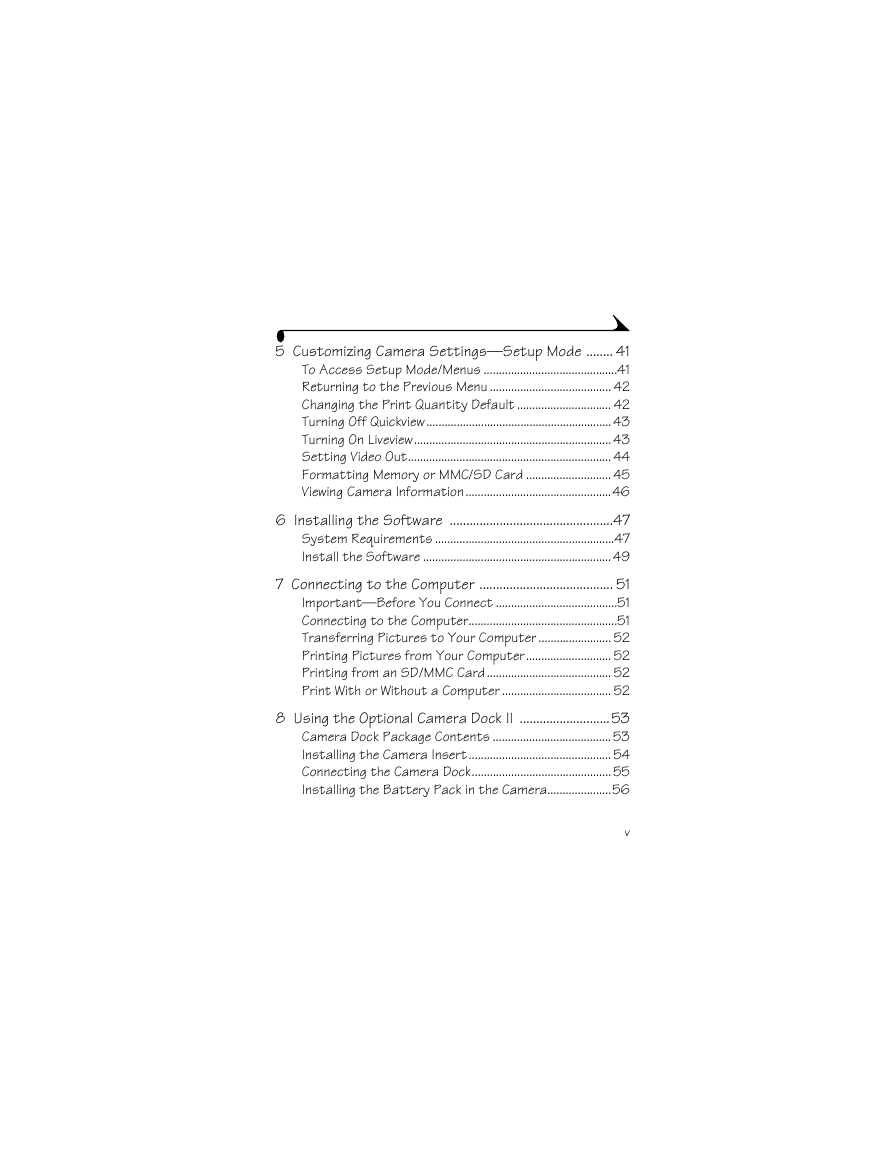
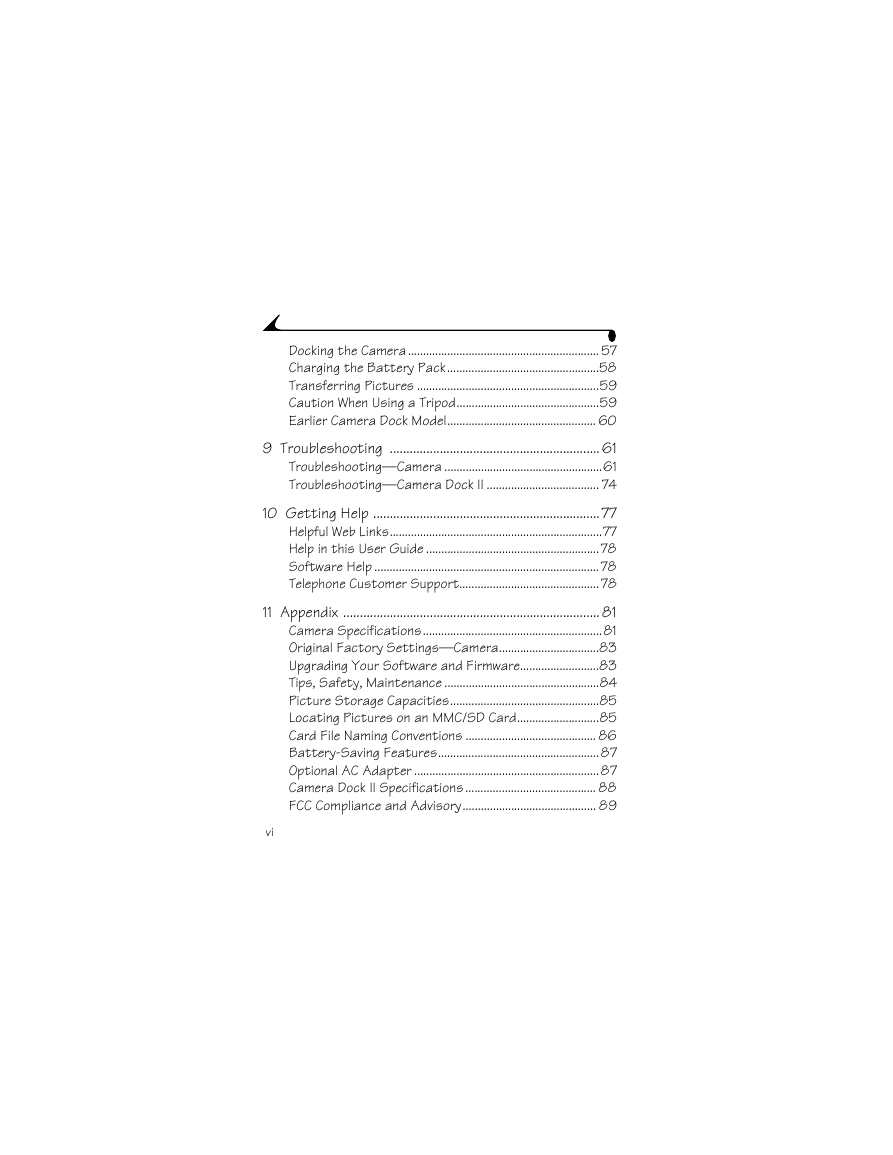
Table of Contents
1 Getting Started
Install the Software First
Need This Guide in Large Print?
Camera Package Contents
Attaching the Wrist Strap
Attaching the Lens Cap
Loading the Batteries
Turning the Camera On and Off
Using the 4-Way Arrow/Zoom/OK Button
Selecting a Language
Setting the Clock
Checking Camera Status
Camera Status Icons
Battery Status
Inserting an SD/MMC Card
Choosing Internal Memory or SD/MMC Card
Changing Your Storage Location Setting
Camera Modes
Important Battery Information
Battery Replacement Types/Battery Life
Extending Battery Life
Battery Safety and Handling
2 Taking Pictures—Capture Mode
Take a Picture Anytime
Taking a Picture
Liveview—Using the LCD to Frame Your Subject
Quickview—Reviewing the Picture Just Taken
Using the Flash
Using Digital Zoom
Changing Picture-Taking Options
To Return to Capture From Another Mode
To Access the Capture Menu
Taking Close-up Pictures
Putting Yourself in the Picture
Setting Exposure Compensation
Setting Picture Quality
Placing the Date on Pictures
Setting the Orientation Sensor
3 Reviewing Pictures—Review Mode
To Enter Review Mode
Picture Information Icons
To Access the Review Menus
Viewing Single Pictures
Viewing Multiple Pictures
Viewing Multiple Pictures—Review Menu
Deleting Pictures
Magnifying Pictures
Protecting Pictures From Deletion
Running a Slide Show
Starting the Slide Show
Changing the Display Interval
Turning On Loop
Displaying Pictures on a Television
Copying Pictures
Viewing Picture Information
4 Tagging Pictures—Share Mode
When Can I Tag My Pictures?
To Access Share Mode/Menus
Tagging Pictures for Printing
Printing Tagged Pictures
Tagging Pictures for Emailing
Emailing Tagged Pictures
Tagging Pictures as Favorites
Using Favorites on Your Computer
5 Customizing Camera Settings—Setup Mode
To Access Setup Mode/Menus
Returning to the Previous Menu
Changing the Print Quantity Default
Turning Off Quickview
Turning On Liveview
Setting Video Out
Formatting Memory or MMC/SD Card
Viewing Camera Information
6 Installing the Software
System Requirements
Windows system requirements
Mac OS X system requirements
Mac OS 8.6 and 9.x system requirements
Install the Software
7 Connecting to the Computer
Important—Before You Connect
Connecting to the Computer
Transferring Pictures With the USB Cable
Transferring Pictures to Your Computer
Printing Pictures from Your Computer
Printing from an SD/MMC Card
Print With or Without a Computer
8 Using the Optional Camera Dock II
Camera Dock Package Contents
Installing the Camera Insert
If You Do Not Have the Custom Insert
Connecting the Camera Dock
Installing the Battery Pack in the Camera
Docking the Camera
Charging the Battery Pack
Transferring Pictures
Caution When Using a Tripod
Earlier Camera Dock Model
9 Troubleshooting
Troubleshooting—Camera
Camera Problems
Camera/Computer Communications
SD/MMC Cards
Camera LCD Messages
Camera Ready Light Status
Troubleshooting—Camera Dock II
Camera Dock II Problems
Camera Dock II Light Status
10 Getting Help
Helpful Web Links
Help in this User Guide
Software Help
Telephone Customer Support
Before You Call
Telephone Numbers
11 Appendix
Camera Specifications
Original Factory Settings—Camera
Upgrading Your Software and Firmware
Tips, Safety, Maintenance
Picture Storage Capacities
Locating Pictures on an MMC/SD Card
Card File Naming Conventions
Battery-Saving Features
Optional AC Adapter
Camera Dock II Specifications
FCC Compliance and Advisory
Canadian DOC Statement
Index



 2023年江西萍乡中考道德与法治真题及答案.doc
 2012年重庆南川中考生物真题及答案.doc
 2013年江西师范大学地理学综合及文艺理论基础考研真题.doc
 2020年四川甘孜小升初语文真题及答案I卷.doc
 2020年注册岩土工程师专业基础考试真题及答案.doc
 2023-2024学年福建省厦门市九年级上学期数学月考试题及答案.doc
 2021-2022学年辽宁省沈阳市大东区九年级上学期语文期末试题及答案.doc
 2022-2023学年北京东城区初三第一学期物理期末试卷及答案.doc
 2018上半年江西教师资格初中地理学科知识与教学能力真题及答案.doc
 2012年河北国家公务员申论考试真题及答案-省级.doc
 2020-2021学年江苏省扬州市江都区邵樊片九年级上学期数学第一次质量检测试题及答案.doc
 2022下半年黑龙江教师资格证中学综合素质真题及答案.doc