logo资料库

松下数码摄像机-AG-DVC15说明书.pdf

第1页 / 共96页
第2页 / 共96页
第3页 / 共96页
第4页 / 共96页
第5页 / 共96页
第6页 / 共96页
第7页 / 共96页
第8页 / 共96页
资料共96页,剩余部分请下载后查看
TABLE OF CONTENTS
BEFORE RECORDING
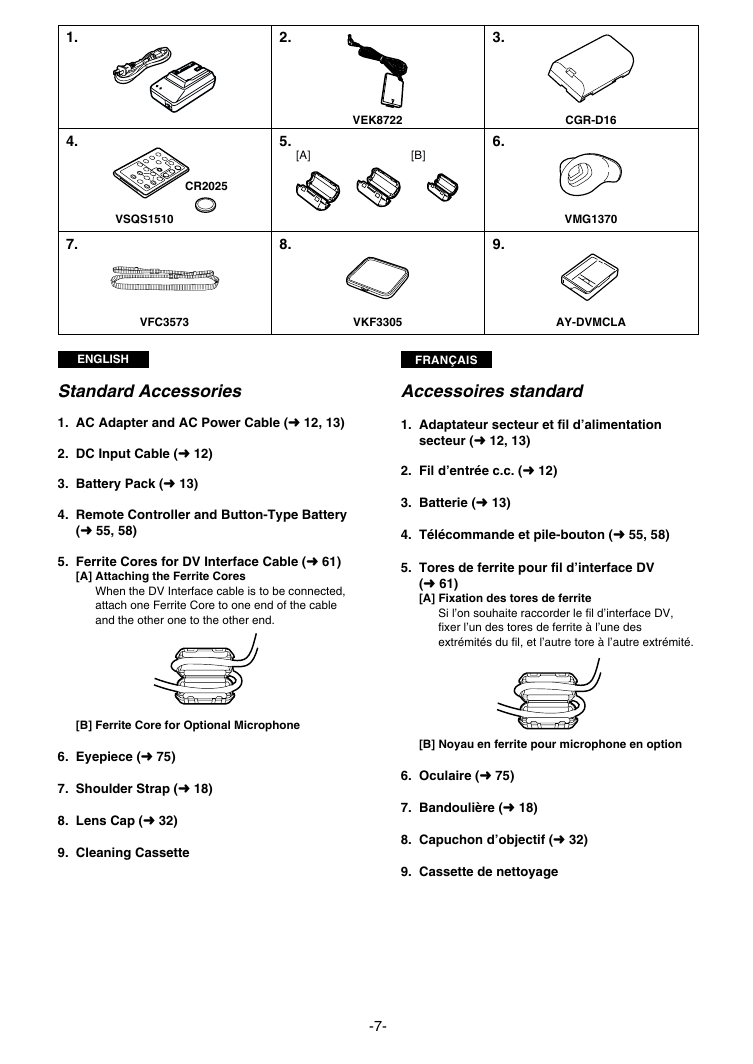
STANDARD ACCESSORIES
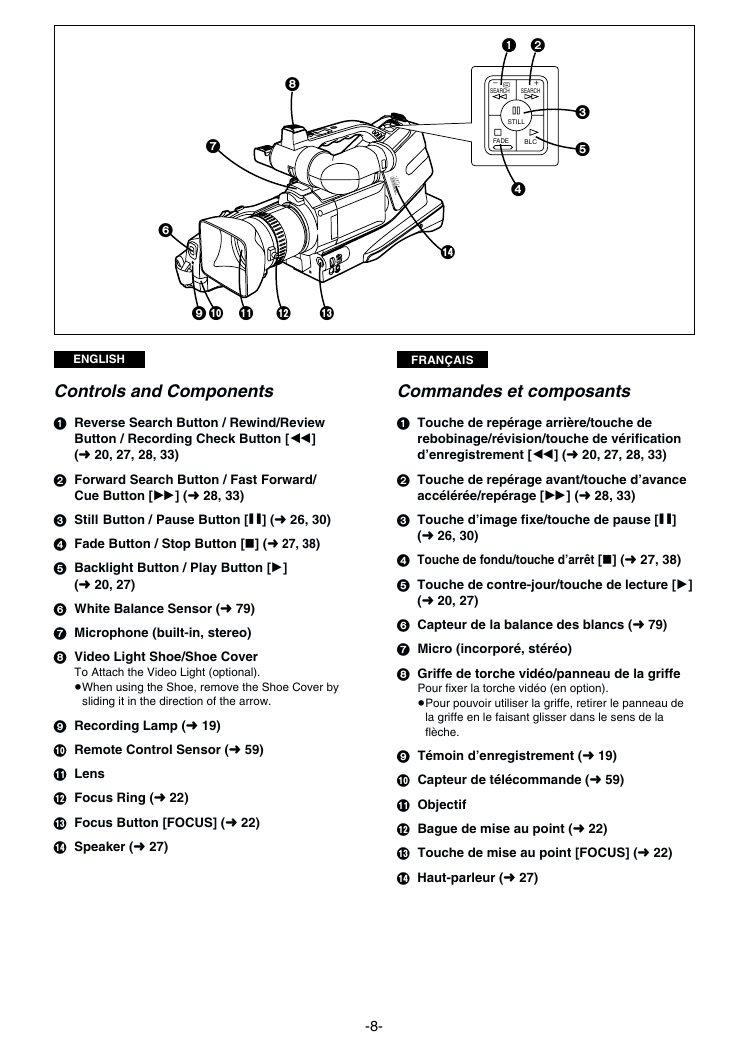
CONTROLS AND COMPONENTS
THE 2 TYPES OF POWER SUPPLIES
INSERTING THE CASSETTE
USING THE FINDER
USING THE LCD MONITOR
ADJUSTING THE GRIP BELT
ATTACHING THE SHOULDER STRAP
BASIC OPERATIONS
RECORDING
CHECKING IF THE PICTURE IS RECORDED (RECORDING CHECK)
RECORDING BACKLIT SCENES (BACKLIGHT COMPENSATION)
RECORDING YOURSELF (RECORDING WITH THE LCD MONITOR FACING FORWARD)
MANUALLY FOCUSING ON THE SUBJECT (MANUAL FOCUS)
ENLARGING YOUR SUBJECT OF WIDENING THE RECORDING ANGLE (ZOOMING IN/OUT)
USING THE CAMERA RECORDER AS A DIGITAL STILL CAMERA (PHOTOSHOT)
RECORDING IN THE WIDE MODE (WIDE MODE)
RECORDING WITH MINIMISED CAMERA SKAKE (DIGITAL IMAGE STABILIZER)
RECORDING STILL PICTURES
VIEWING THE JUST RECORDED SCENES ON THE CAMERA RECORDER (PLAYBACK)
SEARCHING FOR A SCENE YOU WANT TO PLAY BACK
PLAYING BACK IN SLOW MOTION (SLOW MOTION PLAYBACK)
PLAYING BACK STILL PICTURES AND ADVANCING THEM ONE BY ONE (STILL PLAYBACK/STILL ADVANCED PLAYBACK)
PLAYING BACK ON A TV
AFTER USE
ADVANCED OPERATIONS
VIEWING RECORDED SCENES DURING RECORDING PAUSE (CAMERA SEARCH)
SEARCHING FOR THE END OF THE RECORDED PART ON A CASSETTE (BLANK SEARCH)
SEARCHING FOR THE BEGINNING OF RECORDED SCENES MARKED WITH INDEX SIGNAL (INDEX SEARCH)
FADING IN/OUT
RECORDING IN VARIOUS SITUATIONS (PROGRAM AE)
RECORDING WITH SPECIAL FUNCTIONS (DIGITAL FUNCTIONS)
RECORDING WITH NATURAL COLORS (WHITE BALANCE)
ADJUSTING THE WHITE BALANCE MANUALLY
ADJUSTING THE SHUTTER SPEED MANUALLY
ADJUSTING THE IRIS (F NUMBER) MANUALLY
RECORDING WITH FIXED BRIGHTNESS (AE LOCK)
OTHER CONVENIENT FUNCTIONS
ADDING NEW SOUND ON A RECORDED CASSETTE (AUDIO DUBBING)
REMOTE CONTROLLER
EDITING
COPYING ONTO A S-VHS (OR VHS) CASSETTE (DUBBING)
USING WITH DIGITAL VIDEO EQUIPMENT (RECORDING)
NOTES, OTHERS
ND FILTER
USING THE MENU SCREEN
MENU FUNCTIONS
SETTING THE DATE AND TIME
ADJUSTING THE LCD MONITOR
CAUTIONS FOR USE
GLOSSARY
INDICATIONS ON THE LCD MONITOR/IN THE FINDER
BEFORE REQUESTING SERVICE (PROBLEMS & SOLUTIONS)
SPECIFICATIONS
TABLE DES MATIERES
AVANT L'ENREGISTREMENT
ACCESSORIES STANDARD
COMMANDES ET COMPOSANTS
LES DEUX TYPES D'ALIMENTATION
INSERTION DE LA CASSETTE
UTILISATION DU VISEUR
UTILISATION DU MONITEUR LCD
REGLAGE DE LA COURROIE DE POIGNEE
FIXATION DE LA BANDOULIERE
OPERATIONS DE BASE
ENREGISTREMENT
VERIFICATION DU BON DEROULEMENT DE L'ENREGISTREMENT (VERIFICATION D'ENREGISTREMENT)
ENREGISTREMENT DE SEQUENCES A CONTRE-JOUR (COMPENSATION DE CONTRE-JOUR)
ENREGISTREMENT DE SOI-MEME (ENREGISTREMENT AVEC LE MONITEUR LCD ORIENTE VERS L'AVANT
MISE AU POINT MANUELLE SURE LE SUJET (MISE AU POINT MANUELLE)
AGRANDISSEMENT DU SUJET OU ELARGISSEMENT DE L'ANGLE D'ENREGISTREMENT (RAPPROCHEMENT/ELOIGNEMENT AU ZOOM)
UTILISATION DU CAMESCOPE COMME APPAREIL PHOTO NUMERIQUE (INSTANTANE)
ENREGISTREMENT EN MODE GRAND ECRAN (MODE GRAND ECRAN)
ENREGISTREMENT AVEC LE MOINS DE TREMBLEMENT POSSIBLE (STABILISATEUR ELECTRONIQUE DE L'IMAGE)
ENREGISTREMENT D'IMAGES FIXES
VISIONNEMENT SUR LE CAMESCOPE DES SEQUENCES QUE L'ON VIENT D'ENREGISTRER (LECTURE)
REPERAGE D'UNE SEQUENCE QUE L'ON DESIRE VISIONNER
LECTURE AU RALENTI
LECTURE D'IMAGES FIXES ET D'IMAGES AVANCEES UNE PAR UNE (LECTURE D'IMAGES FIXES/IMAGE PAR IMAGE)
LECTURE SUR UN TELEVISEUR
APRES L'UTILISATION
OPERATIONS PLUS POUSSEES
VISIONNEMENT DE SEQUENCES ENREGISTREES PENDANT LA PAUSE D'ENREGISTREMENT (REPERAGE CAMESCOPE)
REPERAGE DE LA FIN D'UNE PARTIE ENREGISTREE SUR UNE CASSETTE (REPERAGE D'ESPACE VIERGE)
REPERAGE DU DEBUT D'ENREGISTREMENTS MARQUES D'UN SIGNAL D'INDEX (REPERAGE D'INDEX)
OUVERTURE/FERMETURE EN FONDU
ENREGISTREMENT EN DIVERSES SITUATIONS (PROGRAMME AE)
ENREGISTREMENT AVEC FONCTIONS SPECIALES (FONCTIONS NUMERIQUES)
ENREGISTREMENT AUX COULEURS NATURELLES (BALANCE DES BLANCS)
REGLAGE MANUEL DE LA BALANCE DES BLANCS
REGLAGE MANUEL DE LA VITESSE D'OBTURATEUR
REGLAGE MANUEL DU DIAPHRAGME
ENREGISTREMENT AVEC LUMINOSITE FIXE (FONCTION VERROUILLAGE AE)
AUTRES FONCTIONS UTILES
AJOUT DE NOUVEAUX SONS SUR UNE CASSETTE ENREGISTREE (REPIQUAGE SONORE)
TELECOMMANDE
MONTAGE
COPIE SUR UNE CASSETTE S-VHS (OU VHS) (REPIQUAGE)
UTILISATION AVEC DES APPAREILS VIDEO NUMERIQUES (ENREGISTREMENT)
REMARQUES, DIVERS
FILTRE ND
UTILISATION DE L'ECRAN DE MENU
FONCTIONS DES MENUS
REGLAGE DE LA DATE ET DE L'HEURE
REGLAGE DE MONITEUR LCD
PRECAUTIONS D'UTILISATION
GLOSSAIRE
Untitled
INDICATIONS SUR LE MONITEUR LCD/DANS LE VISEUR
AVANT DE FAIRE APPEL A UN TECHNICIEN (PROBLEMES & SOLUTIONS)
DONNEES TECHNIQUES
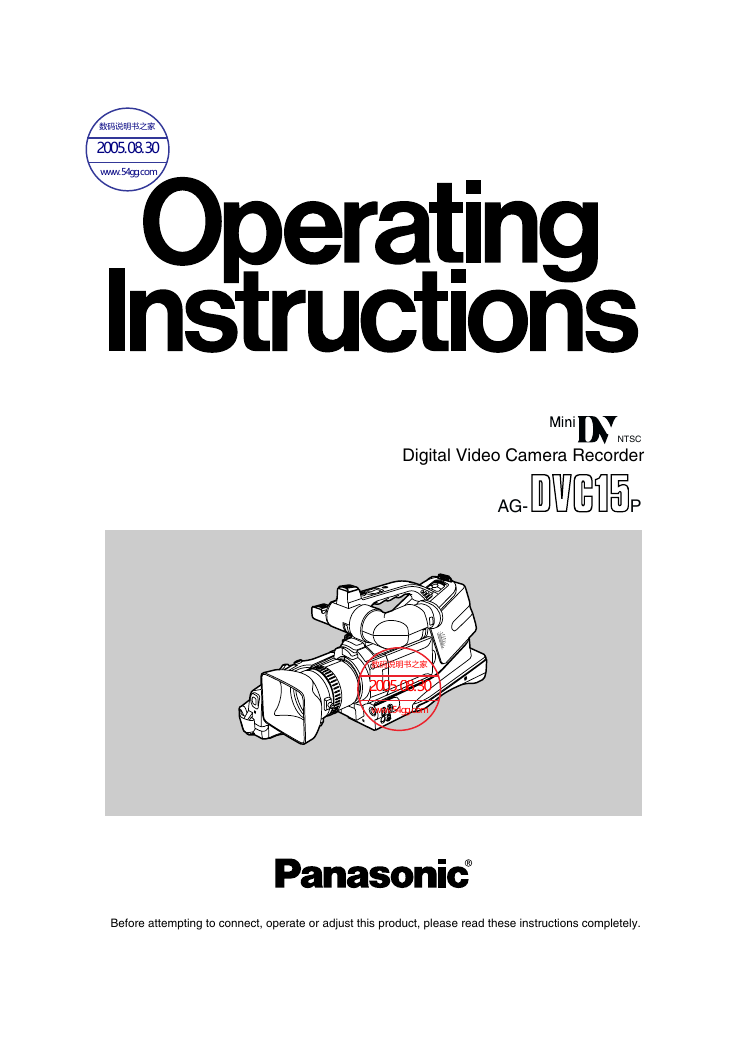
NTSC Digital Video Camera Recorder AG- P Before attempting to connect, operate or adjust this product, please read these instructions completely.
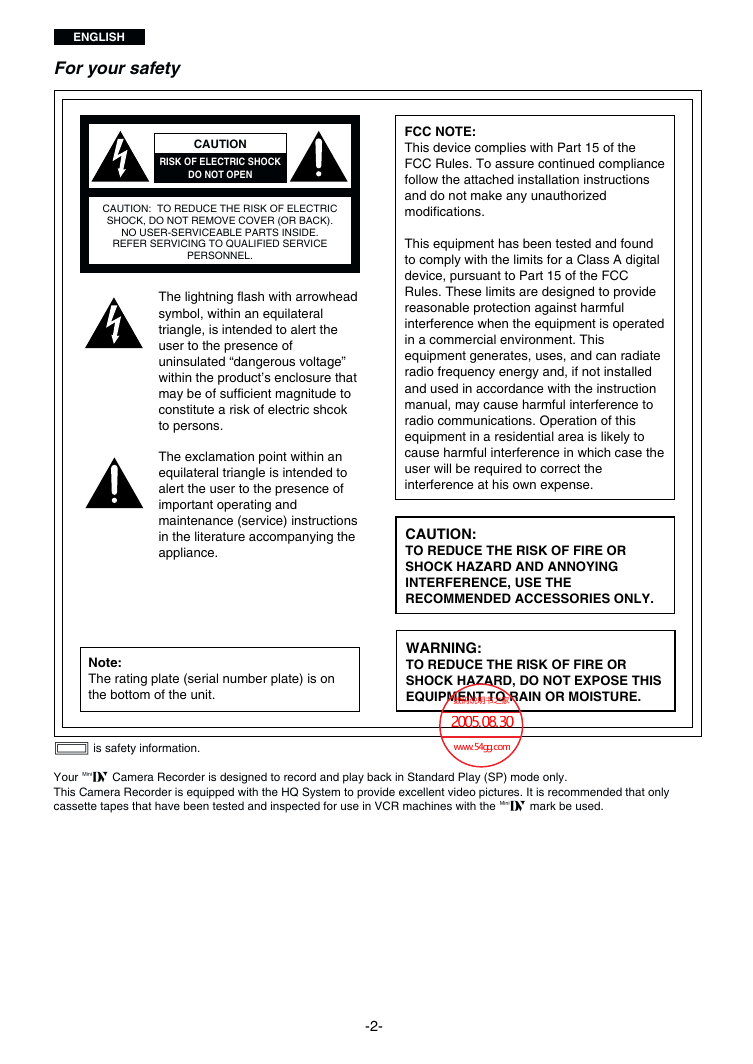
ENGLISH For your safety CAUTION RISK OF ELECTRIC SHOCK DO NOT OPEN CAUTION: TO REDUCE THE RISK OF ELECTRIC SHOCK, DO NOT REMOVE COVER (OR BACK). NO USER-SERVICEABLE PARTS INSIDE. REFER SERVICING TO QUALIFIED SERVICE PERSONNEL. The lightning flash with arrowhead symbol, within an equilateral triangle, is intended to alert the user to the presence of uninsulated “dangerous voltage” within the product’s enclosure that may be of sufficient magnitude to constitute a risk of electric shcok to persons. The exclamation point within an equilateral triangle is intended to alert the user to the presence of important operating and maintenance (service) instructions in the literature accompanying the appliance. FCC NOTE: This device complies with Part 15 of the FCC Rules. To assure continued compliance follow the attached installation instructions and do not make any unauthorized modifications. This equipment has been tested and found to comply with the limits for a Class A digital device, pursuant to Part 15 of the FCC Rules. These limits are designed to provide reasonable protection against harmful interference when the equipment is operated in a commercial environment. This equipment generates, uses, and can radiate radio frequency energy and, if not installed and used in accordance with the instruction manual, may cause harmful interference to radio communications. Operation of this equipment in a residential area is likely to cause harmful interference in which case the user will be required to correct the interference at his own expense. CAUTION: TO REDUCE THE RISK OF FIRE OR SHOCK HAZARD AND ANNOYING INTERFERENCE, USE THE RECOMMENDED ACCESSORIES ONLY. Note: The rating plate (serial number plate) is on the bottom of the unit. WARNING: TO REDUCE THE RISK OF FIRE OR SHOCK HAZARD, DO NOT EXPOSE THIS EQUIPMENT TO RAIN OR MOISTURE. 1 is safety information. Your Ò Camera Recorder is designed to record and play back in Standard Play (SP) mode only. This Camera Recorder is equipped with the HQ System to provide excellent video pictures. It is recommended that only cassette tapes that have been tested and inspected for use in VCR machines with the Ò mark be used. -2-
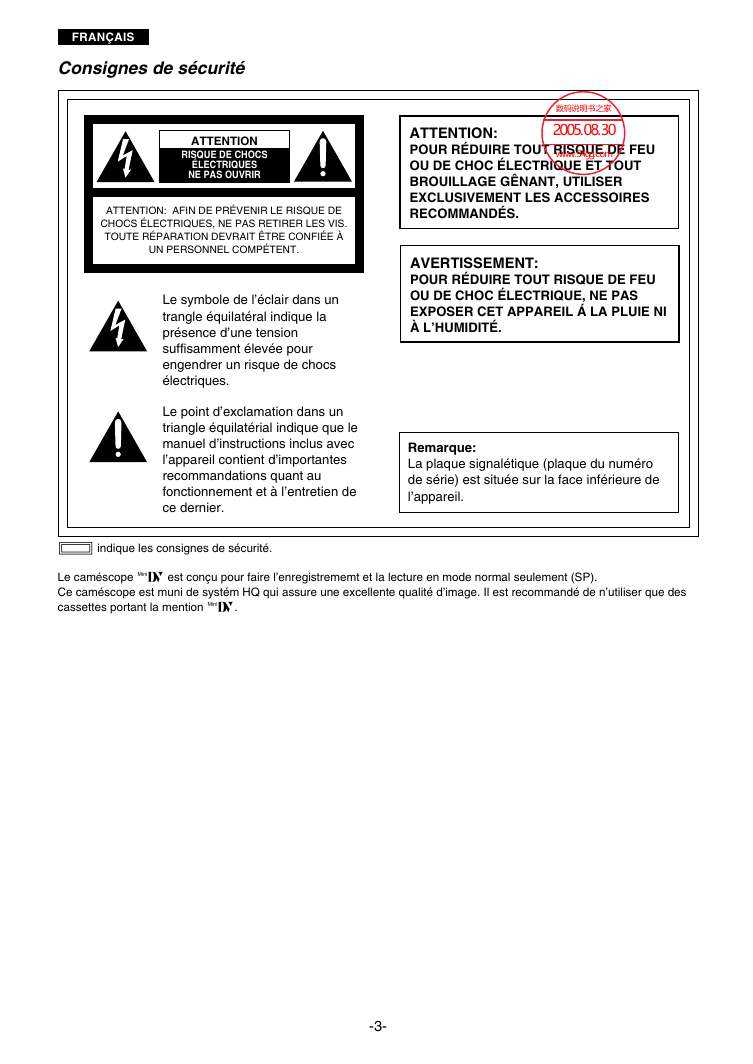
FRANÇAIS Consignes de sécurité ATTENTION RISQUE DE CHOCS ÉLECTRIQUES NE PAS OUVRIR ATTENTION: AFIN DE PRÉVENIR LE RISQUE DE CHOCS ÉLECTRIQUES, NE PAS RETIRER LES VIS. TOUTE RÉPARATION DEVRAIT ÊTRE CONFIÉE À UN PERSONNEL COMPÉTENT. Le symbole de l’éclair dans un trangle équilatéral indique la présence d’une tension suffisamment élevée pour engendrer un risque de chocs électriques. Le point d’exclamation dans un triangle équilatérial indique que le manuel d’instructions inclus avec l’appareil contient d’importantes recommandations quant au fonctionnement et à l’entretien de ce dernier. ATTENTION: POUR RÉDUIRE TOUT RISQUE DE FEU OU DE CHOC ÉLECTRIQUE ET TOUT BROUILLAGE GÊNANT, UTILISER EXCLUSIVEMENT LES ACCESSOIRES RECOMMANDÉS. AVERTISSEMENT: POUR RÉDUIRE TOUT RISQUE DE FEU OU DE CHOC ÉLECTRIQUE, NE PAS EXPOSER CET APPAREIL Á LA PLUIE NI À L’HUMIDITÉ. Remarque: La plaque signalétique (plaque du numéro de série) est située sur la face inférieure de l’appareil. 1 indique les consignes de sécurité. Le caméscope Ò est conçu pour faire l’enregistrememt et la lecture en mode normal seulement (SP). Ce caméscope est muni de systém HQ qui assure une excellente qualité d’image. Il est recommandé de n’utiliser que des cassettes portant la mention Ò. -3-
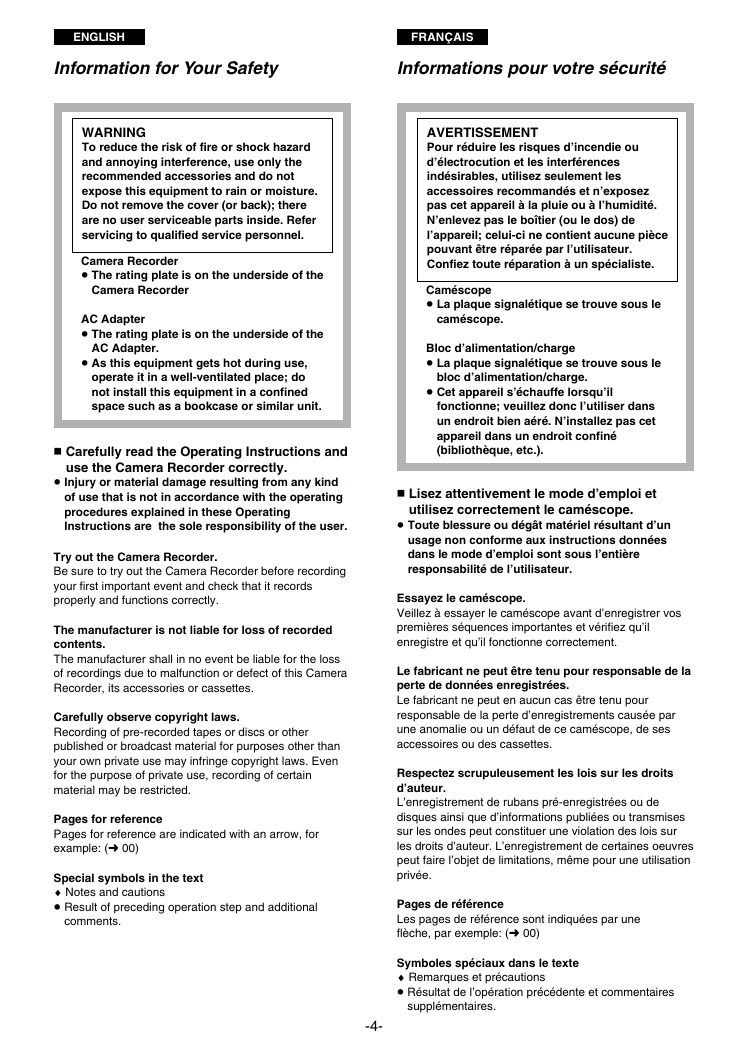
ENGLISH FRANÇAIS Information for Your Safety Informations pour votre sécurité WARNING To reduce the risk of fire or shock hazard and annoying interference, use only the recommended accessories and do not expose this equipment to rain or moisture. Do not remove the cover (or back); there are no user serviceable parts inside. Refer servicing to qualified service personnel. Camera Recorder ¡ The rating plate is on the underside of the Camera Recorder AC Adapter ¡ The rating plate is on the underside of the AC Adapter. ¡ As this equipment gets hot during use, operate it in a well-ventilated place; do not install this equipment in a confined space such as a bookcase or similar unit. « Carefully read the Operating Instructions and use the Camera Recorder correctly. ¡ Injury or material damage resulting from any kind of use that is not in accordance with the operating procedures explained in these Operating Instructions are the sole responsibility of the user. Try out the Camera Recorder. Be sure to try out the Camera Recorder before recording your first important event and check that it records properly and functions correctly. The manufacturer is not liable for loss of recorded contents. The manufacturer shall in no event be liable for the loss of recordings due to malfunction or defect of this Camera Recorder, its accessories or cassettes. Carefully observe copyright laws. Recording of pre-recorded tapes or discs or other published or broadcast material for purposes other than your own private use may infringe copyright laws. Even for the purpose of private use, recording of certain material may be restricted. Pages for reference Pages for reference are indicated with an arrow, for example: (m 00) Special symbols in the text ♦ Notes and cautions ¡ Result of preceding operation step and additional comments. AVERTISSEMENT Pour réduire les risques d’incendie ou d’électrocution et les interférences indésirables, utilisez seulement les accessoires recommandés et n’exposez pas cet appareil à la pluie ou à l’humidité. N’enlevez pas le boîtier (ou le dos) de l’appareil; celui-ci ne contient aucune pièce pouvant être réparée par l’utilisateur. Confiez toute réparation à un spécialiste. Caméscope ¡ La plaque signalétique se trouve sous le caméscope. Bloc d’alimentation/charge ¡ La plaque signalétique se trouve sous le bloc d’alimentation/charge. ¡ Cet appareil s’échauffe lorsqu’il fonctionne; veuillez donc l’utiliser dans un endroit bien aéré. N’installez pas cet appareil dans un endroit confiné (bibliothèque, etc.). « Lisez attentivement le mode d’emploi et utilisez correctement le caméscope. ¡ Toute blessure ou dégât matériel résultant d’un usage non conforme aux instructions données dans le mode d’emploi sont sous l’entière responsabilité de l’utilisateur. Essayez le caméscope. Veillez à essayer le caméscope avant d’enregistrer vos premières séquences importantes et vérifiez qu’il enregistre et qu’il fonctionne correctement. Le fabricant ne peut être tenu pour responsable de la perte de données enregistrées. Le fabricant ne peut en aucun cas être tenu pour responsable de la perte d’enregistrements causée par une anomalie ou un défaut de ce caméscope, de ses accessoires ou des cassettes. Respectez scrupuleusement les lois sur les droits d’auteur. L’enregistrement de rubans pré-enregistrées ou de disques ainsi que d’informations publiées ou transmises sur les ondes peut constituer une violation des lois sur les droits d’auteur. L’enregistrement de certaines oeuvres peut faire l’objet de limitations, même pour une utilisation privée. Pages de référence Les pages de référence sont indiquées par une flèche, par exemple: (m 00) Symboles spéciaux dans le texte ♦ Remarques et précautions ¡ Résultat de l’opération précédente et commentaires supplémentaires. -4-
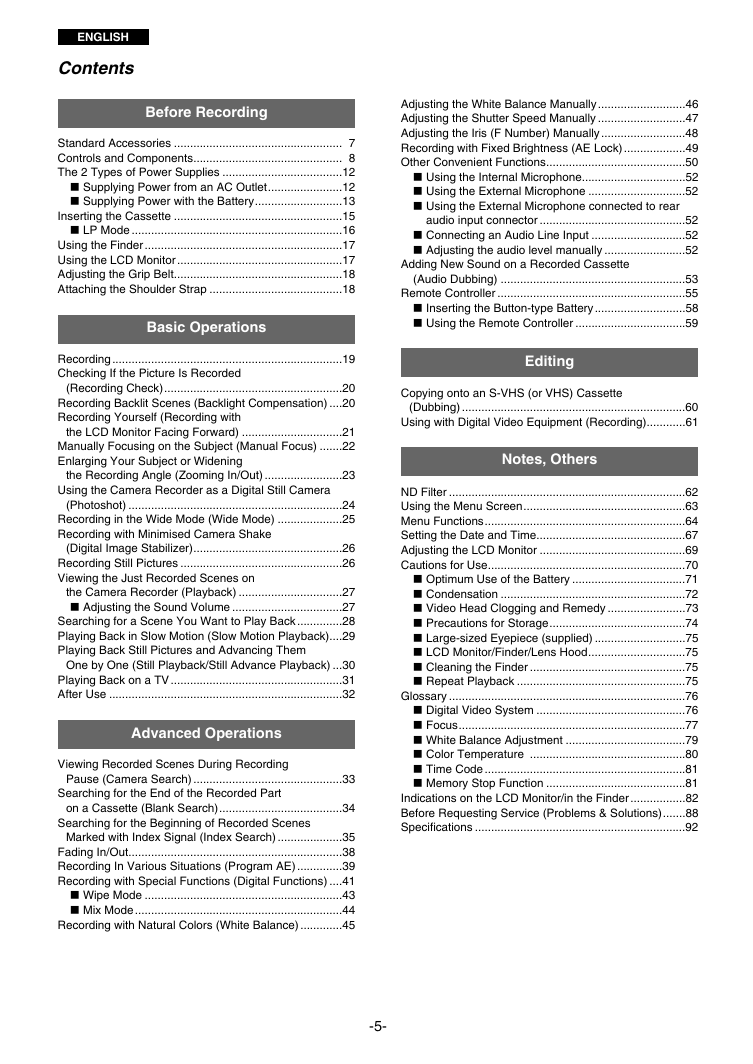
Adjusting the White Balance Manually ...........................46 Adjusting the Shutter Speed Manually ...........................47 Adjusting the Iris (F Number) Manually ..........................48 Recording with Fixed Brightness (AE Lock) ...................49 Other Convenient Functions...........................................50 » Using the Internal Microphone................................52 » Using the External Microphone ..............................52 » Using the External Microphone connected to rear audio input connector .............................................52 » Connecting an Audio Line Input .............................52 » Adjusting the audio level manually .........................52 Adding New Sound on a Recorded Cassette (Audio Dubbing) .........................................................53 Remote Controller ..........................................................55 » Inserting the Button-type Battery............................58 » Using the Remote Controller ..................................59 Editing Copying onto an S-VHS (or VHS) Cassette (Dubbing) .....................................................................60 Using with Digital Video Equipment (Recording)............61 Notes, Others ND Filter .........................................................................62 Using the Menu Screen..................................................63 Menu Functions..............................................................64 Setting the Date and Time..............................................67 Adjusting the LCD Monitor .............................................69 Cautions for Use.............................................................70 » Optimum Use of the Battery ...................................71 » Condensation .........................................................72 » Video Head Clogging and Remedy ........................73 » Precautions for Storage..........................................74 » Large-sized Eyepiece (supplied) ............................75 » LCD Monitor/Finder/Lens Hood..............................75 » Cleaning the Finder ................................................75 » Repeat Playback ....................................................75 Glossary .........................................................................76 » Digital Video System ..............................................76 » Focus......................................................................77 » White Balance Adjustment .....................................79 » Color Temperature ................................................80 » Time Code..............................................................81 » Memory Stop Function ...........................................81 Indications on the LCD Monitor/in the Finder .................82 Before Requesting Service (Problems & Solutions).......88 Specifications .................................................................92 ENGLISH Contents Before Recording Standard Accessories ....................................................07 Controls and Components..............................................08 The 2 Types of Power Supplies .....................................12 » Supplying Power from an AC Outlet.......................12 » Supplying Power with the Battery...........................13 Inserting the Cassette ....................................................15 » LP Mode .................................................................16 Using the Finder .............................................................17 Using the LCD Monitor ...................................................17 Adjusting the Grip Belt....................................................18 Attaching the Shoulder Strap .........................................18 Basic Operations Recording .......................................................................19 Checking If the Picture Is Recorded (Recording Check).......................................................20 Recording Backlit Scenes (Backlight Compensation) ....20 Recording Yourself (Recording with the LCD Monitor Facing Forward) ...............................21 Manually Focusing on the Subject (Manual Focus) .......22 Enlarging Your Subject or Widening the Recording Angle (Zooming In/Out) ........................23 Using the Camera Recorder as a Digital Still Camera (Photoshot) ..................................................................24 Recording in the Wide Mode (Wide Mode) ....................25 Recording with Minimised Camera Shake (Digital Image Stabilizer)..............................................26 Recording Still Pictures ..................................................26 Viewing the Just Recorded Scenes on the Camera Recorder (Playback) ................................27 » Adjusting the Sound Volume ..................................27 Searching for a Scene You Want to Play Back..............28 Playing Back in Slow Motion (Slow Motion Playback)....29 Playing Back Still Pictures and Advancing Them One by One (Still Playback/Still Advance Playback) ...30 Playing Back on a TV .....................................................31 After Use ........................................................................32 Advanced Operations Viewing Recorded Scenes During Recording Pause (Camera Search) ..............................................33 Searching for the End of the Recorded Part on a Cassette (Blank Search)......................................34 Searching for the Beginning of Recorded Scenes Marked with Index Signal (Index Search) ....................35 Fading In/Out..................................................................38 Recording In Various Situations (Program AE) ..............39 Recording with Special Functions (Digital Functions) ....41 » Wipe Mode .............................................................43 » Mix Mode................................................................44 Recording with Natural Colors (White Balance) .............45 -5-
FRANÇAIS Table des matières Avant l’enregistrement Accessoires standard .....................................................07 Commandes et composants...........................................08 Les deux types d’alimentation ........................................12 » Alimentation à partir d’une prise secteur ................12 » Alimentation à partir de la batterie..........................13 Insertion de la cassette ..................................................15 » Mode LP .................................................................16 Utilisation du viseur ........................................................17 Utilisation du moniteur LCD............................................17 Réglage de la courroie de poignée ................................18 Fixation de la bandoulière ..............................................18 Opérations de base Enregistrement ...............................................................19 Vérification du bon déroulement de l’enregistrement (vérification d’enregistrement) .....................................20 Enregistrement de séquences à contre-jour (compensation de contre-jour).....................................20 Enregistrement de soi-même (enregistrement avec le moniteur LCD orienté vers l’avant) ..........................21 Mise au point manuelle sur le sujet (mise au point manuelle) ............................................................22 Agrandissement du sujet ou élargissement de l’angle d’enregistrement (rapprochement/éloignement au zoom)......................................................................23 Utilisation du caméscope comme appareil photo numérique (instantané)......................................24 Enregistrement en mode grand écran (mode grand écran) .....................................................25 Enregistrement avec le moins de tremblement possible (stabilisateur électronique de l’image) .........................26 Enregistrement d’images fixes .......................................26 Visionnement sur le caméscope des séquences que l’on vient d’enregistrer (lecture) ...................................27 » Réglage du volume sonore.....................................27 Repérage d’une séquence que l’on désire visionner ......................................................................28 Lecture au ralenti............................................................29 Lecture d’images fixes et d’images avancées une par une (lecture d’images fixes/image par image) .............30 Lecture sur un téléviseur ................................................31 Après l’utilisation ............................................................32 Opérations plus poussées Visionnement de séquences enregistrées pendant la pause d’enregistrement (repérage caméscope) ..........33 Repérage de la fin d’une partie enregistrée sur une cassette (repérage d’espace vierge) ...........................34 Repérage du début d’enregistrements marqués d’un signal d’index (repérage d’index) .........................35 Ouverture/fermeture en fondu ........................................38 Enregistrement en diverses situations (programme AE) ..........................................................39 Enregistrement avec fonctions spéciales (fonctions numériques) ................................................41 » Mode volet..............................................................43 » Mode mixage..........................................................44 Enregistrement aux couleurs naturelles (balance des blancs)....................................................45 Réglage manuel de la balance des blancs.....................46 Réglage manuel de la vitesse d’obturateur ....................47 Réglage manuel du diaphragme ....................................48 Enregistrement avec luminosité fixe (fonction verrouillage AE) ............................................49 Autres fonctions utiles ....................................................50 » Utilisation du microphone interne ...........................52 » Utilisation du microphone externe ..........................52 » Utilisation du microphone externe raccordé au connecteur d’entrée audio arrière...........................52 » Raccordement d’une entrée de ligne audio............52 » Réglage manuel du niveau audio...........................52 Ajout de nouveaux sons sur une cassette enregistrée (repiquage sonore) ......................................................53 Télécommande...............................................................55 » Insertion de la pile-bouton ......................................58 » Utilisation de la télécommande...............................59 Montage Copie sur une cassette S-VHS (ou VHS) (repiquage) ..................................................................60 Utilisation avec des appareils vidéo numériques (enregistrement) ..........................................................61 Remarques, divers Filtre ND .........................................................................62 Utilisation de l’écran de menu ........................................63 Fonctions des menus .....................................................64 Réglage de la date et de l’heure ....................................67 Réglage du moniteur LCD..............................................69 Précautions d’utilisation..................................................70 » Bon usage de la batterie ........................................71 » Condensation .........................................................72 » Remède à l’encrassement des têtes vidéo ............73 » Précautions pour le rangement ..............................74 » Oculaire grand format (fourni) ................................75 » Moniteur LCD/ Viseur/ Pare-soleil d’objectif................75 » Nettoyage du viseur ...............................................75 » Lecture répétée ......................................................75 Glossaire ........................................................................76 » Système vidéo numérique......................................76 » Mise au point ..........................................................77 » Réglage de la balance des blancs .........................79 » Température de couleur .........................................80 » Code temporel........................................................81 » Fonction arrêt mémoire ..........................................81 Indications sur le moniteur LCD/dans le viseur ..............82 Avant de faire appel à un technicien (problèmes & Solutions) ..............................................88 Données techniques.......................................................92 -6-
1. 4. 7. CR2025 VSQS1510 2. 5. [A] 8. VEK8722 [B] 3. 6. 9. CGR-D16 VMG1370 VFC3573 VKF3305 AY-DVMCLA ENGLISH FRANÇAIS Standard Accessories Accessoires standard 1. AC Adapter and AC Power Cable (m 12, 13) 2. DC Input Cable (m 12) 3. Battery Pack (m 13) 4. Remote Controller and Button-Type Battery (m 55, 58) 5. Ferrite Cores for DV Interface Cable (m 61) 5. [A] Attaching the Ferrite Cores When the DV Interface cable is to be connected, attach one Ferrite Core to one end of the cable and the other one to the other end. 1. Adaptateur secteur et fil d’alimentation secteur (m 12, 13) 2. Fil d’entrée c.c. (m 12) 3. Batterie (m 13) 4. Télécommande et pile-bouton (m 55, 58) 5. Tores de ferrite pour fil d’interface DV (m 61) 5. [A] Fixation des tores de ferrite Si l’on souhaite raccorder le fil d’interface DV, fixer l’un des tores de ferrite à l’une des extrémités du fil, et l’autre tore à l’autre extrémité. 5. [B] Ferrite Core for Optional Microphone 6. Eyepiece (m 75) 7. Shoulder Strap (m 18) 8. Lens Cap (m 32) 9. Cleaning Cassette 5. [B] Noyau en ferrite pour microphone en option 6. Oculaire (m 75) 7. Bandoulière (m 18) 8. Capuchon d’objectif (m 32) 9. Cassette de nettoyage -7-
1 2 s S SEARCH r SEARCH STILL FADE BLC 4 3 5 > 8 7 6 =<;:9 ENGLISH FRANÇAIS Controls and Components Commandes et composants e Reverse Search Button / Rewind/Review Button / Recording Check Button [C] (m 20, 27, 28, 33) e Touche de repérage arrière/touche de rebobinage/révision/touche de vérification d’enregistrement [C] (m 20, 27, 28, 33) f Forward Search Button / Fast Forward/ Cue Button [D] (m 28, 33) f Touche de repérage avant/touche d’avance accélérée/repérage [D] (m 28, 33) g Still Button / Pause Button [G] (m 26, 30) h Fade Button / Stop Button [B] (m 27, 38) i Backlight Button / Play Button [E] (m 20, 27) j White Balance Sensor (m 79) k Microphone (built-in, stereo) l Video Light Shoe/Shoe Cover To Attach the Video Light (optional). ¡When using the Shoe, remove the Shoe Cover by sliding it in the direction of the arrow. m Recording Lamp (m 19) n Remote Control Sensor (m 59) o Lens p Focus Ring (m 22) q Focus Button [FOCUS] (m 22) r Speaker (m 27) g Touche d’image fixe/touche de pause [G] (m 26, 30) h Touche de fondu/touche d’arrêt [B] (m 27, 38) i Touche de contre-jour/touche de lecture [E] (m 20, 27) j Capteur de la balance des blancs (m 79) k Micro (incorporé, stéréo) l Griffe de torche vidéo/panneau de la griffe Pour fixer la torche vidéo (en option). ¡Pour pouvoir utiliser la griffe, retirer le panneau de la griffe en le faisant glisser dans le sens de la flèche. m Témoin d’enregistrement (m 19) n Capteur de télécommande (m 59) o Objectif p Bague de mise au point (m 22) q Touche de mise au point [FOCUS] (m 22) r Haut-parleur (m 27) -8-
分享到:
收藏