LEICA C-LUX1_engl.qxd 24.02.2006 11:55 Uhr Seite 1
LEICA C-LUX 1
Instructions
�
Before Use
Dear Customer,
We would like to take this opportunity to
thank you for purchasing this LEICA
C-LUX 1. Please read these Instructions
carefully and keep them handy for future
reference.
Information for Your
Safety
WARNING
TO REDUCE THE RISK OF FIRE OR
SHOCK HAZARD AND ANNOYING
INTERFERENCE, USE ONLY THE
RECOMMENDED ACCESSORIES
AND DO NOT EXPOSE THIS
EQUIPMENT TO RAIN OR MOISTURE.
DO NOT REMOVE THE COVER (OR
BACK); THERE ARE NO USER
SERVICEABLE PARTS INSIDE.
REFER SERVICING TO QUALIFIED
SERVICE PERSONNEL.
Carefully observe copyright laws.
Recording of pre-recorded tapes or
discs or other published or broadcast
material for purposes other than your
own private use may infringe copyright
laws. Even for the purpose of private
use, recording of certain material may
be restricted.
• Please note that the actual controls and
components, menu items, etc. of your
digital camera may look somewhat
different from those shown in the
illustrations in these Operating
Instructions.
• SD Logo is a trademark.
• Other names, company names, and
product names printed in these
instructions are trademarks or registered
trademarks of the companies concerned.
CAUTION
Danger of explosion if battery is
incorrectly replaced. Replace only with
the same or equivalent type
recommended by the manufacturer.
Dispose of used batteries according to
the manufacturer’s instructions.
(U.S. only)
R B R C
T M
L i - i o n
A lithium ion/polymer battery that is recyclable powers the
product you have purchased. Please call 1-800-8-BATTERY for
information on how to recycle this battery.
QuickTime and the QuickTime logo are trademarks or registered
trademarks of Apple Computer, Inc., used under license.
2
�
FCC Note: (U.S. only)
This equipment has been tested and
found to comply with the limits for a
Class B digital device, pursuant to Part
15 of the FCC Rules. These limits are
designed to provide reasonable
protection against harmful interference
in a residential installation. This
equipment generates, uses, and can
radiate radio frequency energy and, if
not installed and used in accordance
with the instructions, may cause harmful
interference to radio communications.
However, there is no guarantee that
interference will not occur in a particular
installation. If this equipment does cause
harmful interference to radio or
television reception, which can be
determined by turning the equipment off
and on, the user is encouraged to try to
correct the interference by one or more
of the following measures:
• Reorient or relocate the receiving
antenna.
• Increase the separation between the
equipment and receiver.
• Connect the equipment into an outlet
on a circuit different from that to which
the receiver is connected.
• Consult the dealer or an experienced
radio/TV technician for help.
FCC Caution: To assure continued
compliance, follow the
attached installation
instructions and use only
shielded interface cables
with ferrite core when
connecting to computer or
peripheral devices.
Any changes or modifications not
expressly approved by the party
responsible for compliance could void
the user’s authority to operate this
equipment.
Before Use
LEICA
C-LUX 1
Trade Name:
Model No.:
Responsible party / Support Contact:
Leica Camera AG
Oskar-Barnack-Str. 11
D-35606 Solms
Tel.: +49 (0) 64 42-208-0
Fax: +49 (0) 64 42-208-333
www.leica.camera.com
info@leica-camera.com
This device complies with Part 15 of the
FCC Rules. Operation is subject to the
following two conditions: (1) This device
may not cause harmful interference, and
(2) this device must accept any
interference received, including
interference that may cause undesired
operation.
This Class B digital apparatus complies
with Canadian ICES-003
LEICA
C-LUX 1
3
�
Before Use
Only for Great Britain
Camera
The rating plate is on the underside of the
digital camera.
Caution for AC mains lead
For your safety, please read the following
text carefully.
This appliance is supplied with a moulded
three-pin mains plug for your safety and
convenience. A 5-ampere fuse is fitted in
this plug.
Should the fuse need to be replaced,
please ensure that the replacement fuse
has a rating of 5-amperes and it is
approved by ASTA or BSI to BS1362.
Check for the ASTA mark
mark
on the body of the fuse.
or the BSI
If the plug contains a removable fuse cover
you must ensure that it is refitted when the
fuse is replaced. If you lose the fuse cover,
the plug must not be used until a
replacement cover is obtained. A
replacement fuse cover can be purchased
from your local Leica Dealer.
IF THE FITTED MOULDED PLUG IS
UNSUITABLE FOR THE SOCKET
OUTLET IN YOUR HOME THEN THE
FUSE SHOULD BE REMOVED AND THE
PLUG CUT OFF AND DISPOSED OF
SAFELY.
THERE IS A DANGER OF SEVERE
ELECTRICAL SHOCK IF THE CUT OFF
PLUG IS INSERTED INTO ANY 13-
AMPERE SOCKET.
If a new plug is to be fitted, please observe
the wiring code as shown below. If in any
doubt, please consult a qualified
electrician.
4
IMPORTANT
Neutral
Live
The wires in this mains lead are coloured
in accordance with the following code:
Blue:
Brown:
As the colours of the wires in the mains
lead of this appliance may not
correspond with the coloured markings
identifying the terminals in your plug,
proceed as follows:
The wire which is coloured BLUE must
be connected to the terminal in the plug
which is marked with the letter N or
coloured BLACK.
The wire which is coloured BROWN must
be connected to the terminal in the plug
which is marked with the letter L or
coloured RED.
Under no circumstances should either of
these wires be connected to the earth
terminal of the three-pin plug, marked
with the letter E or the Earth Symbol.
Before Use
Remove the Connector Cover.
How to replace the Fuse
The location of the fuse differ according to
the type of AC mains plug (figures A and B).
Confirm the AC mains plug fitted and
follow the instructions below.
Illustrations may differ from actual AC
mains plug.
1) Open the fuse cover with a
screwdriver.
Figure A
Figure B
Fuse cover
2) Replace the fuse and close or attach
the fuse cover.
Figure A
Fuse
(5 ampere)
Figure B
Fuse
(5 ampere)
�
Care for the camera
• Do not strongly shake or bump the
camera. The camera may stop operating
normally, pictures may not be recorded or
the lens may be damaged.
• Sand or dust may cause a malfunction
of the camera. When you use the
camera on a beach etc., take care so
that sand or dust does not get into the
camera.
• When you use the camera on a rainy day
or on a beach, take care so that water
does not get into the camera.
• If seawater splashes onto the camera,
wet a soft cloth with tap water, wring it
well, and use it to wipe the camera
body carefully. Then, wipe it again with
a dry cloth.
About the LCD monitor
• Do not press the LCD monitor strongly.
It may cause uneven colours on the
LCD monitor or a malfunction of the
LCD monitor.
• In a place with drastic temperature
changes, condensation may form on the
LCD monitor. Wipe it with a soft, dry cloth.
• If the camera is extremely cold when you
turn it on, the image on the LCD
monitor is slightly darker than usual at
first. However, as the internal temperature
increases, it returns to the normal
brightness.
Extremely high precision technology is
employed to produce the LCD monitor
screen. However there may be some
dark or bright spots (red, blue or green)
on the screen. This is not a malfunction.
The LCD monitor screen has more than
99.99% effective pixels with a mere
0.01% of the pixels inactive or always lit.
The spots will not be recorded on
pictures on a card.
Before Use
About the Lens
• Do not direct the lens to the sun or strong
light sources. It may cause not only a
malfunction of the camera but irreversible
damage to your eye.
• Do not press the lens strongly.
• Do not leave the camera with the lens
facing the sun as it may cause the camera
to malfunction. Also, be careful when you
leave the camera outside or near a
window.
About Condensation (When the lens
is fogged up)
Condensation occurs when the
ambient temperature or humidity is
changed as follows:
Be careful of condensation since it causes
stains on the lens, fungus or malfunction.
• When the camera is brought inside from
the cold to a warm room.
• When the camera is taken from the
outside to an air-conditioned car.
• When cool wind from an air conditioner
etc. is directly blown onto the camera.
• In humid places
To prevent condensation, put the camera
in a plastic bag until the temperature of
the camera is close to the ambient
temperature. In case of condensation,
turn the camera off and then leave it for
about 2 hours. The fog will disappear
naturally when the temperature of the
camera nears that of the ambient
temperature.
5
�
Before Use
If you will not be using the camera for
a long time
• Store the battery in a cool and dry place
with a relatively stable temperature.
[Recommended temperature: 15°C to
25°C, Recommended humidity: 40% to
60%]
• Be sure to remove the battery and the
card from the camera.
• When the battery is left inserted in the
camera for a long time, discharge takes
place even if the camera is turned off. If
you leave the battery inserted for an
extended period of time, it will be
excessively discharged and it may
become unusable even after it is charged.
• When storing the battery for a long period
of time, we recommend
a. to make sure it is not charged fully, i.e.
a maximum of two segments are shown
in the battery indication (P14), and
b. to charge it to this level every 3 months.
• When you keep the camera in a closet or
a cabinet, we recommend storing it with
a desiccant (silica gel).
6
-If you see this symbol-
Information on Disposal for Users of
Waste Electrical & Electronic
Equipment (private households)
This symbol on the
products and/or
accompanying documents
means that used electrical
and electronic products
should not be mixed with
general household waste.
For proper treatment,
recovery and recycling, please take these
products to designated collection points,
where they will be accepted on a free of
charge basis. Alternatively, in some
countries you may be able to return your
products to your local retailer upon the
purchase of an equivalent new product.
Disposing of this product correctly will
help to save valuable resources and
prevent any potential negative effects on
human health and the environment which
could otherwise arise from inappropriate
waste handling. Please contact your local
authority for further details of your nearest
designated collection point.
Penalties may be applicable for incorrect
disposal of this waste, in accordance with
national legislation.
For business users in the European
Union
If you wish to discard electrical and
electronic equipment, please contact your
dealer or supplier for further information.
Information on Disposal in other
Countries outside the European Union
This symbol is only valid in the European
Union.
If you wish to discard this product, please
contact your local authorities or dealer
and ask for the correct method of
disposal.
�
About The Mode Dial
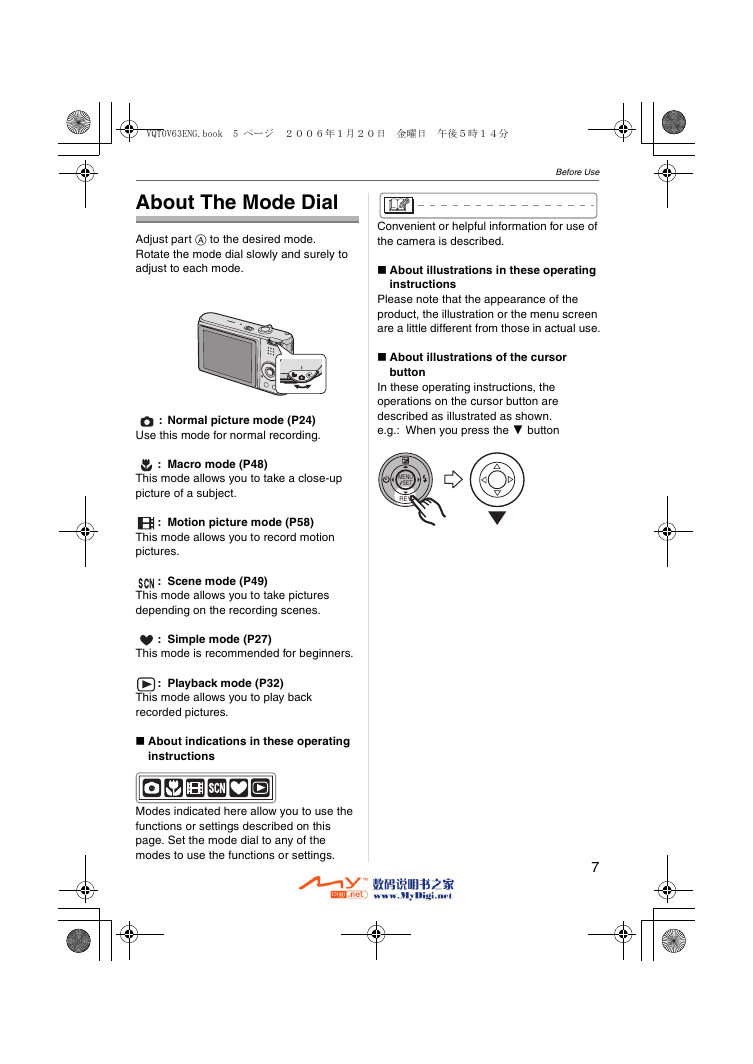
Adjust part to the desired mode.
Rotate the mode dial slowly and surely to
adjust to each mode.
: Normal picture mode (P24)
Use this mode for normal recording.
Before Use
Convenient or helpful information for use of
the camera is described.
About illustrations in these operating
instructions
Please note that the appearance of the
product, the illustration or the menu screen
are a little different from those in actual use.
About illustrations of the cursor
button
In these operating instructions, the
operations on the cursor button are
described as illustrated as shown.
e.g.: When you press the button
: Macro mode (P48)
This mode allows you to take a close-up
picture of a subject.
MENU
SET
REV
: Motion picture mode (P58)
This mode allows you to record motion
pictures.
: Scene mode (P49)
This mode allows you to take pictures
depending on the recording scenes.
: Simple mode (P27)
This mode is recommended for beginners.
: Playback mode (P32)
This mode allows you to play back
recorded pictures.
About indications in these operating
instructions
Modes indicated here allow you to use the
functions or settings described on this
page. Set the mode dial to any of the
modes to use the functions or settings.
7
�
VQT0V86ENG.book 6
Contents
Before Use
Advanced
Information for Your Safety.......................2
About The Mode Dial ................................7
Preparation
Scope of Delivery.................................. 10
Additional Accessories............................10
Names of the Components ......................11
Quick Guide ............................................13
Charging the Battery with the Charger ...14
About the Battery (charging/
number of recordable pictures) ........... 14
Inserting/Removing the Battery ..............15
Inserting/Removing the Card ..................16
About the Card........................................17
Setting Date/Time (Clock Set) ................18
About the Setup Menu ............................ 19
Basic
Taking Pictures .......................................24
Taking Pictures in Simple Mode .............27
Taking Pictures with the Zoom ............... 29
• Using the Optical Zoom .................... 29
• Using the Extended
Optical Zoom (EZ) ............................ 29
• Using the Digital Zoom
Further extending the zoom ..............30
Checking the Recorded Picture
(Review) ...............................................31
Playing Back Pictures .............................32
Deleting Pictures.....................................33
About the LCD Monitor ...........................35
• Changing
the information displayed ................. 35
• Brightening the LCD Monitor
(Power LCD/High angle mode) ........ 37
Taking Pictures
using the Built-in Flash........................38
Taking Pictures with the Self-timer .........42
Compensating the Exposure ..................43
Taking Pictures using Auto Bracket ........44
Optical Image Stabilizer ..........................45
Taking Pictures using Continuous Mode 46
Taking Close-up Pictures........................47
Scene Mode............................................48
– Portrait mode ................................. 49
– Soft skin mode............................... 49
– Scenery mode ............................... 49
– Sports mode .................................. 49
– Night portrait mode .........................50
– Night scenery mode........................50
– Self portrait mode ...........................51
– Food mode .....................................51
– Party mode .....................................51
– Candle light mode.......................... 52
– Fireworks mode ............................. 52
– Starry sky mode............................. 53
– Baby mode 1/Baby mode 2 ........... 53
– Snow mode.................................... 54
– High Sensitivity mode .................... 54
Recording which day of the
vacation you take the picture ..............56
Motion Picture Mode...............................58
Displaying Multiple Images
(Multi Playback)....................................60
Displaying pictures by recording date
(Calendar playback) .............................61
Using the Playback Zoom .......................62
Playing Back Motion Pictures/
Pictures with Audio..............................63
8
�


 2023年江西萍乡中考道德与法治真题及答案.doc
 2012年重庆南川中考生物真题及答案.doc
 2013年江西师范大学地理学综合及文艺理论基础考研真题.doc
 2020年四川甘孜小升初语文真题及答案I卷.doc
 2020年注册岩土工程师专业基础考试真题及答案.doc
 2023-2024学年福建省厦门市九年级上学期数学月考试题及答案.doc
 2021-2022学年辽宁省沈阳市大东区九年级上学期语文期末试题及答案.doc
 2022-2023学年北京东城区初三第一学期物理期末试卷及答案.doc
 2018上半年江西教师资格初中地理学科知识与教学能力真题及答案.doc
 2012年河北国家公务员申论考试真题及答案-省级.doc
 2020-2021学年江苏省扬州市江都区邵樊片九年级上学期数学第一次质量检测试题及答案.doc
 2022下半年黑龙江教师资格证中学综合素质真题及答案.doc