Contents
Contents
1 – Getting Started
3 – Additional Features
4 – Configurations
2 – Select Location and Generate Route
2
Configuration Wizard .......................................................................................................................... 2
Demo .................................................................................................................................................. 2
Main Map ............................................................................................................................................ 3
Map Views .......................................................................................................................................... 4
Route Overview .................................................................................................................................. 5
Cancel Route ...................................................................................................................................... 5
6
Go to an Address................................................................................................................................ 6
Point of Interest (POI)......................................................................................................................... 9
QuickNav .......................................................................................................................................... 10
Recent Place .................................................................................................................................... 12
Address Book ................................................................................................................................... 13
15
Driving Directions.............................................................................................................................. 15
Multistop Planner .............................................................................................................................. 16
Avoid Roads ..................................................................................................................................... 17
Detour ............................................................................................................................................... 19
Map Browsing ................................................................................................................................... 19
Walking Mode ................................................................................................................................... 20
Map Selection ................................................................................................................................... 21
22
Settings Menus ................................................................................................................................. 22
Prompts............................................................................................................................................. 22
Language settings ............................................................................................................................ 23
Look & Feel Settings......................................................................................................................... 23
GPS Signal ....................................................................................................................................... 23
Units of Measure............................................................................................................................... 24
Time Settings.................................................................................................................................... 24
Map Settings..................................................................................................................................... 25
About................................................................................................................................................. 25
Help................................................................................................................................................... 25
26
Index
1
�
Getting Started
1 – Getting Started
Welcome to the world of mobile navigation! Simple operation, clear maps in 2D or 3D mode as well as numerous innovative
features and functions have made Nextar the essential guide for every traveler – whether in the car, on foot or by bike.
Configuration Wizard
This wizard, which automatically starts the first time you use The GPS, lets you easily configure the system settings by
providing a step-by-step setup process. You can also configure these system settings by going to these system options from
the Settings menu.
Language Settings – Set text and voice language preferences.
•
• End User License Agreement (EULA) – Please review the license information and tap the I Agree button. The
EULA screen appears each time you use a new map.
Time Zone –You can select the Adjust to Daylight Savings checkbox to automatically adjust for daylight savings.
•
• Units of Measure – Specify the system measurement units.
• Prompts – Configure the general navigation prompts and notifications.
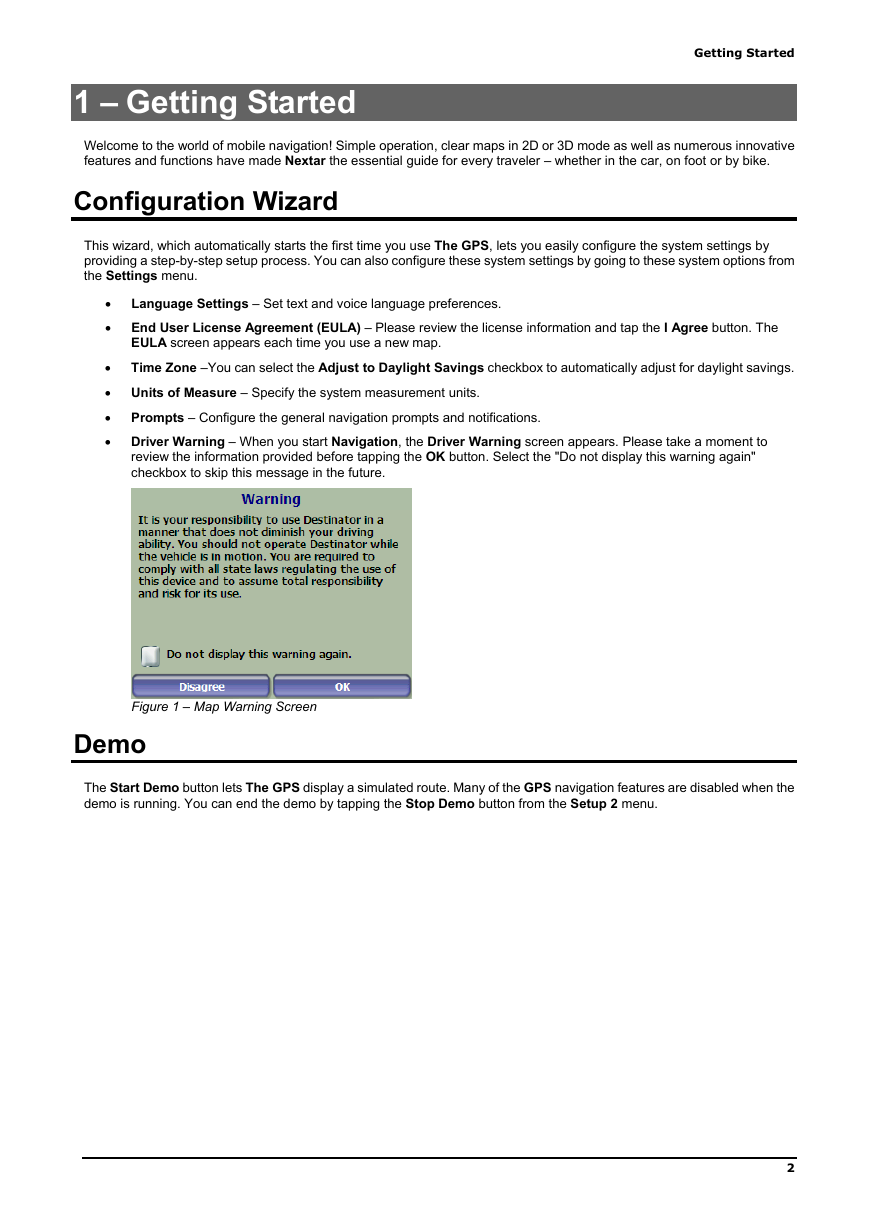
• Driver Warning – When you start Navigation, the Driver Warning screen appears. Please take a moment to
review the information provided before tapping the OK button. Select the "Do not display this warning again"
checkbox to skip this message in the future.
Figure 1 – Map Warning Screen
Demo
The Start Demo button lets The GPS display a simulated route. Many of the GPS navigation features are disabled when the
demo is running. You can end the demo by tapping the Stop Demo button from the Setup 2 menu.
2
�
Getting Started
Main Map
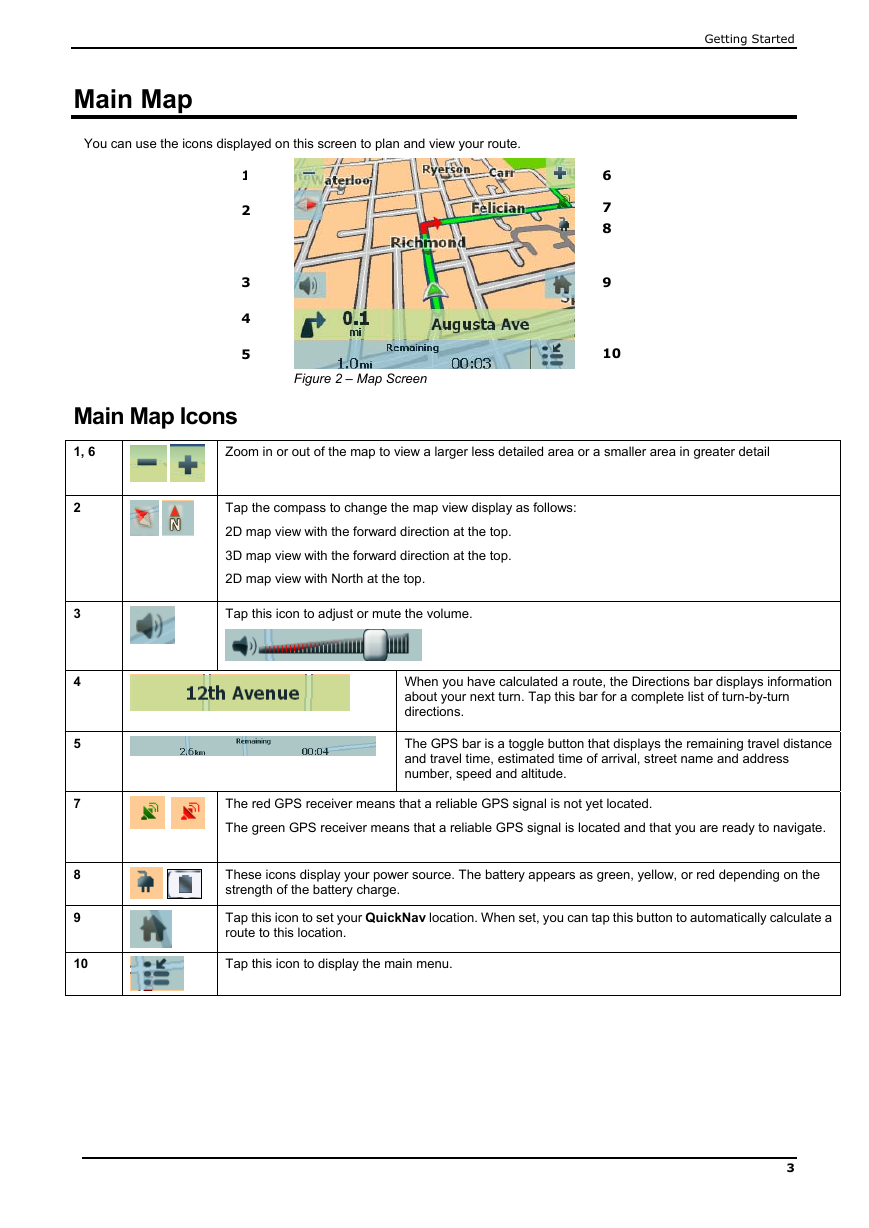
You can use the icons displayed on this screen to plan and view your route.
1
2
3
4
5
Figure 2 – Map Screen
6
7
7
8
9
10
Main Map Icons
1, 6
Zoom in or out of the map to view a larger less detailed area or a smaller area in greater detail
Tap the compass to change the map view display as follows:
2D map view with the forward direction at the top.
3D map view with the forward direction at the top.
2D map view with North at the top.
Tap this icon to adjust or mute the volume.
When you have calculated a route, the Directions bar displays information
about your next turn. Tap this bar for a complete list of turn-by-turn
directions.
The GPS bar is a toggle button that displays the remaining travel distance
and travel time, estimated time of arrival, street name and address
number, speed and altitude.
The red GPS receiver means that a reliable GPS signal is not yet located.
The green GPS receiver means that a reliable GPS signal is located and that you are ready to navigate.
These icons display your power source. The battery appears as green, yellow, or red depending on the
strength of the battery charge.
Tap this icon to set your QuickNav location. When set, you can tap this button to automatically calculate a
route to this location.
Tap this icon to display the main menu.
3
2
3
4
5
7
8
9
10
�
Getting Started
Location Icons
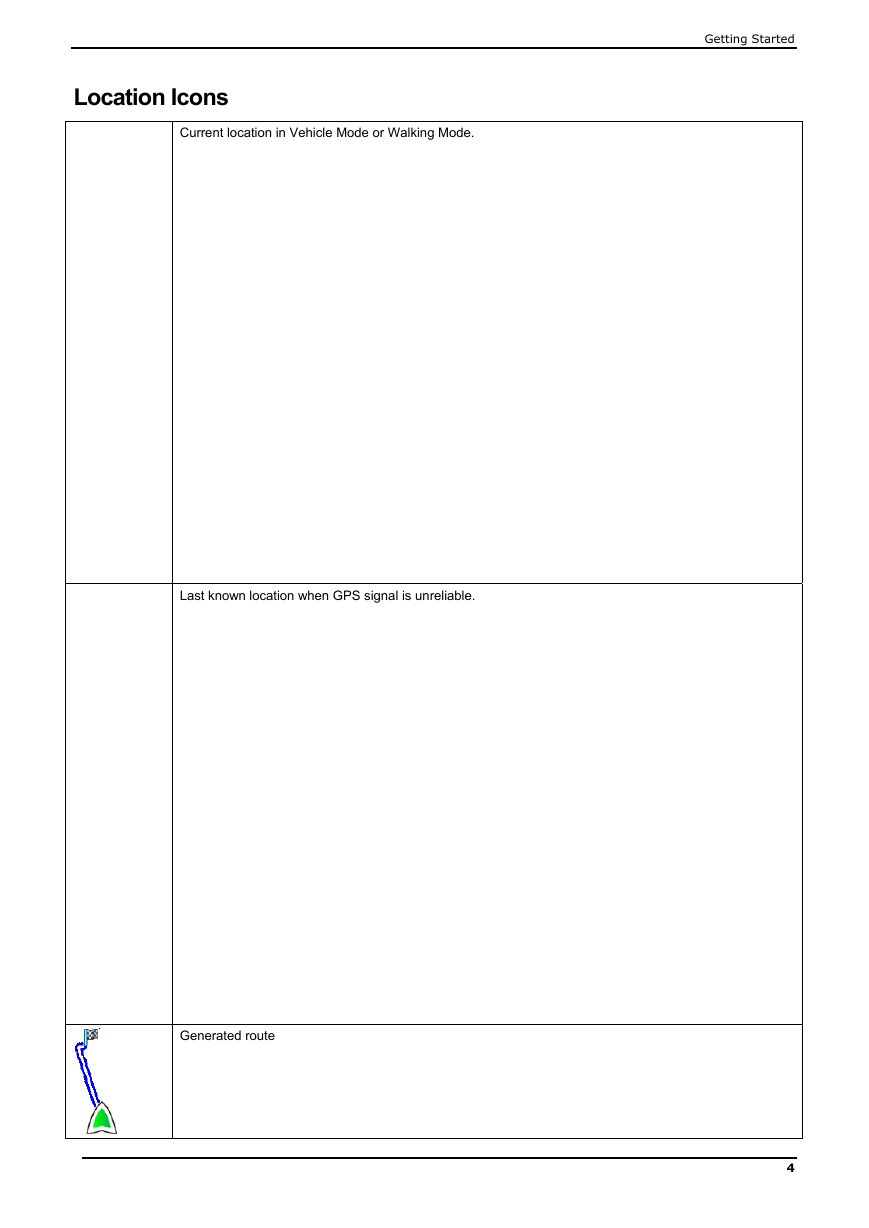
Current location in Vehicle Mode or Walking Mode.
Last known location when GPS signal is unreliable.
Generated route
4
�
Getting Started
Location Point on Main Map
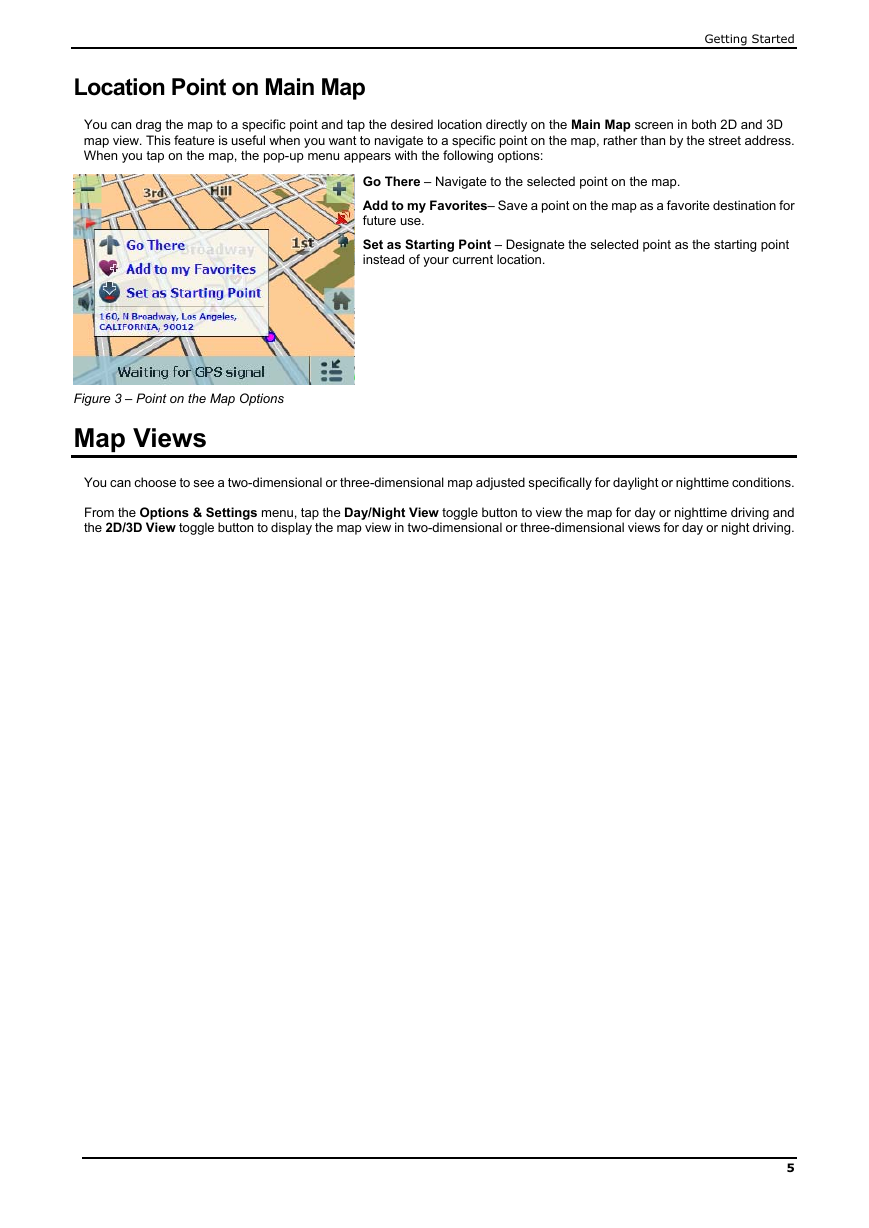
You can drag the map to a specific point and tap the desired location directly on the Main Map screen in both 2D and 3D
map view. This feature is useful when you want to navigate to a specific point on the map, rather than by the street address.
When you tap on the map, the pop-up menu appears with the following options:
Go There – Navigate to the selected point on the map.
Add to my Favorites– Save a point on the map as a favorite destination for
future use.
Set as Starting Point – Designate the selected point as the starting point
instead of your current location.
Figure 3 – Point on the Map Options
Map Views
You can choose to see a two-dimensional or three-dimensional map adjusted specifically for daylight or nighttime conditions.
From the Options & Settings menu, tap the Day/Night View toggle button to view the map for day or nighttime driving and
the 2D/3D View toggle button to display the map view in two-dimensional or three-dimensional views for day or night driving.
5
�
Getting Started
Route Overview
•
From the Manage Route menu, tap the Route Overview button.
An overview of your complete route, the total driving distance to your destination, the estimated travel
time, and the complete destination address, are displayed on the screen.
Cancel Route
•
From the Manage Route menu, tap the Cancel Route button.
The current navigation stops and The GPS clears the route. You can only cancel a route after a
destination has been set.
6
�
Select Loacation and Generate Route
2 – Select Location and Generate Route
Go to an Address
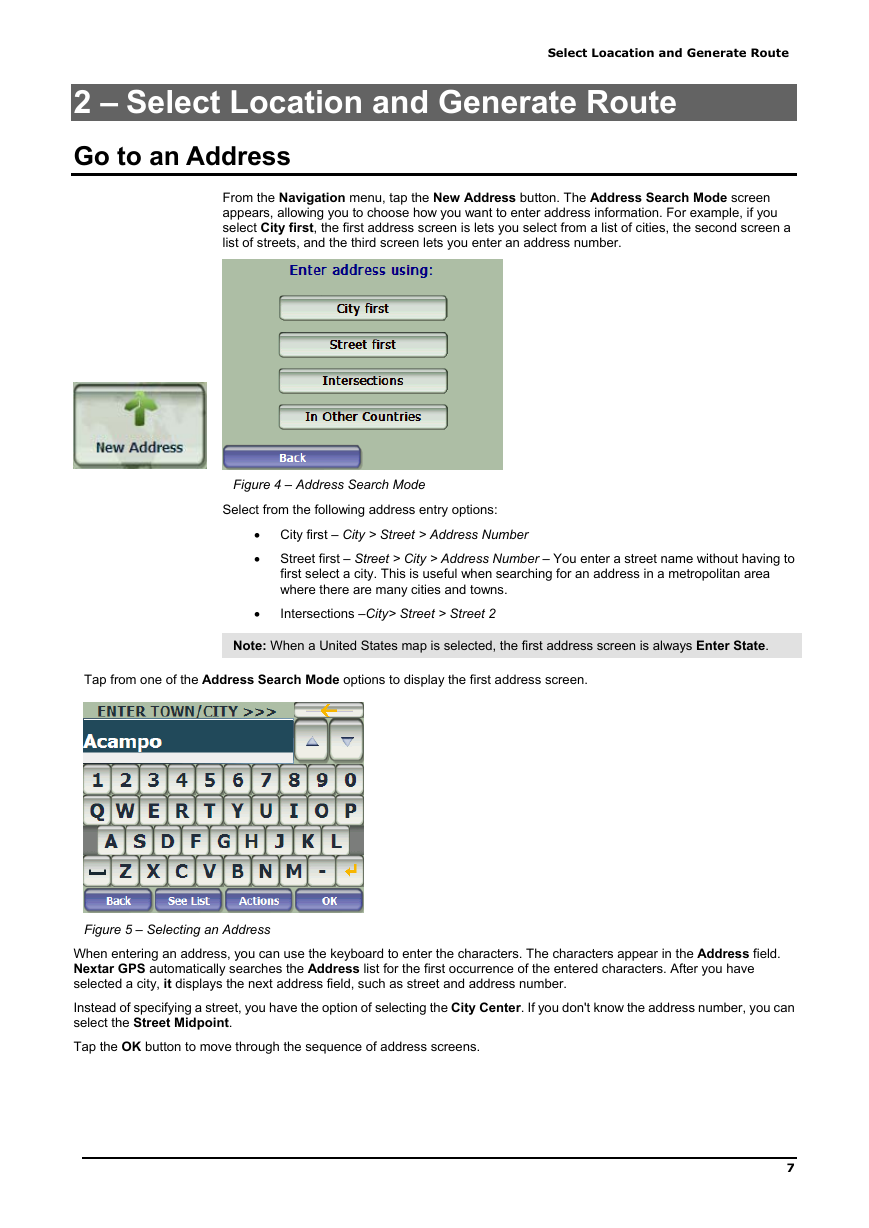
From the Navigation menu, tap the New Address button. The Address Search Mode screen
appears, allowing you to choose how you want to enter address information. For example, if you
select City first, the first address screen is lets you select from a list of cities, the second screen a
list of streets, and the third screen lets you enter an address number.
Figure 4 – Address Search Mode
Select from the following address entry options:
• City first – City > Street > Address Number
• Street first – Street > City > Address Number – You enter a street name without having to
first select a city. This is useful when searching for an address in a metropolitan area
where there are many cities and towns.
Intersections –City> Street > Street 2
•
Note: When a United States map is selected, the first address screen is always Enter State.
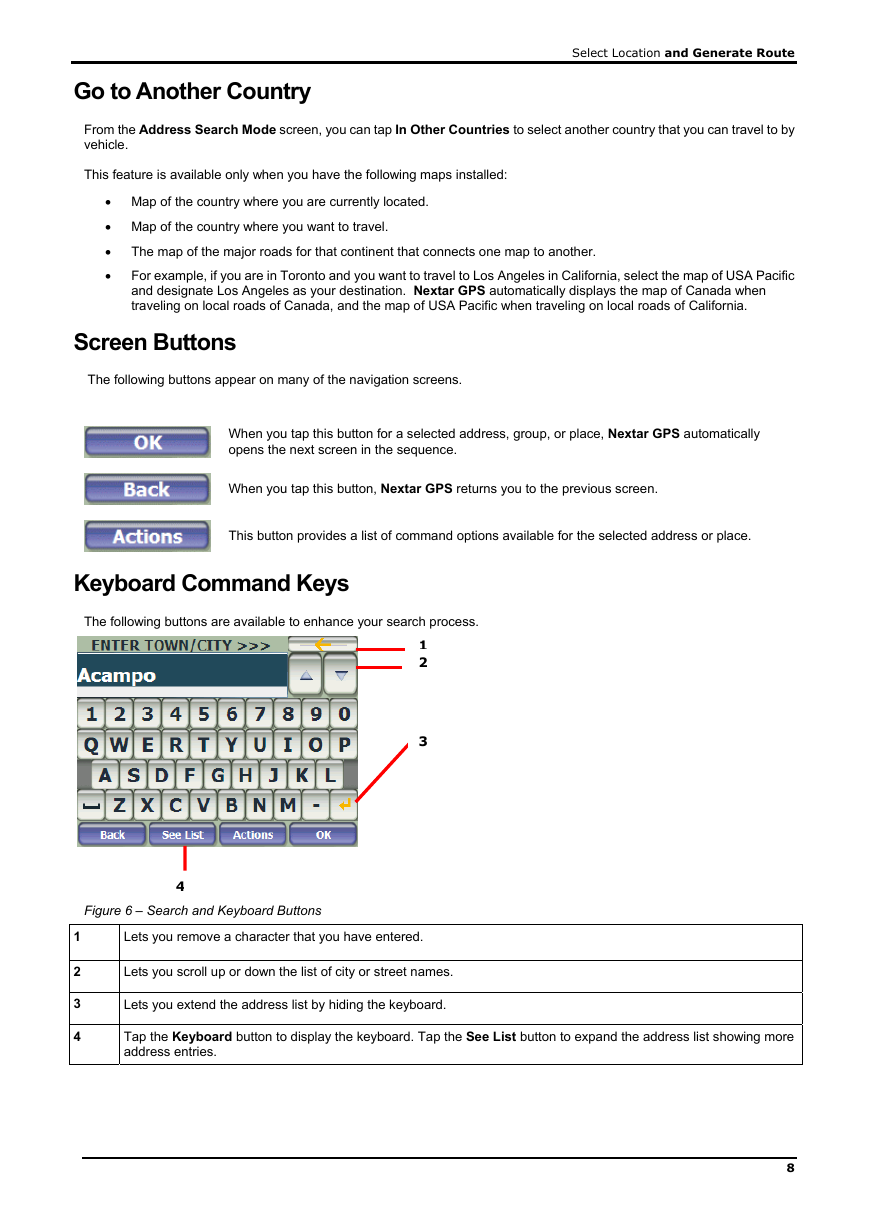
Tap from one of the Address Search Mode options to display the first address screen.
Figure 5 – Selecting an Address
When entering an address, you can use the keyboard to enter the characters. The characters appear in the Address field.
Nextar GPS automatically searches the Address list for the first occurrence of the entered characters. After you have
selected a city, it displays the next address field, such as street and address number.
Instead of specifying a street, you have the option of selecting the City Center. If you don't know the address number, you can
select the Street Midpoint.
Tap the OK button to move through the sequence of address screens.
7
�
Select Location and Generate Route
Go to Another Country
From the Address Search Mode screen, you can tap In Other Countries to select another country that you can travel to by
vehicle.
This feature is available only when you have the following maps installed:
• Map of the country where you are currently located.
• Map of the country where you want to travel.
•
•
The map of the major roads for that continent that connects one map to another.
For example, if you are in Toronto and you want to travel to Los Angeles in California, select the map of USA Pacific
and designate Los Angeles as your destination. Nextar GPS automatically displays the map of Canada when
traveling on local roads of Canada, and the map of USA Pacific when traveling on local roads of California.
Screen Buttons
The following buttons appear on many of the navigation screens.
When you tap this button for a selected address, group, or place, Nextar GPS automatically
opens the next screen in the sequence.
When you tap this button, Nextar GPS returns you to the previous screen.
This button provides a list of command options available for the selected address or place.
Keyboard Command Keys
The following buttons are available to enhance your search process.
1
2
3
Figure 6 – Search and Keyboard Buttons
4
1
2
3
4
Lets you remove a character that you have entered.
Lets you scroll up or down the list of city or street names.
Lets you extend the address list by hiding the keyboard.
Tap the Keyboard button to display the keyboard. Tap the See List button to expand the address list showing more
address entries.
8
�



 2023年江西萍乡中考道德与法治真题及答案.doc
 2012年重庆南川中考生物真题及答案.doc
 2013年江西师范大学地理学综合及文艺理论基础考研真题.doc
 2020年四川甘孜小升初语文真题及答案I卷.doc
 2020年注册岩土工程师专业基础考试真题及答案.doc
 2023-2024学年福建省厦门市九年级上学期数学月考试题及答案.doc
 2021-2022学年辽宁省沈阳市大东区九年级上学期语文期末试题及答案.doc
 2022-2023学年北京东城区初三第一学期物理期末试卷及答案.doc
 2018上半年江西教师资格初中地理学科知识与教学能力真题及答案.doc
 2012年河北国家公务员申论考试真题及答案-省级.doc
 2020-2021学年江苏省扬州市江都区邵樊片九年级上学期数学第一次质量检测试题及答案.doc
 2022下半年黑龙江教师资格证中学综合素质真题及答案.doc