logo资料库

松下数码摄像机-AJ-HDX400E说明书.pdf

第1页 / 共102页
第2页 / 共102页
第3页 / 共102页
第4页 / 共102页
第5页 / 共102页
第6页 / 共102页
第7页 / 共102页
第8页 / 共102页
资料共102页,剩余部分请下载后查看
Contents
Chapter 1 General
1-1 Features of the camera unit
1-2 Features of the VTR unit
1-3 System configuration
Chapter 2 Parts and their functions
2-1 Power supply and accessory mounting section
2-2 Audio function section
2-3 Shooting and recording/playback function section
2-4 Menu operation section
2-5 Time code related section
2-6 Warning/status display section
2-7 Display window and its displays
2-8 Viewfinder section
Chapter 3 Recording and playback
3-1 Cassette tapes
3-2 Basic procedures
3-3 Scene-to-scene continuity
3-4 PRE-RECORDING function
3-5 INTERVAL REC function
3-6 RETAKE function
3-7 Rec-review function
3-8 Normal playback and playback at different speeds
Chapter 4 Adjustments and settings for recording
4-1 Adjusting the white balance and black balance
4-1-1 Adjusting the white balance
4-1-2 Adjusting the black balance
4-2 Setting the electronic shutter
4-2-1 Shutter modes
4-2-2 Setting the shutter mode and speed
4-2-3 Setting the synchro scan mode
4-3 Selecting the recording signals
4-3-1 Selecting the recording signals
4-4 Selecting the audio input signals and adjusting their recording levels
4-4-1 Selecting the audio input signals
4-4-2 Adjusting the audio signal recording levels
4-4-3 CH3 and CH4 recording levels
4-5 Setting the time data
4-5-1 Setting the user bits
4-5-2 Setting the internal clock’s date and time
4-5-3 Setting the time code
4-5-4 Externally locking the time code
4-5-5 Setting the UMID information
4-6 Menu displays on the viewfinder screen
4-6-1 Menu configuration
4-6-2 Basic menu opera
4-6-3 Selecting the user menus
4-7 Viewfinder screen status displays
4-7-1 Viewfinder lamp displays
4-7-2 Viewfinder screen status display configuration
4-7-3 Selecting the viewfinder screen display items
4-7-4 Display modes and setting changes/adjustment result messages
4-7-5 Setting the marker displays
4-7-6 Setting the camera ID
4-7-7 Mode check screen displays (MODE CHECK button function)
4-7-8 Marker check screen displays (MARKER SELECT button function)
4-8 Menu-driven function setup
4-8-1 Setting the USER SW GAIN switching
4-8-2 Selecting the video output signals
4-8-3 Selecting the F.AUDIO LEVEL control function
4-8-4 Allocating functions to the USER MAIN, USER1 and USER2 buttons
4-8-5 Setting the color temperature manually
4-9 Data handling
4-9-1 Handling the setup card
4-9-2 Setup card operations
4-9-3 How to use the user data
4-9-4 How to use the scene file data
4-9-5 How to return the menus settings to the user standard settings
4-9-6 How to return the menus settings to the factory standard settings
Chapter 5 Preparation
5-1 Supplying the power
5-1-1 Attaching the battery and setting the battery type
5-1-2 Using an AC power supply
5-2 Attaching the lens and performing the flange back and white shading adjustments
5-3 Audio input signal preparations
5-3-1 When using the front microphone
5-3-2 When using a wireless receiver
5-3-3 When using an audio component
5-4 Mounting the unit on a tripod
5-5 Attaching the shoulder belt
5-6 Adjusting the position of the shoulder pad
5-7 Attaching the rain cover
5-8 Connecting the extension control unit (AJ-EC3E)
5-9 Attaching the FRONT AUDIO LEVEL control knob
Chapter 6 Maintenance and inspections
6-1 Inspections prior to shooting
6-1-1 Preparation for inspections
6-1-2 Inspecting the camera unit
6-1-3 Inspecting the VTR unit
6-1-4 Self-diagnosis function
6-2 Maintenance
6-2-1 Condensation
6-2-2 Head cleaning
6-2-3 Cleaning inside the viewfinder
6-2-4 Phenomena inherent to CCD cameras
6-2-5 Replacing the backup battery
6-2-6 Connectors and signals
6-3 Warning system
6-3-1 Warning description tables
6-3-2 Error codes
6-3-3 Emergency eject
Chapter 7 Menu description tables
7-1 Menu configuration
7-2 SYSTEM SET
7-2-1 SYSTEM MODE
7-2-2 REC FUNCTION
7-2-3 OUTPUT SEL
7-2-4 GENLOCK
7-2-5 OPTION MODE
7-3 PAINT
7-3-1 ROP
7-3-2 MATRIX
7-3-3 COLOR CORRECTION
7-3-4 LOW SETTING
7-3-5 MID SETTING
7-3-6 HIGH SETTING
7-3-7 ADDITIONAL DTL
7-3-8 SKIN TONE DTL
7-3-9 KNEE/LEVEL
7-3-10 GAMMA
7-3-11 FLARE
7-3-12 CAMERA SETTINGS
7-4 VF
7-4-1 VF DISPLAYS
7-4-2 VF MARKER
7-4-3 USER BOX
7-4-4 VF INDICATOR1
7-4-5 VF INDICATOR2
7-4-6 MODE CHECK IND
7-4-7 !LED
7-5 OPERATION
7-5-1 CAMERA ID
7-5-2 SHUTTER SPEED
7-5-3 SHUTTER SELECT
7-5-4 USER SW
7-5-5 SW MODE
7-5-6 WHITE BALANCE MODE
7-5-7 USER SW GAIN
7-5-8 IRIS
7-6 FILE
7-6-1 CARD READ/WRITE
7-6-2 CARD R/W SELECT
7-6-3 LENS FILE
7-6-4 SCENE
7-6-5 INITIALIZE
7-7 MAINTENANCE
7-7-1 SYSTEM CHECK
7-7-2 DIAGNOSTIC
7-7-3 LENS ADJ
7-7-4 BLACK SHADING
7-7-5 WHITE SHADING
7-8 VTR MENU
7-8-1 VTR FUNCTION
7-8-2 BATTERY/TAPE
7-8-3 BATTERY SETTING1
7-8-4 BATTERY SETTING2
7-8-5 MIC/AUDIO1
7-8-6 MIC/AUDIO2
7-8-7 TC/UB
7-8-8 UMID SET/INFO
7-8-9 VTR DIAG
7-9 OPTION MENU
7-9-1 OPTION
7-9-2 DOWNCON SETTING
Chapter 8 Specifications
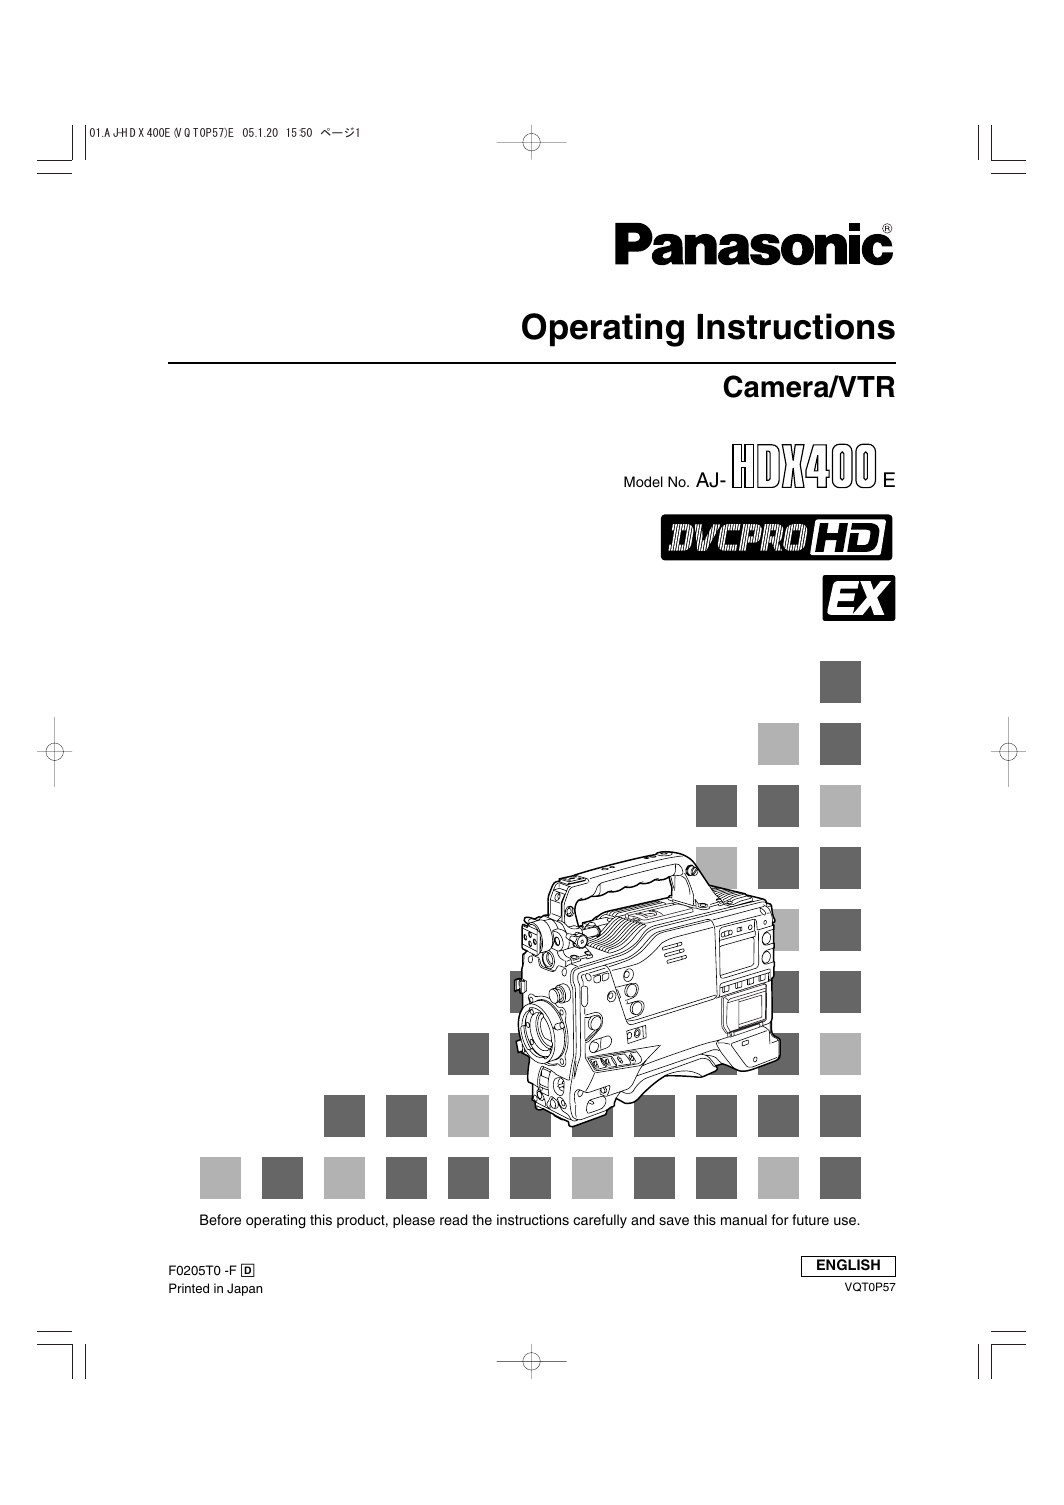
01.AJ-HDX400E(VQT0P57)E 05.1.20 15:50 ページ1 Operating Instructions Camera/VTR Model No. AJ- E Before operating this product, please read the instructions carefully and save this manual for future use. F0205T0 -F @ Printed in Japan ENGLISH VQT0P57
01.AJ-HDX400E(VQT0P57)E 05.1.20 15:50 ページ2 CAUTION: TO REDUCE THE RISK OF FIRE OR SHOCK HAZARD AND ANNOYING INTERFERENCE, USE THE RECOMMENDED ACCESSORIES ONLY. $ DO NOT REMOVE PANEL COVERS BY UNSCREWING THEM. To reduce the risk of electric shock, do not remove the covers. No user serviceable parts inside. Refer servicing to qualified service personnel. CAUTION: TO REDUCE THE RISK OF FIRE OR SHOCK HAZARD, REFER MOUNTING OF OPTIONAL INTERFACE BOARDS TO AUTHORIZED SERVICE PERSONNEL. WARNING: OTO REDUCE THE RISK OF FIRE OR SHOCK HAZARD, DO NOT EXPOSE THIS EQUIPMENT TO RAIN OR MOISTURE. OTO REDUCE THE RISK OF FIRE OR SHOCK HAZARD, KEEP THIS EQUIPMENT AWAY FROM ALL LIQUIDS. USE AND STORE ONLY IN LOCATIONS WHICH ARE NOT EXPOSED TO THE RISK OF DRIPPING OR SPLASHING LIQUIDS, AND DO NOT PLACE ANY LIQUID CONTAINERS ON TOP OF THE EQUIPMENT. Lithium Battery CAUTION Danger of explosion if battery is incorrectly replaced. Replace only with the same or equivalent type recommended by the equipment manufacturer. Discard to manufacturer’s instructions. according used batteries VARNING Explosionsfara vid felaktigt batteribyte. Använd samma batterityp eller en ekvivalent typ som rekommenderas av apparattillverkaren. Kassera använt batteri enligt fabrikantens instruktion. ADVARSEL! Eksplosionsfare ved fejlagtig håndtering. Udskiftning må kun ske med batteri af samme fabrikat og type. Levér det brugte batteri tilbage til leverandøren. VAROITUS Paristo voi räjähtää, jos se on virheellisesti asennettu. Vaihda paristo ainoastaan laitevalmistajan suosittelemaan tyypiin. Hävitä käytetty paristo valmistajan ohjeiden mukaisesti. Warning The lithium battery in this equipment must only be replaced by qualified personnel. When necessary, contact your local Panasonic supplier. “The lithium battery is a critical component (type number CR2032 or BR2032 manufactured by Panasonic.) It must never be subjected to excessive heat or discharge. It must therefore only be fitted in equipment designed specifically for its use. Replacement batteries must be of the same type and manufacturer. They must be fitted in the same manner and location as the original battery, with the correct polarity connections observed. Do not attempt to re-charge the old battery or re-use it for any other purpose. It should be disposed of in waste products destined for burial rather than incineration.” indicates safety information. 2
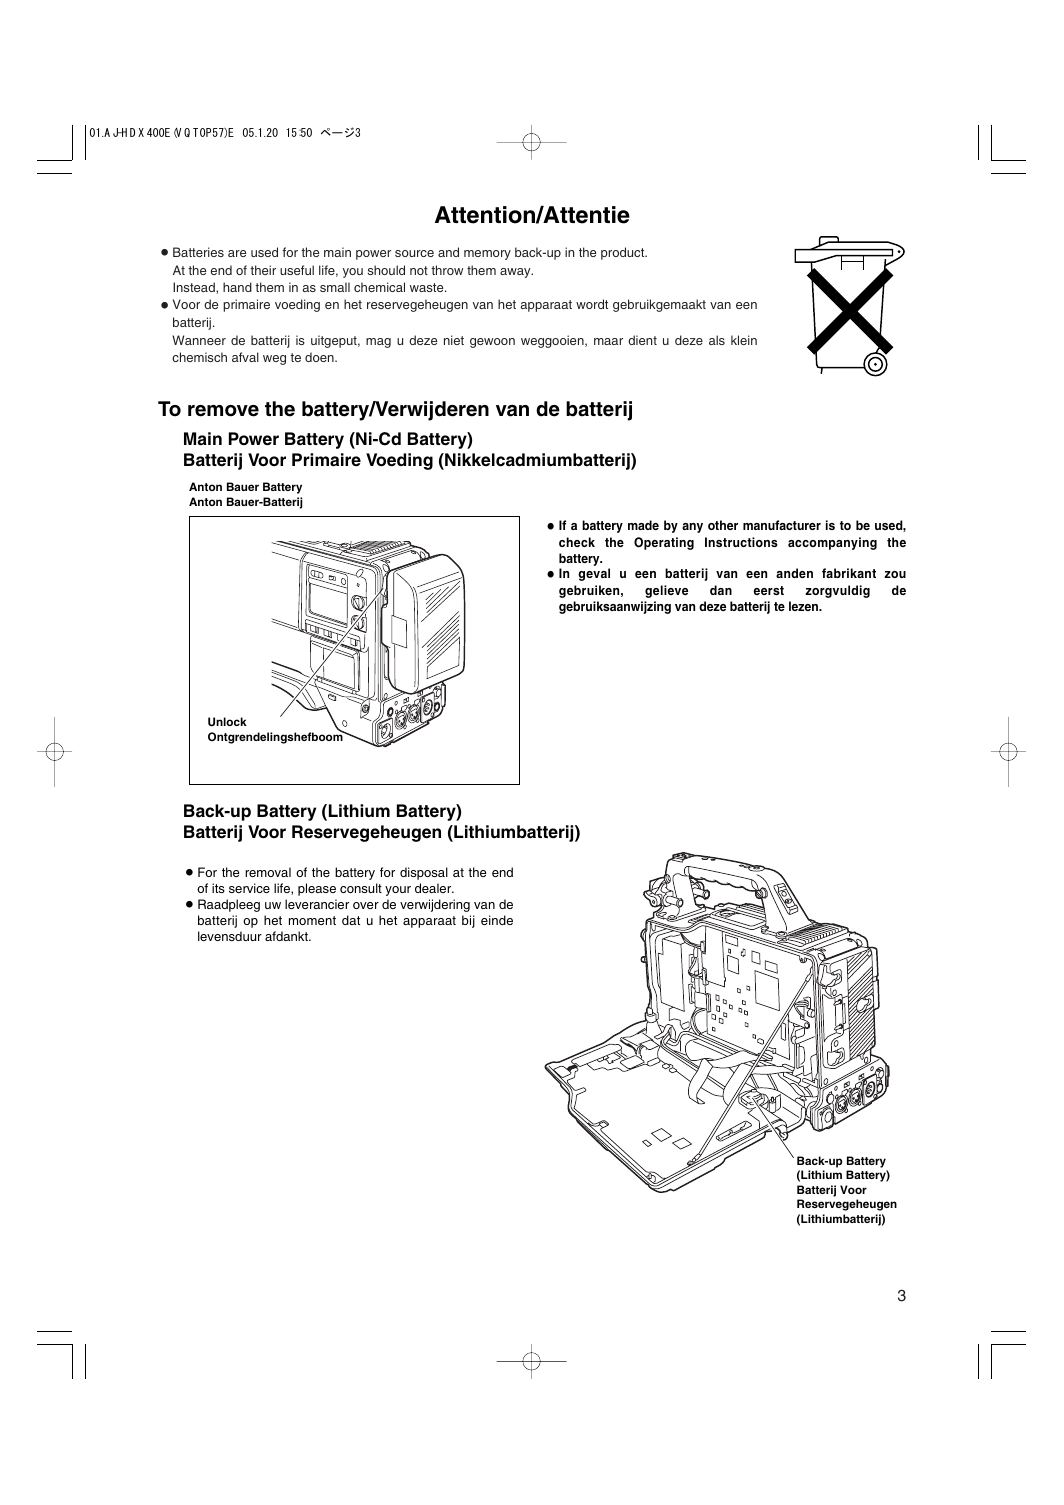
01.AJ-HDX400E(VQT0P57)E 05.1.20 15:50 ページ3 Attention/Attentie OBatteries are used for the main power source and memory back-up in the product. At the end of their useful life, you should not throw them away. Instead, hand them in as small chemical waste. OVoor de primaire voeding en het reservegeheugen van het apparaat wordt gebruikgemaakt van een batterij. Wanneer de batterij is uitgeput, mag u deze niet gewoon weggooien, maar dient u deze als klein chemisch afval weg te doen. To remove the battery/Verwijderen van de batterij Main Power Battery (Ni-Cd Battery) Batterij Voor Primaire Voeding (Nikkelcadmiumbatterij) Anton Bauer Battery Anton Bauer-Batterij O If a battery made by any other manufacturer is to be used, check the Operating Instructions accompanying the battery. O In geval u een batterij van een anden fabrikant zou de gebruiken, gebruiksaanwijzing van deze batterij te lezen. gelieve dan eerst zorgvuldig Unlock Ontgrendelingshefboom Back-up Battery (Lithium Battery) Batterij Voor Reservegeheugen (Lithiumbatterij) OFor the removal of the battery for disposal at the end of its service life, please consult your dealer. ORaadpleeg uw leverancier over de verwijdering van de batterij op het moment dat u het apparaat bij einde levensduur afdankt. Back-up Battery (Lithium Battery) Batterij Voor Reservegeheugen (Lithiumbatterij) 3
01.AJ-HDX400E(VQT0P57)E 05.1.20 15:50 ページ4 Contents Chapter 1 General .................................... 6 Features of the camera unit ...................... 6 Features of the VTR unit ........................... 7 System configuration ................................ 8 Chapter 2 Parts and their functions ....... 9 1-1 1-2 1-3 2-1 Power supply and accessory mounting section ....................................... 9 2-2 Audio function section ............................ 10 2-3 Shooting and recording/playback function section ....................................... 12 2-4 Menu operation section ........................... 15 2-5 Time code related section ....................... 16 2-6 Warning/status display section .............. 17 2-7 Display window and its displays ............ 17 Viewfinder section ................................... 19 2-8 Chapter 3 Recording and playback ...... 20 3-1 Cassette tapes .......................................... 20 3-2 Basic procedures ..................................... 21 Scene-to-scene continuity ...................... 23 3-3 3-4 PRE-RECORDING function ...................... 23 3-5 INTERVAL REC function .......................... 24 3-6 RETAKE function ..................................... 25 3-7 Rec-review function ................................. 26 3-8 Normal playback and playback at different speeds ................................... 26 Chapter 4 Adjustments and settings for recording ............................... 27 4-1 Adjusting the white balance and 4-2 black balance ........................................... 27 Adjusting the white balance ......................... 27 Adjusting the black balance ......................... 29 Setting the electronic shutter ................. 30 Shutter modes ............................................. 30 Setting the shutter mode and speed ........... 30 Setting the synchro scan mode ................... 31 4-1-1 4-1-2 4-2-1 4-2-2 4-2-3 4-3 4-3-1 4-4 4-4-1 4-4-2 4-4-3 Selecting the recording signals and recording system ..................................... 31 Selecting the record signals ........................ 31 Selecting the audio input signals and adjusting their recording levels .............. 31 Selecting the audio input signals ................. 31 Adjusting the audio signal recording levels . 32 CH3 and CH4 recording levels .................... 32 4 4-5 4-7 4-6-1 4-6-2 4-6-3 4-7-1 4-7-2 4-7-3 4-7-4 4-7-5 4-7-6 4-7-7 4-5-1 4-5-2 4-5-3 4-5-4 4-5-5 Setting the time data ................................ 33 Setting the user bits ..................................... 33 Setting the internal clock’s date and time .... 34 Setting the time code ................................... 35 Externally locking the time code .................. 35 Setting the UMID information ...................... 36 4-6 Menu displays on the viewfinder screen....... 37 Menu configuration ...................................... 37 Basic menu operations ................................ 37 Selecting the user menus ............................ 38 Viewfinder screen status displays ......... 39 Viewfinder lamp displays.............................. 39 Viewfinder screen status display configuration..................................................39 Selecting the viewfinder screen display items ............................................................ 39 Display modes and setting changes/adjustment result messages ......... 45 Setting the marker displays ......................... 45 Setting the camera ID .................................. 45 Mode check screen displays (MODE CHECK button function) ................. 46 Marker check screen displays (MARKER SELECT button function) ........... 46 4-8 Menu-driven function setup .................... 47 Setting the USER SW GAIN switching ........ 47 Selecting the video output signals ............... 47 Selecting the F.AUDIO LEVEL control function ............................................ 48 Allocating functions to the USER MAIN, USER1 and USER2 buttons ........................ 48 Setting the color temperature manually ....... 49 4-9 Data handling ........................................... 49 Handling the setup card .............................. 49 Setup card operations ................................. 50 How to use the user data ............................ 53 How to use the scene file data .................... 54 How to return the menus settings to the user standard settings ................................. 57 How to return the menus settings to the factory standard settings ............................. 57 How to use the lens file data ....................... 57 Chapter 5 Preparation ........................... 58 Supplying the power ................................ 58 4-9-1 4-9-2 4-9-3 4-9-4 4-9-5 4-8-1 4-8-2 4-8-3 4-8-4 4-8-5 4-9-6 4-9-7 4-7-8 5-1 5-1-1 5-1-2 Attaching the battery and setting the battery type .................................................. 58 Using an AC power supply .......................... 60 5-2 Attaching the lens and performing the flange back and white shading adjustments .............................................. 60
01.AJ-HDX400E(VQT0P57)E 05.1.20 15:50 ページ5 Contents 5-3 Audio input signal preparations ............. 65 5-3-1 When using the front microphone ............... 65 5-3-2 When using a wireless receiver ................... 65 5-3-3 When using an audio component ................ 66 5-4 Mounting the unit on a tripod ................. 66 5-5 Attaching the shoulder belt .................... 67 5-6 Adjusting the position of the shoulder pad .................................. 67 5-7 Attaching the rain cover .......................... 67 5-8 Connecting the extension control unit (AJ-EC3E) ................................................. 67 5-9 Attacching the FRONT AUDIO LEVEL control knob ............................................. 68 Chapter 6 Maintenance and 6-1 6-1-1 6-1-2 6-1-3 6-1-4 6-2-1 6-2-2 6-2-3 6-2-4 6-2-5 6-2-6 inspections ........................... 69 Inspections prior to shooting ................. 69 Preparation for inspections .......................... 69 Inspecting the camera unit .......................... 69 Inspecting the VTR unit ............................... 70 Self-diagnosis function ................................ 71 6-2 Maintenance ............................................. 72 Condensation ............................................... 72 Head cleaning .............................................. 72 Cleaning inside the viewfinder ..................... 72 Phenomena inherent to CCD cameras ....... 72 Replacing the backup battery ...................... 72 Connectors and signals ............................... 73 6-3 Warning system ....................................... 74 6-3-1 Warning description tables .......................... 74 Error codes .................................................. 76 6-3-2 Emergency eject .......................................... 76 6-3-3 Chapter 7 Menu description tables ...... 77 7-1 Menu configfation .................................... 77 SYSTEM SETTING .................................... 78 7-2 SYSTEM SETTING ..................................... 78 REC FUNCTION ......................................... 78 OUTPUT SEL .............................................. 78 GENLOCK ................................................... 79 OPTION MODE ........................................... 79 PAINT ........................................................ 79 7-3-1 ROP ............................................................. 79 7-3-2 MATRIX ....................................................... 80 7-3-3 COLOR CORRECTION .............................. 80 7-3-4 LOW SETTING ............................................ 81 7-3-5 MID SETTING ............................................. 81 7-3-6 HIGH SETTING ........................................... 82 7-3-7 ADDTIONAL DTL ........................................ 82 7-3-8 SKIN TONE DTL ......................................... 83 7-3-9 KNEE/LEVEL .............................................. 83 7-3-10 GAMMA ....................................................... 84 7-3-11 FLARE ......................................................... 84 7-3-12 CAMERA SETTING .................................... 84 7-2-1 7-2-2 7-2-3 7-2-4 7-2-5 7-3 7-6 7-4 7-6-1 7-6-2 7-6-3 7-6-4 7-6-5 7-4-1 7-4-2 7-4-3 7-4-4 7-4-5 7-4-6 7-4-7 VF .............................................................. 85 VF DISPLAYS ............................................. 85 VF MARKER ............................................... 85 USER BOX .................................................. 86 VF INDICATOR1 ......................................... 86 VF INDICATOR2 ......................................... 86 MODE CHECK IND ..................................... 87 !LED ............................................................ 87 7-5 OPERATION .............................................. 87 CAMERA ID ................................................ 87 7-5-1 SHUTTER SPEED ...................................... 87 7-5-2 SHUTTER SELECT .................................... 88 7-5-3 USER SW .................................................... 88 7-5-4 7-5-5 SW MODE ................................................... 89 7-5-6 WHITE BALANCE MODE ........................... 90 USER SW GAIN .......................................... 90 7-5-7 7-5-8 IRIS ............................................................. 91 FILE ........................................................... 91 CARD READ/WRITE ................................... 91 CARD R/W SELECT ................................... 91 LENS FILE .................................................. 92 SCENE ........................................................ 92 INITIALIZE ................................................... 92 7-7 MAINTENANCE ........................................ 92 SYSTEM CHECK ........................................ 92 7-7-1 DIAGNOSTIC .............................................. 92 7-7-2 LENS ADJ ................................................... 92 7-7-3 7-7-4 BLACK SHADING ....................................... 93 7-7-5 WHITE SHADING ....................................... 93 VTR MENU ................................................ 93 VTR FUNCTION .......................................... 93 BATTERY/TYPE ......................................... 93 BATTERY SETTING1 ................................. 94 BATTERY SETTING2 ................................. 96 MIC/AUDIO1 ............................................... 97 MIC/AUDIO2 ............................................... 97 TC/UB .......................................................... 98 UMID SET/INFO .......................................... 98 VTR DIAG ................................................... 99 7-9 OPTION MENU........................................... 99 OPTION ....................................................... 99 DOWNCON SETTING ................................ 99 Chapter 8 Specifications ..................... 100 7-8-1 7-8-2 7-8-3 7-8-4 7-8-5 7-8-6 7-8-7 7-8-8 7-8-9 7-9-1 7-9-2 7-8 UniSlot is a trademark of Ikegami Tsusinki co., Ltd. 5
01.AJ-HDX400E(VQT0P57)E 05.1.20 15:50 ページ6 Chapter 1 General The AJ-HDX400E is a video camera recorder that integrates a 3-CCD camera unit featuring a 2/3-inch on-chip lens that supports progressive drive with a VTR unit that in turn supports the DVCPRO HD EX format. One special feature of the camera unit is its ability to consistently express images with a high quality and high sensitivity since it employs progressive drive. The unit is both compact and lightweight, and it has a minimal power consumption. It features a high picture quality and sensitivity, it has excellent mobility, and it effectively withstands dust, humidity and moisture. With all these features incorporated, it can be used even for electronic news gathering activities. Both the camera and VTR units employ digital signal processing technology to achieve even higher levels of picture quality and stability and also to produce a system that enables the data to be controlled on the setup card. 1-1 Features of the camera unit ≥E-cinema camera unit featured ≥ Data control function This video camera recorder features the Varicam (AJ- HDC27F) camera unit that was developed for E-cinema uses. This camera maximally exploits the excellence of progressive scanning and, in delivering signals to the VTR unit, it cross-converts the signals into the 1080i system using a newly developed LSI chip. ≥ Progressive drive The unit is a switchable progressive and interlaced standards (1080/25P and 1080/50i) enable reader. While progressive drive is used, the signals transferred to and from the unit ae converted into interlace signais (25PsF). When the unit is used on its own, one set of user data and four sets of scene file data can be registered. Further, by using an SD card or a Multimedia Card (optional accessory) as the setup card, up to eight sets of setup data can be stored. SD card and MultiMedia card used in this unit do not comply with the SD standard. Do not use cards formatted using this unit with other camera-recorders. Further, NTFS and FAT32 formatted cards cannot be used with this unit. The recommended size for SD cards is 8 MB or more and 4 MB or more for MultiMedia cards. ≥ Storage type high-sensitivity function ≥ MARKER SELECT button The unit comes with a storage type gain increase function. This is a function that makes it possible to achieve a higher sensitivity of up to 20 dB above the regular gain increase. ≥ Digital zoom function At the front of the unit is a button for checking the information concerning the markers on the viewfinder screen. This is useful for checking the picture angle, for instance, during shooting. The unit is equipped with a digital zoom employing function. This function is particularly useful when zooming further in on a subject. ≥ ECU supported The unit supports the AJ-EC3E extension control unit. ≥ Single-action shoulder pad slide function It is now possible to adjust the position where the unit is optimally balanced for operation using a single-touch action. This means that the operator can easily optimize the unit’s balance when the lens, battery and other peripheral camera devices have been installed on the unit. ≥ 12-bit A/D conversion digital signal processing circuitry The analog images are processed into digital data by a 12- bit A/D converter with sampling frequencies of 74 MHz, and by operating the signal processor using the 74 MHz frequency, it is possible to reproduce images which are more finely detailed and achieve improvements in stability and reliability. ≥ 12-axis independent color correction function Serving as a paint function, this facility enables the colors for 12 axes to be compensated for independently and is very useful for creating finely detailed images. 6
01.AJ-HDX400E(VQT0P57)E 05.1.20 15:50 ページ7 Chapter 1 General 1-2 Features of the VTR unit ≥DVCPRO HD EX format system supported The VTR unit employs the DVCPRO HD EX recording format that supports the 1080i/25PsF,50i HD system. Using the latest compression technology, it achieves two times the economy of conventional DVCPRO HD format. ≥ Power-saving management function In order to reduce its power consumption efficiently, the unit has a function that shuts down circuitry that is not required for the particular VTR mode established at the time. This enables the user to perform operations while conserving power. ≥ Pre-recording function featured This function makes it possible to record the pictures and sound up to 10 seconds ahead of the point in time when recording is commenced by pressing the REC START button or VTR button on the lens. It is effective in preventing shots from being missed. ≥ Interval REC function provided This unit is capable of interval shooting. This unit makes it possible to conduct recording in intervals with a minimum recording time in increments of one frame. This is particularly useful for shooting science and nature programs. Furthermore, when the unit is used for one-shot recording, frame-by-frame shooting is easily accomplished. ≥ RETAKE function This function is for not leaving behind superfluous cuts when a cut turns out to be no good during the shooting of news, reports or art programmes. By cutting down on the time taken for copying onto the work tape, for instance, this function is very effective in achieving economical operation. Users should remember to handle this function very carefully. ≥SD down-converter output supported This unit makes it possible to output SD down-converter signals from its VIDEO OUT connector. ≥ Input signals of 4 separate audio channels supported The unit enables the audio input signals in four channels to be selected separately. Further, the level of the signal in each channel can be monitored on the LCD display window. ≥ Front audio level control The unit’s front panel is equipped with a control for adjusting the audio recording level. This is useful when the user is filming on his or her own and the audio level needs to be adjusted. It also is possible to cancel the effect of this control. 1 ≥ UniSlot wireless receiver The unit’s construction supports a slot-in wireless receiver which is available as an optional accessory. ≥ Built-in DOLBY NR system The CUE audio recording circuitry contains a Dolby B noise reduction circuit. ≥Dolby noise reduction manufactured under license from Dolby Laboratories Licensing Corporation. ≥“DOLBY” and the double-D symbol Î are trademarks of Dolby Laboratories Licensing Corporation. ≥ Frame-to-frame continuity Simply by pressing the REC START button or VTR button on the lens, the continuity from one frame to the next is assured with a precision of +1 frame or less. ≥ Rec-review function This automatically rewinds the tape for the last 2 to 10 seconds recorded and plays back the recording. This enables the recording to be monitored easily. ≥ Built-in time code generator/reader This enables the time code information to be recorded on the dedicated sub-code track and played back. ≥ Metadata supported The unit allows information from the AJ-GPS900G GPS unit to be recorded on tape as the metadata UMID information. This is useful when it comes to managing on-tape information. 7
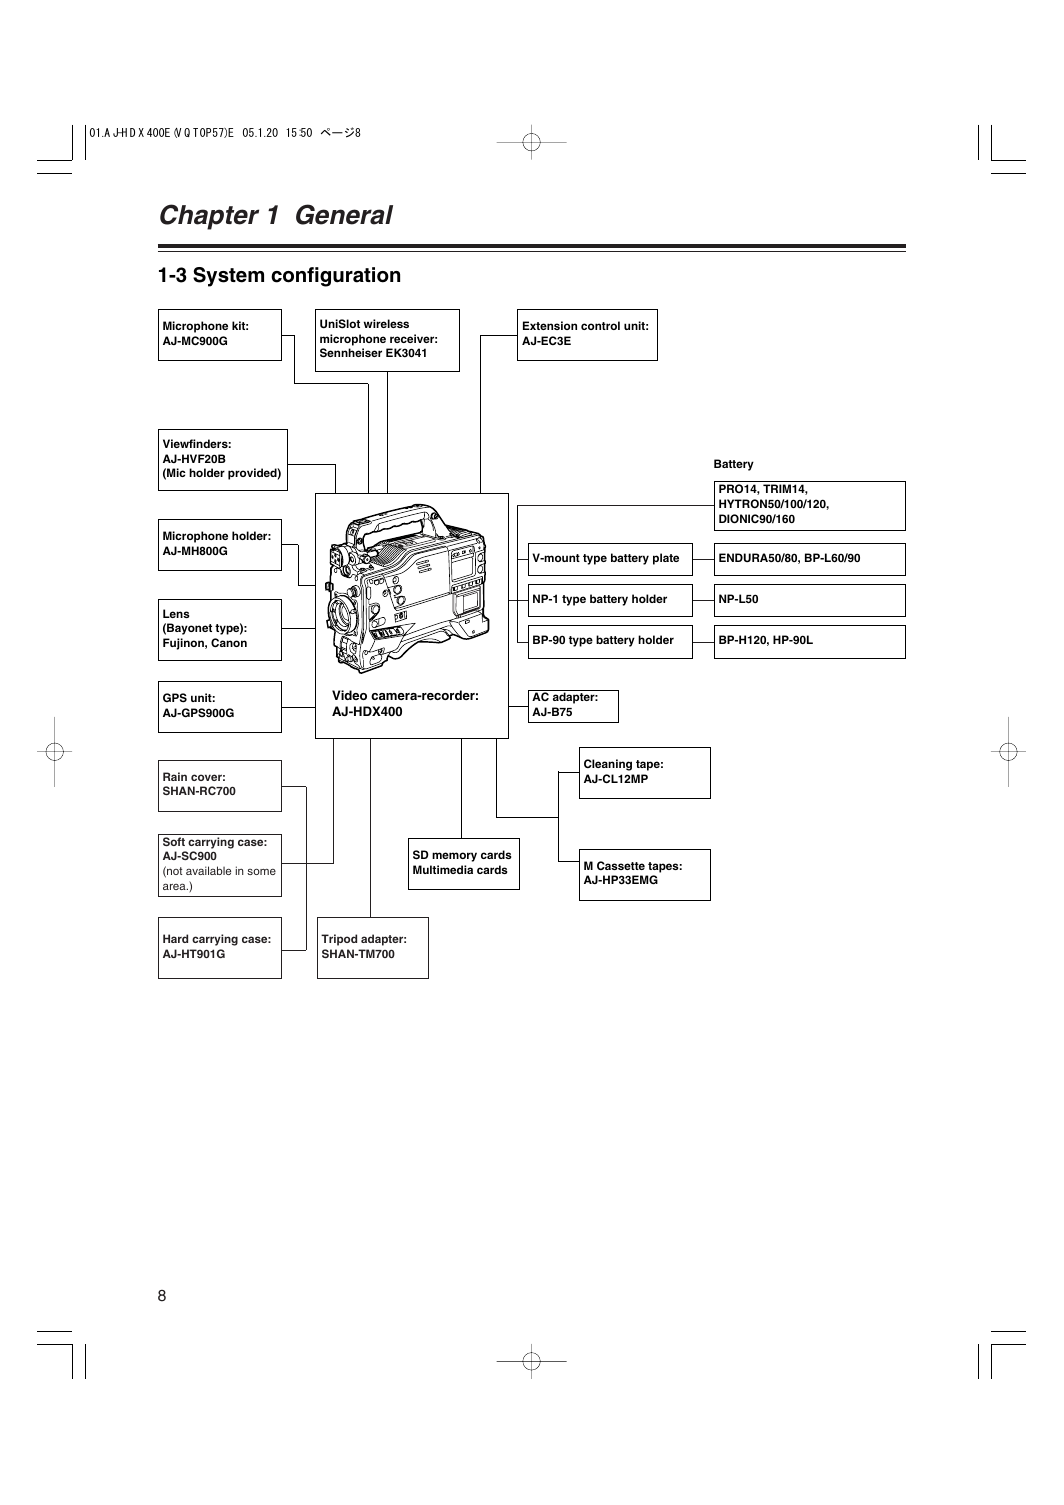
01.AJ-HDX400E(VQT0P57)E 05.1.20 15:50 ページ8 Chapter 1 General 1-3 System configuration Microphone kit: AJ-MC900G UniSlot wireless microphone receiver: Sennheiser EK3041 Extension control unit: AJ-EC3E Viewfinders: AJ-HVF20B (Mic holder provided) Microphone holder: AJ-MH800G Lens (Bayonet type): Fujinon, Canon Battery PRO14, TRIM14, HYTRON50/100/120, DIONIC90/160 V-mount type battery plate ENDURA50/80, BP-L60/90 NP-1 type battery holder NP-L50 BP-90 type battery holder BP-H120, HP-90L GPS unit: AJ-GPS900G Video camera-recorder: AJ-HDX400 AC adapter: AJ-B75 Rain cover: SHAN-RC700 Soft carrying case: AJ-SC900 (not available in some area.) Cleaning tape: AJ-CL12MP SD memory cards Multimedia cards M Cassette tapes: AJ-HP33EMG Hard carrying case: AJ-HT901G Tripod adapter: SHAN-TM700 8
分享到:
收藏