东拼西凑终于把 u-boot+kernel+rootfs 完整的启动成功了!以下是过程的总结,软件包官网上可以下载到。
先把一些库装上,嘎嘎:
安装 zilb 库
#sudo apt-get install zlib1g-dev
安装 glib2.12
#wget http://ftp.gtk.org/pub/glib/2.12/glib-2.12.0.tar.bz2
#tar jxf glib-2.12.0.tar.bz2
#cd glib-2.12.0
#./confugure(出现错误 安装 gettext 再次就可以执行)
#sudo make
#sudo make install
安装 autoreconf
#sudo apt-get install dh-autoreconf
安装 libsdl1.2
#sudo apt-get install libsdl1.2-dev
一、安装 qemu
1、下载 qemu
#tar zxvf qemu-0.14.0.tar.gz
#cd qemu
#git clone git://git.qemu.org/qemu.git
2、安装 qemu
#sudo chmod 777 /opt
将 qemu 安装在/opt 下
#./configure --prefix=/opt/qemu --target-list=arm-softmmu,arm-linux-user --enable-debug
# make
# sudo make install
3、测试 qemu 是否能启动
#tar zxvf arm-test-0.2.tar.gz
#cd arm-test
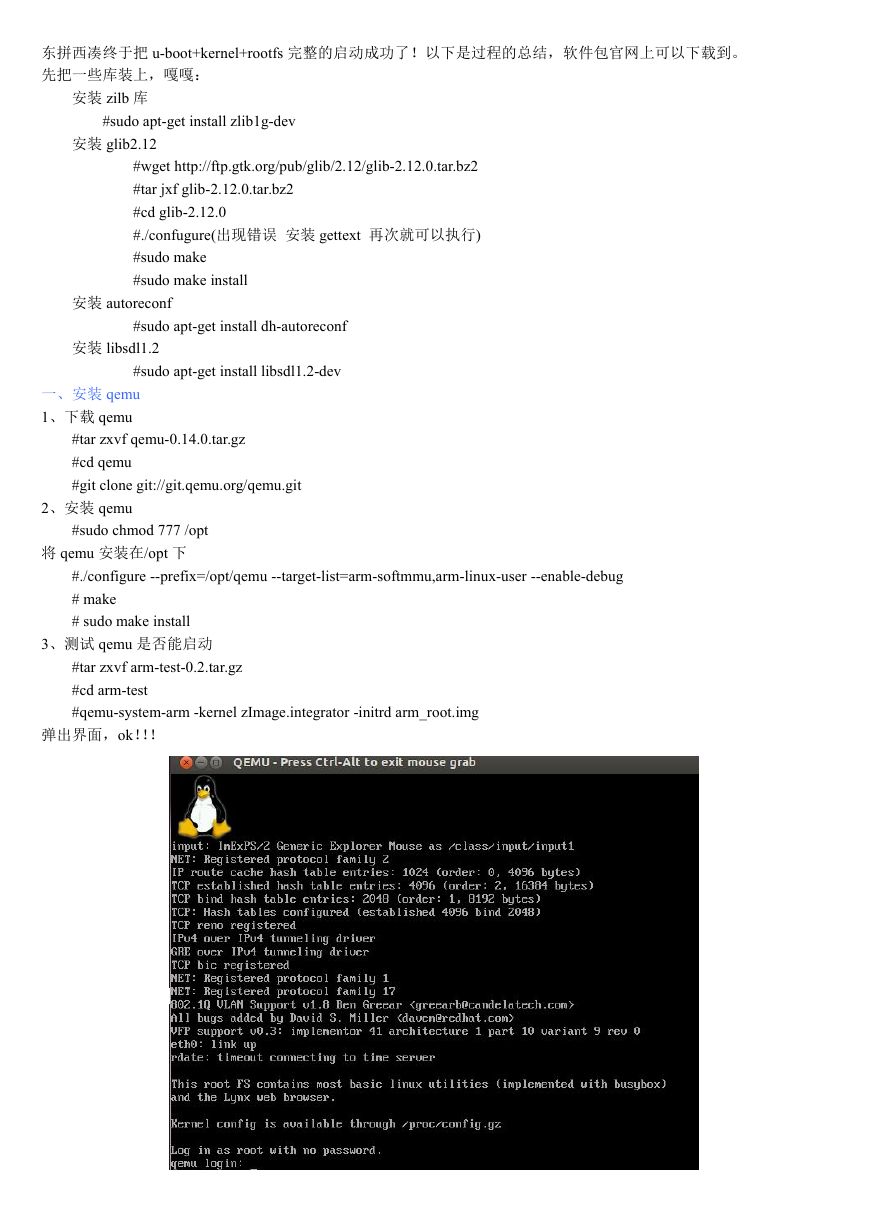
#qemu-system-arm -kernel zImage.integrator -initrd arm_root.img
弹出界面,ok!!!
�
二、安装交叉编译工具
这里安装编译工具 4.3.2。
1、安装 4.3.2
#tar xvf arm-linux-gcc-4.3.2.tgz
#mv -f “you path”/usr/local/arm/* /usr/local/arm
#sudo gedit /etc/profile
末行添加 export PATH=/usr/local/arm/4.3.2/bin:$PATH
#source /etc/profile
2、测试 qemu
你可以写一个 Hello World!!!的 C 程序来进行测试。
#arm-none-linux-gnueabi-gcc -o hello hello.c
#qemu-arm -L “your path”/CodeSourcery/Sourcery_G++_Lite/arm-none-linux-gnueabi/libc hello
三、安装 u-boot
1、下载和解压
2、修改源码(后期方便制作文件系统)
u-boot-2010.03/common/image.c 中,941 行处
#if defined(CONFIG_B2) || defined(CONFIG_EVB4510) || defined(CONFIG_ARMADILLO)
改为:
#if defined(CONFIG_B2) || defined(CONFIG_EVB4510) || defined(CONFIG_ARMADILLO) ||
defined(CONFIG_VERSATILE)
u-boot-2010.03/include/configs/versatile.h 中,124 行处
#define CONFIG_BOOTDELAY 2
#define CONFIG_BOOTARGS
"root=/dev/nfs mem=128M ip=dhcp "\
"netdev=25,0,0xf1010000,0xf1010010,eth0"
改为:
#define CONFIG_BOOTARGS
#define CONFIG_BOOTCOMMAND
1
#define CONFIG_INITRD_TAG
3、编译 u-boot
"root=/dev/ram mem=128M rdinit=/sbin/init"
"bootm 0x210000 0x410000"
#make ARCH=arm CROSS_COMPILE=arm-linux- versatilepb_config
#make ARCH=arm CROSS_COMPILE=arm-linux-
4、测试 u-boot
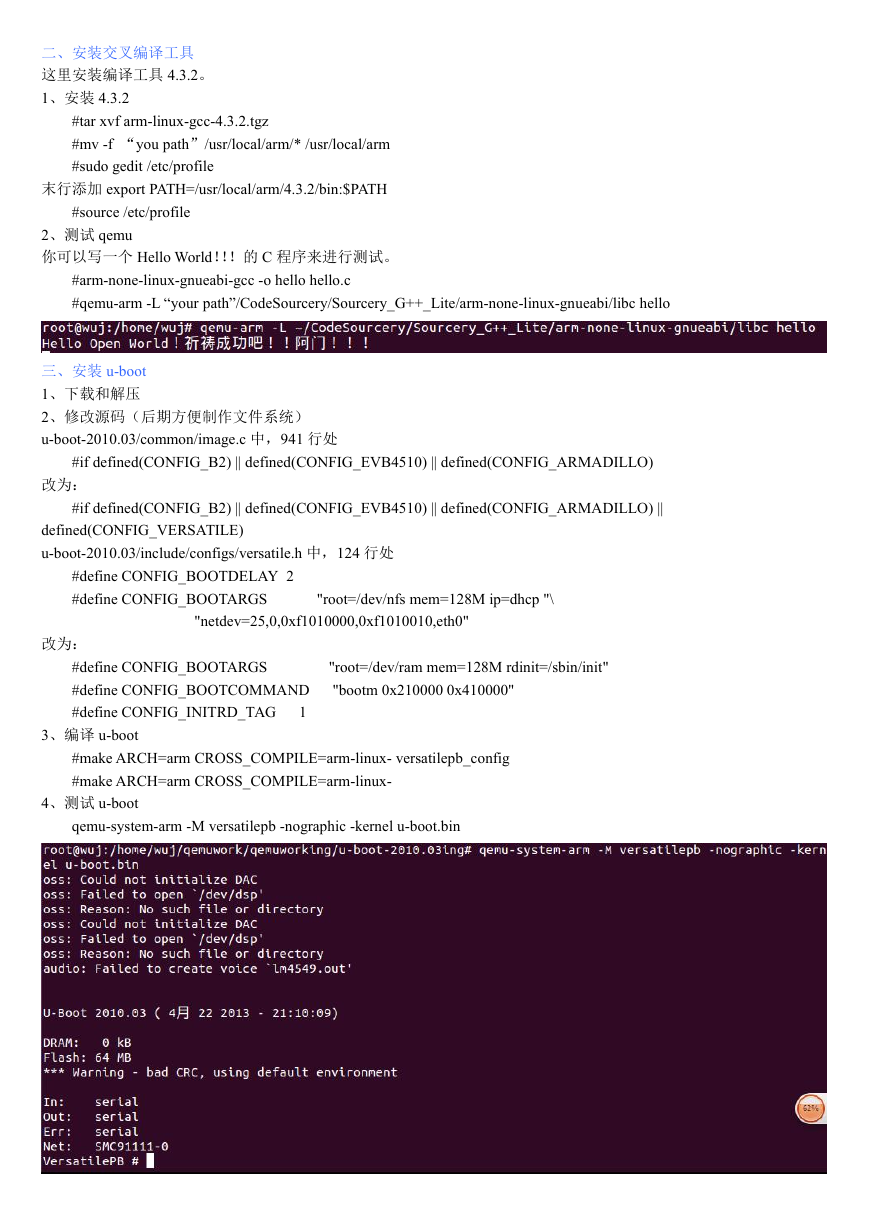
qemu-system-arm -M versatilepb -nographic -kernel u-boot.bin
�
四、编译 linux 内核
#tar xvf linux-2.6.34.14.tar.xz
#cd linux-2.6.34.14
#make ARCH=arm versatile_defconfig
#make ARCH=arm menuconfig
进入图形配置界面将 Kernel Featurer 中的 Use the ARM EABI to compile the kernel 选上
#make ARCH=arm CROSS_COMPILE=arm-none-linux-gnueabi all
在 arch/arm/boot/下会生成 zImage 文件,该文件就是后期制作 kernel 的 bin 文件用的 kernel 镜像文件。
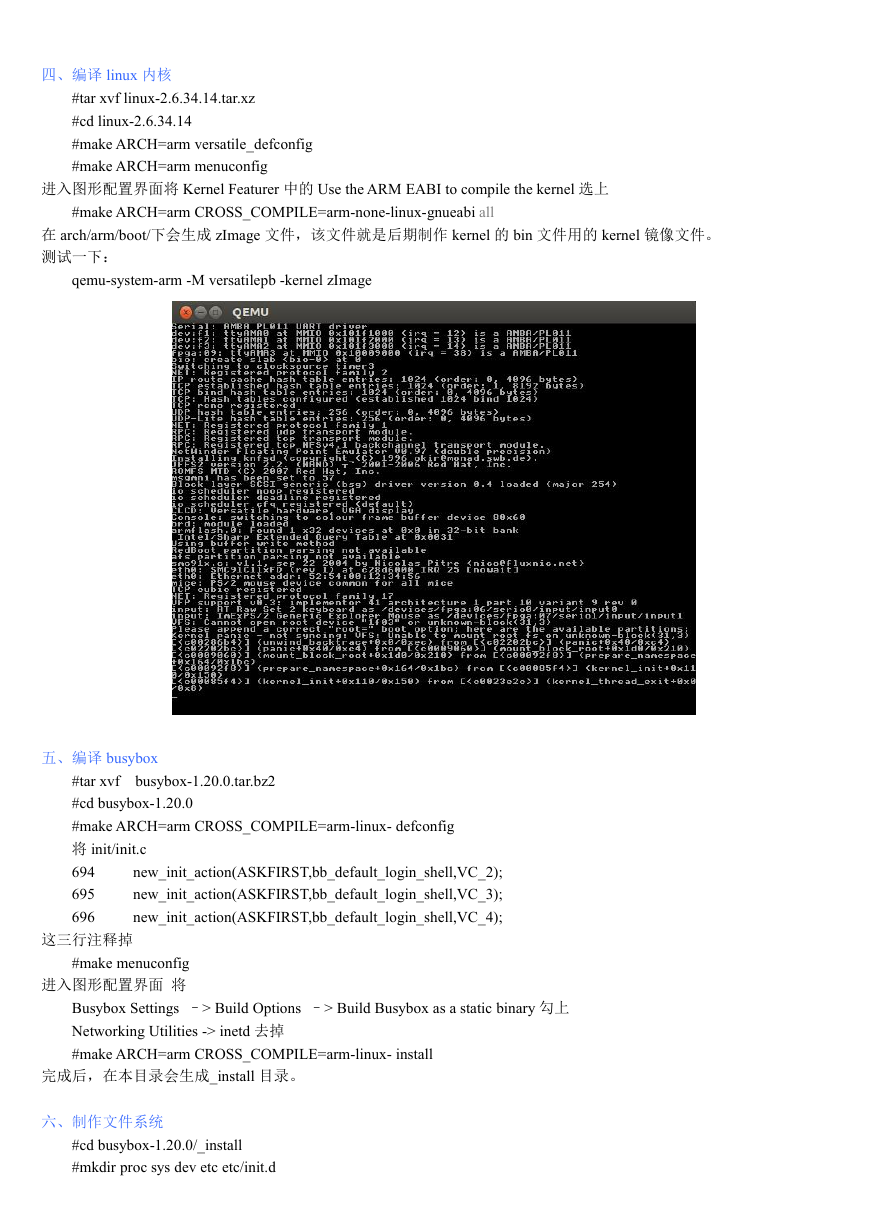
测试一下:
qemu-system-arm -M versatilepb -kernel zImage
五、编译 busybox
busybox-1.20.0.tar.bz2
#tar xvf
#cd busybox-1.20.0
#make ARCH=arm CROSS_COMPILE=arm-linux- defconfig
将 init/init.c
694
695
696
new_init_action(ASKFIRST,bb_default_login_shell,VC_2);
new_init_action(ASKFIRST,bb_default_login_shell,VC_3);
new_init_action(ASKFIRST,bb_default_login_shell,VC_4);
这三行注释掉
#make menuconfig
进入图形配置界面 将
Busybox Settings –> Build Options –> Build Busybox as a static binary 勾上
Networking Utilities -> inetd 去掉
#make ARCH=arm CROSS_COMPILE=arm-linux- install
完成后,在本目录会生成_install 目录。
六、制作文件系统
#cd busybox-1.20.0/_install
#mkdir proc sys dev etc etc/init.d
�
#vim etc/init.d/rcS
添加内容
#!/bin/sh
mount -t proc none /proc
mount -t sysfs none /sys
/sbin/mdev -s
修改 rcS 权限
#chmod 777 rcS
#cd _install
#find . | cpio -o --format=newc > ../rootfs.img
#cd ..
#gzip -c rootfs.img > rootfs.img.gz
测试 kernel 和 rootfs:
将 zImage 拷贝到 busybox-1.20.0/下
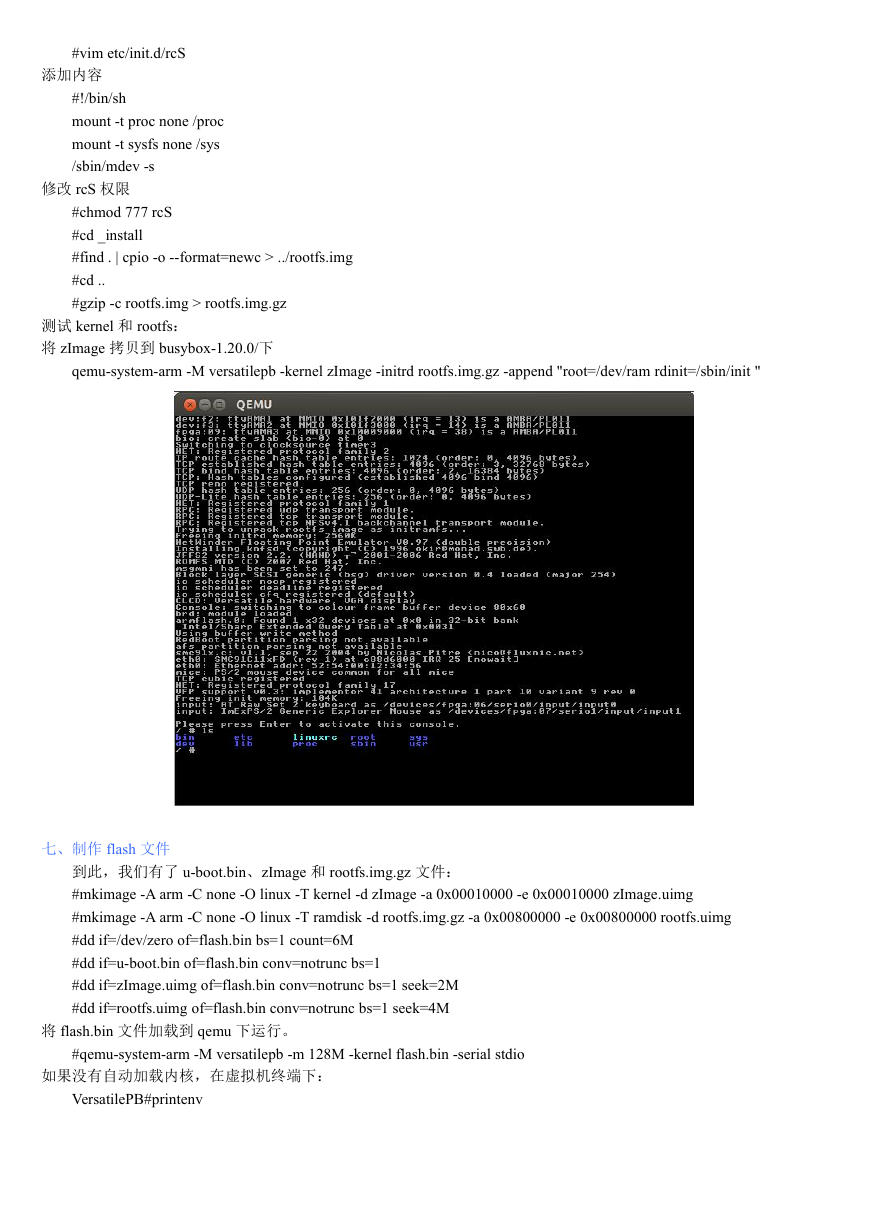
qemu-system-arm -M versatilepb -kernel zImage -initrd rootfs.img.gz -append "root=/dev/ram rdinit=/sbin/init "
七、制作 flash 文件
到此,我们有了 u-boot.bin、zImage 和 rootfs.img.gz 文件:
#mkimage -A arm -C none -O linux -T kernel -d zImage -a 0x00010000 -e 0x00010000 zImage.uimg
#mkimage -A arm -C none -O linux -T ramdisk -d rootfs.img.gz -a 0x00800000 -e 0x00800000 rootfs.uimg
#dd if=/dev/zero of=flash.bin bs=1 count=6M
#dd if=u-boot.bin of=flash.bin conv=notrunc bs=1
#dd if=zImage.uimg of=flash.bin conv=notrunc bs=1 seek=2M
#dd if=rootfs.uimg of=flash.bin conv=notrunc bs=1 seek=4M
将 flash.bin 文件加载到 qemu 下运行。
#qemu-system-arm -M versatilepb -m 128M -kernel flash.bin -serial stdio
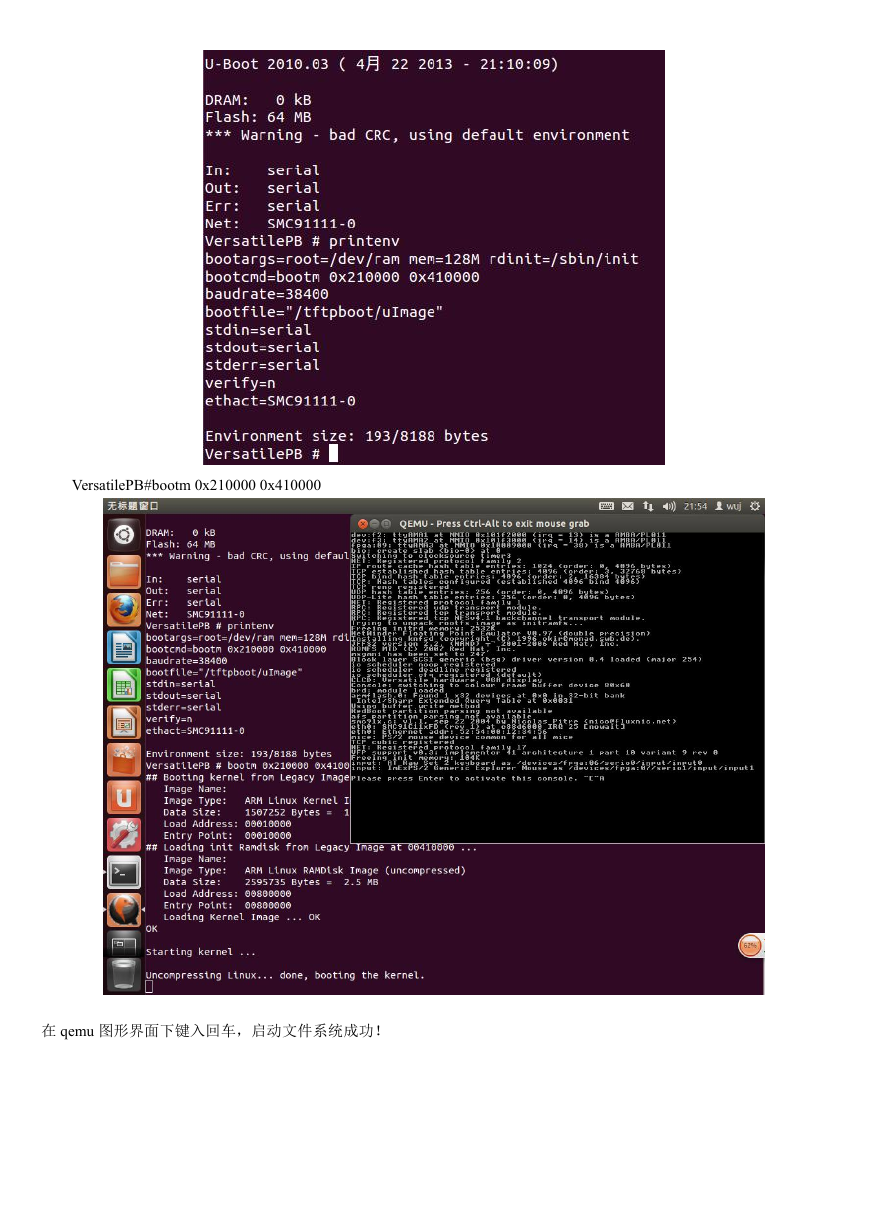
如果没有自动加载内核,在虚拟机终端下:
VersatilePB#printenv
�
VersatilePB#bootm 0x210000 0x410000
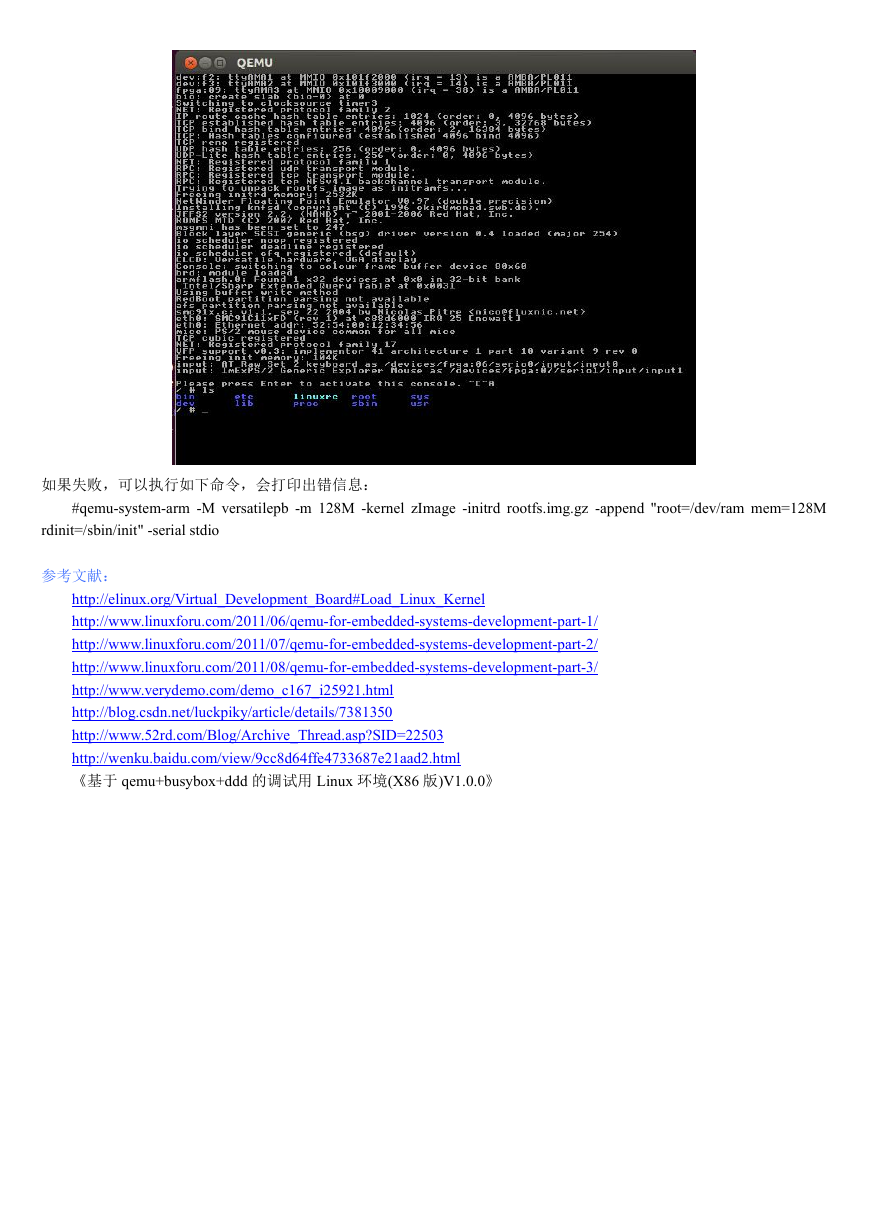
在 qemu 图形界面下键入回车,启动文件系统成功!
�
如果失败,可以执行如下命令,会打印出错信息:
#qemu-system-arm -M versatilepb -m 128M -kernel zImage -initrd rootfs.img.gz -append "root=/dev/ram mem=128M
rdinit=/sbin/init" -serial stdio
参考文献:
http://elinux.org/Virtual_Development_Board#Load_Linux_Kernel
http://www.linuxforu.com/2011/06/qemu-for-embedded-systems-development-part-1/
http://www.linuxforu.com/2011/07/qemu-for-embedded-systems-development-part-2/
http://www.linuxforu.com/2011/08/qemu-for-embedded-systems-development-part-3/
http://www.verydemo.com/demo_c167_i25921.html
http://blog.csdn.net/luckpiky/article/details/7381350
http://www.52rd.com/Blog/Archive_Thread.asp?SID=22503
http://wenku.baidu.com/view/9cc8d64ffe4733687e21aad2.html
《基于 qemu+busybox+ddd 的调试用 Linux 环境(X86 版)V1.0.0》
�


 2023年江西萍乡中考道德与法治真题及答案.doc
 2012年重庆南川中考生物真题及答案.doc
 2013年江西师范大学地理学综合及文艺理论基础考研真题.doc
 2020年四川甘孜小升初语文真题及答案I卷.doc
 2020年注册岩土工程师专业基础考试真题及答案.doc
 2023-2024学年福建省厦门市九年级上学期数学月考试题及答案.doc
 2021-2022学年辽宁省沈阳市大东区九年级上学期语文期末试题及答案.doc
 2022-2023学年北京东城区初三第一学期物理期末试卷及答案.doc
 2018上半年江西教师资格初中地理学科知识与教学能力真题及答案.doc
 2012年河北国家公务员申论考试真题及答案-省级.doc
 2020-2021学年江苏省扬州市江都区邵樊片九年级上学期数学第一次质量检测试题及答案.doc
 2022下半年黑龙江教师资格证中学综合素质真题及答案.doc