logo资料库

奥林巴斯数码相机-AZ-1说明书.pdf

第1页 / 共212页
第2页 / 共212页
第3页 / 共212页
第4页 / 共212页
第5页 / 共212页
第6页 / 共212页
第7页 / 共212页
第8页 / 共212页
资料共212页,剩余部分请下载后查看
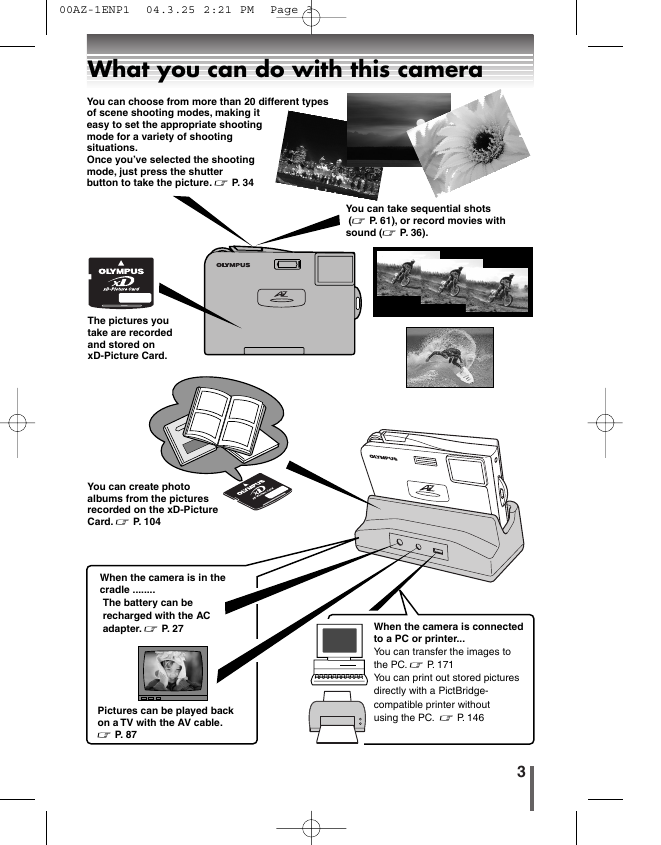
What you can do with this camera
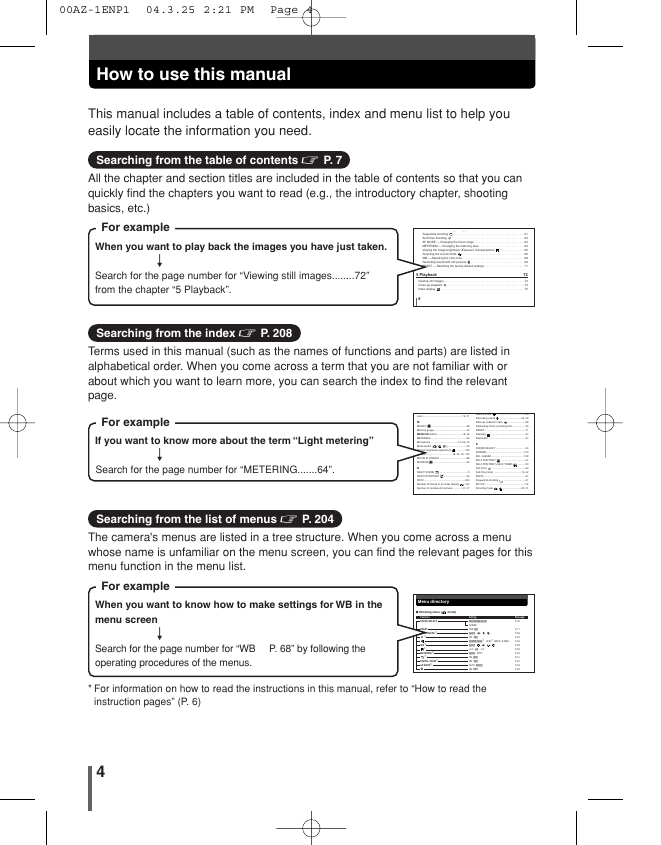
How to use this manual
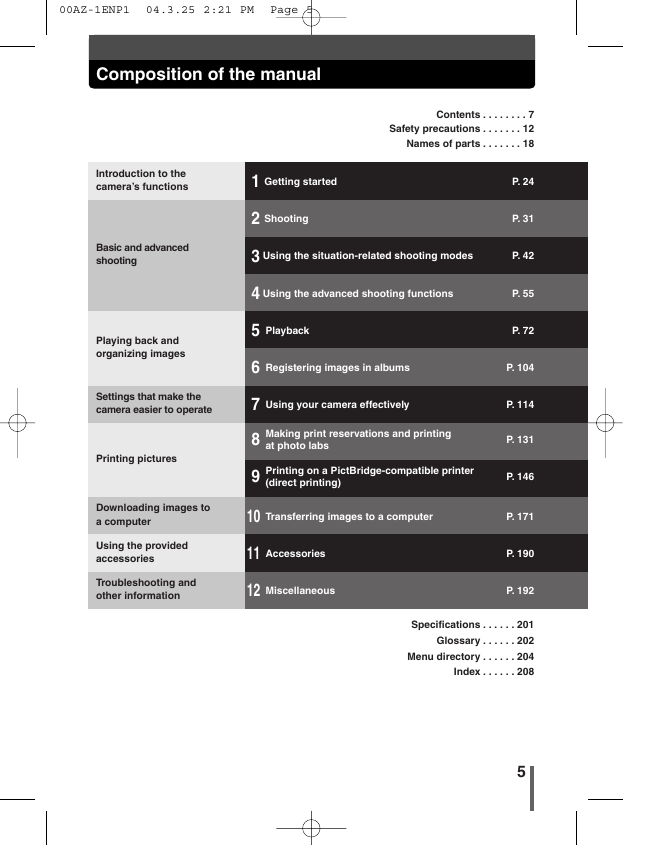
Composition of the manual
How to read the instruction pages
Safety precautions
General precautions
Handling the camera
Caution for usage environment
Battery handling precautions
LCD monitor
Names of parts
Monitor indications
1 Getting started
Attaching the lens cap and strap
Loading the battery
Unloading the battery
Charging the battery
Inserting the card
Removing the card
Power on/off
2 Shooting
Taking still pictures
Specifying the type of scene
Movie recording
If correct focus cannot be obtained
Subjects that are difficult to focus on
Determine the position of the subject after focusing (Focus Lock)
Zoom
3 Using the situation-related shooting modes
LANDSCAPE
LANDSCAPE+PORTRAIT
NIGHT SCENE
NIGHT+PORTRAIT
INDOOR
FIREWORKS
SUNSET
PORTRAIT
SELF PORTRAIT
MACRO
SUPER MACRO
CUISINE
DOCUMENTS
MUSEUM
SPORT
BEACH & SNOW
SELF PORTRAIT+SELF TIMER
CANDLE
AVAILABLE LIGHT PORTRAIT
BEHIND GLASS
2 IN 1
PANORAMA
4 Using the advanced shooting functions
Selecting functions from the shooting menu
Flash
DIGITAL ZOOM — Using the digital zoom
Sequential shooting
Self-timer shooting
AF MODE — Changing the focus range
METERING — Changing the metering area
Varying the image brightness (Exposure Compensation)
Selecting the record mode
WB — Adjusting the color tone
Recording sound with still pictures
RESET — Restoring the factory default settings
5 Playback
Viewing still images
Close-up playback
Index display
Selecting functions from the playback menu
Slideshow (sequential auto playback)
Rotating images
Playback on TV
MOVIE PLAYBACK — Viewing movies
Protecting images (preventing accidental erasure)
ERASE/ ALL ERASE — Erasing images
BLACK & WHITE/SEPIA/ — Editing still images
Adding sound to recorded images
INDEX — Making movie index
FORMAT — Formatting the card
6 Registering images in albums
ALBUM ENTRY — Registering images you shot
SEL. ALBUM — Viewing images in an album
Slideshow (sequential auto playback of images in an album)
REARRANGE — Arranging the order of images in an album
UNDO ENTRY — Removing images from an album
UNDO ALL — Removing all the images registered in the album
7 Using your camera effectively
Selecting functions from the SETUP menu
REC VIEW — Checking the picture immediately after shooting
INFO — Displaying shooting information on the monitor
Changing the display language
SCREEN — Setting the startup screen
SHUTTER SOUND — Setting the shutter sound
VOLUME — Selecting the playback volume
BEEP — Setting the button operation sound
Setting the warning tone
Adjusting the monitor brightness
Selecting the number of images
Setting the date and time
VIDEO OUT — Selecting the video signal type
PIXEL MAPPING — Checking the image processing functions
8 Making print reservations and printing at photo labs
How to print pictures
Selecting the print reservation mode
Single-frame reservation
All-frame reservation
Resetting print reservation
9 Printing on a PictBridge-compatible printer (direct printing)
Direct printing
Connecting the camera to a printer
Selecting the print mode
PRINT — Printing selected pictures
MULTI PRINT — Printing multiple pictures on one page
ALL PRINT — Printing all the pictures stored in the card/album
ALL INDEX — Printing an index of all the pictures stored in the card
PRINT ORDER — Printing with print reservation
Exiting direct printing
If an error code is displayed
10 Transferring images to a computer
Flowchart
Identifying the OS
Installing the USB driver for Windows 98 (When using Windows 98/98 SE)
Connecting the camera to the computer
Downloading images to your computer
Disconnecting the camera from your computer
What you can do with the CAMEDIA Master software
11 Accessories
AC adapter
Card
12 Miscellaneous
Error codes
Troubleshooting
Camera maintenance
Specifications
Glossary
Menu directory
Index
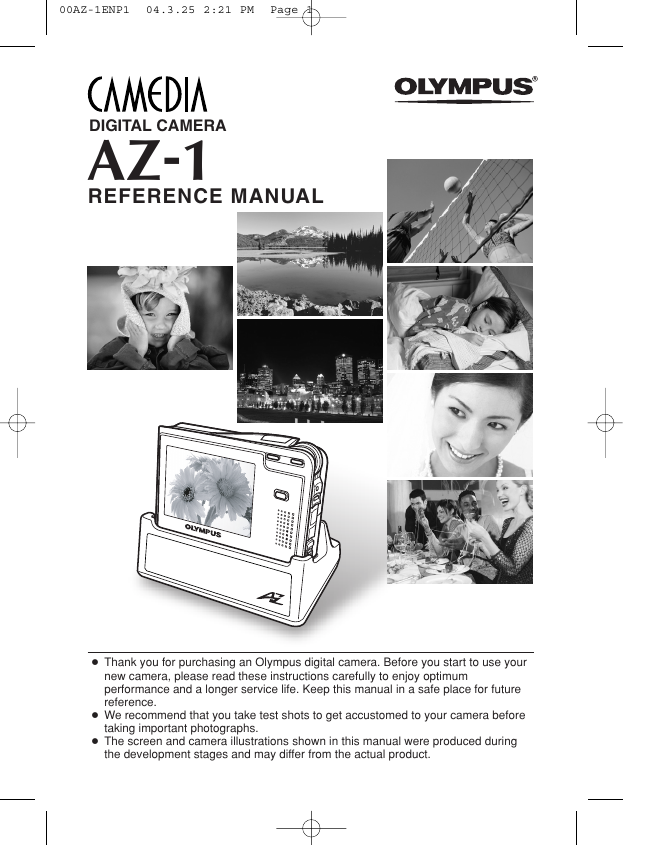
00AZ-1ENP1 04.3.25 2:21 PM Page 1 DIGITAL CAMERA AZ-1 REFERENCE MANUAL ● Thank you for purchasing an Olympus digital camera. Before you start to use your new camera, please read these instructions carefully to enjoy optimum performance and a longer service life. Keep this manual in a safe place for future reference. ● We recommend that you take test shots to get accustomed to your camera before taking important photographs. ● The screen and camera illustrations shown in this manual were produced during the development stages and may differ from the actual product.
00AZ-1ENP1 04.3.25 2:21 PM Page 2 For customers in North and South America For customers in USA Declaration of Conformity Model Number : AZ-1 Trade Name : OLYMPUS Responsible Party : Olympus America Inc. Address : 2 Corporate Center Drive, Melville, New York Telephone Number : 1-631-844-5000 11747-3157 U.S.A. Tested To Comply With FCC Standards FOR HOME OR OFFICE USE This device complies with Part 15 of the FCC rules. Operation is subject to the following two conditions: (1) This device may not cause harmful interference. (2) This device must accept any interference received, including interference that may cause undesired operation. For customers in Canada This Class B digital apparatus meets all requirements of the Canadian Interference-Causing Equipment Regulations. For customers in Europe “CE” mark indicates that this product complies with the European requirements for safety, health, environment and customer protection. “CE” mark cameras are intended for sales in Europe. Trademarks • IBM is a registered trademark of International Business Machines Corporation. • Microsoft and Windows are registered trademarks of Microsoft Corporation. • Macintosh is a trademark of Apple Computer Inc. • All other company and product names are registered trademarks and/or trademarks of their respective owners. • The standards for camera file systems referred to in this manual are the “Design Rule for Camera File System/DCF” standards stipulated by the Japan Electronics and Information Technology Industries Association (JEITA). 2
00AZ-1ENP1 04.3.25 2:21 PM Page 3 What you can do with this camera You can choose from more than 20 different types of scene shooting modes, making it easy to set the appropriate shooting mode for a variety of shooting situations. Once you’ve selected the shooting mode, just press the shutter button to take the picture. ~ P. 34 You can take sequential shots (~ P. 61), or record movies with sound (~ P. 36). The pictures you take are recorded and stored on xD-Picture Card. You can create photo albums from the pictures recorded on the xD-Picture Card. ~ P. 104 When the camera is in the cradle ........ The battery can be recharged with the AC adapter. ~ P. 27 Pictures can be played back on a TV with the AV cable. ~ P. 87 When the camera is connected to a PC or printer... You can transfer the images to the PC. ~ P. 171 You can print out stored pictures directly with a PictBridge- compatible printer without using the PC. ~ P. 146 3
00AZ-1ENP1 04.3.25 2:21 PM Page 4 How to use this manual This manual includes a table of contents, index and menu list to help you easily locate the information you need. Searching from the table of contents ~ P. 7 All the chapter and section titles are included in the table of contents so that you can quickly find the chapters you want to read (e.g., the introductory chapter, shooting basics, etc.) For example When you want to play back the images you have just taken. V Search for the page number for “Viewing still images........72” from the chapter “5 Playback”. Using the digital zoom . . . . . . . . . . . . . . . . . . . . . . . . . . . . . 60 DIGITAL ZOOM . . . . . . . . . . . . . . . . . . . . . . . . . . . . . . . . . . . . . . . . . . . . 61 Sequential shooting Self-timer shooting . . . . . . . . . . . . . . . . . . . . . . . . . . . . . . . . . . . . . . . . . . . . 62 AF MODE — Changing the focus range . . . . . . . . . . . . . . . . . . . . . . . . . . . . . . . 63 METERING — Changing the metering area . . . . . . . . . . . . . . . . . . . . . . . . . . . . 64 . . . . . . . . . . . . . . . 65 Varying the image brightness (Exposure Compensation) Selecting the record mode . . . . . . . . . . . . . . . . . . . . . . . . . . . . . . . . . . . . . . 66 WB — Adjusting the color tone . . . . . . . . . . . . . . . . . . . . . . . . . . . . . . . . . . . . . . 68 Recording sound with still pictures . . . . . . . . . . . . . . . . . . . . . . . . . . . . . . . . . 69 RESET — Restoring the factory default settings. . . . . . . . . . . . . . . . . . . . . . . . . 71 5 Playback 72 Viewing still images . . . . . . . . . . . . . . . . . . . . . . . . . . . . . . . . . . . . . . . . . . . . . . . . . 72 . . . . . . . . . . . . . . . . . . . . . . . . . . . . . . . . . . . . . . . . . . . . . . . . 73 Close-up playback Index display . . . . . . . . . . . . . . . . . . . . . . . . . . . . . . . . . . . . . . . . . . . . . . . . . . . . 75 8 Searching from the index ~ P. 208 Terms used in this manual (such as the names of functions and parts) are listed in alphabetical order. When you come across a term that you are not familiar with or about which you want to learn more, you can search the index to find the relevant page. For example If you want to know more about the term “Light metering” V Search for the page number for “METERING.......64”. Lens........................................................19, 31 M MACRO ..................................................48 Memory gauge..............................................23 MENU/OK button....................................18, 42 METERING ..................................................64 Microphone ......................................19, 69, 99 ) ..........................30 Mode switch ( Monitor brightness adjustment ............125 Monitor......................................18, 20, 30, 125 MOVIE PLAYBACK ......................................88 MUSEUM ..............................................49 / / N ........................................5 NIGHT SCENE ................................46 NIGHT+PORTRAIT NTSC..........................................................202 Number of frames in an index display ..126 Number of storable still pictures ............31, 67 ........................................66 Record mode ..............................69, 99 Recording sound Red-eye reduction flash ........................58 Remaining movie recording time ................36 RESET..........................................................71 Resizing ................................................97 Resolution ....................................................67 S SCENE SELECT ..........................................43 SCREEN ....................................................120 SEL. ALBUM ..............................................108 ..................................47 SELF PORTRAIT SELF PORTRAIT+SELF TIMER ............50 Self-timer ................................................62 Self-timer lamp ......................................19, 62 SEPIA ..........................................................97 Sequential shooting ..............................61 SETUP........................................................114 Shooting mode ..........................20, 31 Searching from the list of menus ~ P. 204 The camera's menus are listed in a tree structure. When you come across a menu whose name is unfamiliar on the menu screen, you can find the relevant pages for this menu function in the menu list. For example When you want to know how to make settings for WB in the menu screen V Search for the page number for “WB P. 68” by following the operating procedures of the menus. Menu directory 䢇 Shooting menu ( mode) Function SCENE SELECT RESET FLASH MODE*1 *1 WB*2 *2 METERING*2 *1 DIGITAL ZOOM*1 AF MODE*1 , , Setting PROGRAM AUTO SCENE YES, NO AUTO , ON, OFF SUPER HIGH*1 , HIGH*1, BASIC, E-MAIL AUTO , +2.0 - 0.0 - –2.0 AUTO , SPOT ON, OFF ON, OFF AUTO, SPOT ON OFF , , , Ref. page P. 42 P. 71 P. 58 P. 62 P. 66 P. 68 P. 65 P. 64 P. 61 P. 60 P. 63 P 69 * For information on how to read the instructions in this manual, refer to “How to read the instruction pages” (P. 6) 4
00AZ-1ENP1 04.3.25 2:21 PM Page 5 Composition of the manual Contents . . . . . . . . 7 Safety precautions . . . . . . . 12 Names of parts . . . . . . . 18 Introduction to the camera’s functions 1 Getting started 2 Shooting Basic and advanced shooting 3 Using the situation-related shooting modes Playing back and organizing images 4 Using the advanced shooting functions 5 Playback 6 Registering images in albums Settings that make the camera easier to operate 7 Using your camera effectively Printing pictures 8 Making print reservations and printing at photo labs 9 Printing on a PictBridge-compatible printer (direct printing) Downloading images to a computer 10 Transferring images to a computer Using the provided accessories Troubleshooting and other information 11 Accessories 12 Miscellaneous P. 24 P. 31 P. 42 P. 55 P. 72 P. 104 P. 114 P. 131 P. 146 P. 171 P. 190 P. 192 Specifications . . . . . . 201 Glossary . . . . . . 202 Menu directory . . . . . . 204 Index . . . . . . 208 5
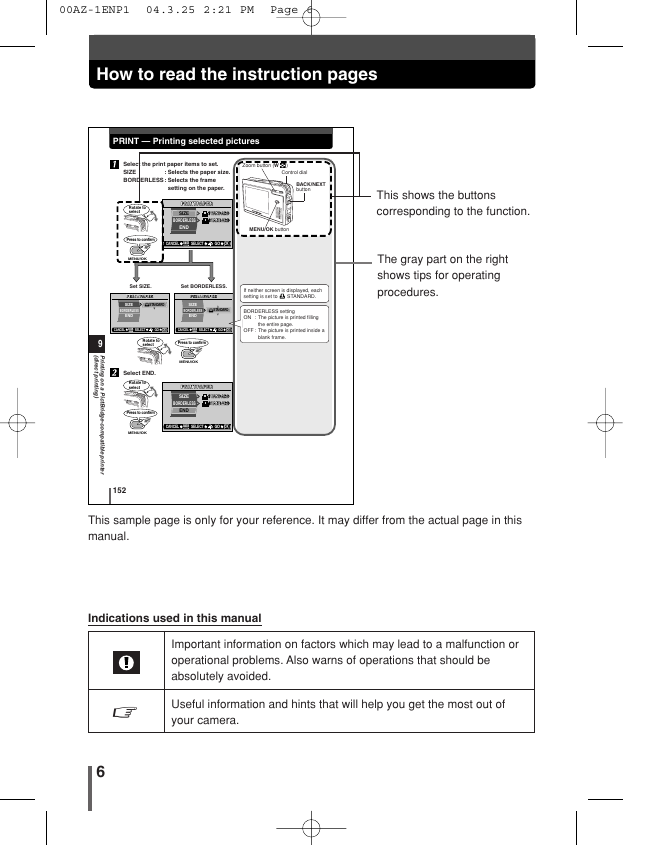
00AZ-1ENP1 04.3.25 2:21 PM Page 6 How to read the instruction pages PRINT — Printing selected pictures Select the print paper items to set. SIZE BORDERLESS : Selects the frame : Selects the paper size. setting on the paper. Rotate to select PRINTPAPER SIZE BORDERLESS END STANDARD ANDARD STANDARD ANDARD Press to confirm CANCEL BACK SELECT GO OK MENU/OK Zoom button (W ) Control dial BACK/NEXT button MENU/OK button Set SIZE. PRINTP PRINTPAPERAPER Set BORDERLESS. PRINTP PRINTPAPERAPER SIZE BORDERLESS END STANDARD SIZE BORDERLESS STANDARD END CANCEL BACK SELECT GO OK CANCEL BACK SELECT GO OK 9 Rotate to select Press to confirm If neither screen is displayed, each setting is set to STANDARD. BORDERLESS setting ON : The picture is printed filling the entire page. OFF : The picture is printed inside a blank frame. This shows the buttons corresponding to the function. The gray part on the right shows tips for operating procedures. ( d i r e c t p r i n t i n g ) P r i n t i n g o n a P i c t B r i d g e - c o m p a t i b l e p r i n t e r MENU/OK PRINTPAPER SIZE BORDERLESS END STANDARD ANDARD STANDARD ANDARD CANCEL BACK SELECT GO OK Select END. Rotate to select Press to confirm MENU/OK 152 This sample page is only for your reference. It may differ from the actual page in this manual. Indications used in this manual Important information on factors which may lead to a malfunction or operational problems. Also warns of operations that should be absolutely avoided. ~ Useful information and hints that will help you get the most out of your camera. 6
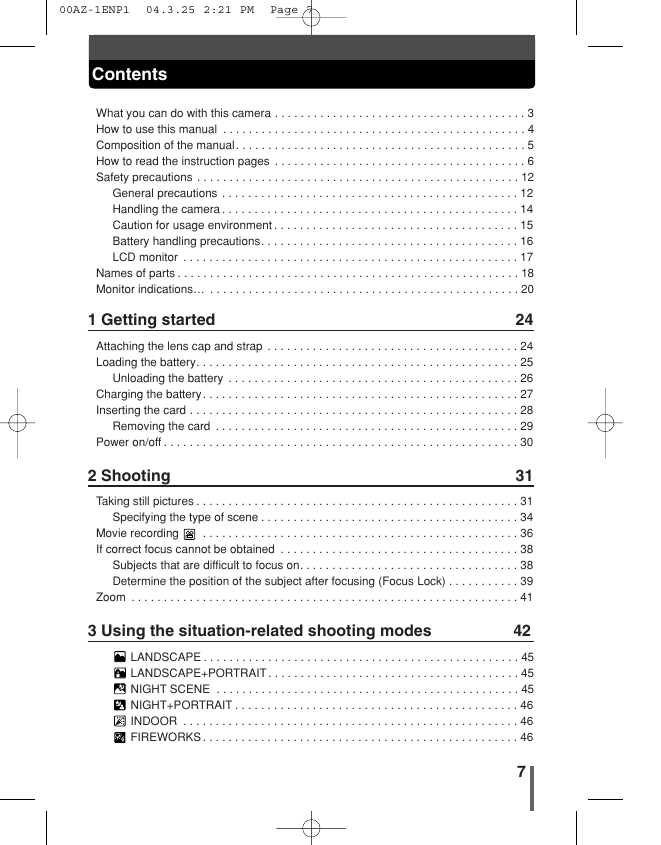
00AZ-1ENP1 04.3.25 2:21 PM Page 7 Contents What you can do with this camera . . . . . . . . . . . . . . . . . . . . . . . . . . . . . . . . . . . . . . . 3 How to use this manual . . . . . . . . . . . . . . . . . . . . . . . . . . . . . . . . . . . . . . . . . . . . . . . 4 Composition of the manual. . . . . . . . . . . . . . . . . . . . . . . . . . . . . . . . . . . . . . . . . . . . . 5 How to read the instruction pages . . . . . . . . . . . . . . . . . . . . . . . . . . . . . . . . . . . . . . . 6 Safety precautions . . . . . . . . . . . . . . . . . . . . . . . . . . . . . . . . . . . . . . . . . . . . . . . . . . 12 General precautions . . . . . . . . . . . . . . . . . . . . . . . . . . . . . . . . . . . . . . . . . . . . . . 12 Handling the camera . . . . . . . . . . . . . . . . . . . . . . . . . . . . . . . . . . . . . . . . . . . . . . 14 Caution for usage environment . . . . . . . . . . . . . . . . . . . . . . . . . . . . . . . . . . . . . . 15 Battery handling precautions. . . . . . . . . . . . . . . . . . . . . . . . . . . . . . . . . . . . . . . . 16 LCD monitor . . . . . . . . . . . . . . . . . . . . . . . . . . . . . . . . . . . . . . . . . . . . . . . . . . . . 17 Names of parts . . . . . . . . . . . . . . . . . . . . . . . . . . . . . . . . . . . . . . . . . . . . . . . . . . . . . 18 Monitor indications… . . . . . . . . . . . . . . . . . . . . . . . . . . . . . . . . . . . . . . . . . . . . . . . . 20 1 Getting started 24 Attaching the lens cap and strap . . . . . . . . . . . . . . . . . . . . . . . . . . . . . . . . . . . . . . . 24 Loading the battery. . . . . . . . . . . . . . . . . . . . . . . . . . . . . . . . . . . . . . . . . . . . . . . . . . 25 Unloading the battery . . . . . . . . . . . . . . . . . . . . . . . . . . . . . . . . . . . . . . . . . . . . . 26 Charging the battery. . . . . . . . . . . . . . . . . . . . . . . . . . . . . . . . . . . . . . . . . . . . . . . . . 27 Inserting the card . . . . . . . . . . . . . . . . . . . . . . . . . . . . . . . . . . . . . . . . . . . . . . . . . . . 28 Removing the card . . . . . . . . . . . . . . . . . . . . . . . . . . . . . . . . . . . . . . . . . . . . . . . 29 Power on/off . . . . . . . . . . . . . . . . . . . . . . . . . . . . . . . . . . . . . . . . . . . . . . . . . . . . . . . 30 2 Shooting 31 Taking still pictures . . . . . . . . . . . . . . . . . . . . . . . . . . . . . . . . . . . . . . . . . . . . . . . . . . 31 Specifying the type of scene . . . . . . . . . . . . . . . . . . . . . . . . . . . . . . . . . . . . . . . . 34 . . . . . . . . . . . . . . . . . . . . . . . . . . . . . . . . . . . . . . . . . . . . . . . . . 36 Movie recording If correct focus cannot be obtained . . . . . . . . . . . . . . . . . . . . . . . . . . . . . . . . . . . . . 38 Subjects that are difficult to focus on. . . . . . . . . . . . . . . . . . . . . . . . . . . . . . . . . . 38 Determine the position of the subject after focusing (Focus Lock) . . . . . . . . . . . 39 Zoom . . . . . . . . . . . . . . . . . . . . . . . . . . . . . . . . . . . . . . . . . . . . . . . . . . . . . . . . . . . . 41 3 Using the situation-related shooting modes 42 LANDSCAPE . . . . . . . . . . . . . . . . . . . . . . . . . . . . . . . . . . . . . . . . . . . . . . . . . 45 LANDSCAPE+PORTRAIT . . . . . . . . . . . . . . . . . . . . . . . . . . . . . . . . . . . . . . . 45 NIGHT SCENE . . . . . . . . . . . . . . . . . . . . . . . . . . . . . . . . . . . . . . . . . . . . . . . 45 NIGHT+PORTRAIT . . . . . . . . . . . . . . . . . . . . . . . . . . . . . . . . . . . . . . . . . . . . 46 INDOOR . . . . . . . . . . . . . . . . . . . . . . . . . . . . . . . . . . . . . . . . . . . . . . . . . . . . 46 FIREWORKS . . . . . . . . . . . . . . . . . . . . . . . . . . . . . . . . . . . . . . . . . . . . . . . . . 46 7
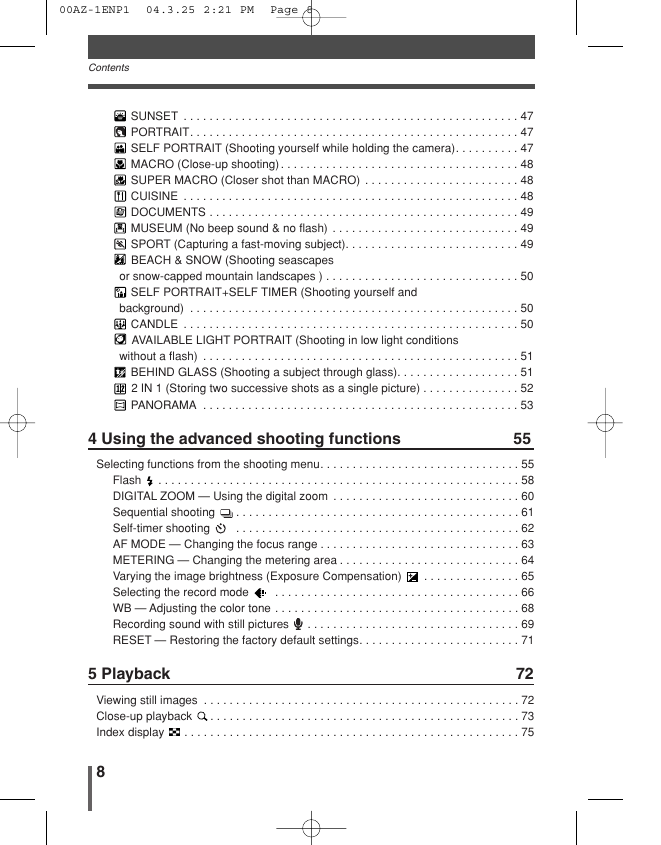
00AZ-1ENP1 04.3.25 2:21 PM Page 8 Contents SUNSET . . . . . . . . . . . . . . . . . . . . . . . . . . . . . . . . . . . . . . . . . . . . . . . . . . . . 47 PORTRAIT. . . . . . . . . . . . . . . . . . . . . . . . . . . . . . . . . . . . . . . . . . . . . . . . . . . 47 SELF PORTRAIT (Shooting yourself while holding the camera). . . . . . . . . . 47 MACRO (Close-up shooting) . . . . . . . . . . . . . . . . . . . . . . . . . . . . . . . . . . . . . 48 SUPER MACRO (Closer shot than MACRO) . . . . . . . . . . . . . . . . . . . . . . . . 48 CUISINE . . . . . . . . . . . . . . . . . . . . . . . . . . . . . . . . . . . . . . . . . . . . . . . . . . . . 48 DOCUMENTS . . . . . . . . . . . . . . . . . . . . . . . . . . . . . . . . . . . . . . . . . . . . . . . . 49 MUSEUM (No beep sound & no flash) . . . . . . . . . . . . . . . . . . . . . . . . . . . . . 49 SPORT (Capturing a fast-moving subject). . . . . . . . . . . . . . . . . . . . . . . . . . . 49 BEACH & SNOW (Shooting seascapes or snow-capped mountain landscapes ) . . . . . . . . . . . . . . . . . . . . . . . . . . . . . . 50 SELF PORTRAIT+SELF TIMER (Shooting yourself and background) . . . . . . . . . . . . . . . . . . . . . . . . . . . . . . . . . . . . . . . . . . . . . . . . . . . 50 CANDLE . . . . . . . . . . . . . . . . . . . . . . . . . . . . . . . . . . . . . . . . . . . . . . . . . . . . 50 AVAILABLE LIGHT PORTRAIT (Shooting in low light conditions without a flash) . . . . . . . . . . . . . . . . . . . . . . . . . . . . . . . . . . . . . . . . . . . . . . . . . 51 BEHIND GLASS (Shooting a subject through glass). . . . . . . . . . . . . . . . . . . 51 2 IN 1 (Storing two successive shots as a single picture) . . . . . . . . . . . . . . . 52 PANORAMA . . . . . . . . . . . . . . . . . . . . . . . . . . . . . . . . . . . . . . . . . . . . . . . . . 53 4 Using the advanced shooting functions 55 Selecting functions from the shooting menu. . . . . . . . . . . . . . . . . . . . . . . . . . . . . . . 55 Flash . . . . . . . . . . . . . . . . . . . . . . . . . . . . . . . . . . . . . . . . . . . . . . . . . . . . . . . . 58 DIGITAL ZOOM — Using the digital zoom . . . . . . . . . . . . . . . . . . . . . . . . . . . . . 60 . . . . . . . . . . . . . . . . . . . . . . . . . . . . . . . . . . . . . . . . . . . . 61 Sequential shooting Self-timer shooting . . . . . . . . . . . . . . . . . . . . . . . . . . . . . . . . . . . . . . . . . . . . 62 AF MODE — Changing the focus range . . . . . . . . . . . . . . . . . . . . . . . . . . . . . . . 63 METERING — Changing the metering area . . . . . . . . . . . . . . . . . . . . . . . . . . . . 64 Varying the image brightness (Exposure Compensation) . . . . . . . . . . . . . . . 65 Selecting the record mode . . . . . . . . . . . . . . . . . . . . . . . . . . . . . . . . . . . . . . 66 WB — Adjusting the color tone . . . . . . . . . . . . . . . . . . . . . . . . . . . . . . . . . . . . . . 68 Recording sound with still pictures . . . . . . . . . . . . . . . . . . . . . . . . . . . . . . . . . 69 RESET — Restoring the factory default settings. . . . . . . . . . . . . . . . . . . . . . . . . 71 5 Playback 72 Viewing still images . . . . . . . . . . . . . . . . . . . . . . . . . . . . . . . . . . . . . . . . . . . . . . . . . 72 . . . . . . . . . . . . . . . . . . . . . . . . . . . . . . . . . . . . . . . . . . . . . . . . 73 Close-up playback Index display . . . . . . . . . . . . . . . . . . . . . . . . . . . . . . . . . . . . . . . . . . . . . . . . . . . . 75 8
分享到:
收藏