CityEngine 基础教程
翻译整理:wdy
本文档为 Esri
CityEngine 学习文档,包含在教程工程文件
“Tutorial_01_CityEngine_Basics__2011_2”中,由wdy 翻译整理。
谨望为各位同仁提供学习之便。
CityEngine Basics Tutorial
CityEngine 基础教程
This tutorial shows how to quickly create a city from scratch. It introduces
the complete workflow through all the parts of the CityEngine. You will learn
how to setup a new project, how to create a street network and setup the
shape creation parameters. Finally, you will learn how to use the rule editor
and generate the city's building models.
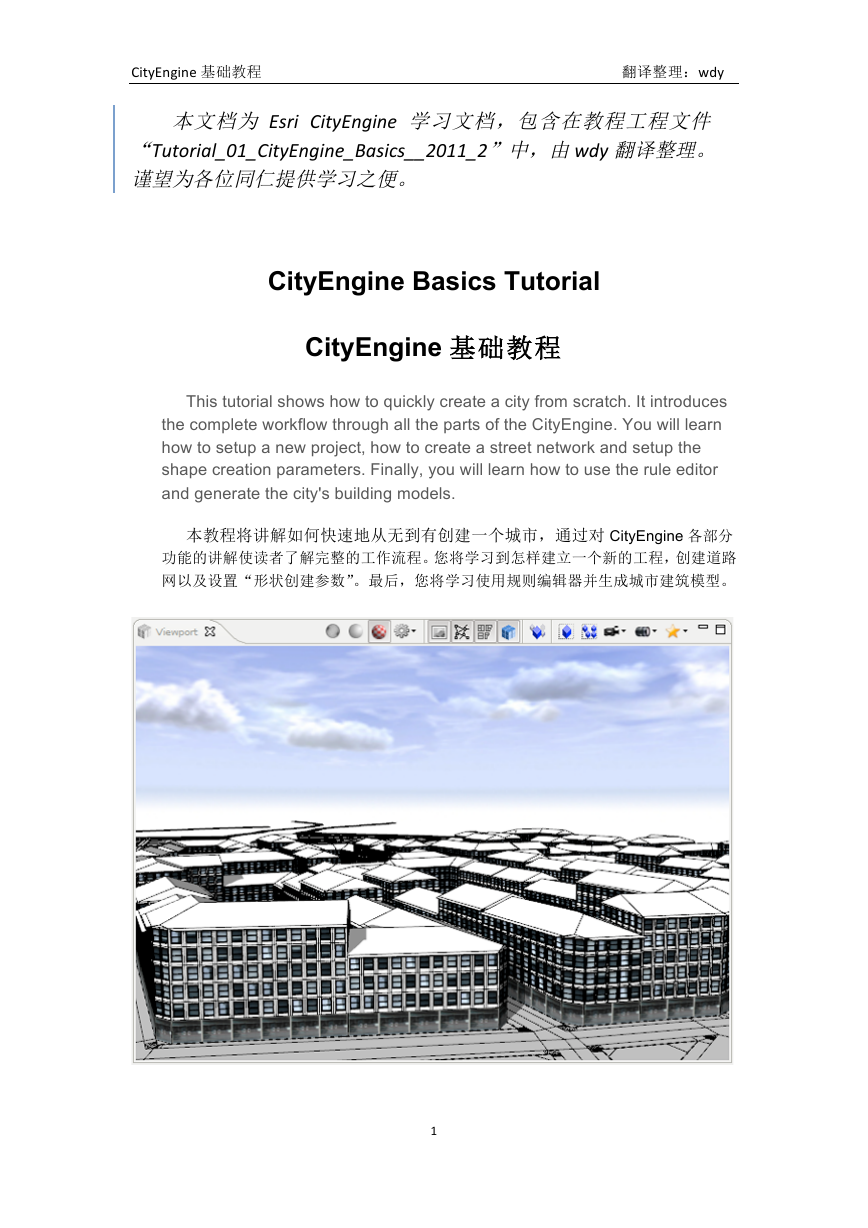
本教程将讲解如何快速地从无到有创建一个城市,通过对 CityEngine 各部分
功能的讲解使读者了解完整的工作流程。您将学习到怎样建立一个新的工程,创建道路
网以及设置“形状创建参数”。最后,您将学习使用规则编辑器并生成城市建筑模型。
1
�
CityEngine 基础教程
翻译整理:wdy
第一部分:创建一个新的工程
(Part
1
:
Prepare
a
new
Project)
创建新工程和场景(Setup
new
Project
and
Scene)
As a first step, we will create a new CityEngine project.
第一步,我们创建一个新的 CityEngine 工程。
§ File → New... → CityEngine → CityEngine project
§ 选择【File】—>【New】—>【CityEngine】—>【CityEngine project】
§ Hit Next , name the project FirstCity and hit Finish
§ 点击【Next】,将工程命名为“FirstCity”并单击【Finish】
A new project has been created and shows up in the Navigator (by default
located in the upper left corner of the CityEngine window). The default folders
that store your project data like assets, rules and scenes are already present.
完成以上操作,一个新的工程便建立好了,并且其包含的内容在导航视窗
(Navigator)中被展现出来(导航视窗默认定位在 cityengine 窗口的左上角)。
这些自动生成的文件夹用来存储你的工程数据,如资源(?),规则和场景等。
Next, we create a new scene:
接下来,我们创建一个新的场景:
§ File → New... → CityEngine → CityEngine scene
§ 选择【File】—>【New】—>【CityEngine】—>【CityEngine scene】
§ Make sure the correct project folder is set (/FirstCity/scenes), name
the scene firstcity_01.cej and hit Finish
§ 确认新场景所保存的文件夹位置(/FirstCity/scenes),将该场景命名为
“firstcity_01.cej”并点击【Finish】
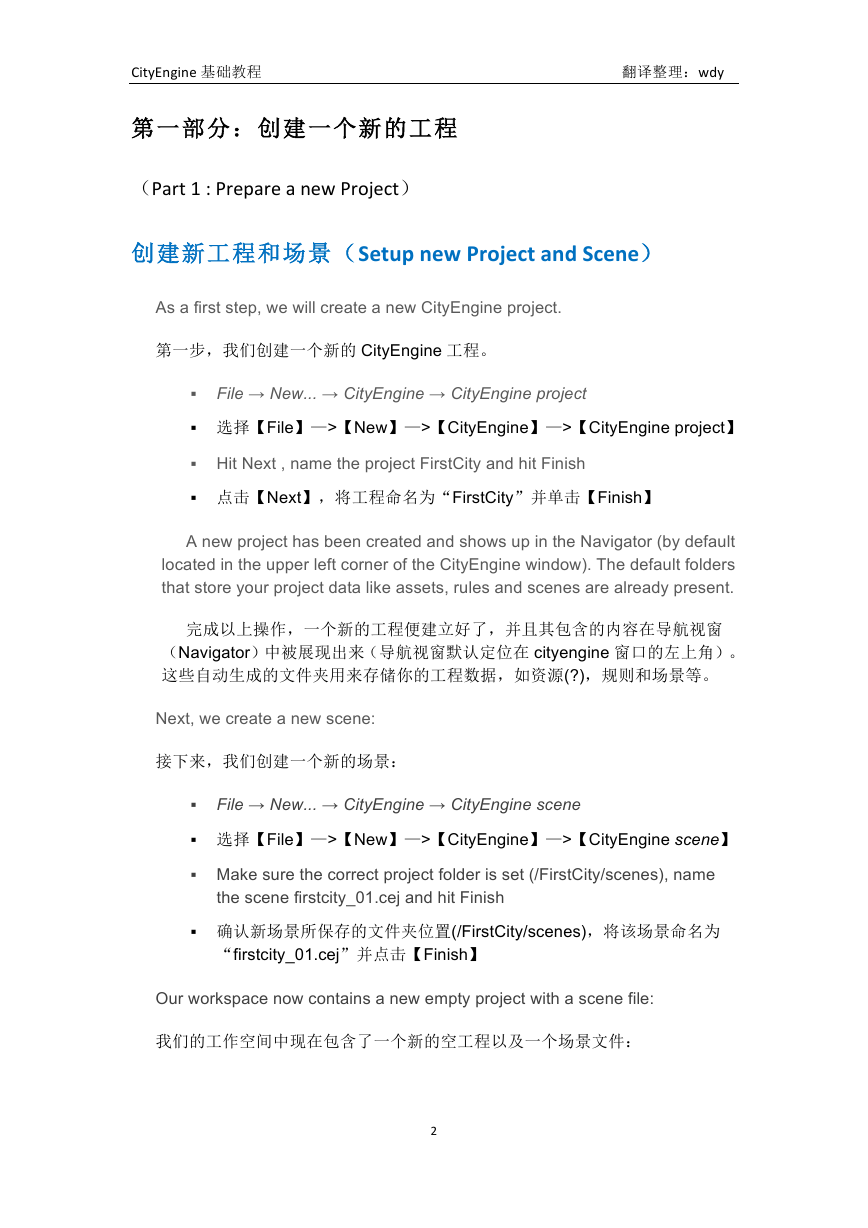
Our workspace now contains a new empty project with a scene file:
我们的工作空间中现在包含了一个新的空工程以及一个场景文件:
2
�
CityEngine 基础教程
翻译整理:wdy
Copy
Rules
and
Assets
拷贝规则和资源
Later in this tutorial, we need rule files and assets for the generation of the
building models. We copy these files from the tutorial projects.
在本教程的后面部分,我们需要使用规则文件和资源(asset)来生成建筑
物模型。因此我们现在需要从教程配套的示例工程中拷贝这些文件。
First, we import the Tutorial 1 project into the current workspace.
首先,我们将教程 1 的示例工程导入到当前的工作空间
§ Download and import the tutorial projects (or only Tutorial 1) into your
workspace.
§ 下载并导入教程工程(教程 1)到我们的工作空间中
Next, we copy the necessary files from the downloaded Tutorial 1 project into
our new project.
接下来,我们将所需要的文件从已下载的教程 1 工程中拷贝到我们的新建工
程中。
§ Locate the asset folder of Tutorial 1.
§ 定位到教程 1 的资源(asset)文件夹。
3
�
CityEngine 基础教程
翻译整理:wdy
§ Use copy and paste (Ctrl+C and Ctrl+V) to copy all files and folders in
the asset folder into the assets folder of your new project.
§ 使用复制和粘贴(Ctrl+C 和 Ctrl+V)将资源(asset)文件夹中所有的文件
与文件夹拷贝到我们新建工程的资源(asset)文件夹中。
§ Also copy the rule file building.cga from the rules folder into the rules
folder of the new project.
§ 使用同样的方法,将规则文件夹中的 “building.cga” 规则文件拷贝到
新工程的规则文件夹中。
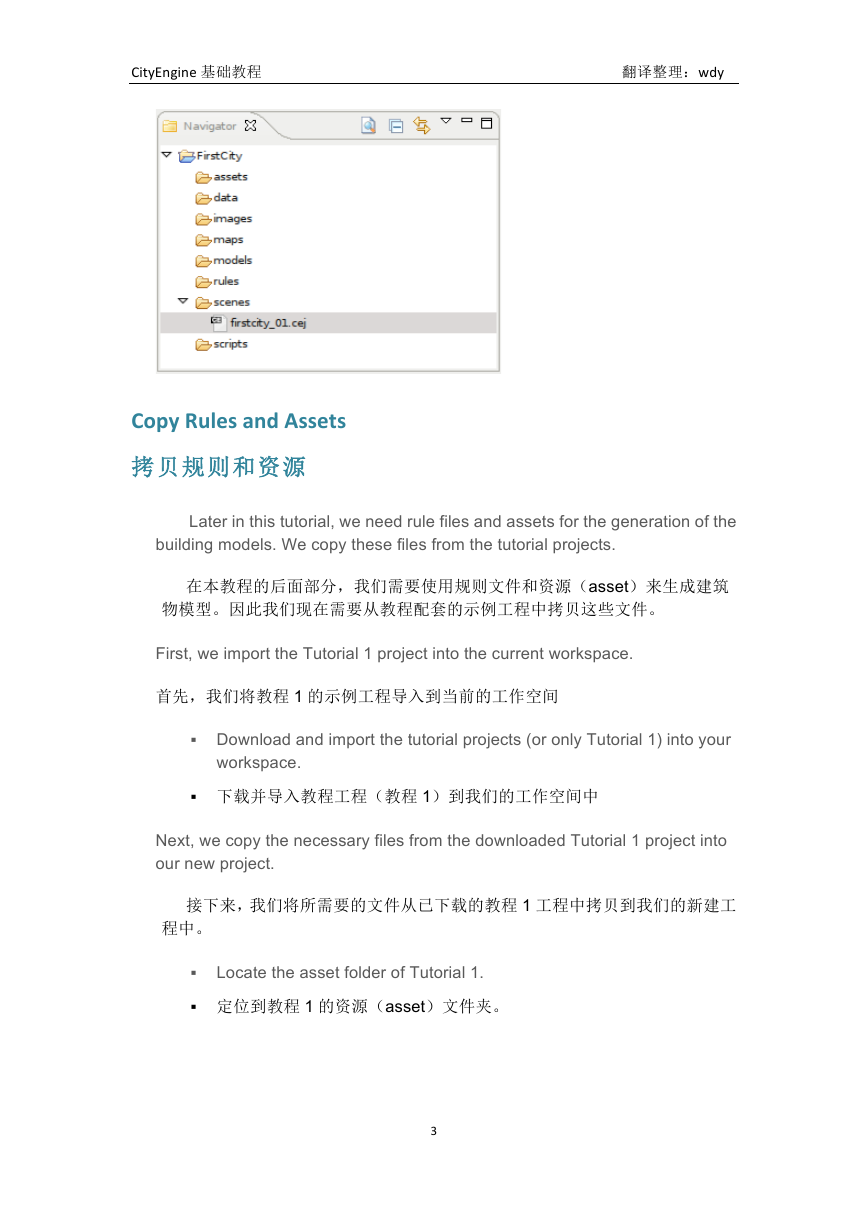
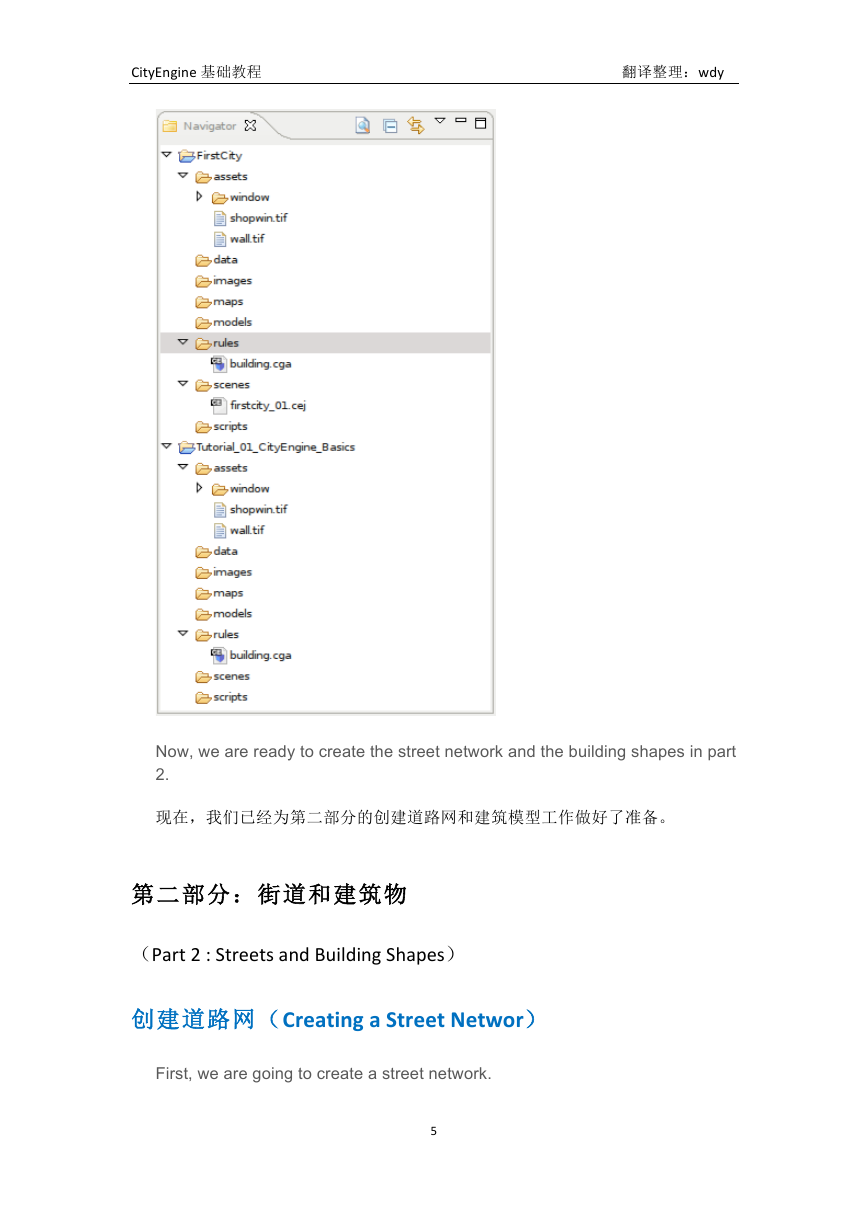
Your navigator should now look similar to the following screenshot
现在,你的导航视窗应如下图所示:
4
�
CityEngine 基础教程
翻译整理:wdy
Now, we are ready to create the street network and the building shapes in part
2.
现在,我们已经为第二部分的创建道路网和建筑模型工作做好了准备。
第二部分:街道和建筑物
(Part
2
:
Streets
and
Building
Shapes)
创建道路网(Creating
a
Street
Networ)
First, we are going to create a street network.
5
�
CityEngine 基础教程
翻译整理:wdy
第一步,创建道路网
§ Click in the viewport to make it active.
§ 单击 viewport 视窗将其激活
§ Graph → Grow Streets...
§ 选择【Graph】—>【Grow Streets...】
For the city we want to create we use the default settings.
选择默认设置来建立我们的城市。
§ Hit Apply , and Close the dialog.
§ 单击【Apply】,并关闭对话框。
§ Click on the Frame All button
on the Viewport's top menu (or press
a ) to zoom out and view all of your newly created street network in the
Viewport.
§ 单击 Viewport 视窗上方工具栏中的“Frame All”按钮 (或单击键盘
上的“a”键)在 Viewport 视窗中全图显示你新建的道路网。
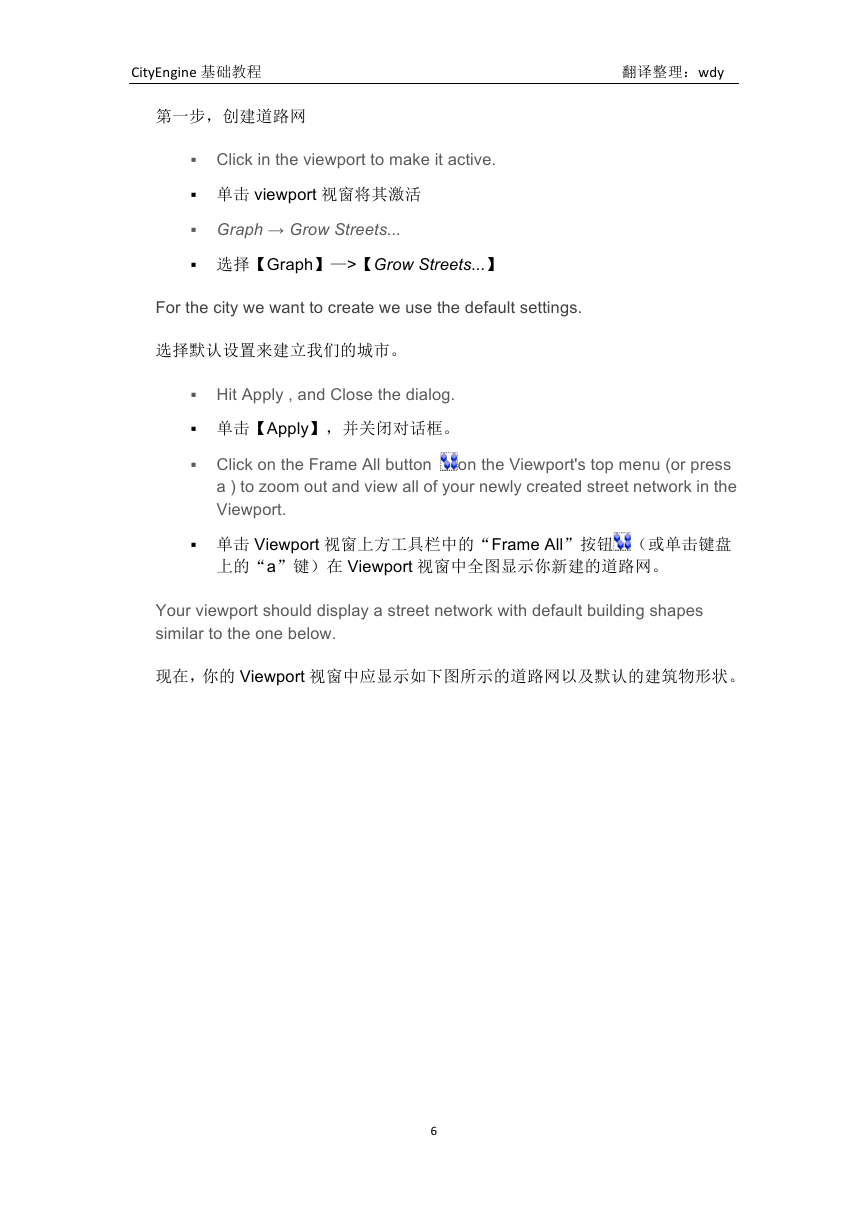
Your viewport should display a street network with default building shapes
similar to the one below.
现在,你的 Viewport 视窗中应显示如下图所示的道路网以及默认的建筑物形状。
6
�
CityEngine 基础教程
翻译整理:wdy
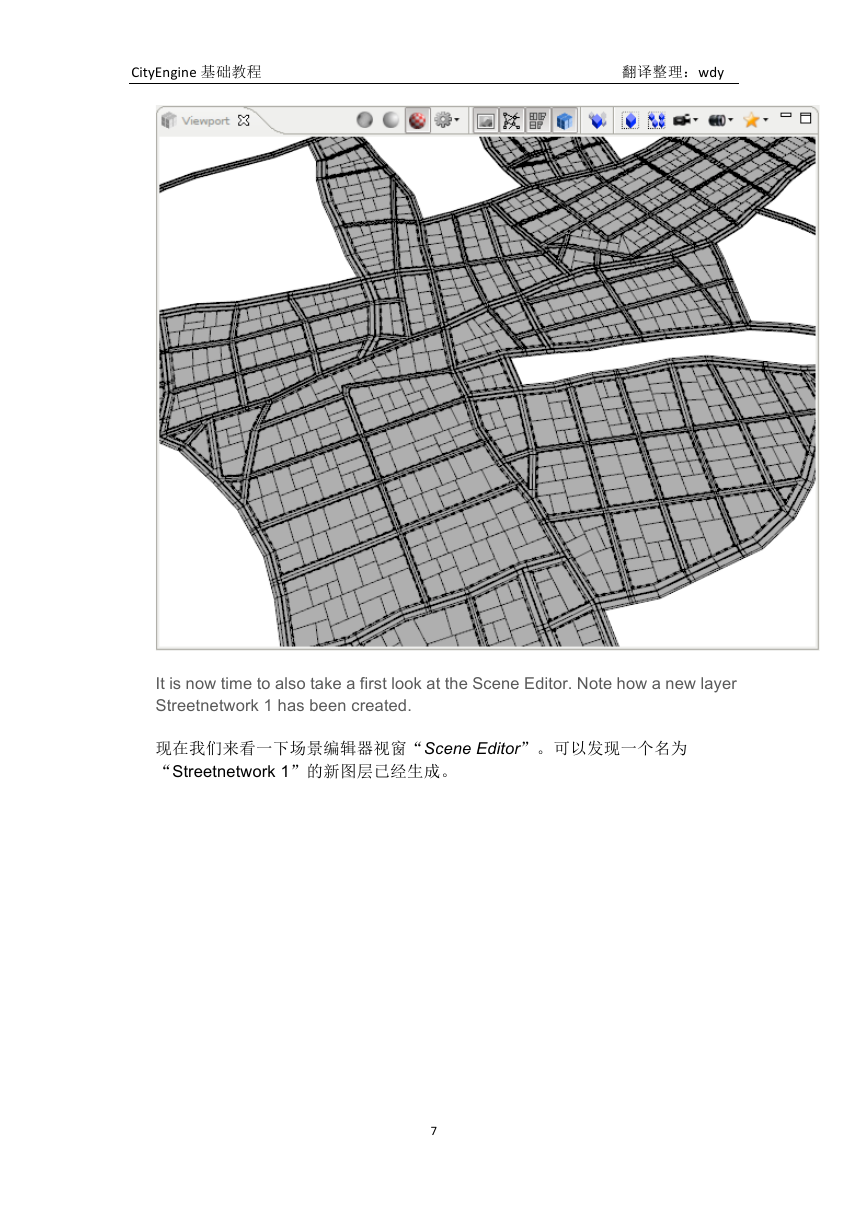
It is now time to also take a first look at the Scene Editor. Note how a new layer
Streetnetwork 1 has been created.
现在我们来看一下场景编辑器视窗“Scene Editor”。可以发现一个名为
“Streetnetwork 1”的新图层已经生成。
7
�
CityEngine 基础教程
翻译整理:wdy
修 改 “ 形 状 创 建 参 数 ” ( Modifying
the
Shape
Creation
Parameters)
We will now change a few of the shape creation parameters to make the scene
more interesting.
现在我们改变一些形状创建参数使场景看起来更加有趣。
§ Make sure you see the complete scene by pressing a in the viewport.
§ 点击“a”键使当前场景全图层显示。
§ With the left mouse button pressed, draw a rectangle from right-to-left
around the whole scene to select all elements.
§ 按住鼠标左键,从右向左拖拽一个矩形框将场景中的全部元素都包含在
内。
8
�


 2023年江西萍乡中考道德与法治真题及答案.doc
 2012年重庆南川中考生物真题及答案.doc
 2013年江西师范大学地理学综合及文艺理论基础考研真题.doc
 2020年四川甘孜小升初语文真题及答案I卷.doc
 2020年注册岩土工程师专业基础考试真题及答案.doc
 2023-2024学年福建省厦门市九年级上学期数学月考试题及答案.doc
 2021-2022学年辽宁省沈阳市大东区九年级上学期语文期末试题及答案.doc
 2022-2023学年北京东城区初三第一学期物理期末试卷及答案.doc
 2018上半年江西教师资格初中地理学科知识与教学能力真题及答案.doc
 2012年河北国家公务员申论考试真题及答案-省级.doc
 2020-2021学年江苏省扬州市江都区邵樊片九年级上学期数学第一次质量检测试题及答案.doc
 2022下半年黑龙江教师资格证中学综合素质真题及答案.doc