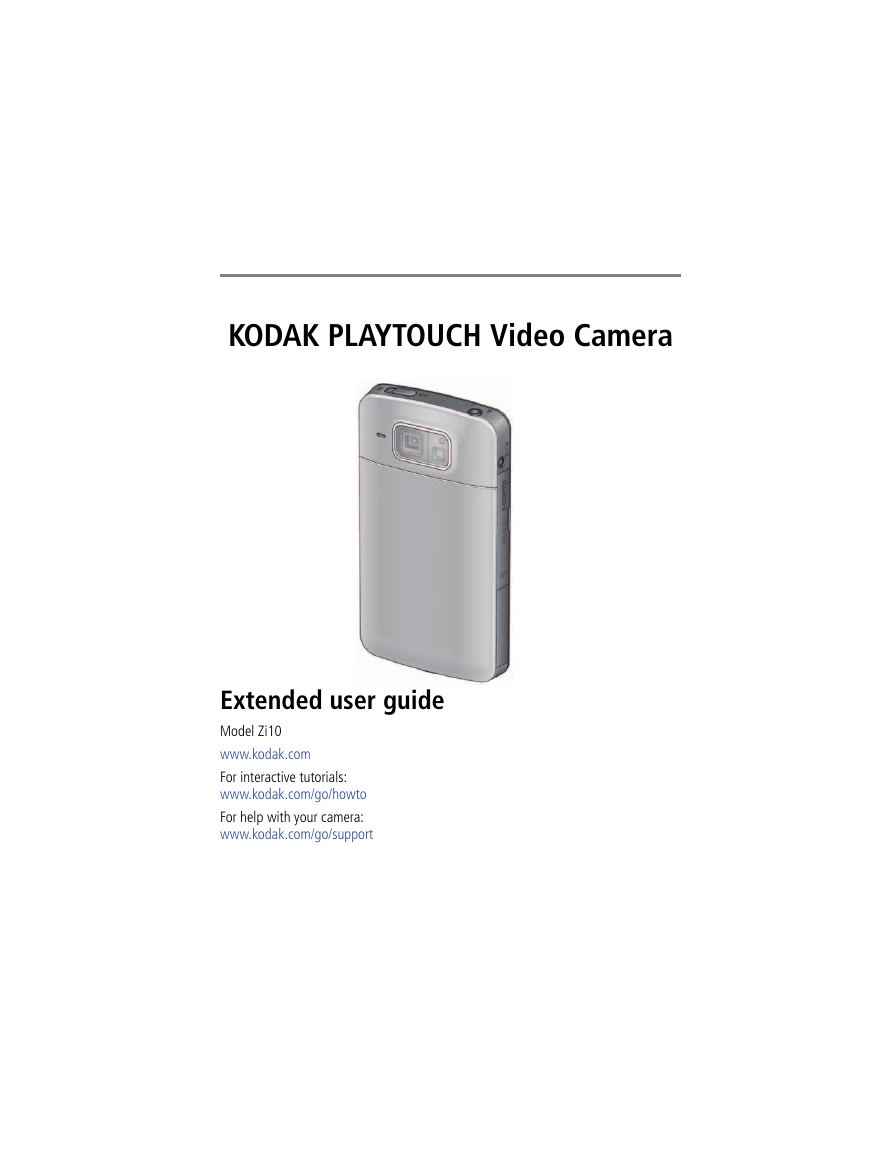
KODAK PLAYTOUCH Video Camera
Extended user guide
Model Zi10
www.kodak.com
For interactive tutorials:
www.kodak.com/go/howto
For help with your camera:
www.kodak.com/go/support
�
Eastman Kodak Company
Rochester, New York 14650
© Kodak, 2010
All screen images are simulated.
Kodak and PlayTouch are trademarks of Eastman Kodak Company.
HDMI, the HDMI Logo, and High-Definition Multimedia Interface are trademarks or
registered trademarks of HDMI Licensing LLC.
4H7217_en
�
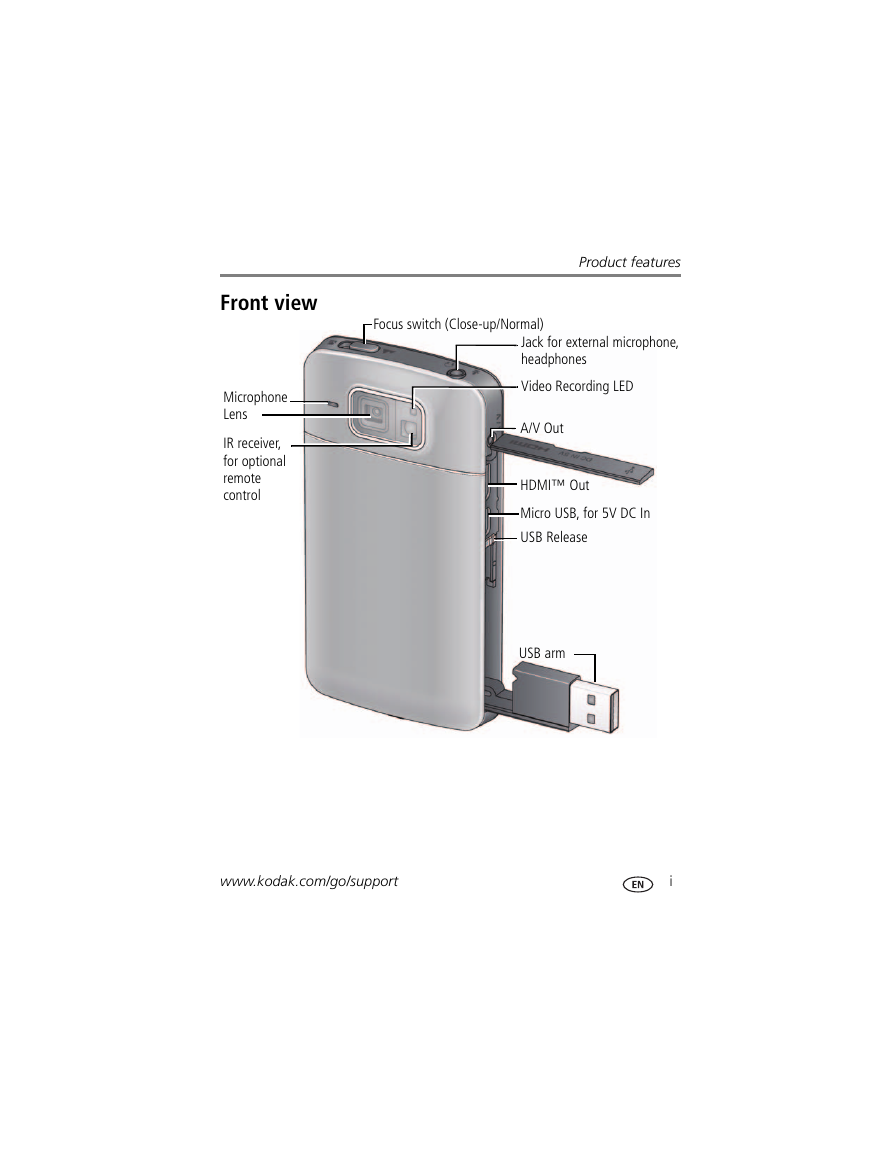
Front view
Focus switch (Close-up/Normal)
Product features
Microphone
Lens
IR receiver,
for optional
remote
control
Jack for external microphone,
headphones
Video Recording LED
A/V Out
HDMI™ Out
Micro USB, for 5V DC In
USB Release
USB arm
www.kodak.com/go/support
i
�
Product features
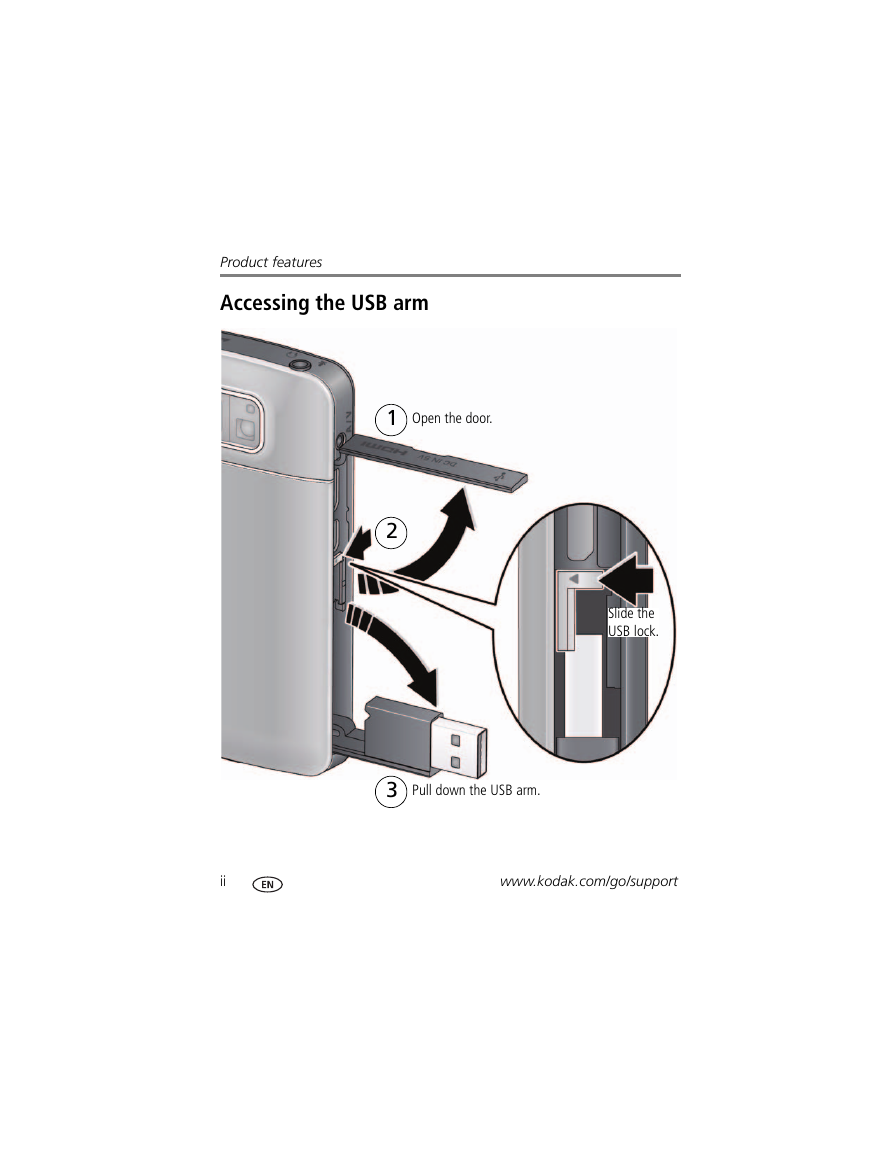
Accessing the USB arm
Open the door.
1
2
Slide the
USB lock.
3
Pull down the USB arm.
ii
www.kodak.com/go/support
�
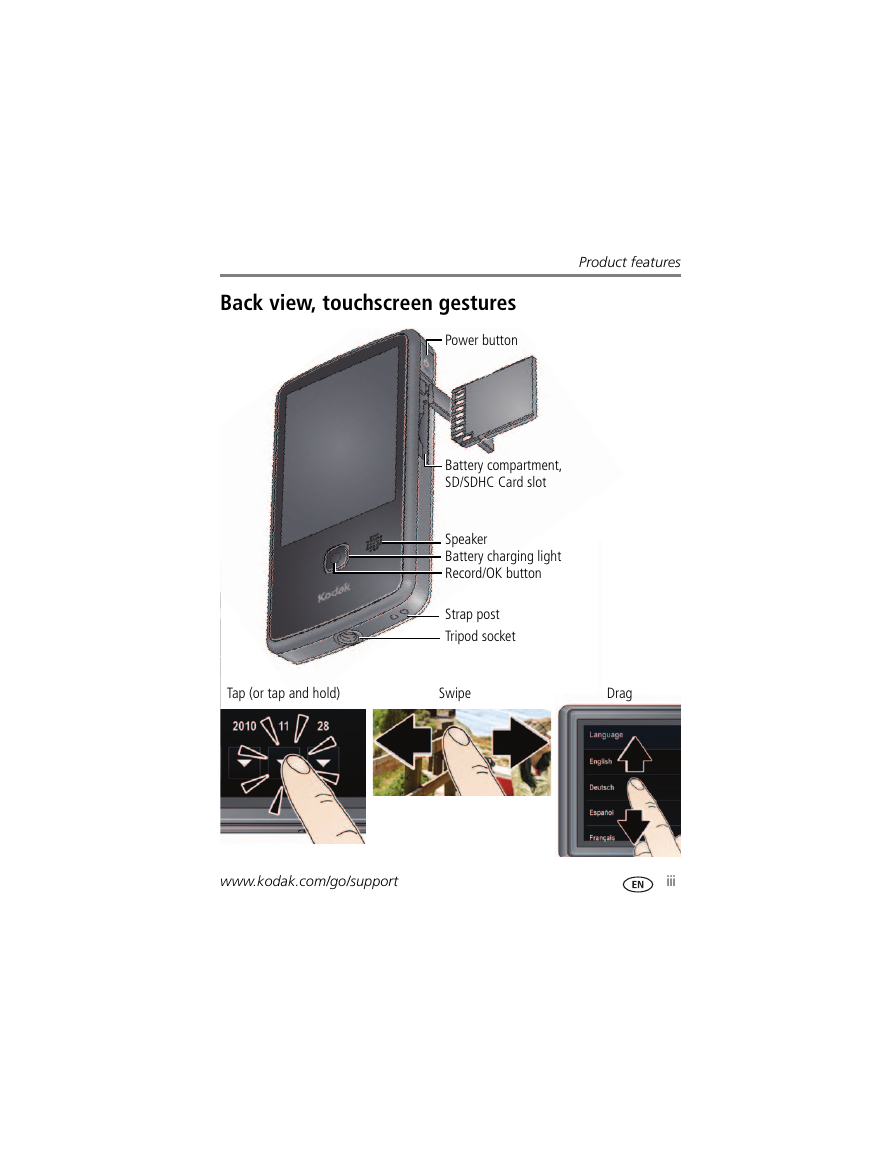
Back view, touchscreen gestures
Power button
Product features
Battery compartment,
SD/SDHC Card slot
Speaker
Battery charging light
Record/OK button
Strap post
Tripod socket
Tap (or tap and hold)
Swipe
Drag
www.kodak.com/go/support
iii
�
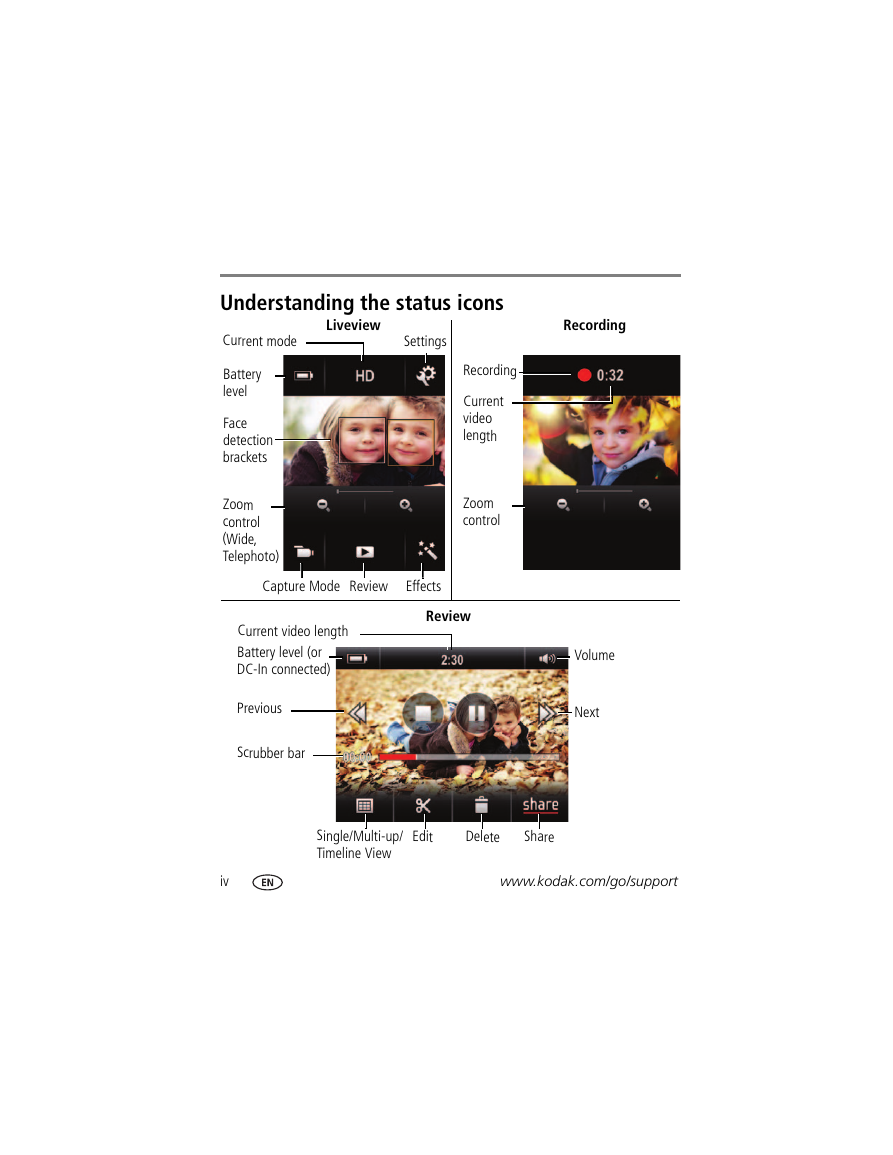
Understanding the status icons
Current mode
Liveview
Settings
Recording
Battery
level
Face
detection
brackets
Zoom
control
(Wide,
Telephoto)
Recording
Current
video
length
Zoom
control
Capture Mode
Review
Effects
Current video length
Battery level (or
DC-In connected)
Previous
Scrubber bar
Review
Volume
Next
Single/Multi-up/
Timeline View
Edit
Delete
Share
iv
www.kodak.com/go/support
�
1
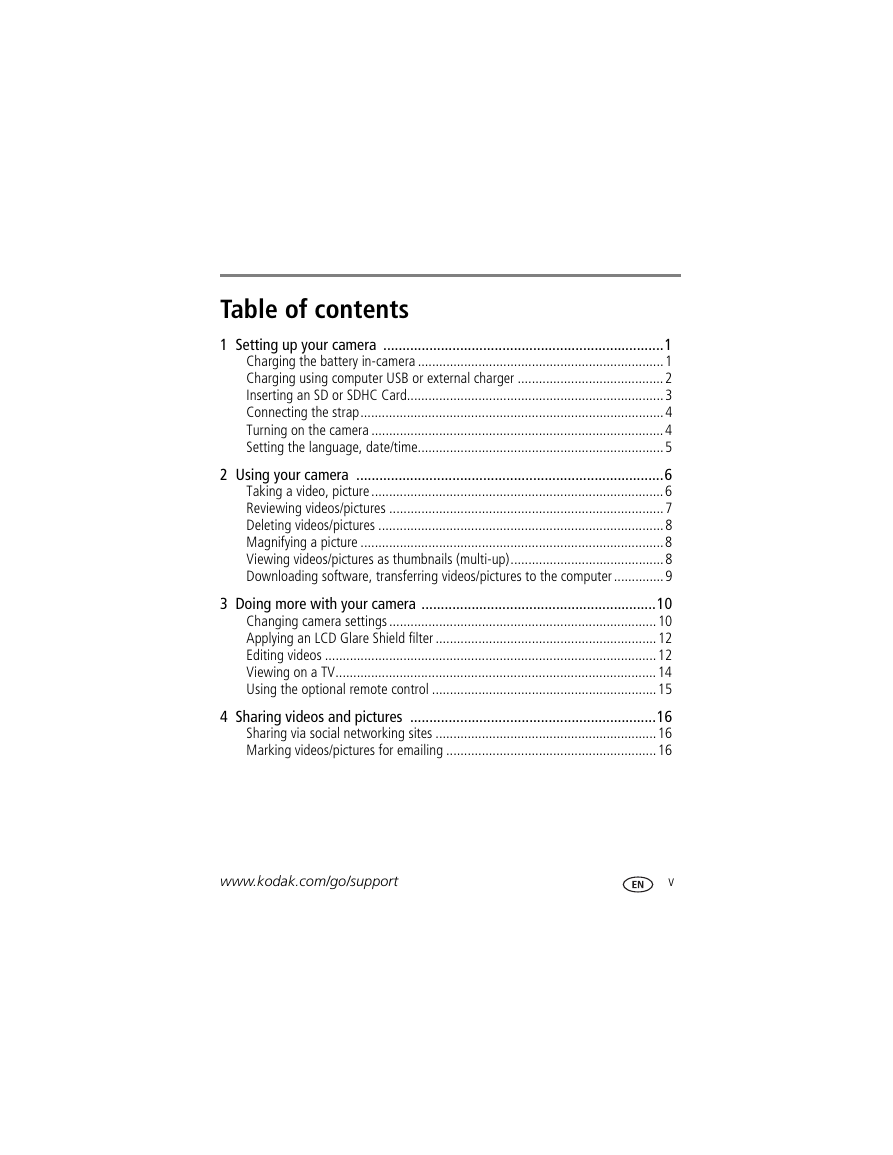
Table of contents
1 Setting up your camera .........................................................................1
Charging the battery in-camera .....................................................................1
Charging using computer USB or external charger .........................................2
Inserting an SD or SDHC Card........................................................................3
Connecting the strap.....................................................................................4
Turning on the camera ..................................................................................4
Setting the language, date/time.....................................................................5
2 Using your camera ................................................................................6
Taking a video, picture ..................................................................................6
Reviewing videos/pictures .............................................................................7
Deleting videos/pictures ................................................................................8
Magnifying a picture .....................................................................................8
Viewing videos/pictures as thumbnails (multi-up)...........................................8
Downloading software, transferring videos/pictures to the computer ..............9
3 Doing more with your camera .............................................................10
Changing camera settings ...........................................................................10
Applying an LCD Glare Shield filter ..............................................................12
Editing videos .............................................................................................12
Viewing on a TV..........................................................................................14
Using the optional remote control ...............................................................15
4 Sharing videos and pictures ................................................................16
Sharing via social networking sites ..............................................................16
Marking videos/pictures for emailing ...........................................................16
www.kodak.com/go/support
v
�
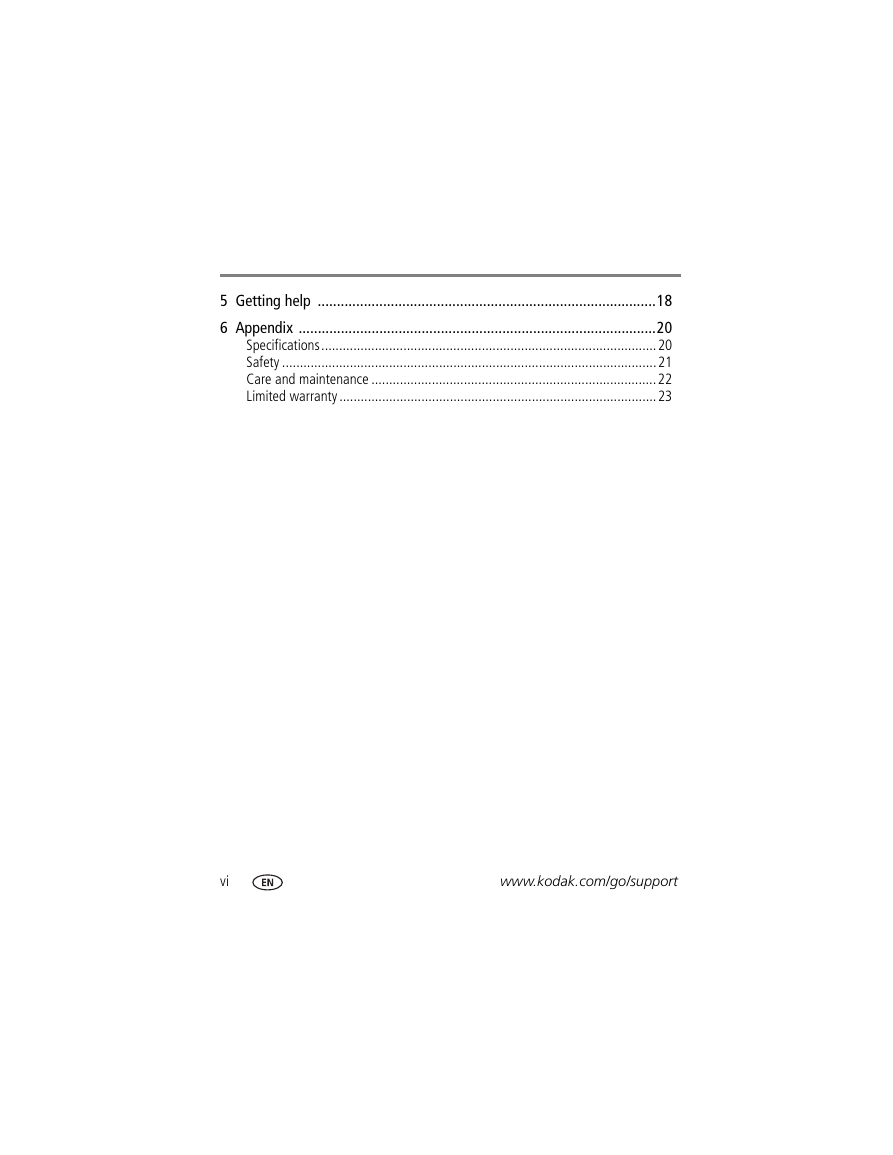
5 Getting help ........................................................................................18
6 Appendix .............................................................................................20
Specifications..............................................................................................20
Safety .........................................................................................................21
Care and maintenance ................................................................................22
Limited warranty .........................................................................................23
vi
www.kodak.com/go/support
�


 2023年江西萍乡中考道德与法治真题及答案.doc
 2012年重庆南川中考生物真题及答案.doc
 2013年江西师范大学地理学综合及文艺理论基础考研真题.doc
 2020年四川甘孜小升初语文真题及答案I卷.doc
 2020年注册岩土工程师专业基础考试真题及答案.doc
 2023-2024学年福建省厦门市九年级上学期数学月考试题及答案.doc
 2021-2022学年辽宁省沈阳市大东区九年级上学期语文期末试题及答案.doc
 2022-2023学年北京东城区初三第一学期物理期末试卷及答案.doc
 2018上半年江西教师资格初中地理学科知识与教学能力真题及答案.doc
 2012年河北国家公务员申论考试真题及答案-省级.doc
 2020-2021学年江苏省扬州市江都区邵樊片九年级上学期数学第一次质量检测试题及答案.doc
 2022下半年黑龙江教师资格证中学综合素质真题及答案.doc