logo资料库

SONY索尼数码相机-DSC-T100(英文)说明书.pdf

第1页 / 共119页
第2页 / 共119页
第3页 / 共119页
第4页 / 共119页
第5页 / 共119页
第6页 / 共119页
第7页 / 共119页
第8页 / 共119页
资料共119页,剩余部分请下载后查看
Notes on using your camera
Table of contents
Basic techniques for better images
Focus
Exposure
Color
Quality
Identifying parts
Indicators on the screen
Changing the screen display
Using the internal memory
Basic Operations
Shooting images easily (Auto adjustment mode)
Viewing images
Deleting images
Learning the various functions - HOME/Menu
Menu items
Using functions for shooting
Switching the shooting mode
Shooting images using Scene Selection
Shooting menu
Scene Selection: Using Scene Selection
Image Size: Selecting the image size
Face Detection: Detecting the face of subject
REC Mode: Selecting the continuous shooting method
Color Mode: Changing the vividness of the image or adding special effects
ISO: Selecting a luminous sensitivity
EV: Adjusting the light intensity
Metering Mode: Selecting the metering mode
Focus: Changing the focus method
White Bal: Adjusting the color tones
Flash Level: Adjusting the amount of flash light
Red Eye Reduction: Reducing the red-eye phenomenon
SteadyShot: Selecting the anti-blur mode
SETUP: Selecting the shooting settings
Using functions for viewing
Playing back images from the HOME screen
Single Image: Playing back a single image
Index Display: Playing back a list of images
Slide Show: Playing back a series of images
Viewing menu
Delete: Deleting images
Slide Show: Playing back a series of images
Retouch: Retouching still images after shooting
Protect: Preventing accidental erasure
DPOF: Adding a Print order mark
Print: Printing images using a printer
Rotate: Rotating a still image
Select Folder: Selecting the folder for viewing images
Customizing the settings
Customizing the Manage Memory feature and the Settings
Manage Memory
Memory Tool - Memory Stick Tool
Format
Create REC.Folder
Change REC.Folder
Copy
Memory Tool - Internal Memory Tool
Format
Settings
Main Settings - Main Settings 1
Beep
Function Guide
Initialize
Main Settings - Main Settings 2
USB Connect
COMPONENT
Video Out
Shooting Settings - Shooting Settings 1
AF Illuminator
Grid Line
AF Mode
Digital Zoom
Shooting Settings - Shooting Settings 2
Auto Orientation
Auto Review
Clock Settings
Clock Settings
Language Setting
Language Setting
Viewing images on a TV
Using your computer
Enjoying your Windows computer
Installing the software (supplied)
Copying images to your computer
Viewing image files stored on a computer with your camera (using a “Memory Stick Duo”)
Using the “Picture Motion Browser” (supplied)
Using the “Music Transfer” (supplied)
Using your Macintosh computer
Printing still images
How to print still images
Printing images directly using a PictBridge compliant printer
Printing at a shop
Troubleshooting
Troubleshooting
Warning indicators and messages
Others
To use your camera abroad - Power sources
On the “Memory Stick”
On the battery pack
On the battery charger
Index
Index
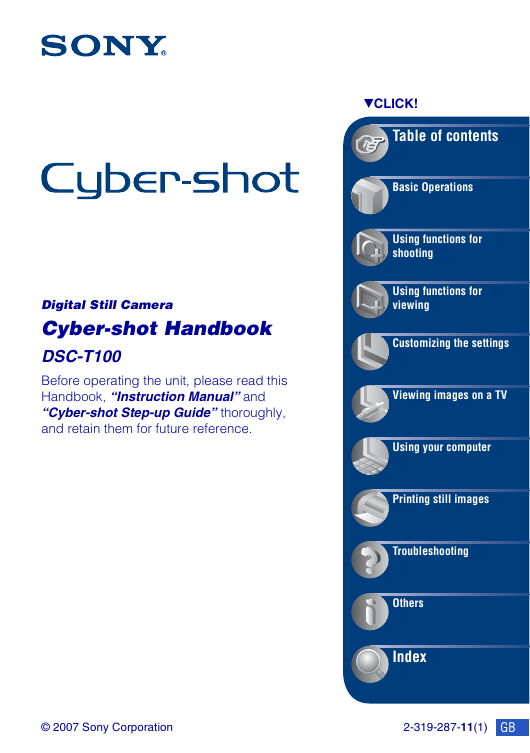
Digital Still Camera Cyber-shot Handbook DSC-T100 Before operating the unit, please read this Handbook, “Instruction Manual” and “Cyber-shot Step-up Guide” thoroughly, and retain them for future reference. VCLICK! Table of contents Basic Operations Using functions for shooting Using functions for viewing Customizing the settings Viewing images on a TV Using your computer Printing still images Troubleshooting Others Index © 2007 Sony Corporation 2-319-287-11(1) GB
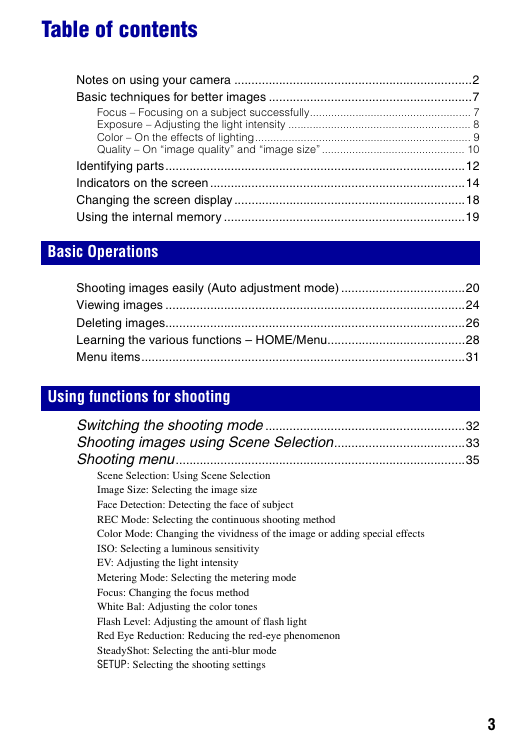
Notes on using your camera Types of “Memory Stick” that can be used (not supplied) The IC recording medium used by this camera is a “Memory Stick Duo”. There are two types of “Memory Stick”. “Memory Stick Duo”: you can use a “Memory Stick Duo” with your camera. “Memory Stick”: you cannot use a “Memory Stick” with your camera. Other memory cards cannot be used. For details on “Memory Stick Duo”, see page 111. When using a “Memory Stick Duo” with “Memory Stick” compatible equipment You can use the “Memory Stick Duo” by inserting it into the Memory Stick Duo Adaptor (not supplied). Memory Stick Duo Adaptor Notes on the battery pack Charge the battery pack (supplied) before using the camera for the first time. The battery pack can be charged even if it is not completely discharged. Also, even if the battery pack is not fully charged, you can use the partially charged capacity of the battery pack as is. 2 If you do not intend to use the battery pack for a long time, use up the existing charge and remove it from your camera, then store it in a cool, dry place. This is to maintain the battery pack functions. For details on the usable battery pack, see page 113. Carl Zeiss lens This camera is equipped with a Carl Zeiss lens which is capable of reproducing sharp images with excellent contrast. The lens for this camera has been produced under a quality assurance system certified by Carl Zeiss in accordance with the quality standards of Carl Zeiss in Germany. Notes on the LCD screen and lens The LCD screen is manufactured using extremely high-precision technology so over 99.99% of the pixels are operational for effective use. However, there may be some tiny black points and/or bright points (white, red, blue or green in color) that constantly appear on the LCD screen. These points are normal in the manufacturing process and do not affect the recording in any way. Black, white, red, blue or green points Exposing the LCD screen or the lens to direct sunlight for long periods may cause malfunctions. Be careful when placing the camera near a window or outdoors. Do not press against the LCD screen. The screen may be discolored and that may cause a malfunction. Images may trail across on the LCD screen in a cold location. This is not a malfunction. Be careful not to bump the lens, and be careful not to apply force to it. The pictures used in this Handbook The photographs used as examples of pictures in this Handbook are reproduced images, and are not actual images shot using this camera.
Table of contents Notes on using your camera .....................................................................2 Basic techniques for better images ...........................................................7 Focus – Focusing on a subject successfully..................................................... 7 Exposure – Adjusting the light intensity ............................................................ 8 Color – On the effects of lighting....................................................................... 9 Quality – On “image quality” and “image size” ............................................... 10 Identifying parts.......................................................................................12 Indicators on the screen ..........................................................................14 Changing the screen display ...................................................................18 Using the internal memory ......................................................................19 Basic Operations Shooting images easily (Auto adjustment mode) ....................................20 Viewing images .......................................................................................24 Deleting images.......................................................................................26 Learning the various functions – HOME/Menu........................................28 Menu items..............................................................................................31 Using functions for shooting Switching the shooting mode ..........................................................32 Shooting images using Scene Selection......................................33 Shooting menu....................................................................................35 Scene Selection: Using Scene Selection Image Size: Selecting the image size Face Detection: Detecting the face of subject REC Mode: Selecting the continuous shooting method Color Mode: Changing the vividness of the image or adding special effects ISO: Selecting a luminous sensitivity EV: Adjusting the light intensity Metering Mode: Selecting the metering mode Focus: Changing the focus method White Bal: Adjusting the color tones Flash Level: Adjusting the amount of flash light Red Eye Reduction: Reducing the red-eye phenomenon SteadyShot: Selecting the anti-blur mode SETUP: Selecting the shooting settings 3
Table of contents Using functions for viewing Playing back images from the HOME screen ............................. 46 (Single Image): Playing back a single image (Index Display): Playing back a list of images (Slide Show): Playing back a series of images Viewing menu ..................................................................................... 49 (Delete): Deleting images (Slide Show): Playing back a series of images (Retouch): Retouching still images after shooting (Protect): Preventing accidental erasure DPOF: Adding a Print order mark (Print): Printing images using a printer (Rotate): Rotating a still image (Select Folder): Selecting the folder for viewing images Customizing the settings Change REC.Folder Copy Customizing the Manage Memory feature and the Settings ........ 55 Manage Memory.......................................................................... 57 Memory Tool – Memory Stick Tool .................................................... 57 Format Create REC.Folder Memory Tool – Internal Memory Tool................................................ 59 Format Settings........................................................................................... 60 Main Settings – Main Settings 1 ....................................................... 60 Beep Function Guide Main Settings – Main Settings 2 ....................................................... 61 USB Connect COMPONENT Shooting Settings – Shooting Settings 1 .......................................... 63 AF Illuminator Grid Line Shooting Settings – Shooting Settings 2 .......................................... 65 Auto Orientation Video Out Initialize AF Mode Digital Zoom Auto Review Clock Settings..................................................................................... 66 4
Table of contents Language Setting...............................................................................67 Viewing images on a TV Viewing images on a TV..........................................................................68 Using your computer Enjoying your Windows computer ...........................................................71 Installing the software (supplied).............................................................73 Copying images to your computer...........................................................74 Viewing image files stored on a computer with your camera (using a “Memory Stick Duo”) ...............................................................................80 Using the “Picture Motion Browser” (supplied)........................................81 Using the “Music Transfer” (supplied)......................................................87 Using your Macintosh computer..............................................................88 Printing still images How to print still images ..........................................................................90 Printing images directly using a PictBridge compliant printer .................91 Printing at a shop ....................................................................................94 Troubleshooting Troubleshooting .......................................................................................96 Warning indicators and messages ........................................................107 Others To use your camera abroad — Power sources......................................110 On the “Memory Stick” ..........................................................................111 On the battery pack...............................................................................113 On the battery charger ..........................................................................114 5
Table of contents Index Index ..................................................................................................... 115 6
Basic techniques for better images Focus Exposure Color Quality This section describes the basics so you can enjoy your camera. It tells you how to use various camera functions such as the HOME screen (page 28), the menus (page 30), and so on. Focus Focusing on a subject successfully When you press the shutter button halfway down, the camera adjusts the focus automatically (Auto Focus). Remember to press the shutter button only halfway down. Press the shutter button fully down suddenly. Press the shutter button halfway down. AE/AF lock indicator flashing , lit/beeps Then press the shutter button fully down. To shoot a still image difficult to focus on t [Focus] (page 41) If the image looks blurred even after focusing, it may be because of camera shake. t See “Hints for preventing blur” (as follows). Hints for preventing blur Hold the camera steady, keeping your arms at your side. It is recommended to lean against a tree or a building nearby to steady yourself. Shooting with a 2-second delay self-timer, or using a tripod is also effective. Use the flash when you shoot under a low light condition. 7
Basic techniques for better images Exposure Adjusting the light intensity You can create various images by adjusting the exposure and the ISO sensitivity. Exposure is the amount of light that the camera will receive when you release the shutter. Exposure: Shutter speed = Length of time the camera receives light Aperture = Size of the opening allowing light to pass through ISO Sensitivity (Recommended Exposure Index) = Recording sensitivity Overexposure = too much light Whitish image Correct exposure Underexposure = too little light Darker image The exposure is automatically set to the proper value in the auto adjustment mode. However, you can adjust it manually using the functions below. Adjusting EV: Allows you to adjust the exposure determined by the camera (page 39). Metering Mode: Allows you to change the part of the subject to be measured to determine the exposure (page 40). Adjusting ISO Sensitivity (Recommended Exposure Index) ISO sensitivity is a speed rating for recording media that incorporates an image sensor that receives light. Even when the exposure is the same, images differ depending on the ISO sensitivity. To adjust the ISO sensitivity, see page 39. High ISO sensitivity Records a bright image even when shooting in a dark location. However, the image tends to become noisy. Low ISO sensitivity Records a smoother image. However, when the exposure is insufficient, the image may become darker. 8
分享到:
收藏