Ubuntu16.4部署部署fabric1.4+kafka集群最新最完整
集群最新最完整
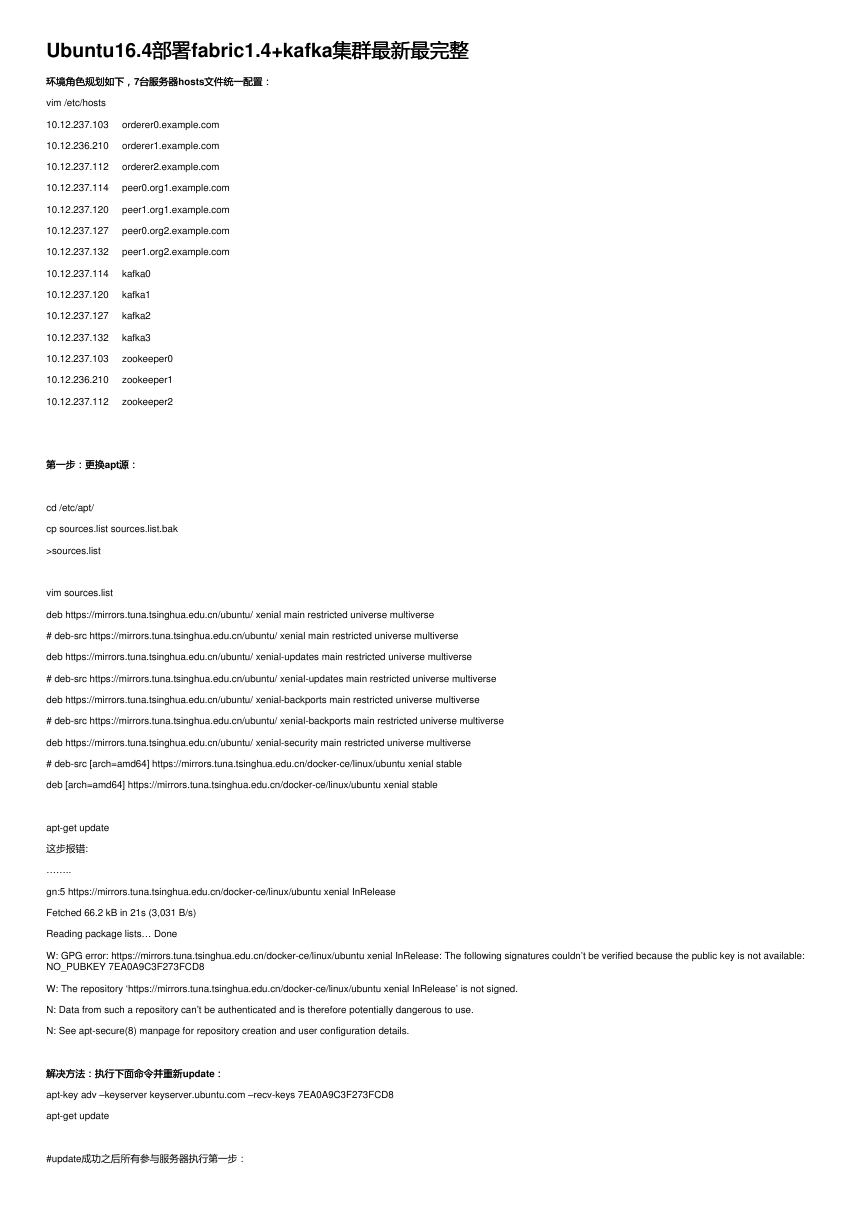
环境角色规划如下,7台服务器
环境角色规划如下,
台服务器hosts文件统一配置:
文件统一配置:
vim /etc/hosts
10.12.237.103 orderer0.example.com
10.12.236.210 orderer1.example.com
10.12.237.112 orderer2.example.com
10.12.237.114 peer0.org1.example.com
10.12.237.120 peer1.org1.example.com
10.12.237.127 peer0.org2.example.com
10.12.237.132 peer1.org2.example.com
10.12.237.114 kafka0
10.12.237.120 kafka1
10.12.237.127 kafka2
10.12.237.132 kafka3
10.12.237.103 zookeeper0
10.12.236.210 zookeeper1
10.12.237.112 zookeeper2
第一步:更换apt源:源:
第一步:更换
cd /etc/apt/
cp sources.list sources.list.bak
>sources.list
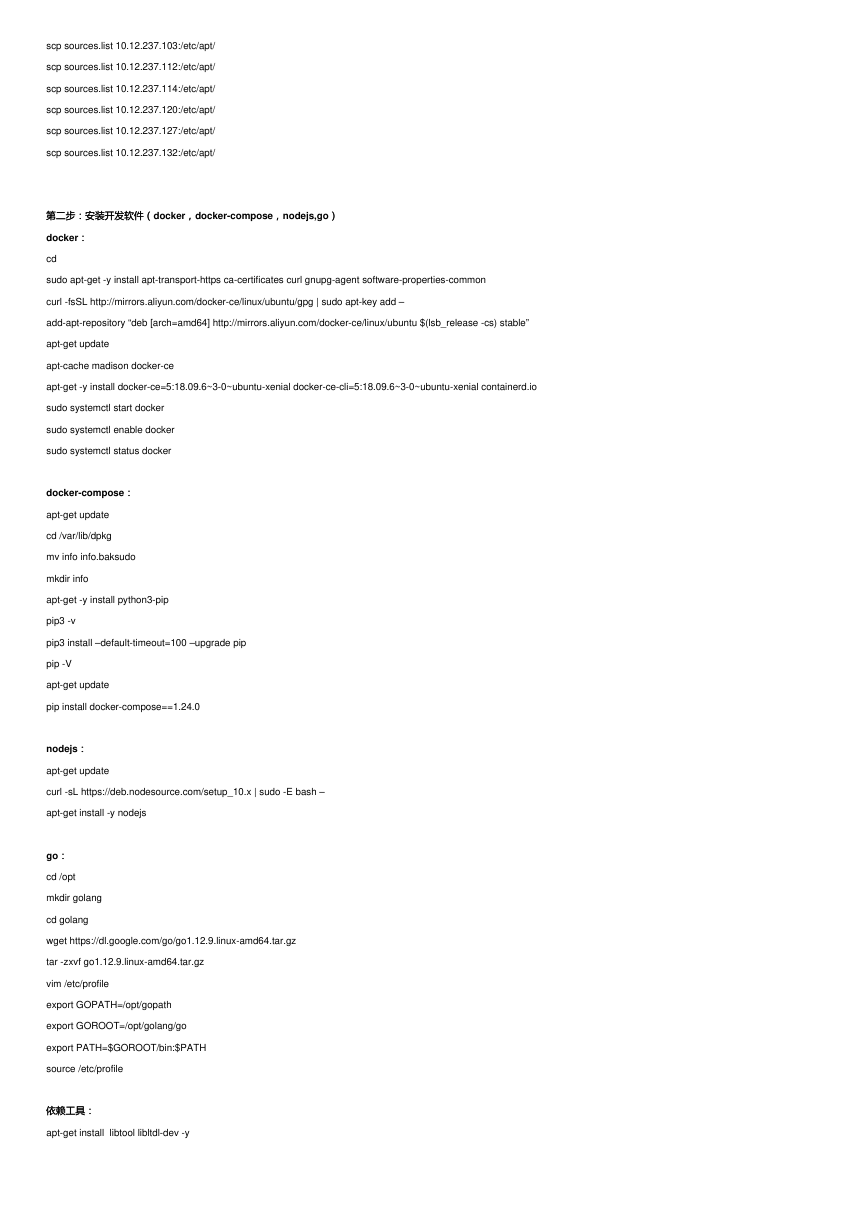
vim sources.list
deb https://mirrors.tuna.tsinghua.edu.cn/ubuntu/ xenial main restricted universe multiverse
# deb-src https://mirrors.tuna.tsinghua.edu.cn/ubuntu/ xenial main restricted universe multiverse
deb https://mirrors.tuna.tsinghua.edu.cn/ubuntu/ xenial-updates main restricted universe multiverse
# deb-src https://mirrors.tuna.tsinghua.edu.cn/ubuntu/ xenial-updates main restricted universe multiverse
deb https://mirrors.tuna.tsinghua.edu.cn/ubuntu/ xenial-backports main restricted universe multiverse
# deb-src https://mirrors.tuna.tsinghua.edu.cn/ubuntu/ xenial-backports main restricted universe multiverse
deb https://mirrors.tuna.tsinghua.edu.cn/ubuntu/ xenial-security main restricted universe multiverse
# deb-src [arch=amd64] https://mirrors.tuna.tsinghua.edu.cn/docker-ce/linux/ubuntu xenial stable
deb [arch=amd64] https://mirrors.tuna.tsinghua.edu.cn/docker-ce/linux/ubuntu xenial stable
apt-get update
这步报错:
……..
gn:5 https://mirrors.tuna.tsinghua.edu.cn/docker-ce/linux/ubuntu xenial InRelease
Fetched 66.2 kB in 21s (3,031 B/s)
Reading package lists… Done
W: GPG error: https://mirrors.tuna.tsinghua.edu.cn/docker-ce/linux/ubuntu xenial InRelease: The following signatures couldn’t be verified because the public key is not available:
NO_PUBKEY 7EA0A9C3F273FCD8
W: The repository ‘https://mirrors.tuna.tsinghua.edu.cn/docker-ce/linux/ubuntu xenial InRelease’ is not signed.
N: Data from such a repository can’t be authenticated and is therefore potentially dangerous to use.
N: See apt-secure(8) manpage for repository creation and user configuration details.
解决方法:执行下面命令并重新update::
解决方法:执行下面命令并重新
apt-key adv –keyserver keyserver.ubuntu.com –recv-keys 7EA0A9C3F273FCD8
apt-get update
#update成功之后所有参与服务器执行第一步:
�
scp sources.list 10.12.237.103:/etc/apt/
scp sources.list 10.12.237.112:/etc/apt/
scp sources.list 10.12.237.114:/etc/apt/
scp sources.list 10.12.237.120:/etc/apt/
scp sources.list 10.12.237.127:/etc/apt/
scp sources.list 10.12.237.132:/etc/apt/
第二步:安装开发软件(docker,,docker-compose,,nodejs,go))
第二步:安装开发软件(
docker::
cd
sudo apt-get -y install apt-transport-https ca-certificates curl gnupg-agent software-properties-common
curl -fsSL http://mirrors.aliyun.com/docker-ce/linux/ubuntu/gpg | sudo apt-key add –
add-apt-repository “deb [arch=amd64] http://mirrors.aliyun.com/docker-ce/linux/ubuntu $(lsb_release -cs) stable”
apt-get update
apt-cache madison docker-ce
apt-get -y install docker-ce=5:18.09.6~3-0~ubuntu-xenial docker-ce-cli=5:18.09.6~3-0~ubuntu-xenial containerd.io
sudo systemctl start docker
sudo systemctl enable docker
sudo systemctl status docker
docker-compose::
apt-get update
cd /var/lib/dpkg
mv info info.baksudo
mkdir info
apt-get -y install python3-pip
pip3 -v
pip3 install –default-timeout=100 –upgrade pip
pip -V
apt-get update
pip install docker-compose==1.24.0
nodejs::
apt-get update
curl -sL https://deb.nodesource.com/setup_10.x | sudo -E bash –
apt-get install -y nodejs
go::
cd /opt
mkdir golang
cd golang
wget https://dl.google.com/go/go1.12.9.linux-amd64.tar.gz
tar -zxvf go1.12.9.linux-amd64.tar.gz
vim /etc/profile
export GOPATH=/opt/gopath
export GOROOT=/opt/golang/go
export PATH=$GOROOT/bin:$PATH
source /etc/profile
依赖工具:
依赖工具:
apt-get install libtool libltdl-dev -y
�
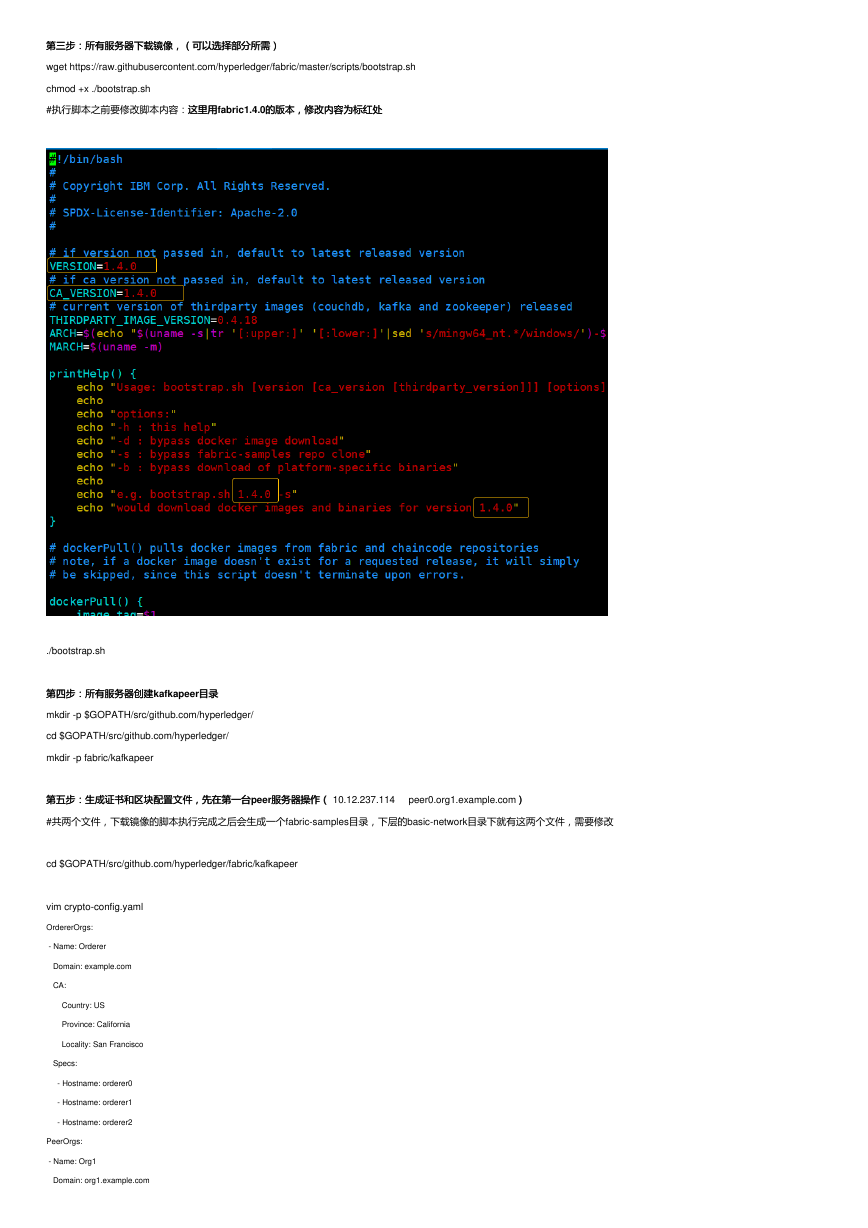
第三步:所有服务器下载镜像,(可以选择部分所需)
第三步:所有服务器下载镜像,(可以选择部分所需)
wget https://raw.githubusercontent.com/hyperledger/fabric/master/scripts/bootstrap.sh
chmod +x ./bootstrap.sh
#执行脚本之前要修改脚本内容:这里用这里用fabric1.4.0的版本,修改内容为标红处
的版本,修改内容为标红处
./bootstrap.sh
第四步:所有服务器创建kafkapeer目录目录
第四步:所有服务器创建
mkdir -p $GOPATH/src/github.com/hyperledger/
cd $GOPATH/src/github.com/hyperledger/
mkdir -p fabric/kafkapeer
第五步:生成证书和区块配置文件,先在第一台peer服务器操作(
第五步:生成证书和区块配置文件,先在第一台
服务器操作( 10.12.237.114 peer0.org1.example.com))
#共两个文件,下载镜像的脚本执行完成之后会生成一个fabric-samples目录,下层的basic-network目录下就有这两个文件,需要修改
cd $GOPATH/src/github.com/hyperledger/fabric/kafkapeer
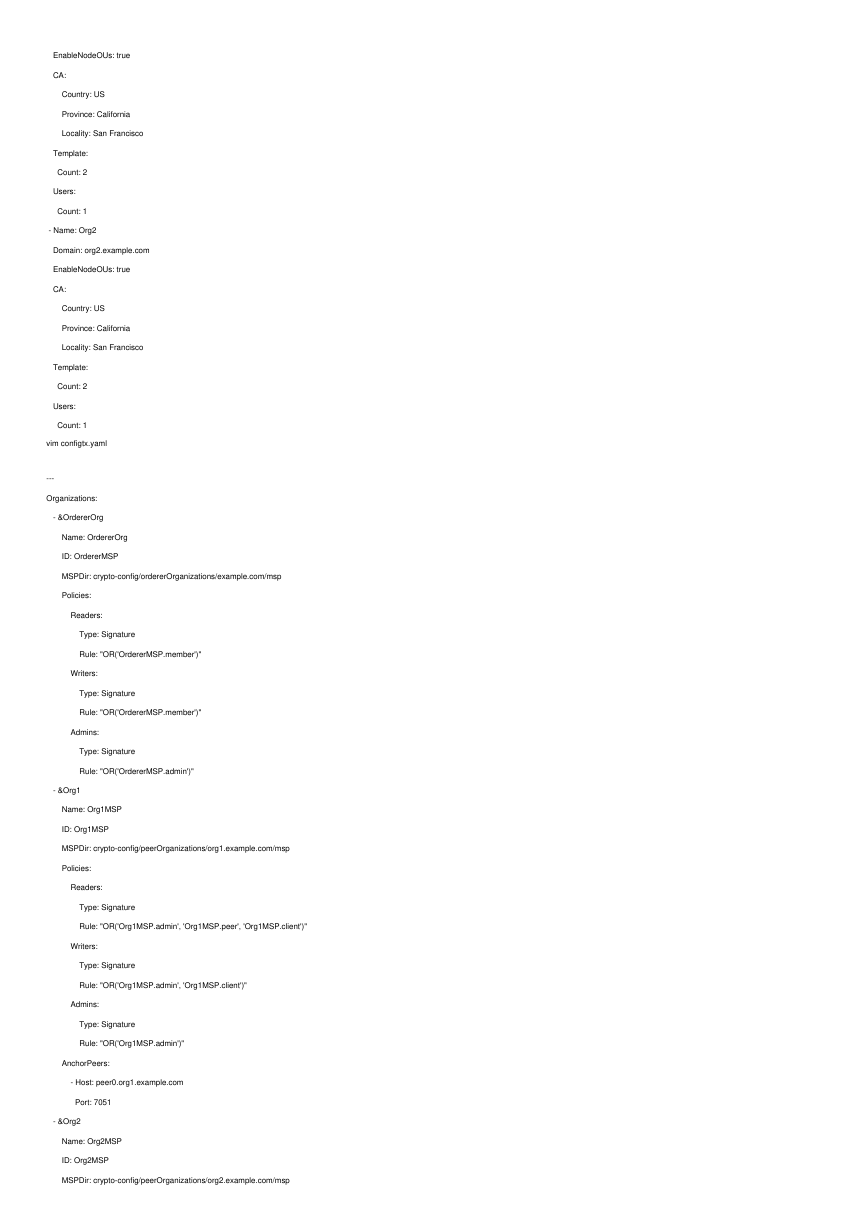
vim crypto-config.yaml
OrdererOrgs:
- Name: Orderer
Domain: example.com
CA:
Country: US
Province: California
Locality: San Francisco
Specs:
- Hostname: orderer0
- Hostname: orderer1
- Hostname: orderer2
PeerOrgs:
- Name: Org1
Domain: org1.example.com
�
EnableNodeOUs: true
CA:
Country: US
Province: California
Locality: San Francisco
Template:
Count: 2
Users:
Count: 1
- Name: Org2
Domain: org2.example.com
EnableNodeOUs: true
CA:
Country: US
Province: California
Locality: San Francisco
Template:
Count: 2
Users:
Count: 1
vim configtx.yaml
---
Organizations:
- &OrdererOrg
Name: OrdererOrg
ID: OrdererMSP
MSPDir: crypto-config/ordererOrganizations/example.com/msp
Policies:
Readers:
Type: Signature
Rule: "OR('OrdererMSP.member')"
Writers:
Type: Signature
Rule: "OR('OrdererMSP.member')"
Admins:
Type: Signature
Rule: "OR('OrdererMSP.admin')"
- &Org1
Name: Org1MSP
ID: Org1MSP
MSPDir: crypto-config/peerOrganizations/org1.example.com/msp
Policies:
Readers:
Type: Signature
Rule: "OR('Org1MSP.admin', 'Org1MSP.peer', 'Org1MSP.client')"
Writers:
Type: Signature
Rule: "OR('Org1MSP.admin', 'Org1MSP.client')"
Admins:
Type: Signature
Rule: "OR('Org1MSP.admin')"
AnchorPeers:
- Host: peer0.org1.example.com
Port: 7051
- &Org2
Name: Org2MSP
ID: Org2MSP
MSPDir: crypto-config/peerOrganizations/org2.example.com/msp
�
Policies:
Readers:
Type: Signature
Rule: "OR('Org2MSP.admin', 'Org2MSP.peer', 'Org2MSP.client')"
Writers:
Type: Signature
Rule: "OR('Org2MSP.admin', 'Org2MSP.client')"
Admins:
Type: Signature
Rule: "OR('Org2MSP.admin')"
AnchorPeers:
- Host: peer0.org2.example.com
Port: 7051
Capabilities:
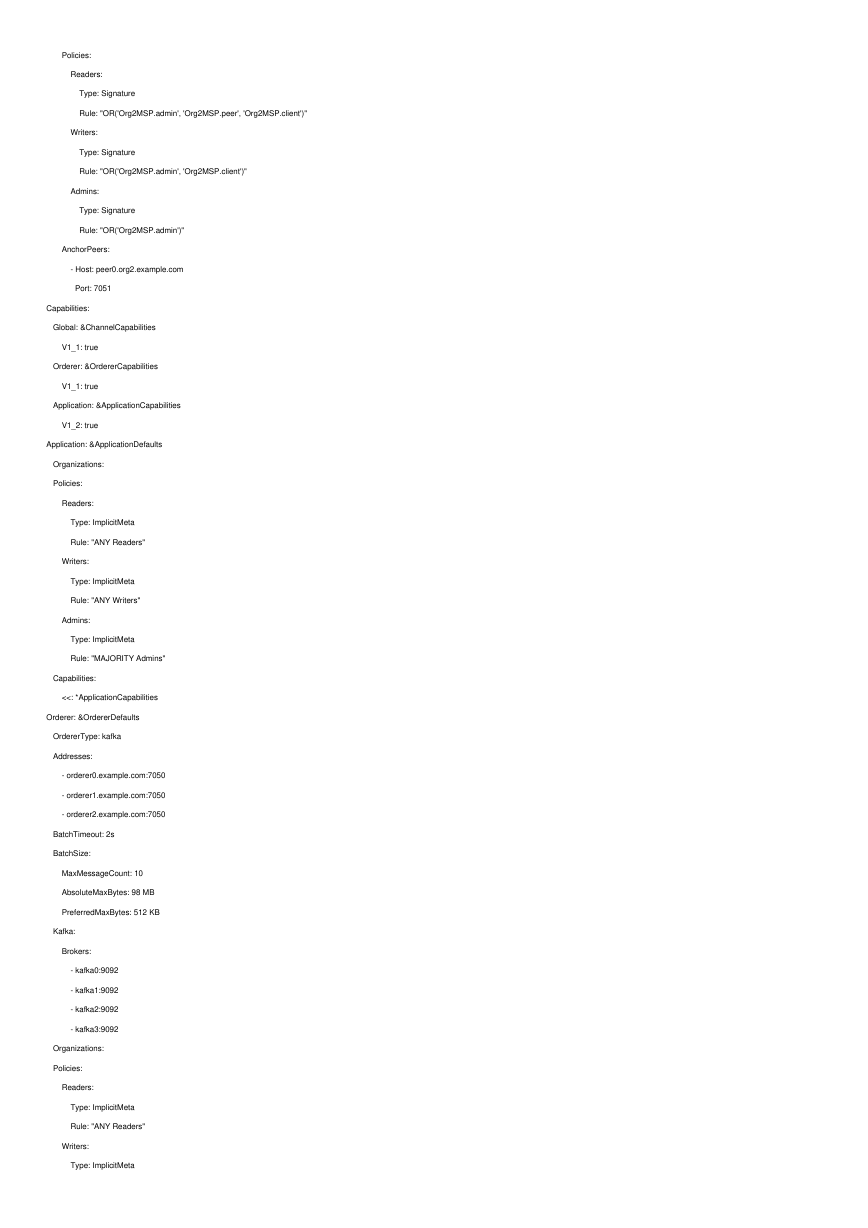
Global: &ChannelCapabilities
V1_1: true
Orderer: &OrdererCapabilities
V1_1: true
Application: &ApplicationCapabilities
V1_2: true
Application: &ApplicationDefaults
Organizations:
Policies:
Readers:
Type: ImplicitMeta
Rule: "ANY Readers"
Writers:
Type: ImplicitMeta
Rule: "ANY Writers"
Admins:
Type: ImplicitMeta
Rule: "MAJORITY Admins"
Capabilities:
<<: *ApplicationCapabilities
Orderer: &OrdererDefaults
OrdererType: kafka
Addresses:
- orderer0.example.com:7050
- orderer1.example.com:7050
- orderer2.example.com:7050
BatchTimeout: 2s
BatchSize:
MaxMessageCount: 10
AbsoluteMaxBytes: 98 MB
PreferredMaxBytes: 512 KB
Kafka:
Brokers:
- kafka0:9092
- kafka1:9092
- kafka2:9092
- kafka3:9092
Organizations:
Policies:
Readers:
Type: ImplicitMeta
Rule: "ANY Readers"
Writers:
Type: ImplicitMeta
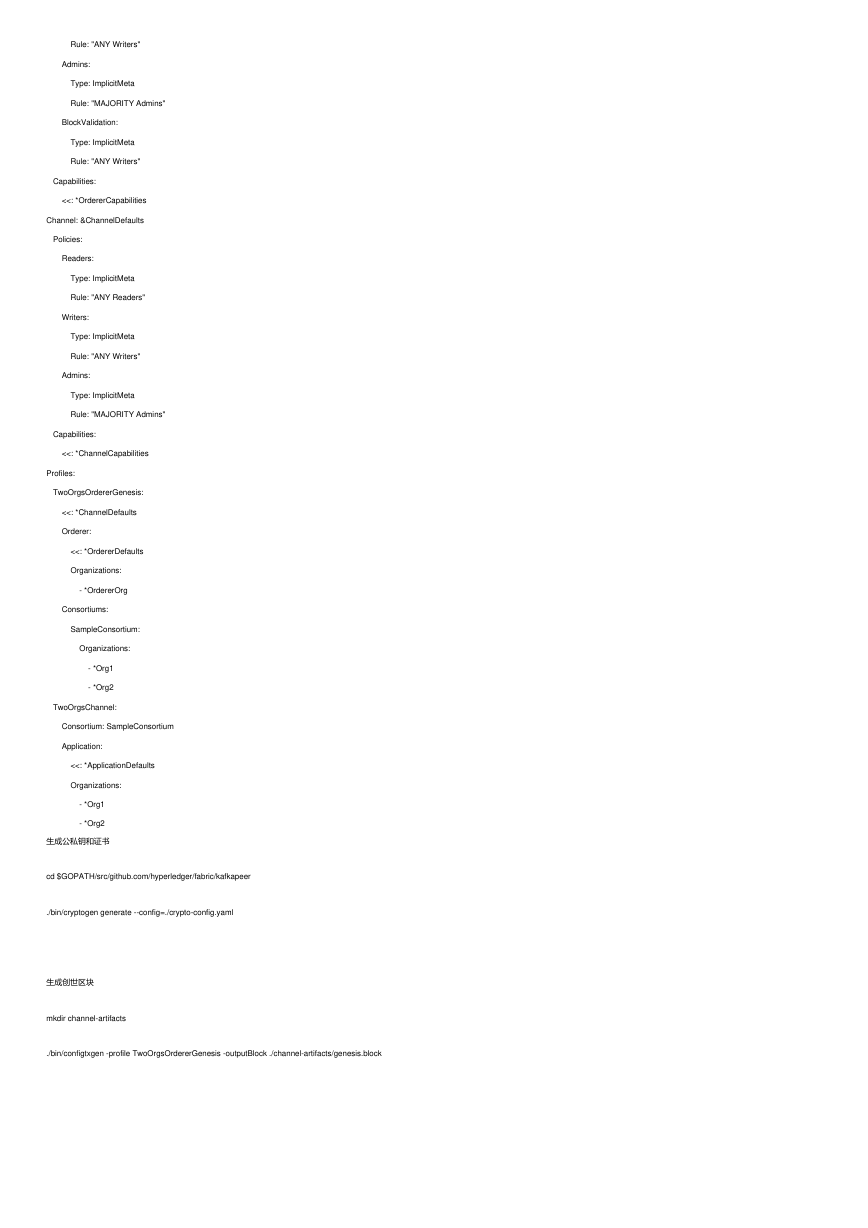
�
Rule: "ANY Writers"
Admins:
Type: ImplicitMeta
Rule: "MAJORITY Admins"
BlockValidation:
Type: ImplicitMeta
Rule: "ANY Writers"
Capabilities:
<<: *OrdererCapabilities
Channel: &ChannelDefaults
Policies:
Readers:
Type: ImplicitMeta
Rule: "ANY Readers"
Writers:
Type: ImplicitMeta
Rule: "ANY Writers"
Admins:
Type: ImplicitMeta
Rule: "MAJORITY Admins"
Capabilities:
<<: *ChannelCapabilities
Profiles:
TwoOrgsOrdererGenesis:
<<: *ChannelDefaults
Orderer:
<<: *OrdererDefaults
Organizations:
- *OrdererOrg
Consortiums:
SampleConsortium:
Organizations:
- *Org1
- *Org2
TwoOrgsChannel:
Consortium: SampleConsortium
Application:
<<: *ApplicationDefaults
Organizations:
- *Org1
- *Org2
生成公私钥和证书
cd $GOPATH/src/github.com/hyperledger/fabric/kafkapeer
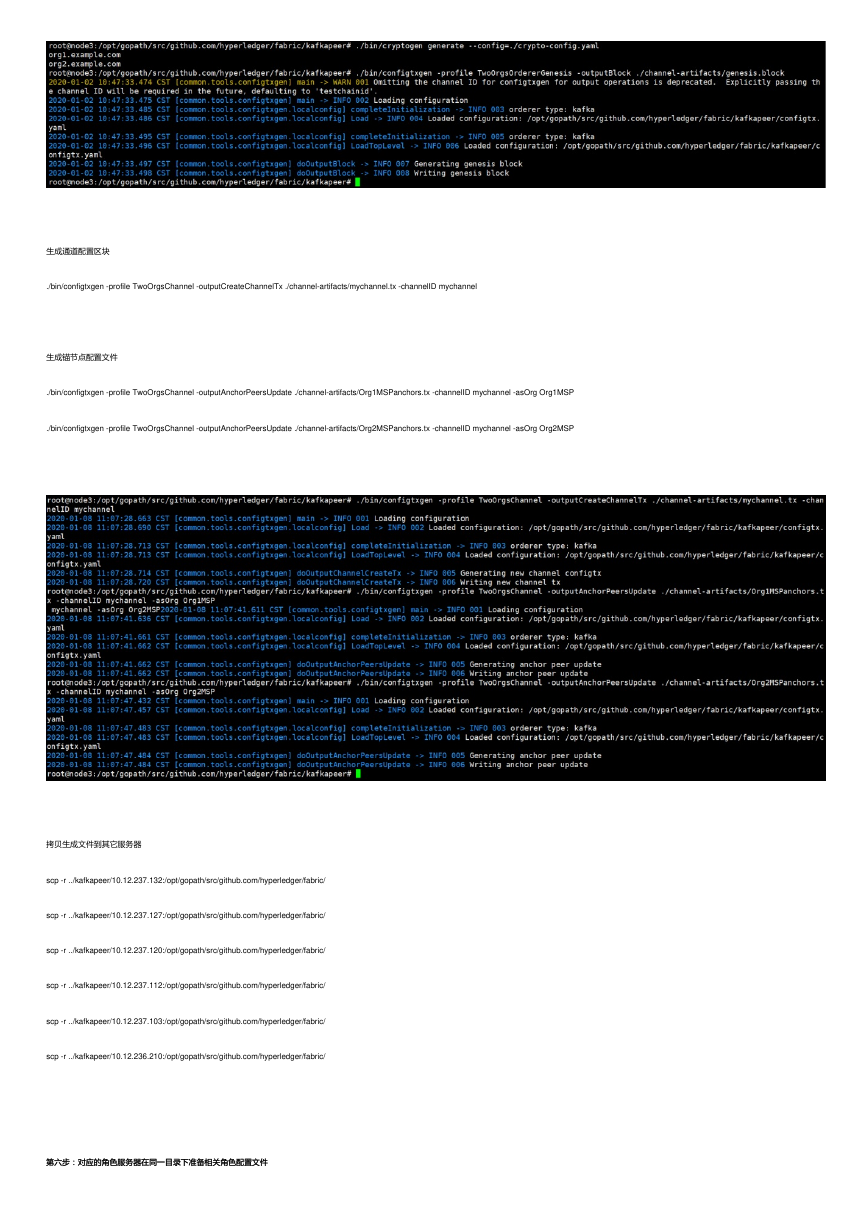
./bin/cryptogen generate --config=./crypto-config.yaml
生成创世区块
mkdir channel-artifacts
./bin/configtxgen -profile TwoOrgsOrdererGenesis -outputBlock ./channel-artifacts/genesis.block
�
生成通道配置区块
./bin/configtxgen -profile TwoOrgsChannel -outputCreateChannelTx ./channel-artifacts/mychannel.tx -channelID mychannel
生成锚节点配置文件
./bin/configtxgen -profile TwoOrgsChannel -outputAnchorPeersUpdate ./channel-artifacts/Org1MSPanchors.tx -channelID mychannel -asOrg Org1MSP
./bin/configtxgen -profile TwoOrgsChannel -outputAnchorPeersUpdate ./channel-artifacts/Org2MSPanchors.tx -channelID mychannel -asOrg Org2MSP
拷贝生成文件到其它服务器
scp -r ../kafkapeer/10.12.237.132:/opt/gopath/src/github.com/hyperledger/fabric/
scp -r ../kafkapeer/10.12.237.127:/opt/gopath/src/github.com/hyperledger/fabric/
scp -r ../kafkapeer/10.12.237.120:/opt/gopath/src/github.com/hyperledger/fabric/
scp -r ../kafkapeer/10.12.237.112:/opt/gopath/src/github.com/hyperledger/fabric/
scp -r ../kafkapeer/10.12.237.103:/opt/gopath/src/github.com/hyperledger/fabric/
scp -r ../kafkapeer/10.12.236.210:/opt/gopath/src/github.com/hyperledger/fabric/
第六步:对应的角色服务器在同一目录下准备相关角色配置文件
第六步:对应的角色服务器在同一目录下准备相关角色配置文件
�
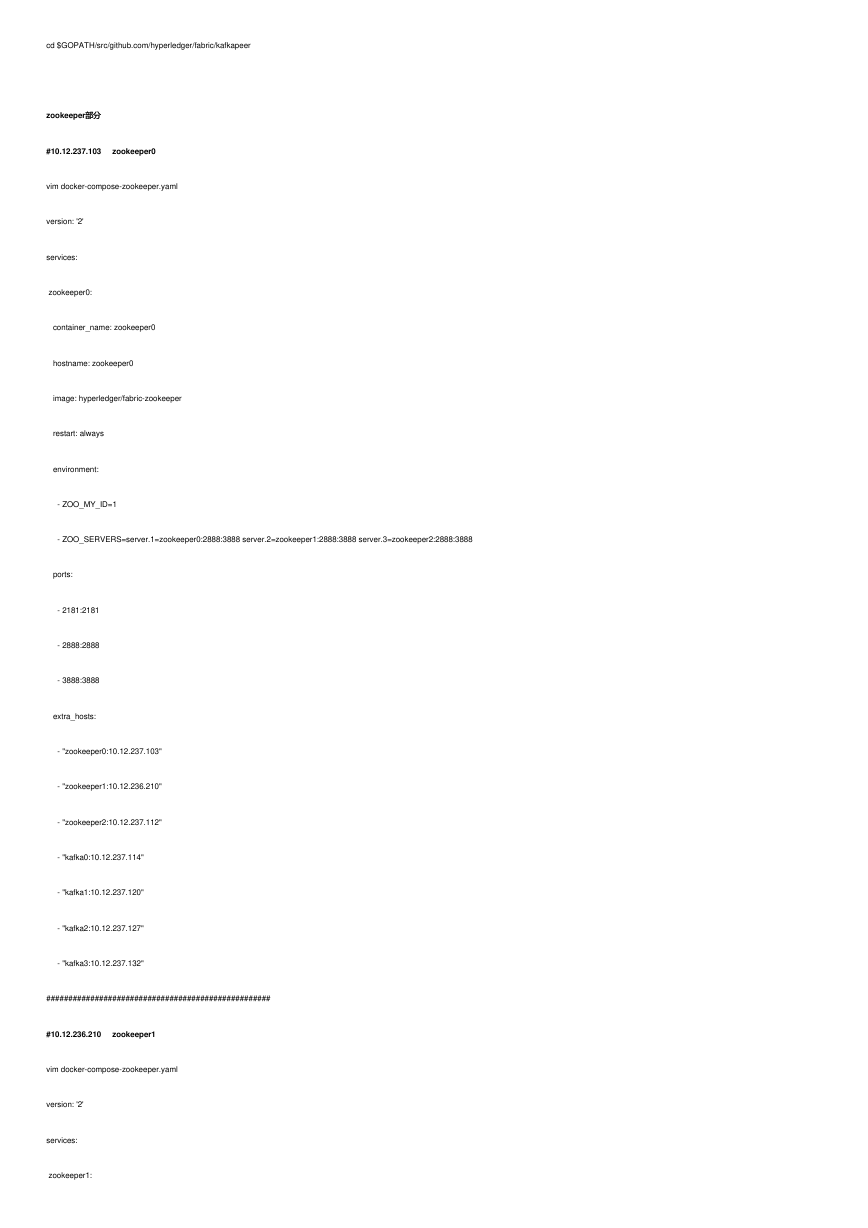
cd $GOPATH/src/github.com/hyperledger/fabric/kafkapeer
zookeeper部分部分
#10.12.237.103 zookeeper0
vim docker-compose-zookeeper.yaml
version: '2'
services:
zookeeper0:
container_name: zookeeper0
hostname: zookeeper0
image: hyperledger/fabric-zookeeper
restart: always
environment:
- ZOO_MY_ID=1
- ZOO_SERVERS=server.1=zookeeper0:2888:3888 server.2=zookeeper1:2888:3888 server.3=zookeeper2:2888:3888
ports:
- 2181:2181
- 2888:2888
- 3888:3888
extra_hosts:
- "zookeeper0:10.12.237.103"
- "zookeeper1:10.12.236.210"
- "zookeeper2:10.12.237.112"
- "kafka0:10.12.237.114"
- "kafka1:10.12.237.120"
- "kafka2:10.12.237.127"
- "kafka3:10.12.237.132"
###################################################
#10.12.236.210 zookeeper1
vim docker-compose-zookeeper.yaml
version: '2'
services:
zookeeper1:
�


 2023年江西萍乡中考道德与法治真题及答案.doc
 2012年重庆南川中考生物真题及答案.doc
 2013年江西师范大学地理学综合及文艺理论基础考研真题.doc
 2020年四川甘孜小升初语文真题及答案I卷.doc
 2020年注册岩土工程师专业基础考试真题及答案.doc
 2023-2024学年福建省厦门市九年级上学期数学月考试题及答案.doc
 2021-2022学年辽宁省沈阳市大东区九年级上学期语文期末试题及答案.doc
 2022-2023学年北京东城区初三第一学期物理期末试卷及答案.doc
 2018上半年江西教师资格初中地理学科知识与教学能力真题及答案.doc
 2012年河北国家公务员申论考试真题及答案-省级.doc
 2020-2021学年江苏省扬州市江都区邵樊片九年级上学期数学第一次质量检测试题及答案.doc
 2022下半年黑龙江教师资格证中学综合素质真题及答案.doc