logo资料库

Agisoft PhotoScan Professional 用户手册.pdf

第1页 / 共85页
第2页 / 共85页
第3页 / 共85页
第4页 / 共85页
第5页 / 共85页
第6页 / 共85页
第7页 / 共85页
第8页 / 共85页
资料共85页,剩余部分请下载后查看
Agisoft PhotoScan User Manual
Table of Contents
Overview
How it works
About the manual
Chapter 1. Installation
System requirements
OpenCL acceleration
Installation procedure
Installing PhotoScan on Microsoft Windows
Installing PhotoScan on Mac OS X
Installing PhotoScan on Debian/Ubuntu
Restrictions of the Demo mode
Chapter 2. Capturing photos
Equipment
Camera settings
Object / scene requirements
Image preprocessing
Capturing scenarios
Restrictions
Modifications of photographs
Lack of EXIF data
Lens distortion
Chapter 3. General workflow
Preferences settings
Loading photos
Camera groups
Inspecting loaded photos
Multispectral imagery
Aligning photos
Image quality
Alignment parameters
Point cloud generation based on imported camera data
Building dense point cloud
Reconstruction parameters
Building mesh
Reconstruction parameters
Building model texture
Texture mapping modes
Texture generation parameters
Saving intermediate results
Exporting results
Point cloud export
Tie points data export
Camera calibration and orientation data export
Panorama export
3D model export
Orthophoto export
DEM (DSM / DTM) export
Extra products to export
Processing report generation
Chapter 4. Referencing and measurements
Camera calibration
Calibration groups
Camera types
Camera calibration parameters
Calibration parameters list
Setting coordinate system
Placing markers
Assigning reference coordinates
Example of a reference coordinates file in CSV format (*.txt)
Optimization of camera alignment
Scale bar based optimization
What does the errors in the Reference pane mean?
Working with coded and non-coded targets
Overview
Coded targets advantages and limitations
Coded targets in workflow
Non-coded targets implementation
Performing measurements
Distance measurement
Surface area and volume measurement
Chapter 5. Editing
Using masks
Overview
Loading masks
Editing masks
Saving masks
Editing point cloud
Filtering points based on specified criterion
Filtering points based on applied masks
Tie point per photo limit
Manual points removal
Classifying dense cloud points
Automatic classification of ground points
Manual classification of dense cloud points
Editing model geometry
Decimation tool
Close Holes tool
Polygon filtering on specified criterion
Manual face removal
Fixing mesh topology
Editing mesh in the external program
Chapter 6. Automation
Using chunks
Creating a chunk
Working with chunks
Aligning chunks
Aligning chunks parameters
Merging chunks
Batch processing
4D processing
Overview
Managing multiframe chunks
Tracking markers
Python scripting
Chapter 7. Network processing
Overview
Cluster components
Server
Processing nodes
Clients
Cluster setup
Starting server
Starting network nodes
Checking cluster status
Starting network processing
Cluster administration
Adding processing nodes
Removing processing nodes
Appendix A. Graphical user interface
Application window
General view
Model view
Photo view
Workspace pane
Photos pane
Console pane
Reference pane
Timeline pane
Menu commands
Toolbar buttons
Hot keys
General
Model View
Photo View
Appendix B. Supported formats
Images
Camera calibration
Camera flight log
GCP locations
Intrinsic and extrinsic camera parameters
Tie points
Sparse/dense point cloud
Mesh model
Texture
Orthophoto
Digital elevation model (DSM/DTM)
Tiled models
Appendix C. Camera models
Frame cameras
Fisheye cameras
Spherical cameras (equirectangular projection)
Agisoft PhotoScan User Manual Professional Edition, Version 1.1
Agisoft PhotoScan User Manual: Professional Edition, Version 1.1 Publication date 2014 Copyright © 2014 Agisoft LLC
Table of Contents Overview .......................................................................................................................... v How it works ............................................................................................................. v About the manual ....................................................................................................... v 1. Installation ..................................................................................................................... 1 System requirements ................................................................................................... 1 OpenCL acceleration ................................................................................................... 1 Installation procedure .................................................................................................. 2 Restrictions of the Demo mode ..................................................................................... 2 2. Capturing photos ............................................................................................................ 4 Equipment ................................................................................................................. 4 Camera settings .......................................................................................................... 4 Object / scene requirements .......................................................................................... 4 Image preprocessing ................................................................................................... 4 Capturing scenarios ..................................................................................................... 5 Restrictions ............................................................................................................... 6 3. General workflow ........................................................................................................... 8 Preferences settings ..................................................................................................... 8 Loading photos .......................................................................................................... 8 Aligning photos ........................................................................................................ 10 Building dense point cloud ......................................................................................... 13 Building mesh .......................................................................................................... 14 Building model texture .............................................................................................. 15 Saving intermediate results ......................................................................................... 17 Exporting results ....................................................................................................... 18 4. Referencing and measurements ........................................................................................ 27 Camera calibration .................................................................................................... 27 Setting coordinate system ........................................................................................... 29 Optimization of camera alignment ............................................................................... 34 Working with coded and non-coded targets ................................................................... 37 Performing measurements ........................................................................................... 38 5. Editing ........................................................................................................................ 41 Using masks ............................................................................................................ 41 Editing point cloud ................................................................................................... 45 Classifying dense cloud points .................................................................................... 47 Editing model geometry ............................................................................................. 48 6. Automation .................................................................................................................. 53 Using chunks ........................................................................................................... 53 4D processing .......................................................................................................... 57 Python scripting ........................................................................................................ 59 7. Network processing ....................................................................................................... 60 Overview ................................................................................................................. 60 Cluster components ................................................................................................... 60 Cluster setup ............................................................................................................ 61 Cluster administration ................................................................................................ 63 A. Graphical user interface ................................................................................................. 64 Application window .................................................................................................. 64 Menu commands ...................................................................................................... 67 Toolbar buttons ........................................................................................................ 71 Hot keys ................................................................................................................. 73 B. Supported formats ......................................................................................................... 75 Images .................................................................................................................... 75 iii
Agisoft PhotoScan User Manual Camera calibration .................................................................................................... 75 Camera flight log ...................................................................................................... 75 GCP locations .......................................................................................................... 75 Intrinsic and extrinsic camera parameters ...................................................................... 75 Tie points ................................................................................................................ 76 Sparse/dense point cloud ............................................................................................ 76 Mesh model ............................................................................................................. 76 Texture ................................................................................................................... 77 Orthophoto .............................................................................................................. 77 Digital elevation model (DSM/DTM) ........................................................................... 77 Tiled models ............................................................................................................ 77 C. Camera models ............................................................................................................ 78 Frame cameras ......................................................................................................... 78 Fisheye cameras ....................................................................................................... 79 Spherical cameras (equirectangular projection) ............................................................... 79 iv
Overview Agisoft PhotoScan is an advanced image-based 3D modeling solution aimed at creating professional quality 3D content from still images. Based on the latest multi-view 3D reconstruction technology, it operates with arbitrary images and is efficient in both controlled and uncontrolled conditions. Photos can be taken from any position, providing that the object to be reconstructed is visible on at least two photos. Both image alignment and 3D model reconstruction are fully automated. How it works Generally the final goal of photographs processing with PhotoScan is to build a textured 3D model. The procedure of photographs processing and 3D model construction comprises four main stages. 1. The first stage is camera alignment. At this stage PhotoScan searches for common points on photographs and matches them, as well as it finds the position of the camera for each picture and refines camera calibration parameters. As a result a sparse point cloud and a set of camera positions are formed. The sparse point cloud represents the results of photo alignment and will not be directly used in the further 3D model construction procedure (except for the sparse point cloud based reconstruction method). However it can be exported for further usage in external programs. For instance, the sparse point cloud model can be used in a 3D editor as a reference. On the contrary, the set of camera positions is required for further 3D model construction by PhotoScan. 2. The next stage is building dense point cloud. Based on the estimated camera positions and pictures themselves a dense point cloud is built by PhotoScan. Dense point cloud may be edited and classified prior to export or proceeding to 3D mesh model generation. 3. Another stage is building mesh. PhotoScan reconstructs a 3D polygonal mesh representing the object surface based on the dense point cloud. Additionally there is a Point Cloud based method for fast geometry generation based on the sparse point cloud alone. Generally there are two algorithmic methods available in PhotoScan that can be applied to 3D mesh generation: Height Field - for planar type surfaces, Arbitrary - for any kind of object. Having built the mesh, it may be necessary to edit it. Some corrections, such as mesh decimation, removal of detached components, closing of holes in the mesh, etc. can be performed by PhotoScan. For more complex editing you have to engage external 3D editor tools. PhotoScan allows to export mesh, edit it by another software and import it back. 4. After geometry (i.e. mesh) is reconstructed, it can be textured and / or used for orthophoto generation. Several texturing modes are available in PhotoScan, they are described in the corresponding section of this manual. About the manual Basically, the sequence of actions described above covers most of the data processing needs. All these operations are carried out automatically according to the parameters set by user. Instructions on how to get through these operations and descriptions of the parameters controlling each step are explained in the corresponding sections of the Chapter 3, General workflow. In some cases, however, additional actions may be required to get the desired results. In some capturing scenarios masking of certain regions of the photos may be required to exclude them from the calculations. Application of masks in PhotoScan processing workflow as well as editing options available are v
Overview described in Chapter 5, Editing. Camera calibration issues are discussed in Chapter 4, Referencing and measurements, that also describes functionality to reference the results and carry out measurements on the model. While Chapter 6, Automation describes opportunities to save up on manual intervention to the processing workflow, Chapter 7, Network processing presents guidelines on how to organize distributed processing of the imagery data on several nodes. It can take up quite a long time to reconstruct a 3D model. PhotoScan allows to export obtained results and save intermediate data in a form of project files at any stage of the process. If you are not familiar with the concept of projects, its brief description is given at the end of the Chapter 3, General workflow. In the manual you can also find instructions on the PhotoScan installation procedure and basic rules for taking "good" photographs, i.e. pictures that provide most necessary information for 3D reconstruction. For the information refer to Chapter 2, Capturing photos and Chapter 1, Installation. vi
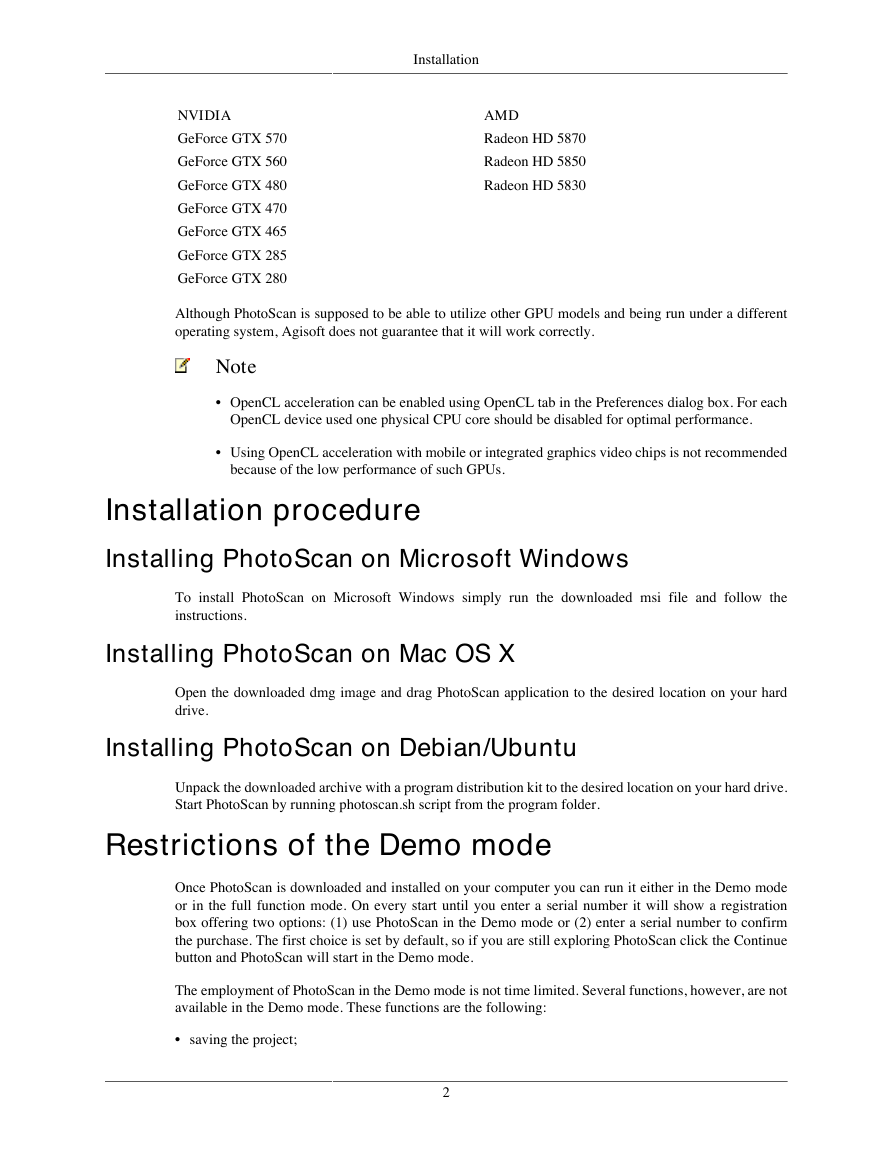
Chapter 1. Installation System requirements Minimal configuration • Windows XP or later (32 or 64 bit), Mac OS X Snow Leopard or later, Debian / Ubuntu (64 bit) • Intel Core 2 Duo processor or equivalent • 2GB of RAM Recommended configuration • Windows XP or later (64 bit), Mac OS X Snow Leopard or later, Debian / Ubuntu (64 bit) • Intel Core i7 processor • 12GB of RAM The number of photos that can be processed by PhotoScan depends on the available RAM and reconstruction parameters used. Assuming that a single photo resolution is of the order of 10 MPx, 2GB RAM is sufficient to make a model based on 20 to 30 photos. 12GB RAM will allow to process up to 200-300 photographs. OpenCL acceleration PhotoScan supports accelerated depth maps reconstruction due to the graphics hardware (GPU) exploiting. NVidia GeForce 8xxx series and later. ATI Radeon HD 5xxx series and later. PhotoScan is likely to be able to utilize processing power of any OpenCL enabled device during Dense Point Cloud generation stage, provided that OpenCL drivers for the device are properly installed. However, because of the large number of various combinations of video chips, driver versions and operating systems, Agisoft is unable to test and guarantee PhotoScan's compatibility with every device and on every platform. The table below lists currently supported devices (on Windows platform only). We will pay particular attention to possible problems with PhotoScan running on these devices. Table 1.1. Supported Desktop GPUs on Windows platform NVIDIA GeForce GTX Titan GeForce GTX 980 GeForce GTX 780 GeForce GTX 680 GeForce GTX 580 AMD Radeon R9 290x Radeon HD 7970 Radeon HD 6970 Radeon HD 6950 Radeon HD 6870 1
NVIDIA GeForce GTX 570 GeForce GTX 560 GeForce GTX 480 GeForce GTX 470 GeForce GTX 465 GeForce GTX 285 GeForce GTX 280 Installation AMD Radeon HD 5870 Radeon HD 5850 Radeon HD 5830 Although PhotoScan is supposed to be able to utilize other GPU models and being run under a different operating system, Agisoft does not guarantee that it will work correctly. Note • OpenCL acceleration can be enabled using OpenCL tab in the Preferences dialog box. For each OpenCL device used one physical CPU core should be disabled for optimal performance. • Using OpenCL acceleration with mobile or integrated graphics video chips is not recommended because of the low performance of such GPUs. Installation procedure Installing PhotoScan on Microsoft Windows To install PhotoScan on Microsoft Windows simply run the downloaded msi file and follow the instructions. Installing PhotoScan on Mac OS X Open the downloaded dmg image and drag PhotoScan application to the desired location on your hard drive. Installing PhotoScan on Debian/Ubuntu Unpack the downloaded archive with a program distribution kit to the desired location on your hard drive. Start PhotoScan by running photoscan.sh script from the program folder. Restrictions of the Demo mode Once PhotoScan is downloaded and installed on your computer you can run it either in the Demo mode or in the full function mode. On every start until you enter a serial number it will show a registration box offering two options: (1) use PhotoScan in the Demo mode or (2) enter a serial number to confirm the purchase. The first choice is set by default, so if you are still exploring PhotoScan click the Continue button and PhotoScan will start in the Demo mode. The employment of PhotoScan in the Demo mode is not time limited. Several functions, however, are not available in the Demo mode. These functions are the following: • saving the project; 2
分享到:
收藏