Instruction Manual
Assembled By: Jonathan K
�
PartsList
Components
●
●
●
●
●
●
●
●
●
●
●
●
●
●
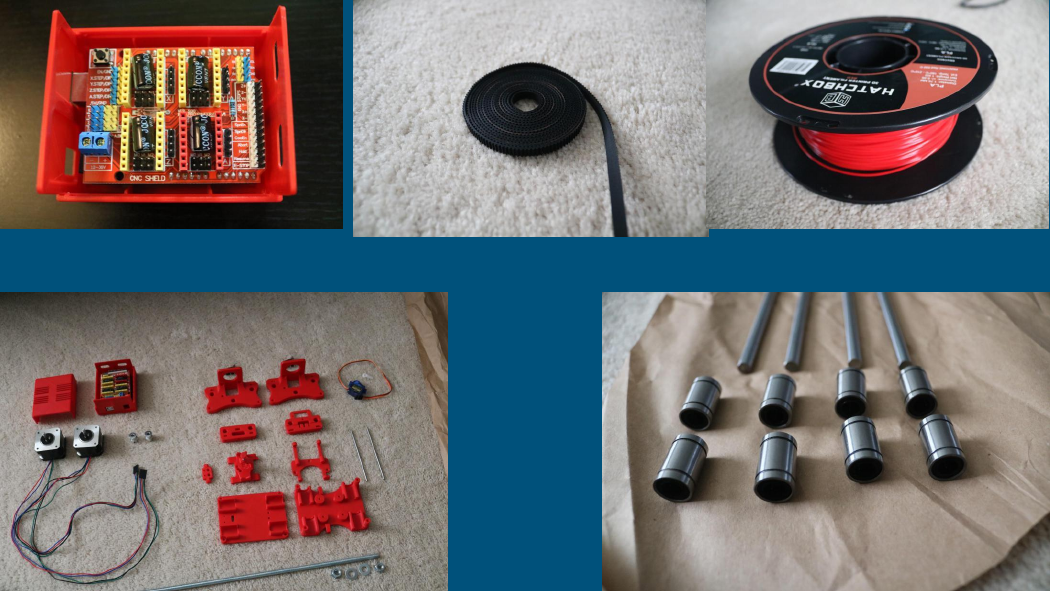
(2) Nema 17 Stepper MotorsLink
(2) Linear Rod M8 x 450mm, X Axis
(2) Linear Rod M8 x 350mm, Y Axis
○
Note: I purchased 4 Linear Rods
that were longer, which I cut to
length later Link
(2) Linear Rod 3mm , Z Axis (CDROM)
(1) Threaded Rod M8 x 470mm Link
(8) LM8UU Bearings or printed Link
(1) Servo Sg90Link
(1) Spring Link
(2) GT2 Pulley, 16 teeth Link
(5) Bearing 624zz Link
2000mm GT2 belt Link
(1) Arduino Uno Link
○
○
○
CNC Shield Link
(4) A4988 Stepper Drivers Link
(16) Jumpers Link
(1) 12V 2A Power Supply Link
(2-4) Limit switches (optional) Link
Approximate cost for all the parts is $100
Hardware
●
●
Nuts
○
○
○
(7) M3-0.5
(5) M4-0.7
(4) 5/16in-18
Screws
○
○
○
○
(13) Phillips M3-0.5 x16mm
(4) Phillips M3-0.5 x6mm
(5) Phillips M4-0.7x 35mm
(1) Hex M3-0.5 x20mm
● Washers
○
○
(4) 5/16in washer
(4) M3 washers
�
3D Printing
●
●
●
●
●
●
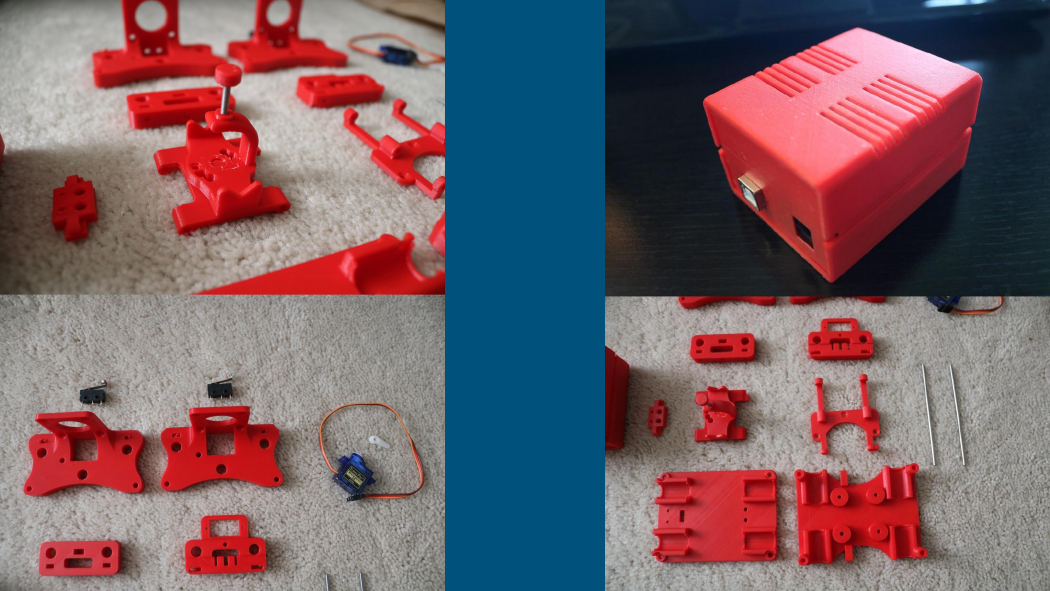
To begin this project, start by downloading the files from Thingiverse: Link
Open the 3D models in your slicer(Cura, Sli3er, Simplify 3D, etc.)
I recommend using Cura as I have heard that people have had issues with some of the models using Sli3er
Note: I also printed one more part that was not listed in the original thing. This part is to help the GT2 belt from
slipping off the 624zz bearings. Link
Input the settings that you will be using on the parts
○
○
○
○
I used 100% infill on all the parts (An infill of 40 - 100% will work as well)
Printed all the parts with 0.15mm layer height
Printed with Hatchbox Red PLA Link
Use supports on the Penholder, Slider, X_Support_L and the X_Support_R (Remove the supports from these
parts once they are printed)
The longest part took around 9hrs and the shortest took 30 minutes to print
�
�
�
Cut your Linear Rods to Length
●
●
●
●
If you purchased rods that were cut to length, then skip this step
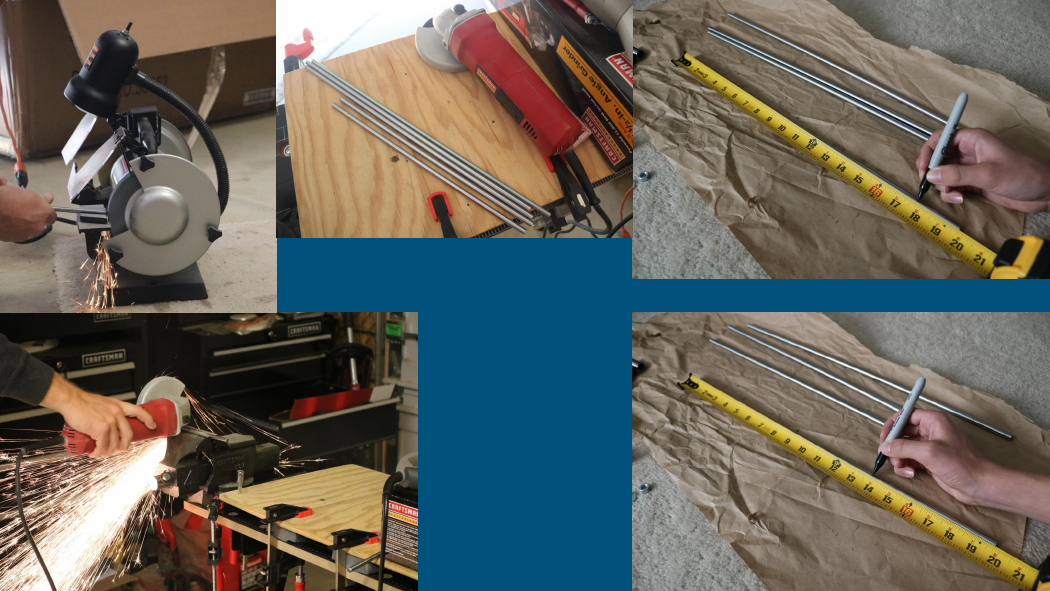
Use a measuring tape and sharpie to mark the spots where the rods need to be cut
○
○
○
Use a vise to hold the rods in place when you cut them
Remember that you need (2) 350mm and (2) 450mm long linear rods
On the threaded rod, mark your cutting point at 470mm
I used an angle grinder to cut the rods
Then I took a bench grinder to smooth the ends that were cut
�
�
AssembletheX-Axis(Linear/ThreadedRods)
●
●
Take the (2) 450mm linear rods and insert them into either x-support part
○
○
Use may need to use a round file to smooth out the holes that you insert them in
Also, you can use a rubber mallet to help insert the rods
Now take the threaded rod and insert it in the hole below. Feed a 5/16in washer and 5/16in nut on both sides of
the x-support part
�


 2023年江西萍乡中考道德与法治真题及答案.doc
 2012年重庆南川中考生物真题及答案.doc
 2013年江西师范大学地理学综合及文艺理论基础考研真题.doc
 2020年四川甘孜小升初语文真题及答案I卷.doc
 2020年注册岩土工程师专业基础考试真题及答案.doc
 2023-2024学年福建省厦门市九年级上学期数学月考试题及答案.doc
 2021-2022学年辽宁省沈阳市大东区九年级上学期语文期末试题及答案.doc
 2022-2023学年北京东城区初三第一学期物理期末试卷及答案.doc
 2018上半年江西教师资格初中地理学科知识与教学能力真题及答案.doc
 2012年河北国家公务员申论考试真题及答案-省级.doc
 2020-2021学年江苏省扬州市江都区邵樊片九年级上学期数学第一次质量检测试题及答案.doc
 2022下半年黑龙江教师资格证中学综合素质真题及答案.doc