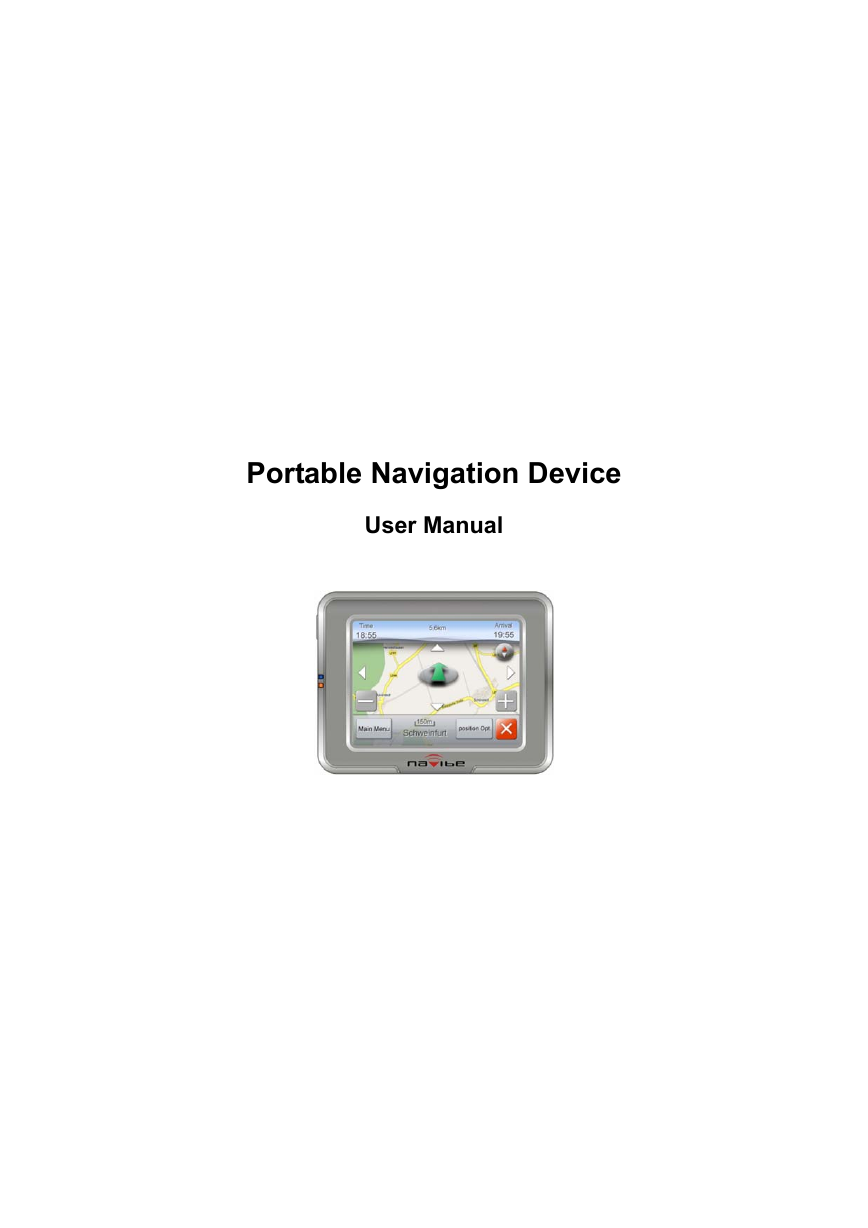
Portable Navigation Device
User Manual
�
Table of Content
Table of Content ................................................................... 1
Product Overview ................................................................. 2
Front View .............................................................................................................2
Back View..............................................................................................................2
Bottom View ..........................................................................................................2
Left-side View/Right-side View.............................................................................2
Install the Device to Your Car................................................................................3
Package Contents...................................................................................................3
Status Indicators.....................................................................................................4
Navigation............................................................................ 4
To Start the Navigation ..........................................................................................4
Overview of the GPS Screen .................................................................................4
Main Menu.............................................................................................................5
Insert the Destination .............................................................................................5
Find a New Destination .........................................................................................6
Search the Destination from Map ..........................................................................8
Overview of the Navigation Mode ........................................................................9
Options after Setting a Route...............................................................................10
Other Settings.......................................................................................................11
Entertainment .................................................................... 14
Audio Player ........................................................................................................14
Video Player.........................................................................................................15
Photo Viewer........................................................................................................15
Settings.............................................................................. 16
Index.................................................................................. 17
Cautions ...............................................................................................................17
Troubleshooting ...................................................................................................18
Specification ........................................................................................................19
1
�
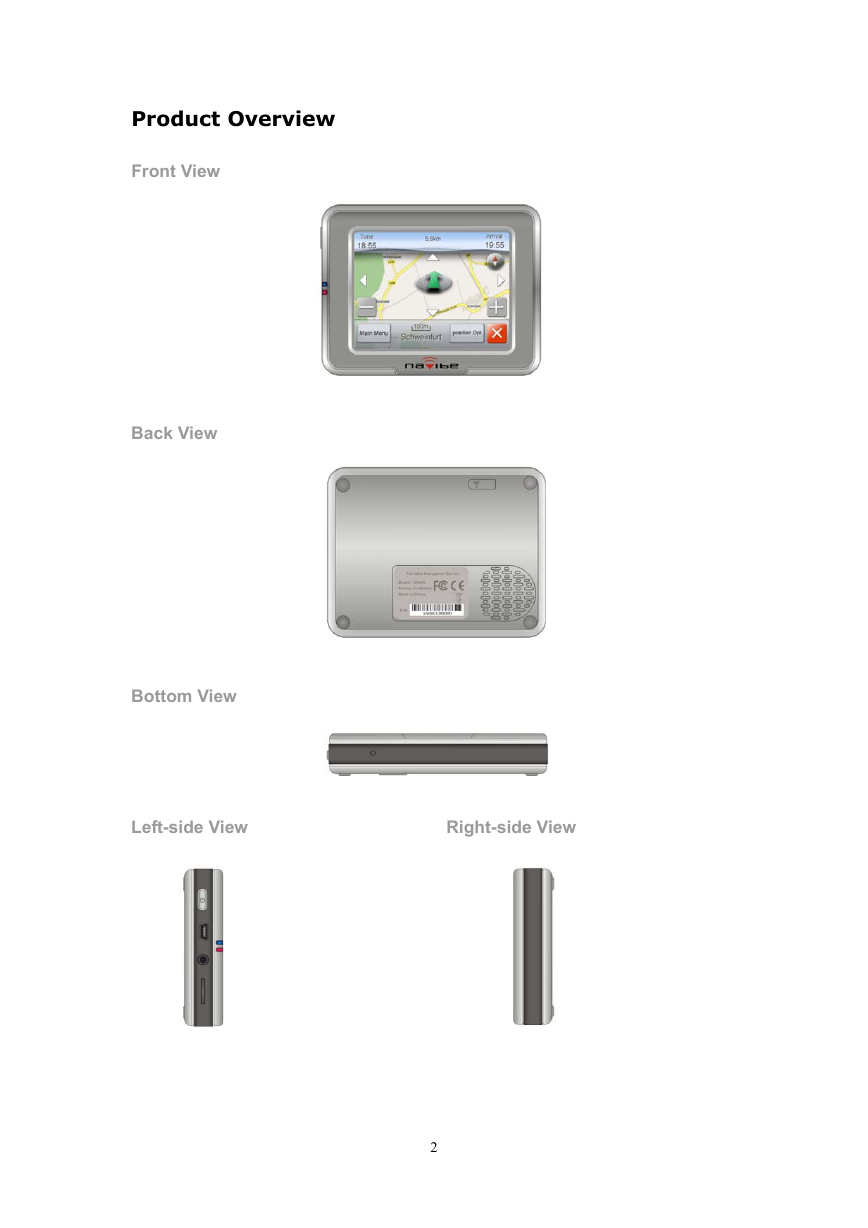
Product Overview
Front View
Right-side View
Back View
Bottom View
Left-side View
2
�
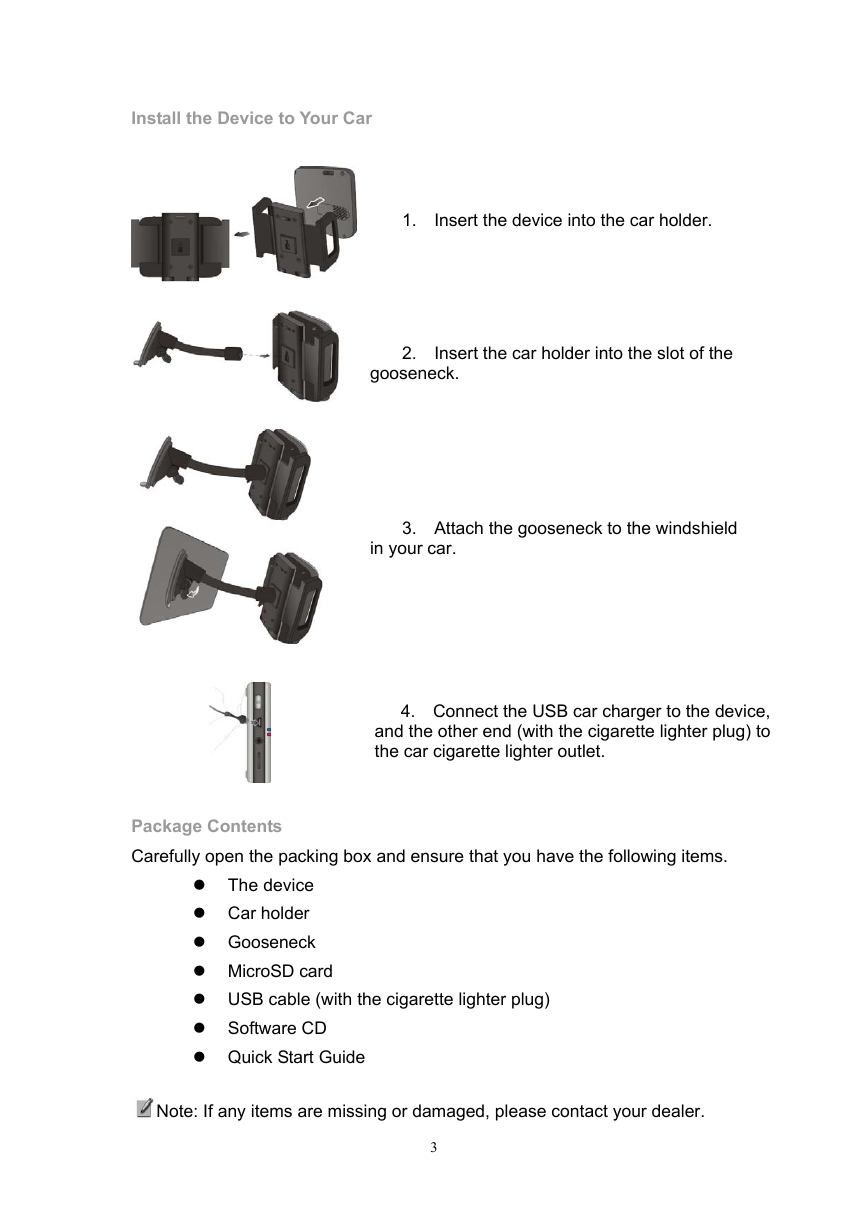
gooseneck.
in your car.
3. Attach the gooseneck to the windshield
Install the Device to Your Car
1. Insert the device into the car holder.
2. Insert the car holder into the slot of the
4. Connect the USB car charger to the device,
and the other end (with the cigarette lighter plug) to
the car cigarette lighter outlet.
Package Contents
Carefully open the packing box and ensure that you have the following items.
The device
Car holder
Gooseneck
MicroSD card
USB cable (with the cigarette lighter plug)
Software CD
Quick Start Guide
Note: If any items are missing or damaged, please contact your dealer.
3
�
Status Indicators
LED Indicator
Blue
Orange
Description
Power on.
Charging.
Navigation
This chapter will introduce all the functions of the navigation engine in this
device. You only need to assign a destination and the device will take you
there. If needed, you can also set your home location, current car position,
address, intersection, and points of interest as explained in the following.
To Start the Navigation
1. Turn the device on.
in the main page.
2. Tap
3. After the safety notice, you will see the map and the current car position.
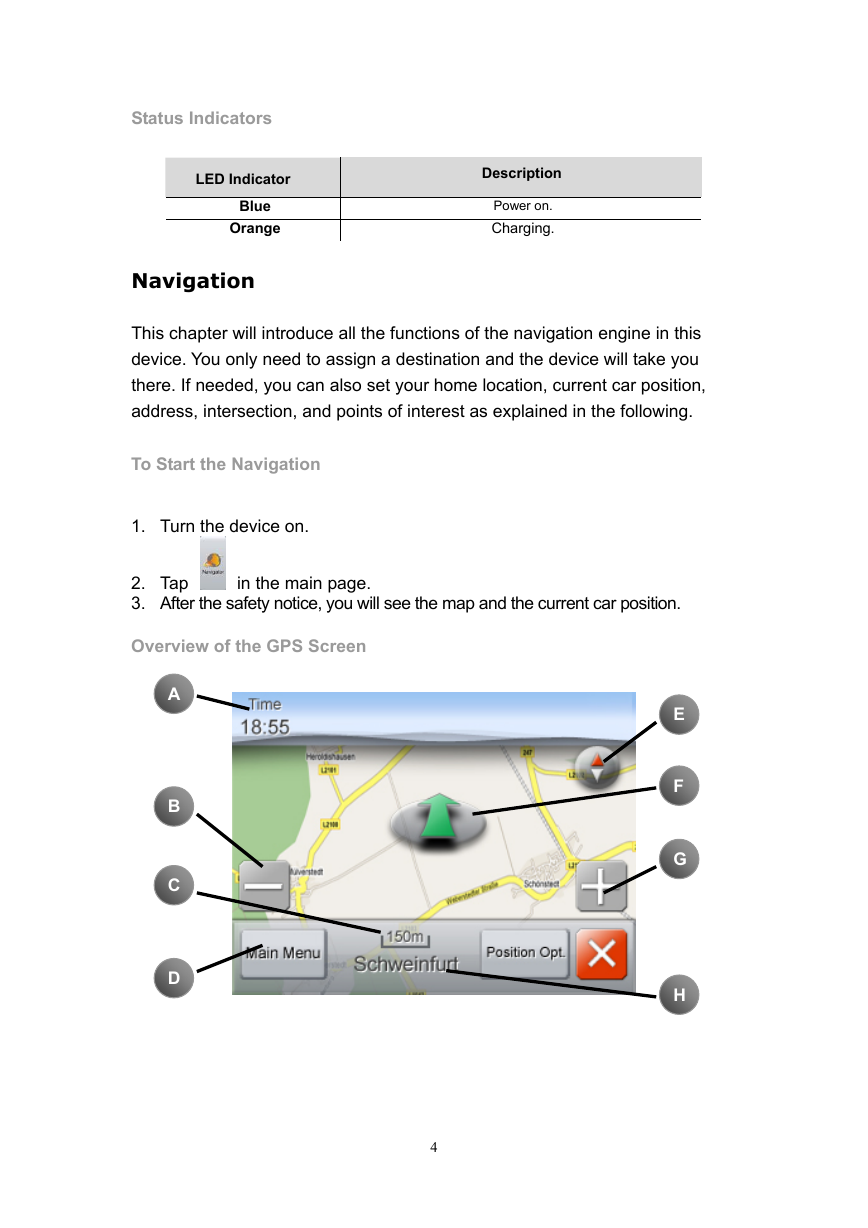
Overview of the GPS Screen
A
B
C
D
4
E
F
G
H
�
Option
A. Time
B. Zoom-out
C. Map scale
D. Main menu
Description
Current time.
Zoom-out.
Current scale of map data.
Back to main menu of navigation mode.
E. Direction of north
Fixed upward direction (just like a conventional
printed map)
Real- time direction (corresponding to the direction
of the current car position)
F. Current car position Current car position.
G. Zoom-out
Zoom-out.
H. Current position Current position of the device.
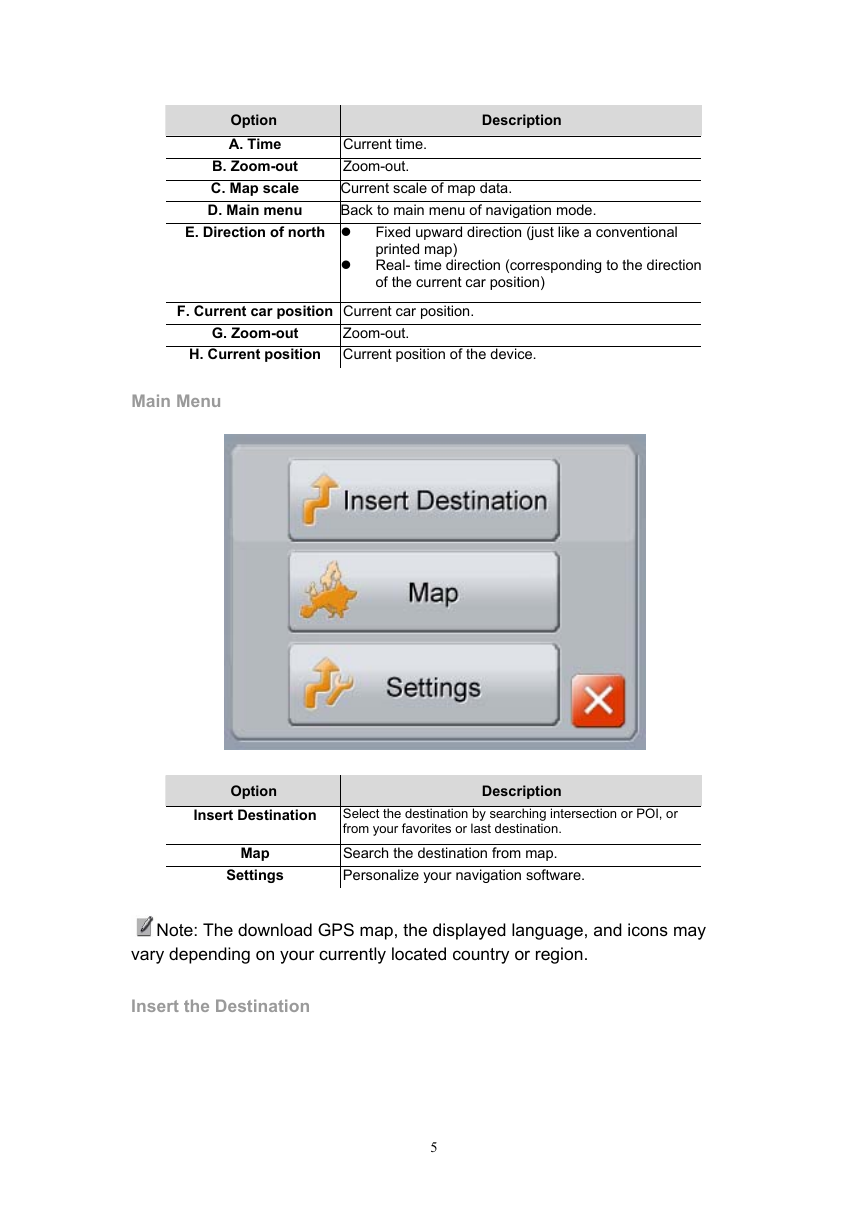
Main Menu
Option
Insert Destination
Map
Settings
Description
Select the destination by searching intersection or POI, or
from your favorites or last destination.
Search the destination from map.
Personalize your navigation software.
Note: The download GPS map, the displayed language, and icons may
vary depending on your currently located country or region.
Insert the Destination
5
�
Description
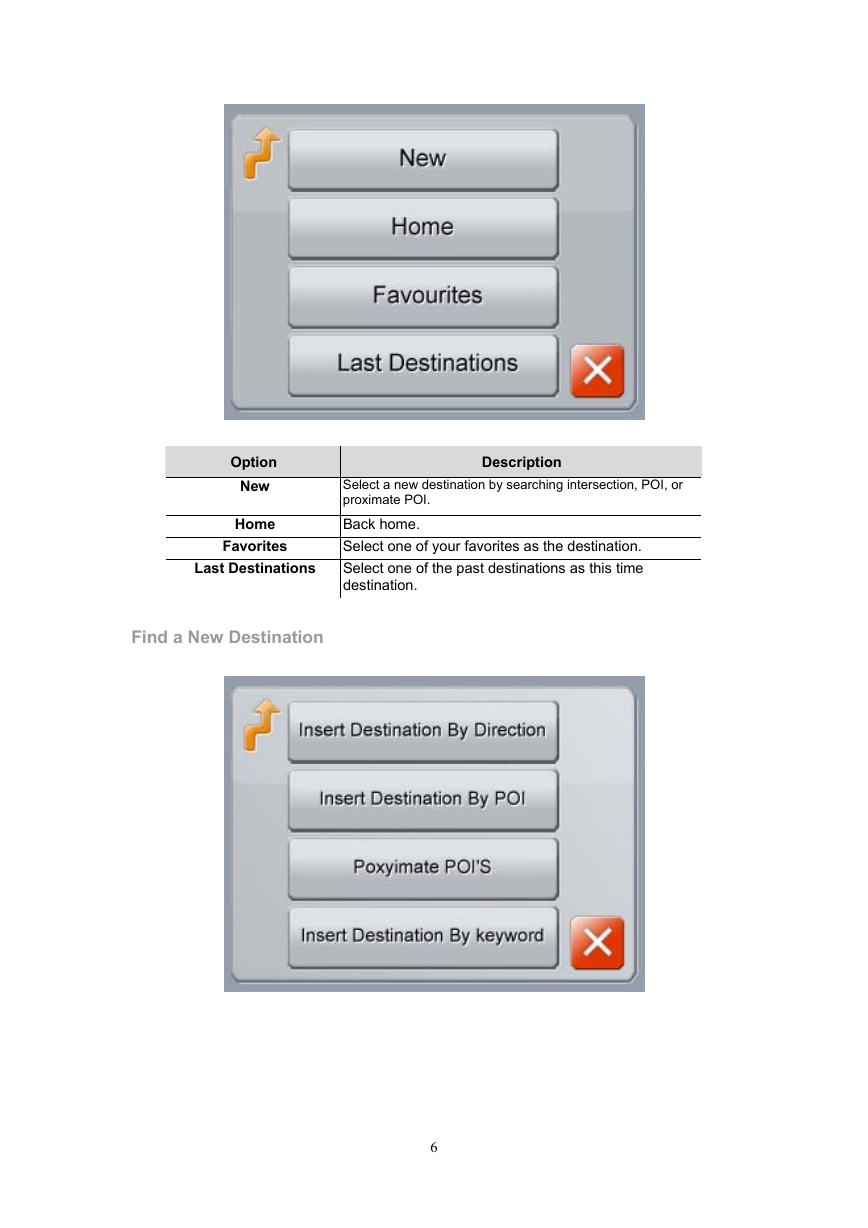
Select a new destination by searching intersection, POI, or
proximate POI.
Back home.
Select one of your favorites as the destination.
Select one of the past destinations as this time
destination.
Option
New
Home
Favorites
Last Destinations
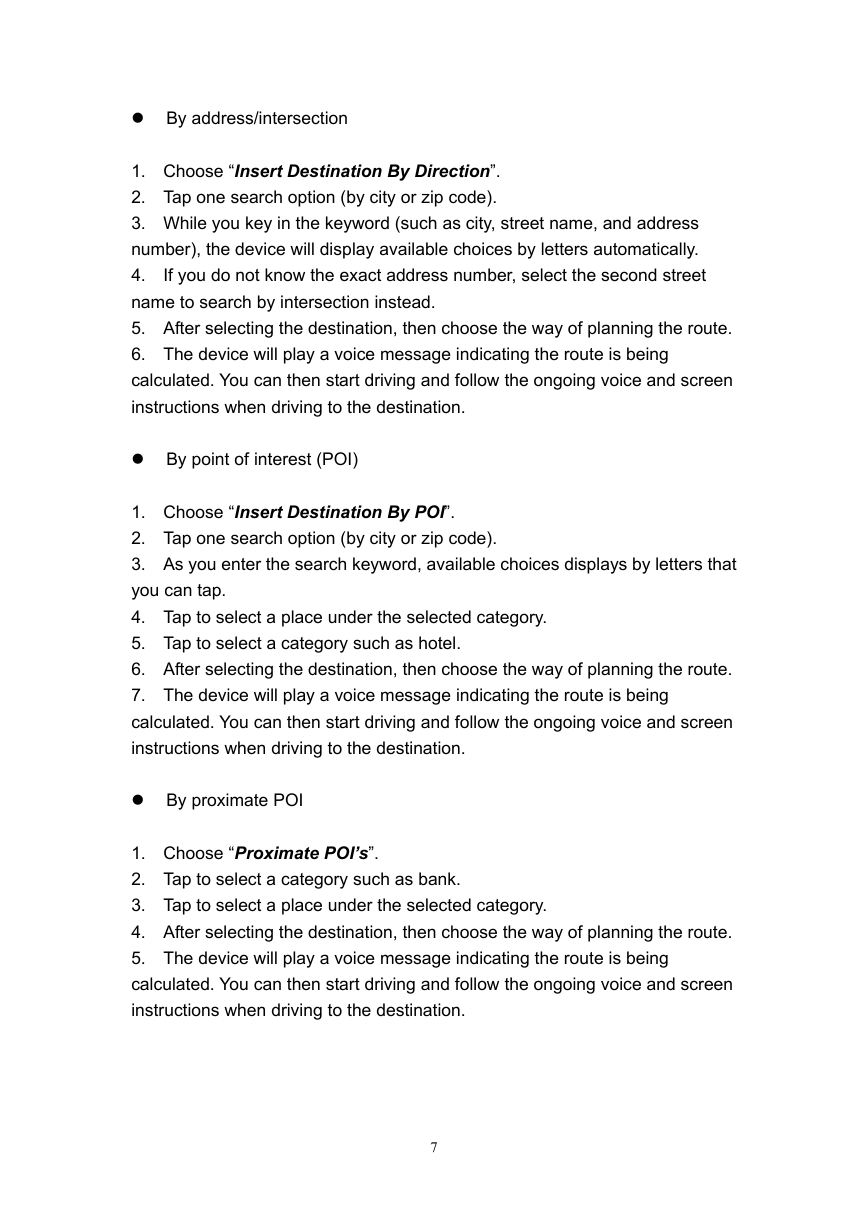
Find a New Destination
6
�
By address/intersection
1. Choose “Insert Destination By Direction”.
2. Tap one search option (by city or zip code).
3. While you key in the keyword (such as city, street name, and address
number), the device will display available choices by letters automatically.
4. If you do not know the exact address number, select the second street
name to search by intersection instead.
5. After selecting the destination, then choose the way of planning the route.
6. The device will play a voice message indicating the route is being
calculated. You can then start driving and follow the ongoing voice and screen
instructions when driving to the destination.
By point of interest (POI)
1. Choose “Insert Destination By POI”.
2. Tap one search option (by city or zip code).
3. As you enter the search keyword, available choices displays by letters that
you can tap.
4. Tap to select a place under the selected category.
5. Tap to select a category such as hotel.
6. After selecting the destination, then choose the way of planning the route.
7. The device will play a voice message indicating the route is being
calculated. You can then start driving and follow the ongoing voice and screen
instructions when driving to the destination.
By proximate POI
1. Choose “Proximate POI’s”.
2. Tap to select a category such as bank.
3. Tap to select a place under the selected category.
4. After selecting the destination, then choose the way of planning the route.
5. The device will play a voice message indicating the route is being
calculated. You can then start driving and follow the ongoing voice and screen
instructions when driving to the destination.
7
�


 2023年江西萍乡中考道德与法治真题及答案.doc
 2012年重庆南川中考生物真题及答案.doc
 2013年江西师范大学地理学综合及文艺理论基础考研真题.doc
 2020年四川甘孜小升初语文真题及答案I卷.doc
 2020年注册岩土工程师专业基础考试真题及答案.doc
 2023-2024学年福建省厦门市九年级上学期数学月考试题及答案.doc
 2021-2022学年辽宁省沈阳市大东区九年级上学期语文期末试题及答案.doc
 2022-2023学年北京东城区初三第一学期物理期末试卷及答案.doc
 2018上半年江西教师资格初中地理学科知识与教学能力真题及答案.doc
 2012年河北国家公务员申论考试真题及答案-省级.doc
 2020-2021学年江苏省扬州市江都区邵樊片九年级上学期数学第一次质量检测试题及答案.doc
 2022下半年黑龙江教师资格证中学综合素质真题及答案.doc