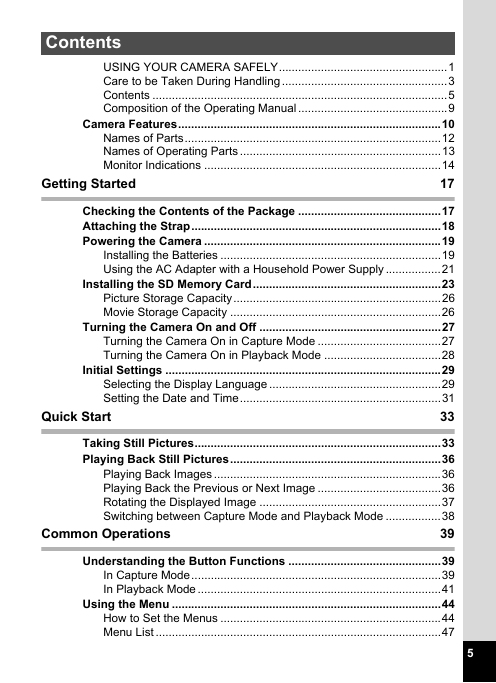
Getting Started 17
Quick Start 33
Common Operations 39
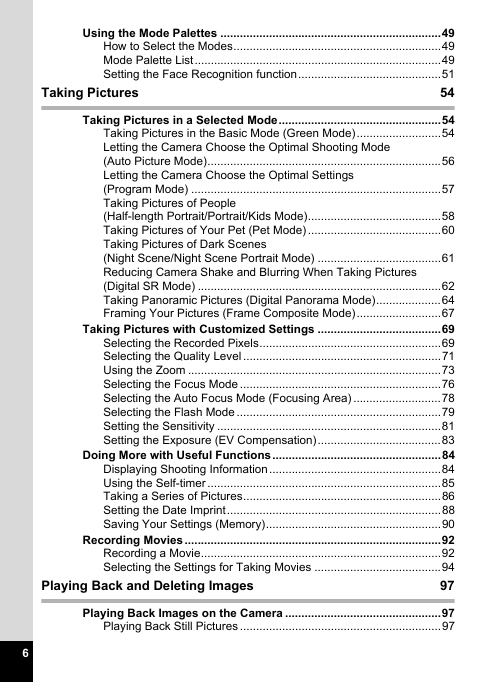
Taking Pictures 54
Playing Back and Deleting Images 97
Editing and Printing Images 116
Recording and Playing Back Sound 137
Settings 140
Appendix 156
1 Getting Started
2 Quick Start
3 Common Operations
4 Taking Pictures
5 Playing Back and Deleting Images
6 Editing and Printing Images
7 Recording and Playing Back Sound
8 Settings
9 Appendix
Camera Features
Getting Started
Checking the Contents of the Package
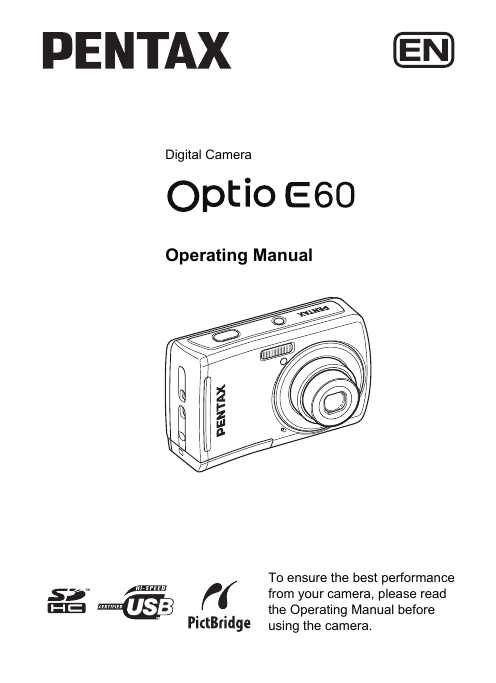
Camera
Optio E60
Strap
O-ST62 (*)
Software (CD-ROM)
S-SW81
USB/AV cable
I-UAV77 (*)
Two AA
alkaline batteries
Operating Manual (this manual) / PC Connection Manual (CD-ROM)
Quick Guide
Attaching the Strap
1 Pass the narrow end of the strap through the strap lug.
2 Pass the other end of the strap through the loop and pull tight.
Powering the Camera
1 Open the battery/card cover.
2 Insert the batteries, making sure the (+) and (-) terminals on the batteries match the (+) and (-) symbols inside the battery compartment.
3 Close the battery/card cover and slide it in the opposite direction of 1.
1 Connect the DC terminal of the AC adapter to the DC input terminal of the DC coupler.
2 Make sure that the camera is turned off and open the battery/card cover.
3 Insert the DC coupler into the battery compartment, making sure the (+) and (-) terminals on the coupler match the (+) and (-) symbols inside the battery compartment.
4 Open the DC coupler cable cover, pass the DC coupler cable through the opening, and close the battery/card cover.
5 Connect the AC plug cord to the AC adapter.
6 Plug the AC plug cord into the power outlet.
Installing the SD Memory Card
1 Open the battery/card cover.
2 Insert the SD Memory Card into the SD Memory Card socket so that the label is facing toward the display.
3 Close the battery/card cover and slide it in the opposite direction of 1.
1 Open the battery/card cover.
2 Push the card into the SD Memory Card socket to eject it.
Turning the Camera On and Off
1 Press the power switch.
2 Press the power switch again.
1 Press the power switch while holding down the Q button.
2 Press the Q button again or press the shutter release button halfway.
Initial Settings
1 Use the four-way controller (2345) to choose the desired display language.
2 Press the 4 button.
1 Press the four-way controller (5).
2 Use the four-way controller (2345) to select the language and press the 4 button.
1 Press the 4 button.
2 Press the 3 button.
3 Press the four-way controller (5).
4 Use the four-way controller (32) to select [Language/ ].
5 Press the four-way controller (5).
6 Use the four-way controller (2345) to select the language.
7 Press the 4 button.
3 Press the four-way controller (3).
4 Press the four-way controller (5).
5 Use the four-way controller (45) to choose the city.
6 Press the four-way controller (3).
7 Use the four-way controller (45) to select O (On) or P (Off).
8 Press the 4 button.
9 Press the 4 button.
1 Press the four-way controller (5).
2 Use the four-way controller (23) to choose the date and time display style.
3 Press the four-way controller (5).
4 Use the four-way controller (23) to select [24h] (24-hour display) or [12h] (12-hour display).
5 Press the four-way controller (5).
6 Press the four-way controller (3).
7 Press the four-way controller (5).
8 Use the four-way controller (23) to change the month.
9 Press the 4 button.
Quick Start
Taking Still Pictures
1 Press the power switch.
2 Compose the picture on the display.
3 Press the shutter release button halfway.
Focus frame
4 Press the shutter release button fully.
1 Press the shutter release button halfway.
2 Confirm the focus frame on the display turns green.
3 Press the shutter release button fully.
Quick Start
Playing Back Still Pictures
1 Press the Q button after taking a picture.
1 Press the Q button after taking a picture.
2 Press the four-way controller (45).
1 Press the Q button after taking a picture.
2 Press the four-way controller (3).
3 Use the four-way controller (2345) to select s (Image Rotation) and press the 4 button.
4 Use the four-way controller (2345) to choose the rotation direction and press the 4 button.
1 Press the i button when playing back an image.
2 Press the four-way controller (2) to select [Delete] and press the 4 button.
3 Press the Q button again or press the shutter release button halfway.
Common Operations
Understanding the Button Functions
Using the Menu
1 Press the 3 button in the capture mode.
2 Press the four-way controller (3).
3 Press the four-way controller (3).
4 Press the four-way controller (5).
5 Use the four-way controller (23) to change the setting.
6 Press the shutter release button halfway.
6 Press the Q button.
6 Press the 4 button or the four-way controller (4).
6 Press the 3 button.
Using the Mode Palettes
1 Press the four-way controller (3).
2 Use the four-way controller (2345) to select an icon.
3 Press the 4 button.
Taking Pictures
Taking Pictures in a Selected Mode
1 Press the Green button in the capture mode.
2 Press the shutter release button halfway.
3 Press the shutter release button fully.
1 Press the four-way controller (3) in the capture mode.
2 Use the four-way controller (2345) to select b.
3 Press the 4 button.
4 Press the shutter release button halfway.
5 Press the shutter release button fully.
1 Press the four-way controller (3) in the capture mode.
2 Use the four-way controller (2345) to select R.
3 Press the 4 button.
4 Set the functions you want to use.
5 Press the shutter release button halfway.
6 Press the shutter release button fully.
1 Press the four-way controller (3) in the capture mode.
2 Use the four-way controller (2345) to select , or .
3 Press the 4 button.
4 Press the shutter release button halfway.
5 Press the shutter release button fully.
1 Press the four-way controller (3) in the capture mode.
2 Use the four-way controller (2345) to select .
3 Press the 4 button.
4 Use the four-way controller (23) to select , , , , or .
5 Press the 4 button.
6 Press the shutter release button halfway.
7 Press the shutter release button fully.
1 Press the four-way controller (3) in the capture mode.
2 Use the four-way controller (2345) to select A or .
3 Press the 4 button.
4 Press the shutter release button halfway.
5 Press the shutter release button fully.
1 Press the four-way controller (3) in the capture mode.
2 Use the four-way controller (2345) to select 4.
3 Press the 4 button.
4 Press the shutter release button halfway.
5 Press the shutter release button fully.
1 Press the four-way controller (3) in the capture mode.
2 Use the four-way controller (2345) to select A, and press the 4 button.
3 Use the four-way controller (45) to select the direction to stitch.
4 Take the first frame.
5 Pan the camera to the right and take the second frame.
6 Press the 4 button.
7 Use the four-way controller (23) to select [Save], [Discard], or [Cancel] and press the 4 button.
1 Press the four-way controller (3) in the capture mode.
2 Use the four-way controller (2345) to select Y.
3 Press the 4 button.
4 Use the four-way controller (2345) to choose the frame you want to use.
5 Press the 4 button.
6 Press the 4 button.
7 Press the shutter release button halfway.
8 Press the shutter release button fully.
Taking Pictures with Customized Settings
1 Press the 3 button in the capture mode.
2 Use the four-way controller (23) to select [Recorded Pixels].
3 Press the four-way controller (5).
4 Use the four-way controller (23) to change the number of recorded pixels.
5 Press the 4 button.
6 Press the 3 button.
1 Press the 3 button in the capture mode.
2 Use the four-way controller (23) to select [Quality Level].
3 Press the four-way controller (5).
4 Use the four-way controller (23) to change the quality level.
5 Press the 4 button.
6 Press the 3 button.
1 Press the Zoom button in the capture mode.
1 Press the 3 button in the capture mode.
2 Use the four-way controller (23) to select [Digital Zoom].
3 Use the four-way controller (45) to select O (On) or P (Off).
4 Press the 3 button.
1 Press the four-way controller (5) in the capture mode.
2 Press the 4 button.
1 Find alternate subject that is in the same distance from the camera as the desired subject.
2 Focus on the alternate subject.
3 Press the shutter release button halfway.
4 While holding the shutter release button halfway, move the camera to obtain the desired composition.
5 Press the shutter release button fully.
1 Press the 3 button in the capture mode.
2 Use the four-way controller (23) to select [Focusing Area].
3 Press the four-way controller (5).
4 Use the four-way controller (23) to change the setting.
5 Press the 4 button.
6 Press the 3 button.
1 Press the four-way controller (4) in the capture mode.
2 Press the 4 button.
1 Press the 3 button in the capture mode.
2 Use the four-way controller (23) to select [Sensitivity].
3 Press the four-way controller (5).
4 Use the four-way controller (23) to change the sensitivity.
5 Press the 4 button.
6 Press the 3 button.
1 Press the 3 button in the capture mode.
2 Use the four-way controller (23) to select [EV Compensation].
3 Use the four-way controller (45) to select the EV value.
4 Press the 3 button.
Doing More with Useful Functions
1 Press the four-way controller (2) in the capture mode.
2 Use the four-way controller (453) to select g or Z and press the 4 button.
3 Press the shutter release button halfway.
4 Press the shutter release button fully.
1 Press the four-way controller (2) in the capture mode.
2 Use the four-way controller (45) to select 1 or f and press the 4 button.
3 Press the shutter release button halfway.
4 Press the shutter release button fully.
1 Press the 3 button in the capture mode.
2 Use the four-way controller (23) to select [Date Imprint].
3 Press the four-way controller (5).
4 Use the four-way controller (23) to select [Date], [Date & Time], [Time] or [Off].
5 Press the 4 button.
6 Press the 3 button.
1 Press the 3 button in the capture mode.
2 Press the four-way controller (23) to select [Memory].
3 Press the four-way controller (5).
4 Use the four-way controller (23) to choose an item.
5 Use the four-way controller (45) to select O (On) or P (Off).
6 Press the 4 button.
7 Press the 3 button.
Recording Movies
1 Press the four-way controller (3) in the capture mode.
2 Use the four-way controller (2345) to select d (Movie).
3 Press the 4 button.
1
4 Press the shutter release button fully.
5 Press the shutter release button fully.
1 Press the 3 button in the capture mode.
2 Use the four-way controller (23) to select [Movie].
3 Press the four-way controller (5).
4 Use the four-way controller (23) to select [Recorded Pixels].
5 Press the four-way controller (5).
6 Use the four-way controller (23) to change the recorded pixels.
7 Press the 4 button.
8 Press the 3 button twice.
4 Use the four-way controller (23) to select [Frame Rate].
5 Press the four-way controller (5).
6 Use the four-way controller (23) to change the frame rate.
7 Press the 4 button.
8 Press the 3 button twice.
1 Press the 3 button in the capture mode.
2 Use the four-way controller (23) to select [Movie].
3 Press the four-way controller (5).
4 Use the four-way controller (23) to select [Movie SR].
5 Use the four-way controller (45) to select O (On) or P (Off).
6 Press the 3 button twice.
Playing Back and Deleting Images
Playing Back Images on the Camera
Normal Display
1 In the playback mode, press f on the Zoom button.
2 Press the 4 button.
1 In the playback mode, press f on the Zoom button.
2 Press f on the Zoom button.
1 Enter the playback mode and use the four-way controller (45) to choose the image you want to magnify.
2 Press y on the Zoom button.
3 Press the 4 button.
1 Enter the playback mode and use the four-way controller (45) to choose the image you want to magnify.
2 Confirm that the I icon is displayed in the image and press the I button.
3 Press the 4 button.
1 Enter the playback mode and use the four-way controller (45) to choose an image to start the slideshow with.
2 Press the four-way controller (3).
3 Use the four-way controller (2345) to select u (Slideshow).
4 Press the 4 button twice.
5 Press any button other than the 4 button or the power switch.
1 Press the four-way controller (3) in the playback mode.
2 Use the four-way controller (2345) to select u.
3 Press the 4 button.
4 Use the four-way controller (23) to select [Interval].
5 Press the four-way controller (5).
6 Use the four-way controller (23) to change the interval and press the 4 button.
7 Use the four-way controller (23) to select [Screen Effect].
8 Use the four-way controller (23) to select [Sound Effect].
9 Use the four-way controller (45) to select O (On) or P (Off).
10 Press the 4 button.
Playing Back Movies
1 Enter the playback mode and use the four-way controller (45) to choose the movie you want to play back.
2 Press the four-way controller (2).
3 Press the four-way controller (3).
Playing Back Images on a TV
1 Connect the supplied USB/AV cable to the USB/AV terminal on the camera.
2 Connect the other ends of the USB/AV cable (yellow: video, white: audio) to the video input terminal and audio input terminal on the AV equipment.
3 Turn the AV equipment on.
4 Turn the camera on.
Deleting Images and Sound Files
1 Enter the playback mode and use the four-way controller (45) to choose the image/sound file you want to delete.
2 Press the i button.
3 Use the four-way controller (23) to select [Delete].
4 Press the 4 button.
1 In the playback mode, press f on the Zoom button.
2 Press the i button.
3 Use the four-way controller (2345) to choose the images and sound files that you want to delete and press the 4 button.
4 Press the i button.
5 Use the four-way controller (23) to select [Select & Delete].
6 Press the 4 button.
1 Press the i button twice in the playback mode.
2 Use the four-way controller (23) to select [Delete All].
3 Press the 4 button.
1 After deleting a file, press the four-way controller (3).
2 Use the four-way controller (2345) to select ] (Image Recovery).
3 Press the 4 button.
4 Use the four-way controller (23) to select [Recover].
5 Press the 4 button.
1 Press the four-way controller (3) in the playback mode.
2 Use the four-way controller (2345) to select Z (Protect).
3 Press the 4 button.
4 Use the four-way controller (23) to select [Select image/sound].
5 Press the 4 button.
6 Use the four-way controller (23) to select [Protect].
7 Press the 4 button.
1 Press the four-way controller (3) in the playback mode.
2 Use the four-way controller (2345) to select Z (Protect).
3 Press the 4 button.
4 Use the four-way controller (23) to select [All Images/Sounds].
5 Press the 4 button.
6 Use the four-way controller (23) to select [Protect].
7 Press the 4 button.
Editing and Printing Images
Editing Images
1 Enter the playback mode and use the four-way controller (45) to choose the image you want to resize.
2 Press the four-way controller (3).
3 Use the four-way controller (2345 ) to select n (Resize).
4 Press the 4 button.
5 Select [Recorded Pixels] and [Quality Level].
6 Press the 4 button.
7 Use the four-way controller (23) to select [Overwrite] or [Save as].
8 Press the 4 button.
1 Enter the playback mode and use the four-way controller (45) to choose the image you want to crop.
2 Press the four-way controller (3).
3 Use the four-way controller (2345) to select o (Cropping).
4 Press the 4 button.
5 Specify the portion to be cropped.
6 Press the 4 button.
1 Press the four-way controller (3) in the playback mode.
2 Use the four-way controller (2345) to select p (Image/Sound Copy).
3 Press the 4 button.
4 Use the four-way controller (23) to select [f}{].
5 Press the 4 button.
4 Use the four-way controller (23) to select [{}f].
5 Press the 4 button.
6 Use the four-way controller (45) to select the file you want to copy.
7 Press the 4 button.
1 Enter the playback mode and use the four-way controller (45) to choose the image you want to edit.
2 Press the four-way controller (3).
3 Use the four-way controller (2345) to select D (Digital Filter).
4 Press the 4 button.
5 Use the four-way controller (23) to choose a digital filter.
6 Press the 4 button.
7 Use the four-way controller (23) to select [Overwrite] or [Save as].
8 Press the 4 button.
1 Enter the playback mode and use the four-way controller (45) to choose the image you want to edit.
2 Press the four-way controller (3).
3 Use the four-way controller (2345) to select q (Brightness Filter).
4 Press the 4 button.
5 Use the four-way controller (45) to adjust the brightness.
6 Press the 4 button.
7 Use the four-way controller (23) to select [Overwrite] or [Save as].
8 Press the 4 button.
1 Enter the playback mode and use the four-way controller (45) to choose the image to which you want to add a frame.
2 Press the four-way controller (3).
3 Use the four-way controller (2345) to select Y (Frame Composite).
4 Press the 4 button.
5 Use the four-way controller (2345) to choose a frame.
6 Press the 4 button or y on the Zoom button.
7 Press the 4 button.
8 Press the 4 button.
9 Use the four-way controller (23) to select [Overwrite] or [Save as].
10 Press the 4 button.
1 Enter the playback mode and use the four-way controller (45) to choose the image you want to correct.
2 Press the four-way controller (3).
3 Use the four-way controller (2345) to select Z (Red- eye Compensation).
4 Press the 4 button.
5 Use the four-way controller (23) to select [Overwrite] or [Save as].
6 Press the 4 button.
Setting the Printing Service (DPOF)
1 Press the four-way controller (3) in the playback mode.
2 Use the four-way controller (2345) to select r (DPOF).
3 Press the 4 button.
4 Use the four-way controller (23) to select [Single Image].
5 Press the 4 button.
6 Use the four-way controller (23) to choose the number of copies.
7 Use the Green button to choose whether to insert the date or not.
8 Press the 4 button.
1 Display the screen for DPOF settings in the playback mode.
2 Use the four-way controller (23) to select [All Images].
3 Press the 4 button.
4 Choose the number of copies and whether to insert the date or not.
5 Press the 4 button.
Printing Using PictBridge
1 Select [PictBridge] for the [USB Connection] mode on the [W Setting] menu.
2 Turn off the camera.
3 Connect the camera to the printer using the supplied USB/AV cable.
4 Turn the printer on.
5 When the printer is ready to print, turn the camera on.
1 In the printing mode selection screen, use the four-way controller (23) to select [Single Image].
2 Press the 4 button.
3 Use the four-way controller (45) to choose an image to print.
4 Use the four-way controller (23) to choose the number of copies.
5 Use the Green button to choose whether to insert the date or not.
6 Press the 4 button.
7 Press the Green button.
8 Select [Paper Size] and press the four-way controller (5).
9 Use the four-way controller (2345) to choose the paper size.
10 Press the 4 button.
11 Use the four-way controller (23) to select [Paper Type] and press the four-way controller (5).
12 Use the four-way controller (23) to select the paper type and press the 4 button.
13 Press the 3 button.
14 Press the 4 button.
1 In the printing mode selection screen, use the four-way controller (23) to select [All Images].
2 Press the 4 button.
3 Choose the number of copies and whether to insert the date or not.
4 Press the 4 button.
5 Press the 4 button on the print settings confirmation screen.
1 In the printing mode selection screen, use the four-way controller (23) to select [DPOF AUTOPRINT].
2 Press the 4 button.
3 Press the 4 button.
4 Press the 4 button on the print settings confirmation screen.
1 Turn off the camera.
2 Disconnect the USB/AV cable from the camera and the printer.
Recording and Playing Back Sound
Recording Sound (Voice Recording Mode)
1 Press the four-way controller (3) in the capture mode.
2 Use the four-way controller (2345) to select O (Voice Recording).
3 Press the 4 button.
1
4 Press the shutter release button fully.
5 Press the shutter release button fully.
Playing Back Sound
1 Press the Q button.
1
2 Use the four-way controller (45) to choose a sound file to play back.
3 Press the four-way controller (2).
4 Press the four-way controller (3).
Settings
Camera Settings
1 Use the four-way controller (23) to select [Format] on the [R Setting] menu.
2 Press the four-way controller (5).
3 Use the four-way controller (23) to select [Format].
4 Press the 4 button.
1 Use the four-way controller (23) to select [Sound] on the [R Setting] menu.
2 Press the four-way controller (5).
3 Use the four-way controller (23) to select [Volume].
4 Use the four-way controller (45) to adjust the volume.
5 Use the four-way controller (23) to select [Shutter Sound].
6 Press the four-way controller (5).
7 Use the four-way controller (23) to select [1], [2], [3] or [Off] and press 4 button.
8 Set [Operation Sound] in the same way as in Steps 5 to 7.
9 Press the 3 button.
1 Use the four-way controller (23) to select [Date Adjust] on the [R Setting] menu.
2 Press the four-way controller (5).
3 Press the four-way controller (5).
4 Use the four-way controller (23) to choose the date display style.
5 Press the four-way controller (5).
6 Use the four-way controller (23) to select [24h] (24-hour display) or [12h] (12-hour display).
7 Press the four-way controller (5).
8 Press the four-way controller (3).
9 Press the four-way controller (5).
10 Use the four-way controller (23) to change the month.
11 Press the four-way controller (5).
12 Change the time in the same way as in Steps 7 to 10.
13 Press the 4 button.
1 Use the four-way controller (23) to select [World Time] on the [R Setting] menu.
2 Press the four-way controller (5).
3 Use the four-way controller (23) to select X (Destination).
4 Press the four-way controller (5).
5 Use the four-way controller (45) to change the Destination city.
6 Use the four-way controller (23) to select [DST].
7 Use the four-way controller (45) to select O (On) or P (Off).
8 Press the 4 button.
9 Press the 3 button twice.
1 Use the four-way controller (23) to select [World Time] on the [R Setting] menu.
2 Press the four-way controller (5).
3 Use the four-way controller (23) to select [Select time].
4 Press the four-way controller (5).
5 Use the four-way controller (23) to select X (Destination) or W (Hometown).
6 Press the 4 button.
7 Press the 3 button twice.
1 Use the four-way controller (23) to select [Language/ ] on the [R Setting] menu.
2 Press the four-way controller (5).
3 Use the four-way controller (2345) to select the language.
4 Press the 4 button.
1 Use the four-way controller (23) to select [Folder Name] on the [R Setting] menu.
2 Press the four-way controller (5).
3 Use the four-way controller (23) to select [Standard] or [Date].
4 Press the 4 button.
1 Use the four-way controller (23) to select [USB Connection] on the [R Setting] menu.
2 Press the four-way controller (5).
3 Use the four-way controller (23) to select [PC] or [PictBridge].
4 Press the 4 button.
1 Use the four-way controller (23) to select [Video Out] on the [R Setting] menu.
2 Press the four-way controller (5).
3 Use the four-way controller (23) to select [NTSC] or [PAL].
4 Press the 4 button.
1 Use the four-way controller (23) to select [Brightness Level] on the [R Setting] menu.
2 Use the four-way controller (45) to adjust the brightness.
3 Press the 3 button.
1 Use the four-way controller (23) to select [Power Saving] on the [R Setting] menu.
2 Press the four-way controller (5).
3 Use the four-way controller (23) to select [2min], [1min], [30sec], [15sec], [5sec] or [Off].
4 Press the 4 button.
1 Use the four-way controller (23) to select [Auto Power Off] on the [R Setting] menu.
2 Press the four-way controller (5).
3 Use the four-way controller (23) to select [5min], [3min] or [Off].
4 Press the 4 button.
1 Use the four-way controller (23) to select [Reset] on the [R Setting] menu.
2 Press the four-way controller (5).
3 Use the four-way controller (23) to select [Reset].
4 Press the 4 button.
Appendix
List of World Time Cities
Default Settings
Functions Available for Each Shooting Mode
Optional Accessories
Messages
Troubleshooting
Problem
Cause
Remedy
Main Specifications
WARRANTY POLICY
Index


 2023年江西萍乡中考道德与法治真题及答案.doc
 2012年重庆南川中考生物真题及答案.doc
 2013年江西师范大学地理学综合及文艺理论基础考研真题.doc
 2020年四川甘孜小升初语文真题及答案I卷.doc
 2020年注册岩土工程师专业基础考试真题及答案.doc
 2023-2024学年福建省厦门市九年级上学期数学月考试题及答案.doc
 2021-2022学年辽宁省沈阳市大东区九年级上学期语文期末试题及答案.doc
 2022-2023学年北京东城区初三第一学期物理期末试卷及答案.doc
 2018上半年江西教师资格初中地理学科知识与教学能力真题及答案.doc
 2012年河北国家公务员申论考试真题及答案-省级.doc
 2020-2021学年江苏省扬州市江都区邵樊片九年级上学期数学第一次质量检测试题及答案.doc
 2022下半年黑龙江教师资格证中学综合素质真题及答案.doc