Centos 7 Oracle 12C 超详细安装
2016-05-05
�
[1] 先决环境 Install Desktop Environment, refer to here.
[2] Install required packages.
[root@dlp ~]#
yum -y install binutils compat-libcap1 gcc gcc-c++ glibc glibc.i686
glibc-devel glibc.i686 ksh libaio libaio.i686 libaio-devel libaio-
devel.i686 libgcc libgcc.i686 libstdc++ libstdc++l7.i686 libstdc++-
devel libstdc++-devel.i686 compat-libstdc++-33 compat-libstdc++-
33.i686 libXi libXi.i686 libXtst libXtst.i686 make sysstat
[3] Edit Kernel parameters.
[root@dlp ~]#
MEMTOTAL=$(free -b | sed -n '2p' | awk '{print $2}')
[root@dlp ~]#
SHMMAX=$(expr $MEMTOTAL / 2)
[root@dlp ~]#
SHMMNI=4096
[root@dlp ~]#
PAGESIZE=$(getconf PAGE_SIZE)
[root@dlp ~]#
cat >> /etc/sysctl.conf << EOF
fs.aio-max-nr = 1048576
fs.file-max = 6815744
kernel.shmmax = $SHMMAX
kernel.shmall = `expr $SHMMAX/$PAGESIZE \* $SHMMNI/16`
kernel.shmmni = $SHMMNI
kernel.sem = 250 32000 100 128
net.ipv4.ip_local_port_range = 9000 65500
�
net.core.rmem_default = 262144
net.core.rmem_max = 4194304
net.core.wmem_default = 262144
net.core.wmem_max = 1048576
EOF
[root@dlp ~]#
sysctl -p
fs.aio-max-nr = 1048576
fs.file-max = 6815744
kernel.shmmax = 6274715648
kernel.shmall = 392169728
kernel.shmmni = 4096
kernel.sem = 250 32000 100 128
net.ipv4.ip_local_port_range = 9000 65500
net.core.rmem_default = 262144
net.core.rmem_max = 4194304
net.core.wmem_default = 262144
net.core.wmem_max = 1048576
[4] Create user and groups for Oracle Database service.
[root@dlp ~]#
i=54321; for group in oinstall dba backupdba oper dgdba kmdba; do
groupadd -g $i $group; i=`expr $i + 1`
done
[root@dlp ~]#
useradd -u 1200 -g oinstall -G dba,oper,backupdba,dgdba,kmdba -d
/home/oracle oracle
[root@dlp ~]#
passwd oracle
Changing password for user oracle.
New password:
Retype new password:
passwd: all authentication tokens updated successfully.
[root@dlp ~]#
mkdir -p /u01/app/oracle
[root@dlp ~]#
chown -R oracle:oinstall /u01/app
[root@dlp ~]#
chmod -R 775 /u01
�
[root@dlp ~]#
vi /etc/pam.d/login
# near line 14: add
session required pam_selinux.so open
session required pam_namespace.so
session required pam_limits.so
session optional pam_keyinit.so force revoke
session include system-auth
-session optional pam_ck_connector.so
[root@dlp ~]#
vi /etc/security/limits.conf
# add to the end
oracle soft nproc 2047
oracle hard nproc 16384
oracle soft nofile 1024
oracle hard nofile 65536
oracle soft stack 10240
oracle hard stack 32768
[5]
图形化安装 Oracle 12C Login with the user "oracle" and set
environment variables.
dlp login:
oracle
Password:
[oracle@dlp ~]$
vi ~/.bash_profile
# add to the end
umask 022
export ORACLE_BASE=/u01/app/oracle
# create a temporary directory for installation
[oracle@dlp ~]$
mkdir tmp
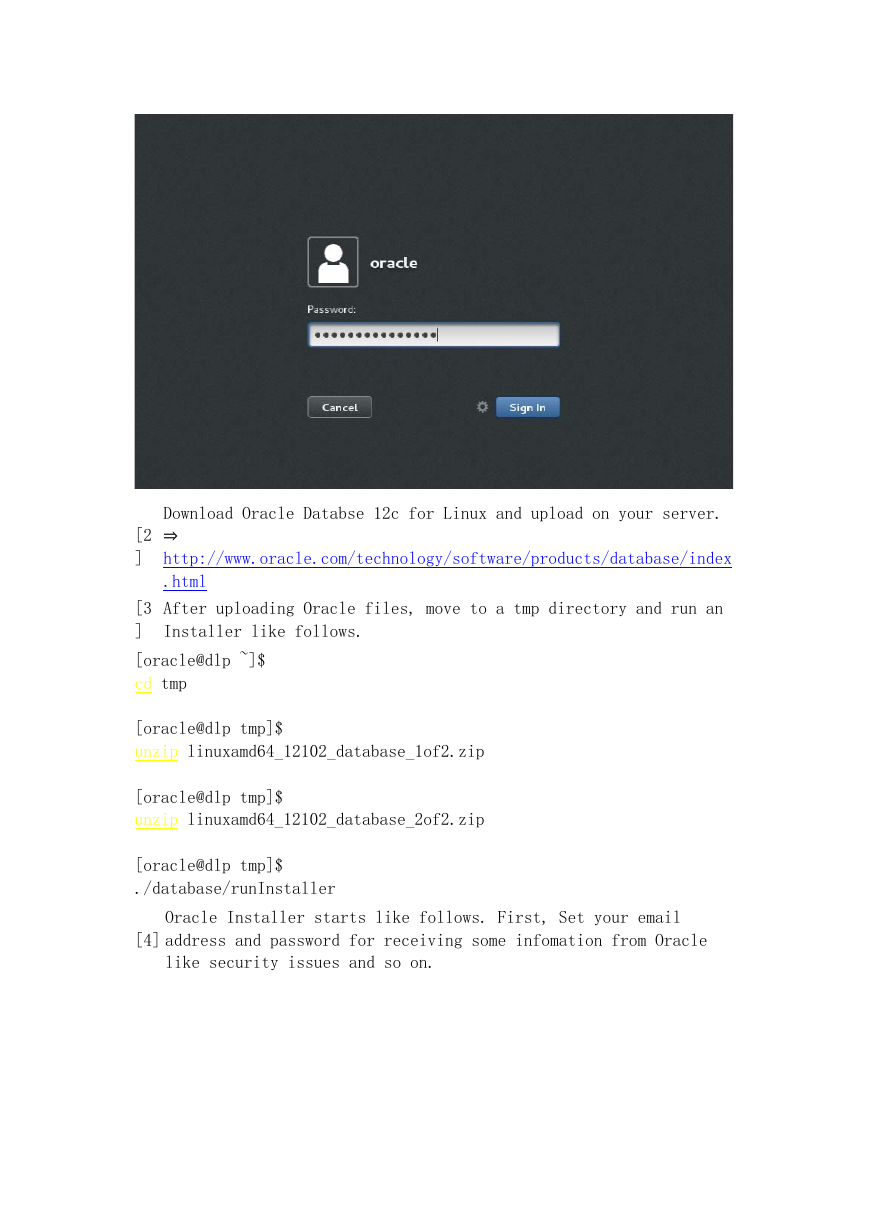
[1]
Login and work with oracle admin user which you create in pre-
requirements settings.
�
Download Oracle Databse 12c for Linux and upload on your server.
⇒
[2
]
http://www.oracle.com/technology/software/products/database/index
.html
[3
]
After uploading Oracle files, move to a tmp directory and run an
Installer like follows.
[oracle@dlp ~]$
cd tmp
[oracle@dlp tmp]$
unzip linuxamd64_12102_database_1of2.zip
[oracle@dlp tmp]$
unzip linuxamd64_12102_database_2of2.zip
[oracle@dlp tmp]$
./database/runInstaller
[4]
Oracle Installer starts like follows. First, Set your email
address and password for receiving some infomation from Oracle
like security issues and so on.
�
[5] On this example, Select "Install database software only".
�
[6] On this example, Select "Single Instance Database ***".
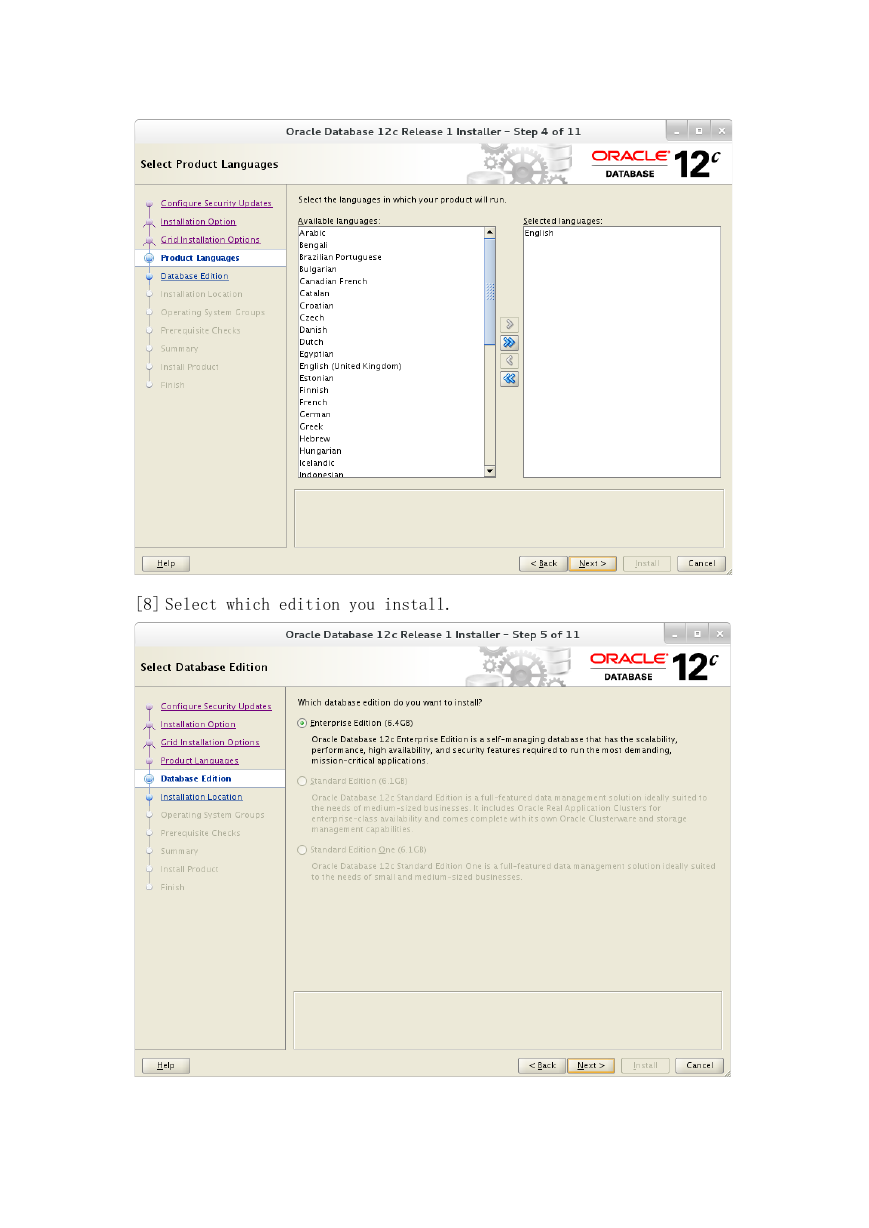
[7] Select your language.
�
[8] Select which edition you install.
�





 2023年江西萍乡中考道德与法治真题及答案.doc
 2012年重庆南川中考生物真题及答案.doc
 2013年江西师范大学地理学综合及文艺理论基础考研真题.doc
 2020年四川甘孜小升初语文真题及答案I卷.doc
 2020年注册岩土工程师专业基础考试真题及答案.doc
 2023-2024学年福建省厦门市九年级上学期数学月考试题及答案.doc
 2021-2022学年辽宁省沈阳市大东区九年级上学期语文期末试题及答案.doc
 2022-2023学年北京东城区初三第一学期物理期末试卷及答案.doc
 2018上半年江西教师资格初中地理学科知识与教学能力真题及答案.doc
 2012年河北国家公务员申论考试真题及答案-省级.doc
 2020-2021学年江苏省扬州市江都区邵樊片九年级上学期数学第一次质量检测试题及答案.doc
 2022下半年黑龙江教师资格证中学综合素质真题及答案.doc