S7-1200 Programmable controller
Preface
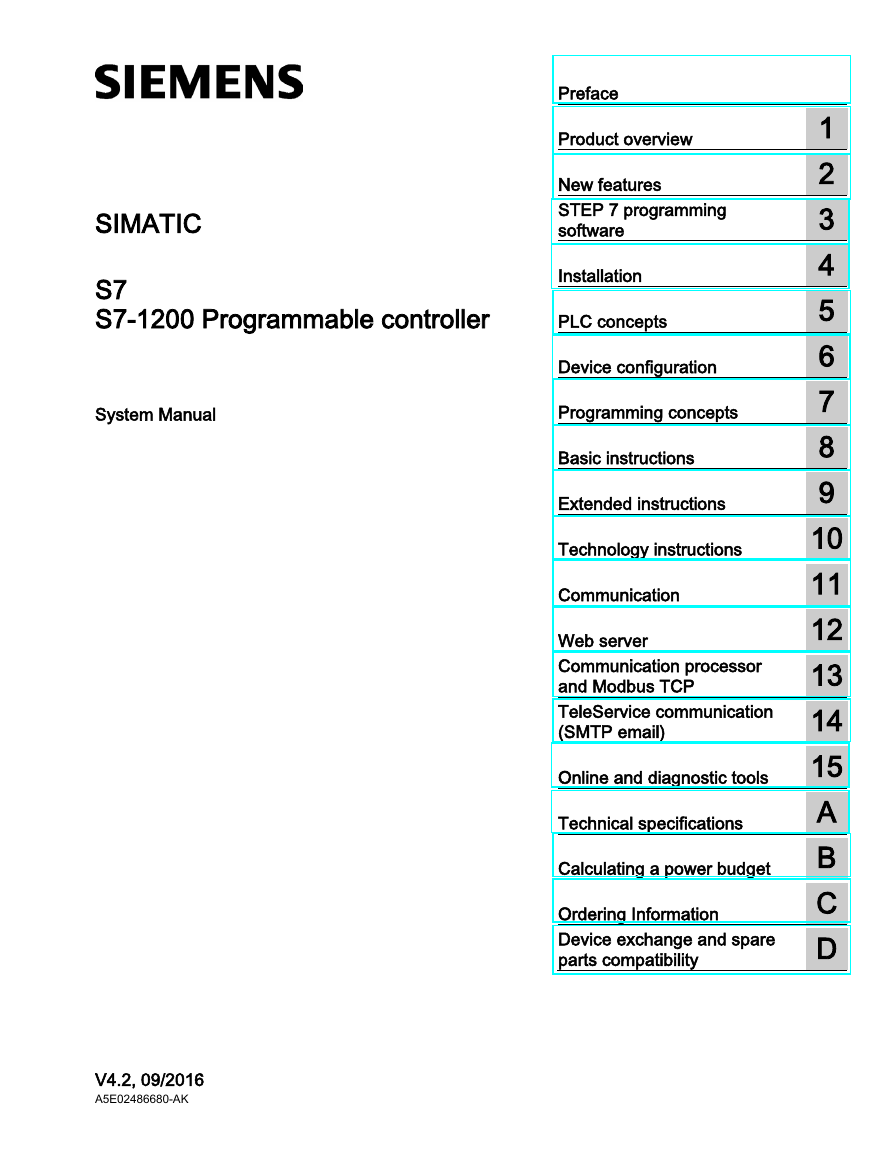
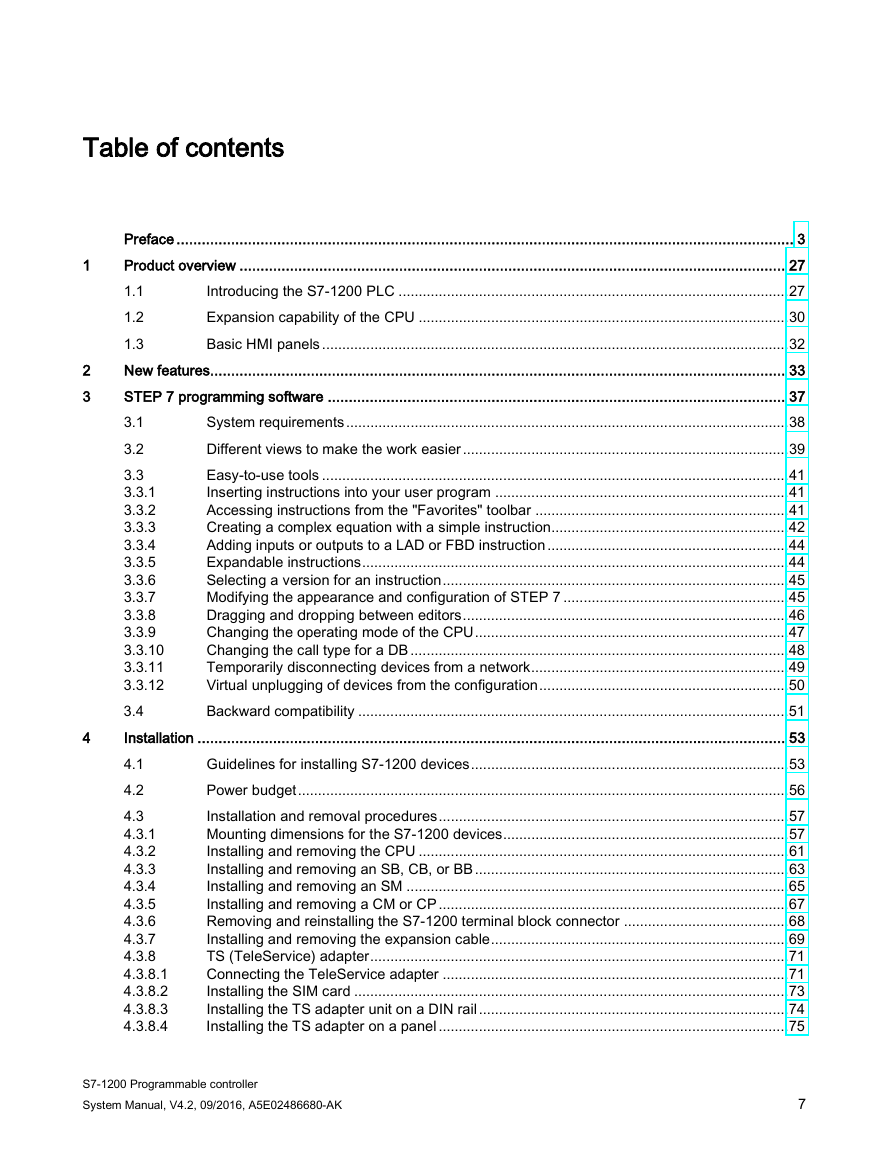
Table of contents
1 Product overview
1.1 Introducing the S7-1200 PLC
1.2 Expansion capability of the CPU
1.3 Basic HMI panels
2 New features
3 STEP 7 programming software
3.1 System requirements
3.2 Different views to make the work easier
3.3 Easy-to-use tools
3.3.1 Inserting instructions into your user program
3.3.2 Accessing instructions from the "Favorites" toolbar
3.3.3 Creating a complex equation with a simple instruction
3.3.4 Adding inputs or outputs to a LAD or FBD instruction
3.3.5 Expandable instructions
3.3.6 Selecting a version for an instruction
3.3.7 Modifying the appearance and configuration of STEP 7
3.3.8 Dragging and dropping between editors
3.3.9 Changing the operating mode of the CPU
3.3.10 Changing the call type for a DB
3.3.11 Temporarily disconnecting devices from a network
3.3.12 Virtual unplugging of devices from the configuration
3.4 Backward compatibility
4 Installation
4.1 Guidelines for installing S7-1200 devices
4.2 Power budget
4.3 Installation and removal procedures
4.3.1 Mounting dimensions for the S7-1200 devices
4.3.2 Installing and removing the CPU
4.3.3 Installing and removing an SB, CB, or BB
4.3.4 Installing and removing an SM
4.3.5 Installing and removing a CM or CP
4.3.6 Removing and reinstalling the S7-1200 terminal block connector
4.3.7 Installing and removing the expansion cable
4.3.8 TS (TeleService) adapter
4.3.8.1 Connecting the TeleService adapter
4.3.8.2 Installing the SIM card
4.3.8.3 Installing the TS adapter unit on a DIN rail
4.3.8.4 Installing the TS adapter on a panel
4.4 Wiring guidelines
5 PLC concepts
5.1 Execution of the user program
5.1.1 Operating modes of the CPU
5.1.2 Processing the scan cycle in RUN mode
5.1.3 Organization blocks (OBs)
5.1.3.1 Program cycle OB
5.1.3.2 Startup OB
5.1.3.3 Time delay interrupt OB
5.1.3.4 Cyclic interrupt OB
5.1.3.5 Hardware interrupt OB
5.1.3.6 Time error interrupt OB
5.1.3.7 Diagnostic error interrupt OB
5.1.3.8 Pull or plug of modules OB
5.1.3.9 Rack or station failure OB
5.1.3.10 Time of day OB
5.1.3.11 Status OB
5.1.3.12 Update OB
5.1.3.13 Profile OB
5.1.3.14 MC-Servo and MC-Interpolator OB
5.1.3.15 MC-PreServo
5.1.3.16 MC-PostServo
5.1.3.17 Event execution priorities and queuing
5.1.4 Monitoring and configuring the cycle time
5.1.5 CPU memory
5.1.5.1 System and clock memory
5.1.6 Diagnostics buffer
5.1.7 Time of day clock
5.1.8 Configuring the outputs on a RUN-to-STOP transition
5.2 Data storage, memory areas, I/O and addressing
5.2.1 Accessing the data of the S7-1200
5.3 Processing of analog values
5.4 Data types
5.4.1 Bool, Byte, Word, and DWord data types
5.4.2 Integer data types
5.4.3 Floating-point real data types
5.4.4 Time and Date data types
5.4.5 Character and String data types
5.4.6 Array data type
5.4.7 Data structure data type
5.4.8 PLC data type
5.4.9 Variant pointer data type
5.4.10 Accessing a "slice" of a tagged data type
5.4.11 Accessing a tag with an AT overlay
5.5 Using a memory card
5.5.1 Inserting a memory card in the CPU
5.5.2 Configuring the startup parameter of the CPU before copying the project to the memory card
5.5.3 Transfer card
5.5.4 Program card
5.5.5 Firmware update
5.6 Recovery from a lost password
6 Device configuration
6.1 Inserting a CPU
6.2 Uploading the configuration of a connected CPU
6.3 Adding modules to the configuration
6.4 Configuration control
6.4.1 Advantages and applications of configuration control
6.4.2 Configuring the central installation and optional modules
6.4.3 Example of configuration control
6.5 Changing a device
6.6 Configuring the operation of the CPU
6.6.1 Overview
6.6.2 Configuring digital input filter times
6.6.3 Pulse catch
6.7 Configuring multilingual support
6.8 Configuring the parameters of the modules
6.9 Configuring the CPU for communication
6.10 Time synchronization
7 Programming concepts
7.1 Guidelines for designing a PLC system
7.2 Structuring your user program
7.3 Using blocks to structure your program
7.3.1 Organization block (OB)
7.3.2 Function (FC)
7.3.3 Function block (FB)
7.3.4 Data block (DB)
7.3.5 Creating reusable code blocks
7.3.6 Passing parameters to blocks
7.4 Understanding data consistency
7.5 Programming language
7.5.1 Ladder logic (LAD)
7.5.2 Function Block Diagram (FBD)
7.5.3 SCL
7.5.3.1 SCL program editor
7.5.3.2 SCL expressions and operations
7.5.3.3 Indexed addressing with PEEK and POKE instructions
7.5.4 EN and ENO for LAD, FBD and SCL
7.6 Protection
7.6.1 Access protection for the CPU
7.6.2 External load memory
7.6.3 Know-how protection
7.6.4 Copy protection
7.7 Downloading the elements of your program
7.8 Synchronizing the online CPU and offline project
7.9 Uploading from the online CPU
7.9.1 Comparing the online CPU to the offline CPU
7.10 Debugging and testing the program
7.10.1 Monitor and modify data in the CPU
7.10.2 Watch tables and force tables
7.10.3 Cross reference to show usage
7.10.4 Call structure to examine the calling hierarchy
8 Basic instructions
8.1 Bit logic operations
8.1.1 Bit logic instructions
8.1.2 Set and reset instructions
8.1.3 Positive and negative edge instructions
8.2 Timer operations
8.3 Counter operations
8.4 Comparator operations
8.4.1 Compare values instructions
8.4.2 IN_Range (Value within range) and OUT_Range (Value outside range)
8.4.3 OK (Check validity) and NOT_OK (Check invalidity)
8.4.4 Variant and array comparison instructions
8.4.4.1 Equality and non-equality comparison instructions
8.4.4.2 Null comparsion instructions
8.4.4.3 IS_ARRAY (Check for ARRAY)
8.5 Math functions
8.5.1 CALCULATE (Calculate)
8.5.2 Add, subtract, multiply and divide instructions
8.5.3 MOD (return remainder of division)
8.5.4 NEG (Create twos complement)
8.5.5 INC (Increment) and DEC (Decrement)
8.5.6 ABS (Form absolute value)
8.5.7 MIN (Get minimum) and MAX (Get maximum)
8.5.8 LIMIT (Set limit value)
8.5.9 Exponent, logarithm, and trigonometry instructions
8.6 Move operations
8.6.1 MOVE (Move value), MOVE_BLK (Move block), UMOVE_BLK (Move block uninterruptible), and MOVE_BLK_VARIANT (Move block)
8.6.2 Deserialize
8.6.3 Serialize
8.6.4 FILL_BLK (Fill block) and UFILL_BLK (Fill block uninterruptible)
8.6.5 SWAP (Swap bytes)
8.6.6 LOWER_BOUND: (Read out ARRAY low limit)
8.6.7 UPPER_BOUND: (Read out ARRAY high limit)
8.6.8 Read / Write memory instructions
8.6.8.1 PEEK and POKE (SCL only)
8.6.8.2 Read and write big and little Endian instructions (SCL)
8.6.9 Variant instructions
8.6.9.1 VariantGet (Read VARIANT tag value)
8.6.9.2 VariantPut (Write VARIANT tag value)
8.6.9.3 CountOfElements (Get number of ARRAY elements)
8.6.10 Legacy instructions
8.6.10.1 FieldRead (Read field) and FieldWrite (Write field) instructions
8.7 Conversion operations
8.7.1 CONV (Convert value)
8.7.2 Conversion instructions for SCL
8.7.3 ROUND (Round numerical value) and TRUNC (Truncate numerical value)
8.7.4 CEIL and FLOOR (Generate next higher and lower integer from floating-point number)
8.7.5 SCALE_X (Scale) and NORM_X (Normalize)
8.7.6 Variant conversion instructions
8.7.6.1 VARIANT_TO_DB_ANY (Convert VARIANT to DB_ANY)
8.7.6.2 DB_ANY_TO_VARIANT (Convert DB_ANY to VARIANT)
8.8 Program control operations
8.8.1 JMP (Jump if RLO = 1), JMPN (Jump if RLO = 0), and Label (Jump label) instructions
8.8.2 JMP_LIST (Define jump list)
8.8.3 SWITCH (Jump distributor)
8.8.4 RET (Return)
8.8.5 ENDIS_PW (Enable/disable CPU passwords)
8.8.6 RE_TRIGR (Restart cycle monitoring time)
8.8.7 STP (Exit program)
8.8.8 GET_ERROR and GET_ERROR_ID (Get error and error ID locally) instructions
8.8.9 RUNTIME (Measure program runtime)
8.8.10 SCL program control statements
8.8.10.1 Overview of SCL program control statements
8.8.10.2 IF-THEN statement
8.8.10.3 CASE statement
8.8.10.4 FOR statement
8.8.10.5 WHILE-DO statement
8.8.10.6 REPEAT-UNTIL statement
8.8.10.7 CONTINUE statement
8.8.10.8 EXIT statement
8.8.10.9 GOTO statement
8.8.10.10 RETURN statement
8.9 Word logic operations
8.9.1 AND, OR, and XOR logic operation instructions
8.9.2 INV (Create ones complement)
8.9.3 DECO (Decode) and ENCO (Encode) instructions
8.9.4 SEL (Select), MUX (Multiplex), and DEMUX (Demultiplex) instructions
8.10 Shift and rotate
8.10.1 SHR (Shift right) and SHL (Shift left) instructions
8.10.2 ROR (Rotate right) and ROL (Rotate left) instructions
9 Extended instructions
9.1 Date, time-of-day, and clock functions
9.1.1 Date and time-of-day instructions
9.1.2 Clock functions
9.1.3 TimeTransformationRule data structure
9.1.4 SET_TIMEZONE (Set timezone)
9.1.5 RTM (Runtime meters)
9.2 String and character
9.2.1 String data overview
9.2.2 S_MOVE (Move character string)
9.2.3 String conversion instructions
9.2.3.1 S_CONV, STRG_VAL, and VAL_STRG (Convert to/from character string and number) instructions
9.2.3.2 Strg_TO_Chars and Chars_TO_Strg (Convert to/from character string and array of CHAR) instructions
9.2.3.3 ATH and HTA (Convert to/from ASCII string and hexadecimal number) instructions
9.2.4 String operation instructions
9.2.4.1 MAX_LEN (Maximum length of a character string)
9.2.4.2 LEN (Determine the length of a character string)
9.2.4.3 CONCAT (Combine character strings)
9.2.4.4 LEFT, RIGHT, and MID (Read substrings in a character string) instructions
9.2.4.5 DELETE (Delete characters in a character string)
9.2.4.6 INSERT (Insert characters in a character string)
9.2.4.7 REPLACE (Replace characters in a character string)
9.2.4.8 FIND (Find characters in a character string)
9.2.5 Runtime information
9.2.5.1 GetSymbolName (Read out a tag on the input parameter)
9.2.5.2 GetSymbolPath (Query composite global name of the input parameter assignment)
9.2.5.3 GetInstanceName (Read out name of the block instance)
9.2.5.4 GetInstancePath (Query composite global name of the block instance)
9.2.5.5 GetBlockName (Read out name of the block)
9.3 Distributed I/O (PROFINET, PROFIBUS, or AS-i)
9.3.1 Distributed I/O Instructions
9.3.2 RDREC and WRREC (Read/write data record)
9.3.3 GETIO (Read process image)
9.3.4 SETIO (Transfer process image)
9.3.5 GETIO_PART (Read process image area)
9.3.6 SETIO_PART (Transfer process image area)
9.3.7 RALRM (Receive interrupt)
9.3.8 D_ACT_DP (Enable/disable PROFINET IO devices)
9.3.9 STATUS parameter for RDREC, WRREC, and RALRM
9.3.10 Others
9.3.10.1 DPRD_DAT and DPWR_DAT (Read/write consistent data)
9.3.10.2 RCVREC (I-device/I-slave receive data record)
9.3.10.3 PRVREC (I-device/I-slave make data record available)
9.3.10.4 DPNRM_DG (Read diagnostic data from a PROFIBUS DP slave)
9.4 PROFIenergy
9.5 Interrupts
9.5.1 ATTACH and DETACH (Attach/detach an OB and an interrupt event) instructions
9.5.2 Cyclic interrupts
9.5.2.1 SET_CINT (Set cyclic interrupt parameters)
9.5.2.2 QRY_CINT (Query cyclic interrupt parameters)
9.5.3 Time of day interrupts
9.5.3.1 SET_TINTL (Set time of day interrupt)
9.5.3.2 CAN_TINT (Cancel time of day interrupt)
9.5.3.3 ACT_TINT (Activate time of day interrupt)
9.5.3.4 QRY_TINT (Query status of time of day interrupt)
9.5.4 Time delay interrupts
9.5.5 DIS_AIRT and EN_AIRT (Delay/enable execution of higher priority interrupts and asynchronous error events) instructions
9.6 Alarms
9.6.1 Gen_UsrMsg (Generate user diagnostic alarms)
9.7 Diagnostics (PROFINET or PROFIBUS)
9.7.1 Diagnostic instructions
9.7.2 RD_SINFO (Read current OB start information)
9.7.3 LED (Read LED status)
9.7.4 Get_IM_Data (Read the identification and maintenance data)
9.7.5 Get_Name (Read the name of a PROFINET IO device)
9.7.6 GetStationInfo (Read the IP or MAC address of a PROFINET IO device)
9.7.7 DeviceStates instruction
9.7.7.1 DeviceStates example configurations
9.7.8 ModuleStates instruction
9.7.8.1 ModuleStates example configurations
9.7.9 GET_DIAG (Read diagnostic information)
9.7.10 Diagnostic events for distributed I/O
9.8 Pulse
9.8.1 CTRL_PWM (Pulse width modulation)
9.8.2 CTRL_PTO (Pulse train output)
9.8.3 Operation of the pulse outputs
9.8.4 Configuring a pulse channel for PWM or PTO
9.9 Recipes and Data logs
9.9.1 Recipes
9.9.1.1 Recipe overview
9.9.1.2 Recipe example
9.9.1.3 Program instructions that transfer recipe data
9.9.1.4 Recipe example program
9.9.2 Data logs
9.9.2.1 Data log record structure
9.9.2.2 Program instructions that control data logs
9.9.2.3 Working with data logs
9.9.2.4 Limit to the size of data log files
9.9.2.5 Data log example program
9.10 Data block control
9.10.1 CREATE_DB (Create data block)
9.10.2 READ_DBL and WRIT_DBL (Read/write a data block in load memory) instructions
9.10.3 ATTR_DB (Read data block attribute)
9.10.4 DELETE_DB (Delete data block)
9.11 Address handling
9.11.1 GEO2LOG (Determine the hardware identifier from the slot)
9.11.2 LOG2GEO (Determine the slot from the hardware identifier)
9.11.3 IO2MOD (Determine the hardware identifier from an I/O address)
9.11.4 RD_ADDR (Determine the IO addresses from the hardware identifier)
9.11.5 GEOADDR system data type
9.12 Common error codes for the Extended instructions
10 Technology instructions
10.1 Counting (High-speed counters)
10.1.1 CTRL_HSC_EXT (Control high-speed counter) instruction
10.1.1.1 Instruction overview
10.1.1.2 Example
10.1.1.3 CTRL_HSC_EXT Instruction System Data Types (SDT)
10.1.2 Operating the high-speed counter
10.1.2.1 Synchronization function
10.1.2.2 Gate function
10.1.2.3 Capture function
10.1.2.4 Compare function
10.1.2.5 Applications
10.1.3 Configuring a high-speed counter
10.1.3.1 Type of Counting
10.1.3.2 Operating phase
10.1.3.3 Initial values
10.1.3.4 Input functions
10.1.3.5 Output function
10.1.3.6 Interrupt events
10.1.3.7 Hardware input pin assignment
10.1.3.8 Hardware output pin assignment
10.1.3.9 HSC input memory addresses
10.1.3.10 Hardware identifier
10.1.4 Legacy CTRL_HSC (Control high-speed counter) instruction
10.1.4.1 Instruction overview
10.1.4.2 Using CTRL_HSC
10.1.4.3 HSC current count value
10.2 PID control
10.2.1 Inserting the PID instruction and technology object
10.2.2 PID_Compact
10.2.2.1 PID_Compact instruction
10.2.2.2 PID_Compact instruction Process value limits
10.2.2.3 PID_Compact instruction ErrorBit parameters
10.2.2.4 PID_Compact instruction Warning parameters
10.2.3 PID_3Step
10.2.3.1 PID_3Step instruction
10.2.3.2 PID_3Step instruction ErrorBit parameters
10.2.3.3 PID_3Step instruction Warning parameters
10.2.4 PID_Temp
10.2.4.1 PID_Temp instruction
10.2.4.2 PID_Temp ErrorBit parameters
10.2.4.3 PID_Temp Warning parameters
10.2.5 Configuring the PID_Compact and PID_3Step controllers
10.2.6 Configuring the PID_Temp controller
10.2.7 Commissioning the PID_Compact and PID_3Step controllers
10.2.8 Commissioning the PID_Temp controller
10.3 Motion control
10.3.1 Phasing
10.3.2 Configuring a pulse generator
10.3.3 Open loop motion control
10.3.3.1 Configuring the axis
10.3.3.2 Commissioning
10.3.4 Closed loop motion control
10.3.4.1 Configuring the axis
10.3.4.2 ServoOBs
10.3.4.3 Speed controlled operation
10.3.4.4 Telegram 4 support
10.3.4.5 Simulation axis
10.3.4.6 Data adaptation
10.3.4.7 Axis control using the TM Pulse module
10.3.5 Configuring the TO_CommandTable_PTO
10.3.6 Operation of motion control for S7-1200
10.3.6.1 CPU outputs used for motion control
10.3.6.2 Hardware and software limit switches for motion control
10.3.6.3 Homing
10.3.6.4 Jerk limit
10.3.7 Motion control instructions
10.3.7.1 MC instruction overview
10.3.7.2 MC_Power (Release/block axis)
10.3.7.3 MC_Reset (Confirm error)
10.3.7.4 MC_Home (Home axis)
10.3.7.5 MC_Halt (Pause axis)
10.3.7.6 MC_MoveAbsolute (Position axis absolutely)
10.3.7.7 MC_MoveRelative (Position axis relatively)
10.3.7.8 MC_MoveVelocity (Move axis at predefined velocity)
10.3.7.9 MC_MoveJog (Move axis in jog mode)
10.3.7.10 MC_CommandTable (Run axis commans as movement sequence)
10.3.7.11 MC_ChangeDynamic (Change dynamc settings for the axis)
10.3.7.12 MC_WriteParam (write parameters of a technology object)
10.3.7.13 MC_ReadParam instruction (read parameters of a technology object)
10.3.8 Monitoring active commands
10.3.8.1 Monitoring MC instructions with a "Done" output parameter
10.3.8.2 Monitoring the MC_Velocity
10.3.8.3 Monitoring the MC_MoveJog
10.3.9 ErrorIDs and ErrorInfos for motion control
11 Communication
11.1 Asynchronous communication connections
11.2 PROFINET
11.2.1 Creating a network connection
11.2.2 Configuring the Local/Partner connection path
11.2.3 Assigning Internet Protocol (IP) addresses
11.2.3.1 Assigning IP addresses to programming and network devices
11.2.3.2 Checking the IP address of your programming device
11.2.3.3 Assigning an IP address to a CPU online
11.2.3.4 Configuring an IP address for a CPU in your project
11.2.4 Testing the PROFINET network
11.2.5 Locating the Ethernet (MAC) address on the CPU
11.2.6 Configuring Network Time Protocol (NTP) synchronization
11.2.7 PROFINET device start-up time, naming, and address assignment
11.2.8 Open user communication
11.2.8.1 Protocols
11.2.8.2 TCP and ISO on TCP
11.2.8.3 Communication services and used port numbers
11.2.8.4 Ad hoc mode
11.2.8.5 Connection IDs for the Open user communication instructions
11.2.8.6 Parameters for the PROFINET connection
11.2.8.7 TSEND_C and TRCV_C instructions
11.2.8.8 Legacy TSEND_C and TRCV_C instructions
11.2.8.9 TCON, TDISCON, TSEND, and TRCV instructions
11.2.8.10 Legacy TCON, TDISCON, TSEND, and TRCV instructions
11.2.8.11 T_RESET (Terminate and re-establish an existing connection) instruction
11.2.8.12 T_DIAG (Checks the status of connection and reads information) instruction
11.2.8.13 TMAIL_C (Send an email using the Ethernet interface of the CPU) instruction
11.2.8.14 UDP
11.2.8.15 TUSEND and TURCV
11.2.8.16 T_CONFIG
11.2.8.17 Common parameters for instructions
11.2.9 Communication with a programming device
11.2.9.1 Establishing the hardware communications connection
11.2.9.2 Configuring the devices
11.2.9.3 Assigning Internet Protocol (IP) addresses
11.2.9.4 Testing your PROFINET network
11.2.10 HMI-to-PLC communication
11.2.10.1 Configuring logical network connections between two devices
11.2.11 PLC-to-PLC communication
11.2.11.1 Configuring logical network connections between two devices
11.2.11.2 Configuring the Local/Partner connection path between two devices
11.2.11.3 Configuring transmit (send) and receive parameters
11.2.12 Configuring a CPU and PROFINET IO device
11.2.12.1 Adding a PROFINET IO device
11.2.12.2 Assigning CPUs and device names
11.2.12.3 Assigning Internet Protocol (IP) addresses
11.2.12.4 Configuring the IO cycle time
11.2.13 Configuring a CPU and PROFINET I-device
11.2.13.1 I-device functionality
11.2.13.2 Properties and advantages of the I-device
11.2.13.3 Characteristics of an I-device
11.2.13.4 Data exchange between higher- and lower-level IO system
11.2.13.5 Configuring the I-device
11.2.14 Shared devices
11.2.14.1 Shared device functionality
11.2.14.2 Example: Configuring a shared device (GSD configuration)
11.2.14.3 Example: Configuring an I-device as a shared device
11.2.15 Media Redundancy Protocol (MRP)
11.2.15.1 Media redundancy with ring topologies
11.2.15.2 Using Media Redundancy Protocol (MRP)
11.2.15.3 Configuring media redundancy
11.2.16 S7 routing
11.2.16.1 S7 routing between CPU and CP interfaces
11.2.16.2 S7 routing between two CP interfaces
11.2.17 Disabling SNMP
11.2.17.1 Disabling SNMP
11.2.18 Diagnostics
11.2.19 Distributed I/O instructions
11.2.20 Diagnostic instructions
11.2.21 Diagnostic events for distributed I/O
11.3 PROFIBUS
11.3.1 Communications services of the PROFIBUS CMs
11.3.2 Reference to the PROFIBUS CM user manuals
11.3.3 Configuring a DP master and slave device
11.3.3.1 Adding the CM 1243-5 (DP master) module and a DP slave
11.3.3.2 Configuring logical network connections between two PROFIBUS devices
11.3.3.3 Assigning PROFIBUS addresses to the CM 1243-5 module and DP slave
11.3.4 Distributed I/O instructions
11.3.5 Diagnostic instructions
11.3.6 Diagnostic events for distributed
11.4 AS-i
11.4.1 Configuring an AS-i master and slave device
11.4.1.1 Adding the AS-i master CM 1243-2 and AS-i slave
11.4.1.2 Configuring logical network connections between two AS-i devices
11.4.1.3 Configuring the properties of the AS-i master CM1243-2
11.4.1.4 Assigning an AS-i address to an AS-i slave
11.4.2 Exchanging data between the user program and AS-i slaves
11.4.2.1 STEP 7 basic configuration
11.4.2.2 Configuring slaves with STEP 7
11.4.3 Distributed I/O instructions
11.4.4 Working with AS-i online tools
11.5 S7 communication
11.5.1 GET and PUT (Read and write from a remote CPU)
11.5.2 Creating an S7 connection
11.5.3 Configuring the Local/Partner connection path between two devices
11.5.4 GET/PUT connection parameter assignment
11.5.4.1 Connection parameters
11.5.4.2 Configuring a CPU-to-CPU S7 connection
12 Web server
12.1 Enabling the Web server
12.2 Configuring Web server users
12.3 Accessing the Web pages from a PC
12.4 Accessing the Web pages from a mobile device
12.5 Using a CP module to access Web pages
12.6 Standard Web pages
12.6.1 Layout of the standard Web pages
12.6.2 Basic pages
12.6.3 Logging in and user privileges
12.6.4 Introduction
12.6.5 Start
12.6.6 Diagnostics
12.6.7 Diagnostic Buffer
12.6.8 Module Information
12.6.9 Communication
12.6.10 Tag status
12.6.11 Watch tables
12.6.12 Online backup
12.6.13 File Browser
12.7 User-defined Web pages
12.7.1 Creating HTML pages
12.7.2 AWP commands supported by the S7-1200 Web server
12.7.2.1 Reading variables
12.7.2.2 Writing variables
12.7.2.3 Reading special variables
12.7.2.4 Writing special variables
12.7.2.5 Using an alias for a variable reference
12.7.2.6 Defining enum types
12.7.2.7 Referencing CPU variables with an enum type
12.7.2.8 Creating fragments
12.7.2.9 Importing fragments
12.7.2.10 Combining definitions
12.7.2.11 Handling tag names that contain special characters
12.7.3 Configuring use of user-defined Web pages
12.7.4 Configuring the entry page
12.7.5 Programming the WWW instruction for user-defined web pages
12.7.6 Downloading the program blocks to the CPU
12.7.7 Accessing the user-defined Web pages
12.7.8 Constraints specific to user-defined Web pages
12.7.9 Example of a user-defined web page
12.7.9.1 Web page for monitoring and controlling a wind turbine
12.7.9.2 Reading and displaying controller data
12.7.9.3 Using an enum type
12.7.9.4 Writing user input to the controller
12.7.9.5 Writing a special variable
12.7.9.6 Reference: HTML listing of remote wind turbine monitor Web page
12.7.9.7 Configuration in STEP 7 of the example Web page
12.7.10 Setting up user-defined Web pages in multiple languages
12.7.10.1 Creating the folder structure
12.7.10.2 Programming the language switch
12.7.10.3 Configuring STEP 7 to use a multi-language page structure
12.7.11 Advanced user-defined Web page control
12.8 Constraints
12.8.1 Use of JavaScript
12.8.2 Feature restrictions when the Internet options do not allow cookies
12.8.3 Rules for entering tag names and values
12.8.4 Importing the Siemens security certificate
12.8.5 Importing CSV format data logs to non-USA/UK versions of Microsoft Excel
13 Communication processor and Modbus TCP
13.1 Using the serial communication interfaces
13.2 Biasing and terminating an RS485 network connector
13.3 Point-to-point (PtP) communication
13.3.1 PtP, Freeport communication
13.3.2 3964(R) communication
13.3.3 Configuring the PtP Freeport communication
13.3.3.1 Managing flow control
13.3.3.2 Configuring transmit (send) parameters
13.3.3.3 Configuring receive parameters
13.3.4 Configuring 3964(R) communication
13.3.4.1 Configuring the 3964(R) communication ports
13.3.4.2 Configuring the 3964(R) priority and protocol parameters
13.3.5 Point-to-point instructions
13.3.5.1 Common parameters for Point-to-Point instructions
13.3.5.2 Port_Config (Configure communication parameters dynamically)
13.3.5.3 Send_Config (Configure serial transmission parameters dynamically)
13.3.5.4 Receive_Config (Configure serial receive parameters dynamically)
13.3.5.5 P3964_Config (Configuring the 3964(R) protocol)
13.3.5.6 Send_P2P (Transmit send buffer data)
13.3.5.7 Receive_P2P (Enable receive messages)
13.3.5.8 Receive_Reset (Delete receive buffer)
13.3.5.9 Signal_Get (Query RS-232 signals)
13.3.5.10 Signal_Set (Set RS-232 signals)
13.3.5.11 Get_Features
13.3.5.12 Set_Features
13.3.6 Programming the PtP communications
13.3.6.1 Polling architecture
13.3.7 Example: Point-to-Point communication
13.3.7.1 Configuring the communication module
13.3.7.2 RS422 and RS485 operating modes
13.3.7.3 Programming the STEP 7 program
13.3.7.4 Configuring the terminal emulator
13.3.7.5 Running the example program
13.4 Universal serial interface (USS) communication
13.4.1 Selecting the version of the USS instructions
13.4.2 Requirements for using the USS protocol
13.4.3 USS instructions
13.4.3.1 USS_Port_Scan (Edit communication using USS network)
13.4.3.2 USS_Drive_Control (Swap data with drive)
13.4.3.3 USS_Read_Param (Readout parameters from the drive)
13.4.3.4 USS_Write_Param (Change parameters in the drive)
13.4.4 USS status codes
13.4.5 USS general drive setup requirements
13.4.6 Example: USS general drive connection and setup
13.5 Modbus communication
13.5.1 Overview of Modbus RTU and Modbus TCP communication
13.5.2 Modbus TCP
13.5.2.1 Overview
13.5.2.2 Selecting the version of the Modbus TCP instructions
13.5.2.3 Modbus TCP instructions
13.5.2.4 Modbus TCP examples
13.5.3 Modbus RTU
13.5.3.1 Overview
13.5.3.2 Selecting the version of the Modbus RTU instructions
13.5.3.3 Maximum number of supported Modbus slaves
13.5.3.4 Modbus RTU instructions
13.5.3.5 Modbus RTU examples
13.6 Legacy PtP communication (CM/CB 1241 only)
13.6.1 Legacy point-to-point instructions
13.6.1.1 PORT_CFG (Configure communication parameters dynamically)
13.6.1.2 SEND_CFG (Configure serial transmission parameters dynamically)
13.6.1.3 RCV_CFG (Configure serial receive parameters dynamically)
13.6.1.4 SEND_PTP (Transmit send buffer data)
13.6.1.5 RCV_PTP (Enable receive messages)
13.6.1.6 RCV_RST (Delete receive buffer)
13.6.1.7 SGN_GET (Query RS-232 signals)
13.6.1.8 SGN_SET (Set RS-232 signals)
13.7 Legacy USS communication (CM/CB 1241 only)
13.7.1 Selecting the version of the USS instructions
13.7.2 Requirements for using the USS protocol
13.7.3 Legacy USS instructions
13.7.3.1 USS_PORT (Edit communication using USS network) instruction
13.7.3.2 USS_DRV (Swap data with drive) instruction
13.7.3.3 USS_RPM (Readout parameters from the drive) instruction
13.7.3.4 USS_WPM (Change parameters in the drive) instruction
13.7.4 Legacy USS status codes
13.7.5 Legacy USS general drive setup requirements
13.8 Legacy Modbus TCP communication
13.8.1 Overview
13.8.2 Selecting the version of the Modbus TCP instructions
13.8.3 Legacy Modbus TCP instructions
13.8.3.1 MB_CLIENT (Communicate using PROFINET as Modbus TCP client)
13.8.3.2 MB_SERVER (Communicate using PROFINET as Modbus TCP server)
13.8.4 Legacy Modbus TCP examples
13.8.4.1 Example: Legacy MB_SERVER Multiple TCP connections
13.8.4.2 Example: Legacy MB_CLIENT 1: Multiple requests with common TCP connection
13.8.4.3 Example: Legacy MB_CLIENT 2: Multiple requests with different TCP connections
13.8.4.4 Example: Legacy MB_CLIENT 3: Output image write request
13.8.4.5 Example: Legacy MB_CLIENT 4: Coordinating multiple requests
13.9 Legacy Modbus RTU communication (CM/CB 1241 only)
13.9.1 Overview
13.9.2 Selecting the version of the Modbus RTU instructions
13.9.3 Legacy Modbus RTU instructions
13.9.3.1 MB_COMM_LOAD (Configure port on the PtP module for Modbus RTU)
13.9.3.2 MB_MASTER (Communicate using the PtP port as Modbus RTU master)
13.9.3.3 MB_SLAVE (Communicate using the PtP port as Modbus RTU slave)
13.9.4 Legacy Modbus RTU examples
13.9.4.1 Example: Legacy Modbus RTU master program
13.9.4.2 Example: Legacy Modbus RTU slave program
13.10 Industrial Remote Communication (IRC)
13.10.1 Telecontrol CPs overview
13.10.2 Connection to a GSM network
13.10.3 Applications of the CP 1242-7
13.10.4 Other properties of the CP 1242-7
13.10.5 Further information
13.10.6 Accessories
13.10.7 Configuration examples for telecontrol
14 TeleService communication (SMTP email)
14.1 TM_Mail (Send email) instruction
15 Online and diagnostic tools
15.1 Status LEDs
15.2 Going online and connecting to a CPU
15.3 Assigning a name to a PROFINET IO device online
15.4 Setting the IP address and time of day
15.5 Resetting to factory settings
15.6 Updating firmware
15.7 Formatting a SIMATIC memory card from STEP 7
15.8 CPU operator panel for the online CPU
15.9 Monitoring the cycle time and memory usage
15.10 Displaying diagnostic events in the CPU
15.11 Comparing offline and online CPUs
15.12 Performing an online/offline topology comparison
15.13 Monitoring and modifying values in the CPU
15.13.1 Going online to monitor the values in the CPU
15.13.2 Displaying status in the program editor
15.13.3 Capturing a snapshot of the online values of a DB for restoring values
15.13.4 Using a watch table to monitor and modify values in the CPU
15.13.4.1 Using a trigger when monitoring or modifying PLC tags
15.13.4.2 Enabling outputs in STOP mode
15.13.5 Forcing values in the CPU
15.13.5.1 Using the force table
15.13.5.2 Operation of the Force function
15.14 Downloading in RUN mode
15.14.1 Prerequisites for "Download in RUN mode"
15.14.2 Changing your program in RUN mode
15.14.3 Downloading selected blocks
15.14.4 Downloading a single selected block with a compile error in another block
15.14.5 Modifying and downloading existing blocks in RUN mode
15.14.6 System reaction if the download process fails
15.14.7 Considerations when downloading in RUN mode
15.15 Tracing and recording CPU data on trigger conditions
15.16 Determining the type of wire break condition from an SM 1231 module
15.17 Backing up and restoring a CPU
15.17.1 Backup and restore options
15.17.2 Backing up an online CPU
15.17.3 Restoring a CPU
A Technical specifications
A.1 Siemens Online Support website
A.2 General technical specifications
A.3 PROFINET interface X1 port pinouts
A.4 CPU 1211C
A.4.1 General specifications and features
A.4.2 Timers, counters, and code blocks supported by CPU 1211C
A.4.3 Digital inputs and outputs
A.4.4 Analog inputs
A.4.4.1 Step response of the built-in analog inputs of the CPU
A.4.4.2 Sample time for the built-in analog ports of the CPU
A.4.4.3 Measurement ranges of the analog inputs for voltage (CPUs)
A.4.5 CPU 1211C wiring diagrams
A.5 CPU 1212C
A.5.1 General specifications and features
A.5.2 Timers, counters, and code blocks supported by CPU 1212C
A.5.3 Digital inputs and outputs
A.5.4 Analog inputs
A.5.4.1 Step response of the built-in analog inputs of the CPU
A.5.4.2 Sample time for the built-in analog ports of the CPU
A.5.4.3 Measurement ranges of the analog inputs for voltage (CPUs)
A.5.5 CPU 1212C wiring diagrams
A.6 CPU 1214C
A.6.1 General specifications and features
A.6.2 Timers, counters and code blocks supported by CPU 1214C
A.6.3 Digital inputs and outputs
A.6.4 Analog inputs
A.6.4.1 Step response of the built-in analog inputs of the CPU
A.6.4.2 Sample time for the built-in analog ports of the CPU
A.6.4.3 Measurement ranges of the analog inputs for voltage (CPUs)
A.6.5 CPU 1214C wiring diagrams
A.7 CPU 1215C
A.7.1 General specifications and features
A.7.2 Timers, counters and code blocks supported by CPU 1215C
A.7.3 Digital inputs and outputs
A.7.4 Analog inputs and outputs
A.7.4.1 Step response of built-in analog inputs of the CPU
A.7.4.2 Sample time for the built-in analog ports of the CPU
A.7.4.3 Measurement ranges of the analog inputs for voltage (CPUs)
A.7.4.4 Analog output specifications
A.7.5 CPU 1215C wiring diagrams
A.8 CPU 1217C
A.8.1 General specifications and features
A.8.2 Timers, counters and code blocks supported by CPU 1217C
A.8.3 Digital inputs and outputs
A.8.4 Analog inputs and outputs
A.8.4.1 Analog input specifications
A.8.4.2 Step response of built-in analog inputs of the CPU
A.8.4.3 Sample time for the built-in analog ports of the CPU
A.8.4.4 Measurement ranges of the analog inputs for voltage (CPUs)
A.8.4.5 Analog output specifications
A.8.5 CPU 1217C wiring diagrams
A.8.6 CPU 1217C Differential Input (DI) detail and application example
A.8.7 CPU 1217C Differential Output (DQ) detail and application example
A.9 Digital signal modules (SMs)
A.9.1 SM 1221 digital input specifications
A.9.2 SM 1222 8-point digital output specifications
A.9.3 SM 1222 16-point digital output specifications
A.9.4 SM 1223 digital input/output V DC specifications
A.9.5 SM 1223 digital input/output V AC specifications
A.10 Analog signal modules (SMs)
A.10.1 SM 1231 analog input module specifications
A.10.2 SM 1232 analog output module specifications
A.10.3 SM 1234 analog input/output module specifications
A.10.4 Step response of the analog inputs
A.10.5 Sample time and update times for the analog inputs
A.10.6 Measurement ranges of the analog inputs for voltage and current (SB and SM)
A.10.7 Measurement ranges of the analog outputs for voltage and current (SB and SM)
A.11 Thermocouple and RTD signal modules (SMs)
A.11.1 SM 1231 Thermocouple
A.11.1.1 Basic operation for a thermocouple
A.11.1.2 Selection tables for the SM 1231 thermocouple
A.11.2 SM 1231 RTD
A.11.2.1 Selection tables for the SM 1231 RTD
A.12 Technology modules
A.12.1 SM 1278 4xIO-Link Master SM
A.12.1.1 SM 1278 4xIO-Link Master overview
A.12.1.2 Connecting
A.12.1.3 Parameters/address space
A.12.1.4 Interrupt, error, and system alarms
A.13 Digital signal boards (SBs)
A.13.1 SB 1221 200 kHz digital input specifications
A.13.2 SB 1222 200 kHz digital output specifications
A.13.3 SB 1223 200 kHz digital input / output specifications
A.13.4 SB 1223 2 X 24 V DC input / 2 X 24 V DC output specifications
A.14 Analog signal boards (SBs)
A.14.1 SB 1231 1 analog input specifications
A.14.2 SB 1232 1 analog output specifications
A.14.3 Measurement ranges for analog inputs and outputs
A.14.3.1 Step response of the analog inputs
A.14.3.2 Sample time and update times for the analog inputs
A.14.3.3 Measurement ranges of the analog inputs for voltage and current (SB and SM)
A.14.3.4 Measurement ranges of the analog outputs for voltage and current (SB and SM)
A.14.4 Thermocouple signal boards (SBs)
A.14.4.1 SB 1231 1 analog thermocouple input specifications
A.14.4.2 Basic operation for a thermocouple
A.14.5 RTD signal boards (SBs)
A.14.5.1 SB 1231 1 analog RTD input specifications
A.14.5.2 Selection tables for the SB 1231 RTD
A.15 BB 1297 Battery board
A.16 Communication interfaces
A.16.1 PROFIBUS
A.16.1.1 CM 1242-5 PROFIBUS DP SLAVE
A.16.1.2 Pinout of the D-sub socket of the CM 1242-5
A.16.1.3 CM 1243-5 PROFIBUS DP Master
A.16.1.4 Pinout of the D-sub socket of the CM 1243-5
A.16.2 CP 1242-7
A.16.2.1 CP 1242-7 GPRS
A.16.2.2 GSM/GPRS antenna ANT794-4MR
A.16.2.3 Flat antenna ANT794-3M
A.16.3 CM 1243-2 AS-i master
A.16.3.1 Technical data for the AS-i master CM 1243-2
A.16.3.2 Electrical connections of the AS-i master
A.16.4 RS232, RS422, and RS485
A.16.4.1 CB 1241 RS485 specifications
A.16.4.2 CM 1241 RS232 specifications
A.16.4.3 CM 1241 RS422/485 specifications
A.17 TeleService (TS Adapter and TS Adapter modular)
A.18 SIMATIC memory cards
A.19 Input simulators
A.20 S7-1200 Potentiometer module
A.21 I/O expansion cable
A.22 Companion products
A.22.1 PM 1207 power module
A.22.2 CSM 1277 compact switch module
A.22.3 CM CANopen module
A.22.4 RF120C communications module
A.22.5 SM 1238 Energy meter module
A.22.6 SIWAREX electronic weighing systems
B Calculating a power budget
C Ordering Information
C.1 CPU modules
C.2 Signal modules (SMs), signal boards (SBs), and battery boards (BBs)
C.3 Communication
C.4 Fail-Safe CPUs and signal modules
C.5 Other modules
C.6 Memory cards
C.7 Basic HMI devices
C.8 Spare parts and other hardware
C.9 Programming software
D Device exchange and spare parts compatibility
D.1 Exchanging a V3.0 CPU for a V4.2 CPU
D.2 S7-1200 V3.0 and earlier terminal block spare kits
Index
&
/
=
>
A
B
C
D
E
F
G
H
I
J
K
L
M
N
O
P
Q
R
S
T
U
V
W
X
Data Type
Timer



 2023年江西萍乡中考道德与法治真题及答案.doc
 2012年重庆南川中考生物真题及答案.doc
 2013年江西师范大学地理学综合及文艺理论基础考研真题.doc
 2020年四川甘孜小升初语文真题及答案I卷.doc
 2020年注册岩土工程师专业基础考试真题及答案.doc
 2023-2024学年福建省厦门市九年级上学期数学月考试题及答案.doc
 2021-2022学年辽宁省沈阳市大东区九年级上学期语文期末试题及答案.doc
 2022-2023学年北京东城区初三第一学期物理期末试卷及答案.doc
 2018上半年江西教师资格初中地理学科知识与教学能力真题及答案.doc
 2012年河北国家公务员申论考试真题及答案-省级.doc
 2020-2021学年江苏省扬州市江都区邵樊片九年级上学期数学第一次质量检测试题及答案.doc
 2022下半年黑龙江教师资格证中学综合素质真题及答案.doc