BLAST
September 16, 2008
1 Introduction
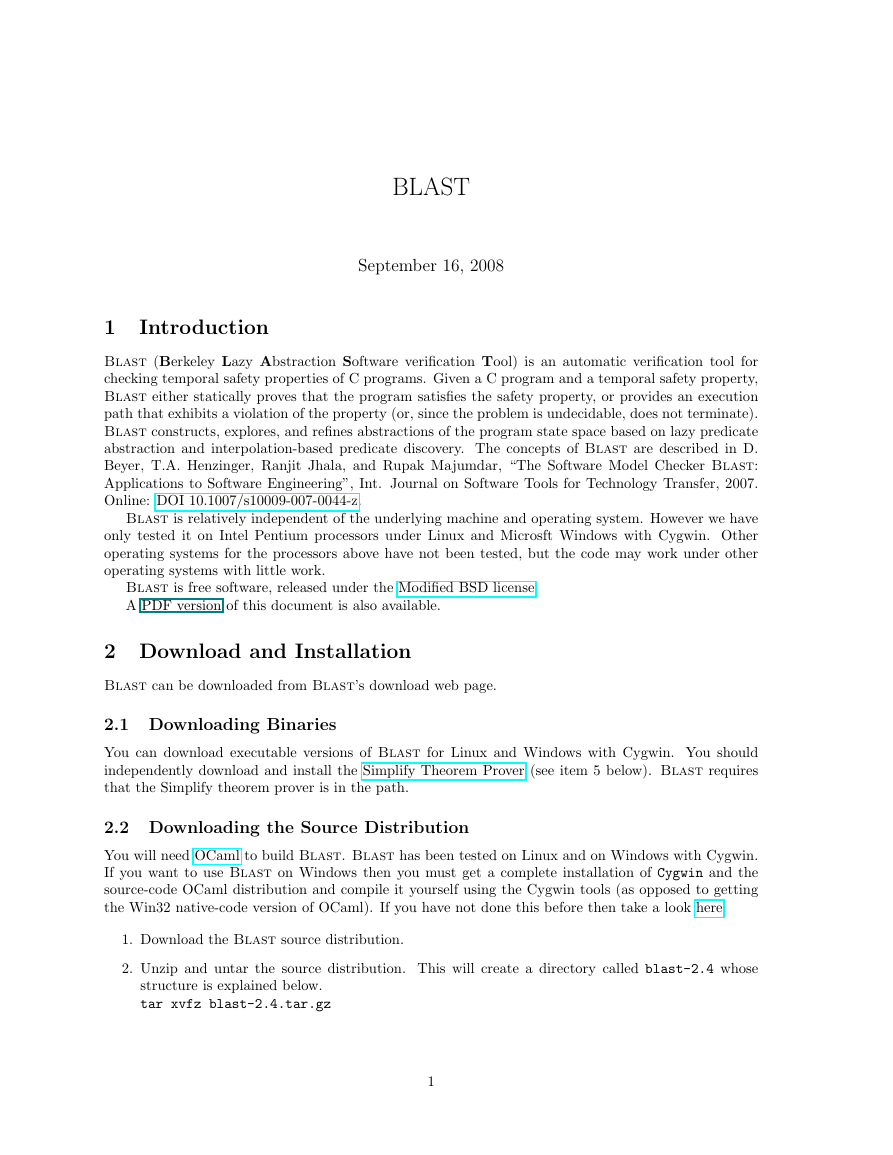
Blast (Berkeley Lazy Abstraction Software verification Tool) is an automatic verification tool for
checking temporal safety properties of C programs. Given a C program and a temporal safety property,
Blast either statically proves that the program satisfies the safety property, or provides an execution
path that exhibits a violation of the property (or, since the problem is undecidable, does not terminate).
Blast constructs, explores, and refines abstractions of the program state space based on lazy predicate
abstraction and interpolation-based predicate discovery. The concepts of Blast are described in D.
Beyer, T.A. Henzinger, Ranjit Jhala, and Rupak Majumdar, “The Software Model Checker Blast:
Applications to Software Engineering”, Int. Journal on Software Tools for Technology Transfer, 2007.
Online: DOI 10.1007/s10009-007-0044-z.
Blast is relatively independent of the underlying machine and operating system. However we have
only tested it on Intel Pentium processors under Linux and Microsft Windows with Cygwin. Other
operating systems for the processors above have not been tested, but the code may work under other
operating systems with little work.
Blast is free software, released under the Modified BSD license.
A PDF version of this document is also available.
2 Download and Installation
Blast can be downloaded from Blast’s download web page.
2.1 Downloading Binaries
You can download executable versions of Blast for Linux and Windows with Cygwin. You should
independently download and install the Simplify Theorem Prover (see item 5 below). Blast requires
that the Simplify theorem prover is in the path.
2.2 Downloading the Source Distribution
You will need OCaml to build Blast. Blast has been tested on Linux and on Windows with Cygwin.
If you want to use Blast on Windows then you must get a complete installation of Cygwin and the
source-code OCaml distribution and compile it yourself using the Cygwin tools (as opposed to getting
the Win32 native-code version of OCaml). If you have not done this before then take a look here.
1. Download the Blast source distribution.
2. Unzip and untar the source distribution. This will create a directory called blast-2.4 whose
structure is explained below.
tar xvfz blast-2.4.tar.gz
1
�
3. Enter the blast-2.4/blast directory and run GNU Make to build the distribution.
cd blast-2.4/blast
make distclean
make
4. You should now find the executables pblast.opt and spec.opt in the directory bin. These
are symbolic links to files of the same name in the directory psrc and spec, respectively. The
executable pblast.opt is the Blast model checker, the executable spec.opt is the specification
instrumenter.
5. You should also download and install the Simplify Theorem Prover. This involves putting the
executables Simplify (Linux) or Simplify.exe (Windows) in the bin directory. Additionally,
Blast has interfaces to the Cvc Theorem Prover, should you wish to install and use this tool for
theorem prover calls. Again, this involves putting the executable for Cvc in the bin directory.
Note that in order for Blast to use Simplify or Cvc, the executable for Simplify and Cvc must
be in your current path. It is a good idea to add the Blast bin directory to your path. Blast
can also use any other SMT-LIB compatible theorem prover for its satisfiability queries (cf. release
notes).
6. Blast also comes with an independent GUI. In order to install the GUI, you must download and
install the LablGTK package in addition to Ocaml. After you have installed LablGTK, you can
build the GUI by going to the blast-2.4 directory and typing:
make gui
This will create the GUI executable blastgui.opt in the directory bin.
7. Blast (actually the GUI) requires the use of the environment variable BLASTHOME. Therefore you
should set the environment variable BLASTHOME to point to the directory blast-2.4/blast where
you have downloaded Blast.
8. Congratulations! You can now start using Blast.
3 A Tutorial Introduction to Blast
In this section we show how Blast can be used to check safety properties of C code. We shall discuss
how to specify safety properties in the Blast specification language, and the various options that Blast
takes to check C code against the specification. Blast can be run both from the command line and
from a GUI.
3.1 Reachability Checking
The simplest way to write a program that Blast should check is to specify a C label at a program
location that must not be reached. The model checker Blast checks whether such a label in the C
source code is reachable. The basic command for running Blast is ”pblast.opt prog.c -main start
-L errlabel”. This runs the model checker on the program prog.c and checks for reachability of the
error label errlabel, starting from the initial location of function start. The run ends with either
an error trace or with a message that the error was unreachable (or, since the reachability problem
is undecidable, the program may not terminate). The defaults for start and errlabel are main and
ERROR, respectively. Therefore, invoking Blast with pblast.opt prog.c checks whether the program
label ERROR is reachable, when execution begins in the function main.
Consider the following C program:
int main() {
int x,y;
2
�
if (x > y) {
x = x - y;
if (x <= 0) {
ERROR: goto ERROR;
}
}
}
Any other safety property can be transformed to reachability checking by program instrumentation.
For example, more sophisticated specifications are instrumented into the code by preprocessing step
such that failure of the specification amounts to reaching a particular error label.
This also means that you can add your own annotations directly to the code, and have a special
error label to signify violation of the property you are checking.
3.2 Assertion Checking
The most convenient form of safety properties are assertions that specify invariants of the program. The
programmer writes
assert (e)
in the code, where e is a C expression. If the expression e evaluates to 0 at run time, the program
aborts. The intent is that the programmer has reasoned that e is an invariant of the program at the
place the assert has been introduced. Consider for example the following piece of code.
#include
int foo(int x, int y) {
if (x > y) {
x = x - y;
L: assert(x > 0);
}
}
By the constraints introduced by the checks, the programmer knows that at the label L, the value of
x is greater than 0. Assertions are typically checked at run time during the testing phase of a program.
However, using Blast, one can check assertions statically, during compile time. Moreover, there is no
explicit test case to be written.
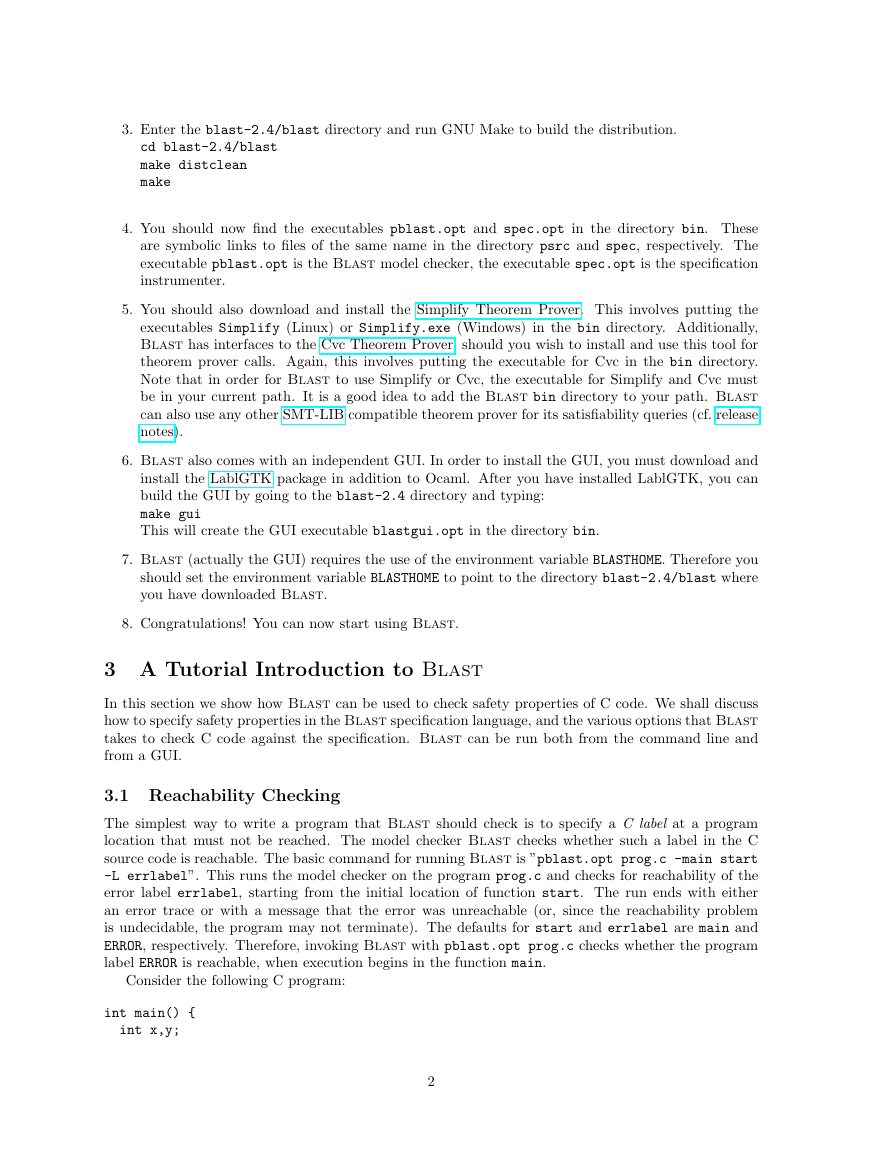
To run the above example through Blast, you must do the following. First, instead of the sys-
tem header file assert.h, you must use the assert.h file provided with Blast (in the directory
test/headers of the distribution. Then, you must produce a preprocessed file containing the source
code. The above file is in test/tutorial/tut1.c. Create a preprocessed file by using the commands:
gcc -E -I $BLASTHOME/test/headers/ tut1.c > tut1.i
This creates a preprocessed file called tut1.i. Now we can run Blast on this file.
Running Blast from the Command Line. The basic command to run Blast is pblast.opt filename -main mainfunction -L ErrorLabel
where filename is the file you are checking, mainfunction is the name of the starting function, and
ErrorLabel is an error label. The default for mainfuntion is main, and ErrorLabel is ERROR, so e.g., if
you are checking a program starting from main, and checking reachability of the label ERROR, you can
just write pblast.opt filename. In our case, the filename is tut1.i, and the start function is foo;
the assertion check automatically introduces an error label ERROR. So we invoke Blast with
pblast.opt tut1.i -main foo
(make sure Simplify is in your path). Blast comes back and reports that the system is safe, i.e., the
assertion is not violated.
3
�Running Blast from the GUI. First, at the command prompt, type blastgui.opt after making
sure that that file is in your path. First we must load the file foo.i: this is done by clicking on File
and then selecting Load Source and then selecting the file tut1.i. Next, to run Blast on this file, in
the text pane labelled “Command” type -main foo, and then click the button labelled Run.
The text written into the command pane is the options that Blast is run with -main foo tells
Blast to start the analysis from the function called foo. Quickly, the tool pops up a window that
states that the system is safe, meaning the asserts never fail. In the pane labelled Log, Blast prints
out the predicates that it learns and uses to prove the property. When the model checking is finished,
it comes with other statistics related to the analysis, the number of iterations, and the number of
refinements required to prove the property.
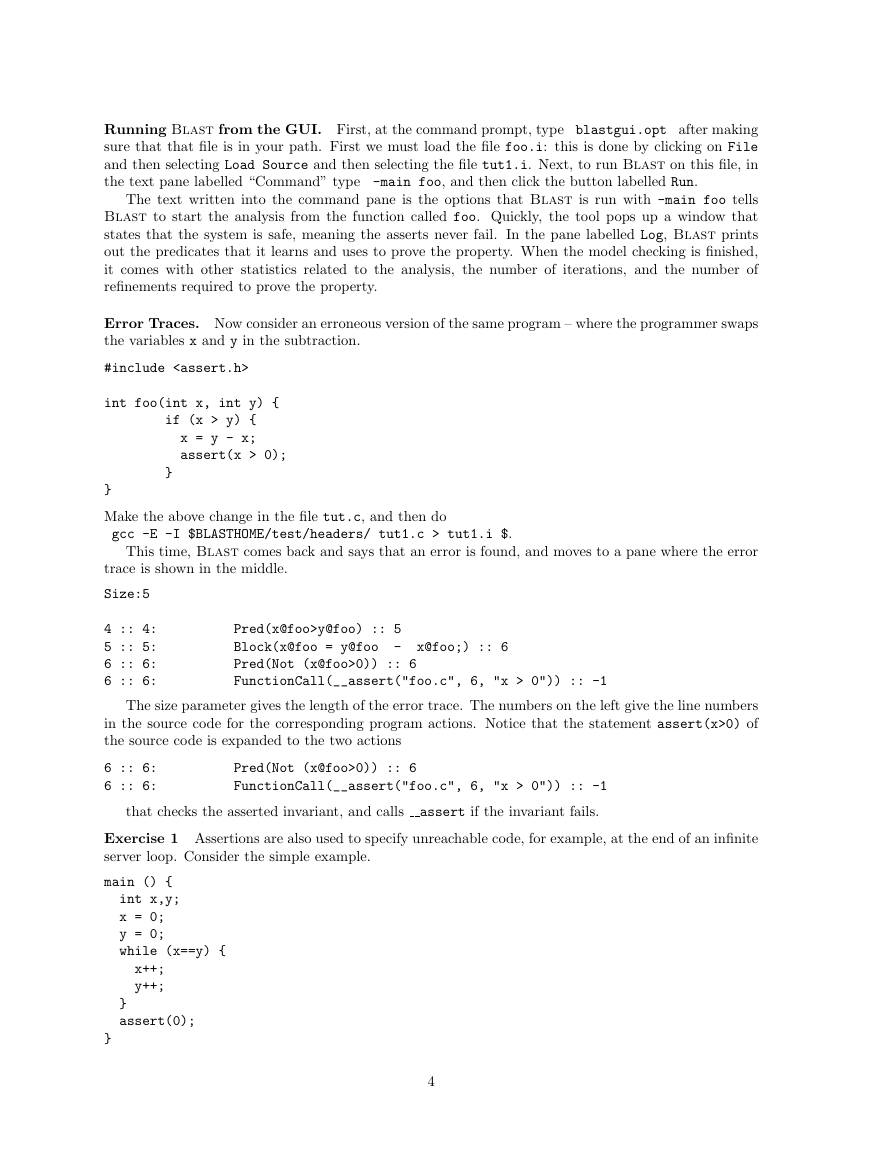
Error Traces. Now consider an erroneous version of the same program – where the programmer swaps
the variables x and y in the subtraction.
#include
int foo(int x, int y) {
if (x > y) {
x = y - x;
assert(x > 0);
}
}
Make the above change in the file tut.c, and then do
gcc -E -I $BLASTHOME/test/headers/ tut1.c > tut1.i $.
This time, Blast comes back and says that an error is found, and moves to a pane where the error
trace is shown in the middle.
Size:5
4 :: 4:
5 :: 5:
6 :: 6:
6 :: 6:
Pred(x@foo>y@foo) :: 5
Block(x@foo = y@foo
-
Pred(Not (x@foo>0)) :: 6
FunctionCall(__assert("foo.c", 6, "x > 0")) :: -1
x@foo;) :: 6
The size parameter gives the length of the error trace. The numbers on the left give the line numbers
in the source code for the corresponding program actions. Notice that the statement assert(x>0) of
the source code is expanded to the two actions
6 :: 6:
6 :: 6:
Pred(Not (x@foo>0)) :: 6
FunctionCall(__assert("foo.c", 6, "x > 0")) :: -1
assert if the invariant fails.
that checks the asserted invariant, and calls
Exercise 1 Assertions are also used to specify unreachable code, for example, at the end of an infinite
server loop. Consider the simple example.
main () {
int x,y;
x = 0;
y = 0;
while (x==y) {
x++;
y++;
}
assert(0);
}
4
�Check that Blast finds that the assert is indeed unreachable (note that assert(0) always fails).
3.3 Temporal Safety Specifications
Assertions are a particularly simple and local way to specify program correctness. More generally, we
are interested in temporal safety properties, where we wish to check that our program satisfies some
finite state property. For example, we might wish to check that a program manipulating locks acquires
and releases locks in strict alternation (that is, two calls to lock without a call to unlock in the middle
is an error, and vice versa). More generally, we wish to check safety properties concerning the proper
sequencing of program “events”. Let us be concrete. Consider the following program that manipulates
locks (in the file tut2.c).
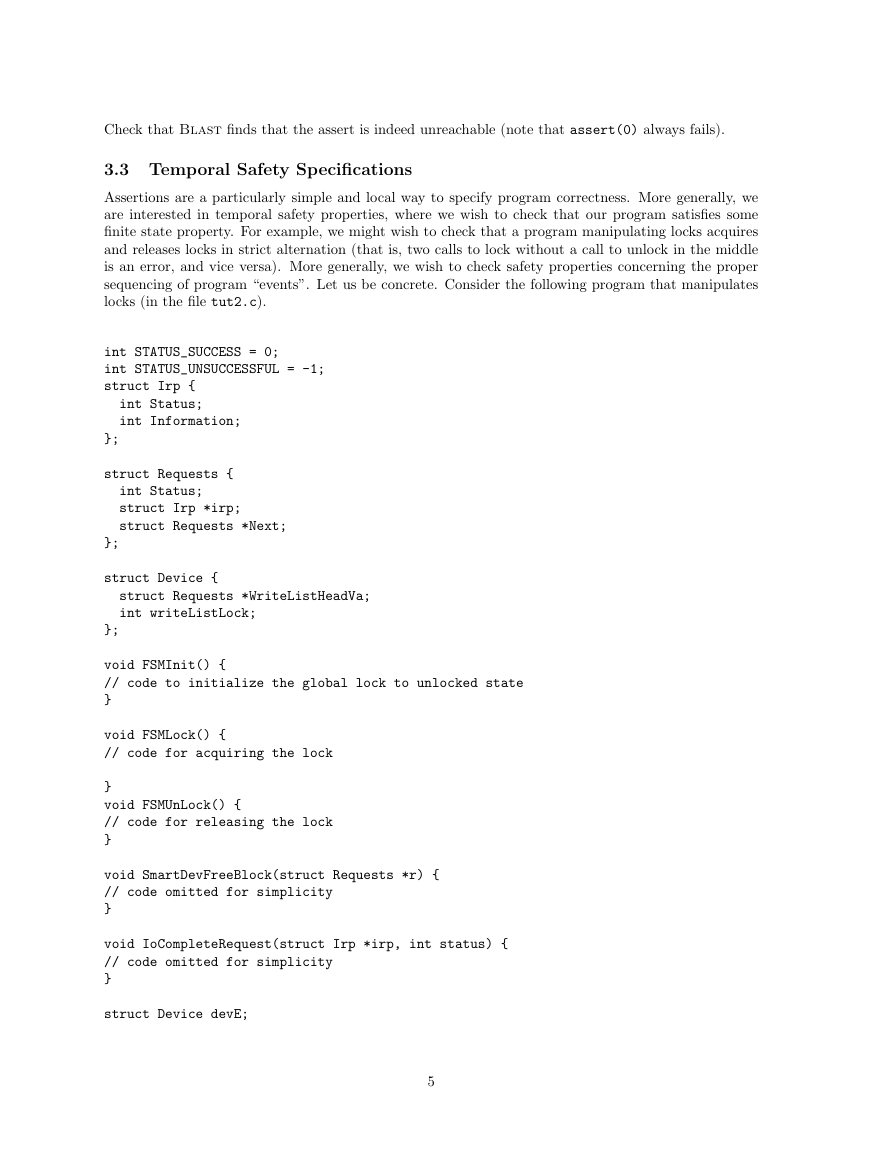
int STATUS_SUCCESS = 0;
int STATUS_UNSUCCESSFUL = -1;
struct Irp {
int Status;
int Information;
};
struct Requests {
int Status;
struct Irp *irp;
struct Requests *Next;
};
struct Device {
struct Requests *WriteListHeadVa;
int writeListLock;
};
void FSMInit() {
// code to initialize the global lock to unlocked state
}
void FSMLock() {
// code for acquiring the lock
}
void FSMUnLock() {
// code for releasing the lock
}
void SmartDevFreeBlock(struct Requests *r) {
// code omitted for simplicity
}
void IoCompleteRequest(struct Irp *irp, int status) {
// code omitted for simplicity
}
struct Device devE;
5
�
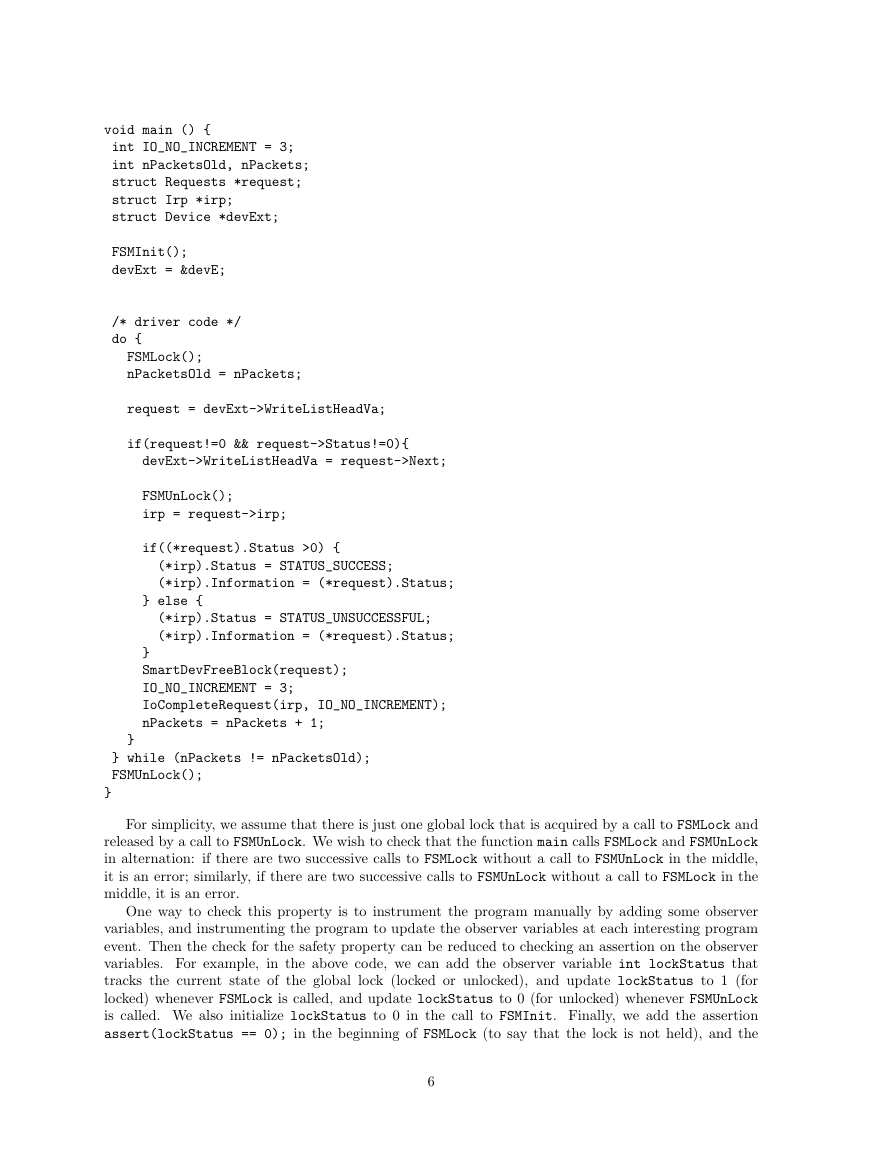
void main () {
int IO_NO_INCREMENT = 3;
int nPacketsOld, nPackets;
struct Requests *request;
struct Irp *irp;
struct Device *devExt;
FSMInit();
devExt = &devE;
/* driver code */
do {
FSMLock();
nPacketsOld = nPackets;
request = devExt->WriteListHeadVa;
if(request!=0 && request->Status!=0){
devExt->WriteListHeadVa = request->Next;
FSMUnLock();
irp = request->irp;
if((*request).Status >0) {
(*irp).Status = STATUS_SUCCESS;
(*irp).Information = (*request).Status;
} else {
(*irp).Status = STATUS_UNSUCCESSFUL;
(*irp).Information = (*request).Status;
}
SmartDevFreeBlock(request);
IO_NO_INCREMENT = 3;
IoCompleteRequest(irp, IO_NO_INCREMENT);
nPackets = nPackets + 1;
}
} while (nPackets != nPacketsOld);
FSMUnLock();
}
For simplicity, we assume that there is just one global lock that is acquired by a call to FSMLock and
released by a call to FSMUnLock. We wish to check that the function main calls FSMLock and FSMUnLock
in alternation: if there are two successive calls to FSMLock without a call to FSMUnLock in the middle,
it is an error; similarly, if there are two successive calls to FSMUnLock without a call to FSMLock in the
middle, it is an error.
One way to check this property is to instrument the program manually by adding some observer
variables, and instrumenting the program to update the observer variables at each interesting program
event. Then the check for the safety property can be reduced to checking an assertion on the observer
variables. For example, in the above code, we can add the observer variable int lockStatus that
tracks the current state of the global lock (locked or unlocked), and update lockStatus to 1 (for
locked) whenever FSMLock is called, and update lockStatus to 0 (for unlocked) whenever FSMUnLock
is called. We also initialize lockStatus to 0 in the call to FSMInit. Finally, we add the assertion
assert(lockStatus == 0); in the beginning of FSMLock (to say that the lock is not held), and the
6
�
assertion assert(lockStatus == 1); in the beginning of FSMUnLock (to say that the lock is held).
Then the instrumented program satisfies our property iff the assertions are never violated.
The problem with this instrumentation is that it is specific for this code, and tedious to do manually.
Therefore Blast comes with a specification language where safety properties can be specified at a
higher level. The specification is automatically compiled into an instrumented program with assertions
as above.
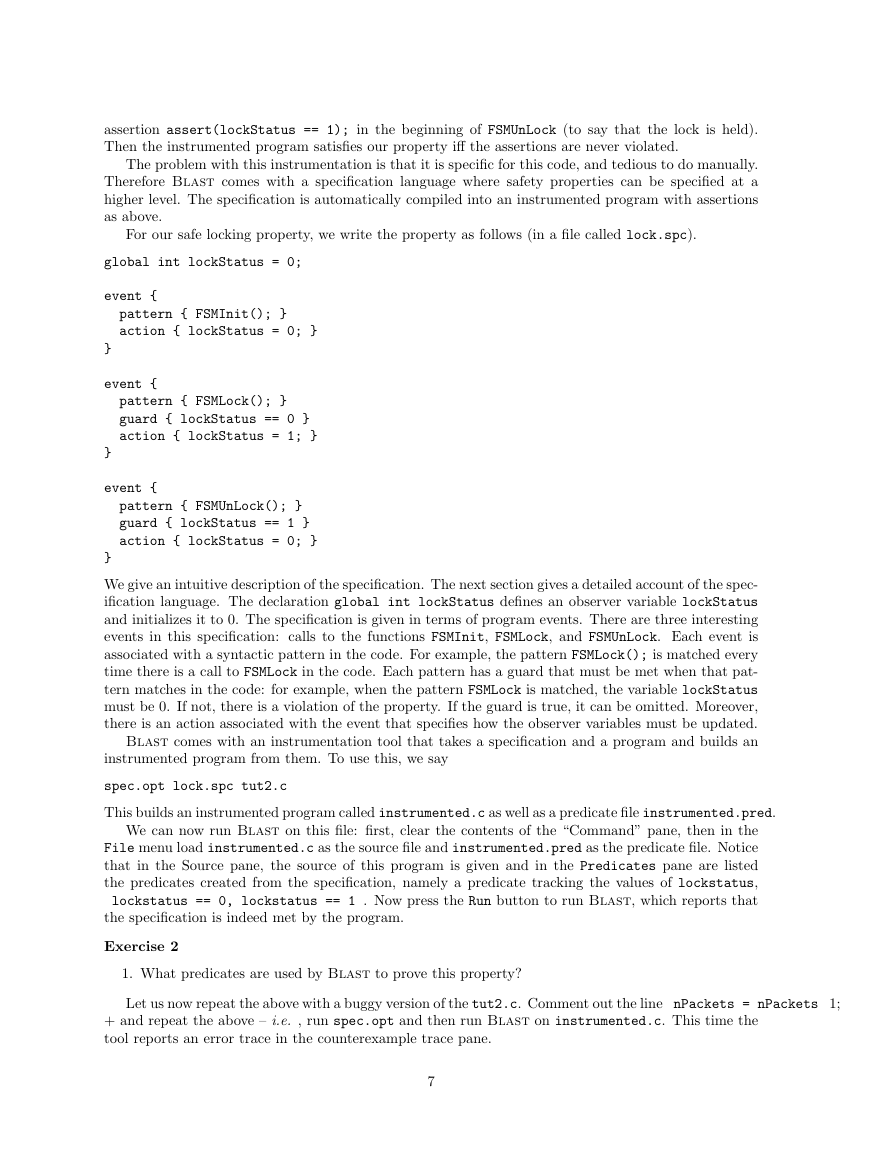
For our safe locking property, we write the property as follows (in a file called lock.spc).
global int lockStatus = 0;
event {
pattern { FSMInit(); }
action { lockStatus = 0; }
}
event {
pattern { FSMLock(); }
guard { lockStatus == 0 }
action { lockStatus = 1; }
}
event {
pattern { FSMUnLock(); }
guard { lockStatus == 1 }
action { lockStatus = 0; }
}
We give an intuitive description of the specification. The next section gives a detailed account of the spec-
ification language. The declaration global int lockStatus defines an observer variable lockStatus
and initializes it to 0. The specification is given in terms of program events. There are three interesting
events in this specification: calls to the functions FSMInit, FSMLock, and FSMUnLock. Each event is
associated with a syntactic pattern in the code. For example, the pattern FSMLock(); is matched every
time there is a call to FSMLock in the code. Each pattern has a guard that must be met when that pat-
tern matches in the code: for example, when the pattern FSMLock is matched, the variable lockStatus
must be 0. If not, there is a violation of the property. If the guard is true, it can be omitted. Moreover,
there is an action associated with the event that specifies how the observer variables must be updated.
Blast comes with an instrumentation tool that takes a specification and a program and builds an
instrumented program from them. To use this, we say
spec.opt lock.spc tut2.c
This builds an instrumented program called instrumented.c as well as a predicate file instrumented.pred.
We can now run Blast on this file: first, clear the contents of the “Command” pane, then in the
File menu load instrumented.c as the source file and instrumented.pred as the predicate file. Notice
that in the Source pane, the source of this program is given and in the Predicates pane are listed
the predicates created from the specification, namely a predicate tracking the values of lockstatus,
lockstatus == 0, lockstatus == 1 . Now press the Run button to run Blast, which reports that
the specification is indeed met by the program.
Exercise 2
1. What predicates are used by Blast to prove this property?
Let us now repeat the above with a buggy version of the tut2.c. Comment out the line nPackets = nPackets 1;
+ and repeat the above – i.e. , run spec.opt and then run Blast on instrumented.c. This time the
tool reports an error trace in the counterexample trace pane.
7
�
3.3.1 The Counterexample Trace Pane
The counterexample trace pane is broken into 3 subpanes – the leftmost is the program source, the
middle pane is the sequence of operations that is the counterexample and the rightmost pane contains
the state of the system given by values for the various predicates in the top half and the function call
stack in the lower pane at the corresponding points in the counterexample. One can see the state of the
system at different points of the trace by clicking on the corresponding operation in the middle pane.
When one chooses an operation in the middle pane, the corresponding program text is highlighted in
the left pane and the predicate values and control stack are shown in the right pane. Alternatively, one
can go back and forth along the trace using the arrows along the bottom.
Adjacent The first pair move to the appropriate adjacent operation,
Undo/Redo The second pair are like web-browser buttons in that they move to the previous or next operation
among the various operations that have been hitherto selected,
FF/REW The third pair move to the next or previous point in the trace where the values of the predicates are
different from the present values – thus they skip over irrelevant operations and proceed directly
to the nearest operation that changes the values of the predicates.
Pred Change The fourth pair are used after first selecting some predicate in the rightmost pane – after selecting
the predicate if one clicks the right (left) button one is taken to the first operation in the future
(past) where the value of that predicate is about to (has just) change(d). This pair is used to see
which operations cause a predicate to get its value at some point in the trace.
In the given counterexample, we see that the first operation is a call to __initialize__ which is a
spec function that sets the initial value of the spec variable lockStatus. The very next statement sets
lockStatus to 0, and on selecting that operation, notice that in the rightmost pane, the state is such
that lockStatus == 0 and lockStatus == 1 is false (i.e.
its negation is true). In this pane, select
the predicate lockStatus == 0 and then click the Right Pred. Change button (the right arrow with
the orange “sun” behind it). The gui leaps forward to the operation where lockStatus is going to be
set to 1. On pressing the Undo button, the gui jumps back to the previous operation that was being
viewed. You can play around with the trace and view the various operations and convince yourself that
this is indeed a violation of the specification.
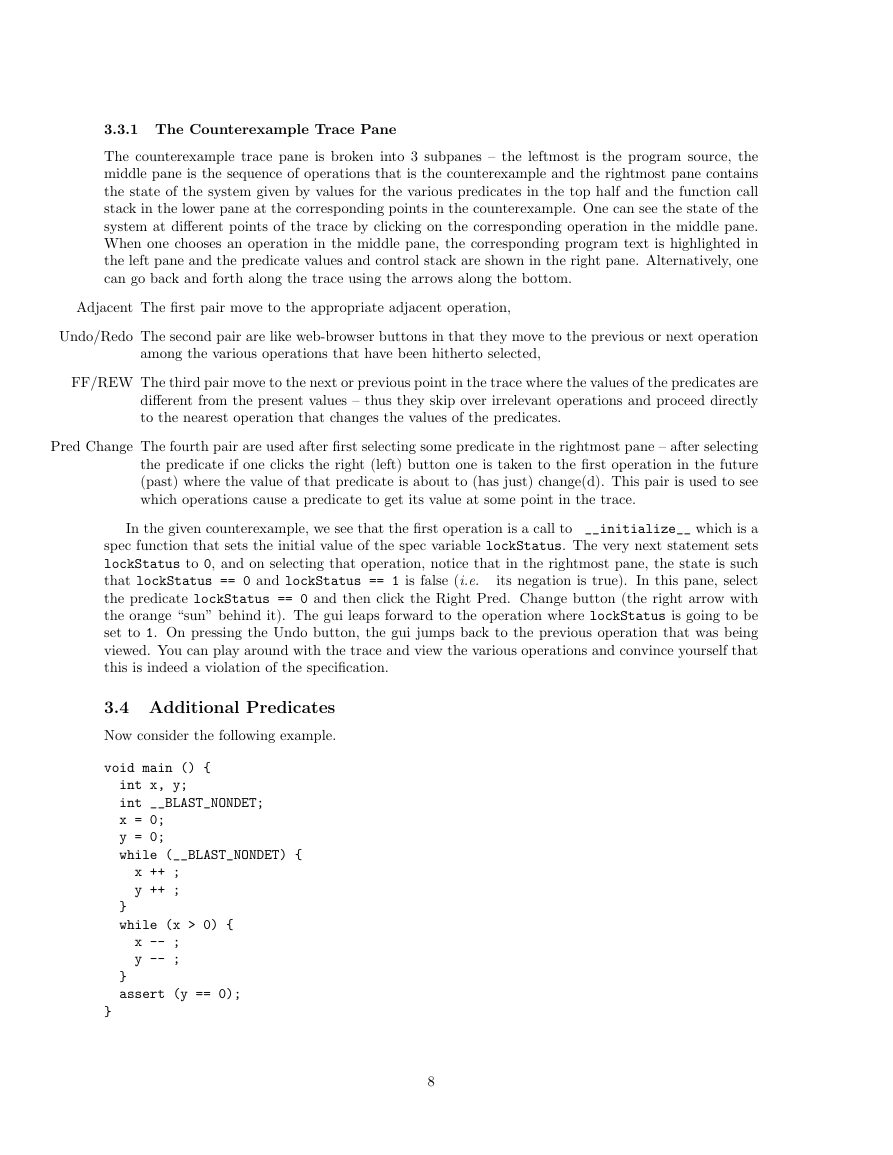
3.4 Additional Predicates
Now consider the following example.
void main () {
int x, y;
int __BLAST_NONDET;
x = 0;
y = 0;
while (__BLAST_NONDET) {
x ++ ;
y ++ ;
}
while (x > 0) {
x -- ;
y -- ;
}
assert (y == 0);
}
8
�



 2023年江西萍乡中考道德与法治真题及答案.doc
 2012年重庆南川中考生物真题及答案.doc
 2013年江西师范大学地理学综合及文艺理论基础考研真题.doc
 2020年四川甘孜小升初语文真题及答案I卷.doc
 2020年注册岩土工程师专业基础考试真题及答案.doc
 2023-2024学年福建省厦门市九年级上学期数学月考试题及答案.doc
 2021-2022学年辽宁省沈阳市大东区九年级上学期语文期末试题及答案.doc
 2022-2023学年北京东城区初三第一学期物理期末试卷及答案.doc
 2018上半年江西教师资格初中地理学科知识与教学能力真题及答案.doc
 2012年河北国家公务员申论考试真题及答案-省级.doc
 2020-2021学年江苏省扬州市江都区邵樊片九年级上学期数学第一次质量检测试题及答案.doc
 2022下半年黑龙江教师资格证中学综合素质真题及答案.doc