Introduction
Camera Preparations
Basic Operations
Techniques for Taking Pictures
Mode C / Mode N / Mode M
Playback Mode P
SET UP Mode G
Appendix
1
2
3
4
5
6
7
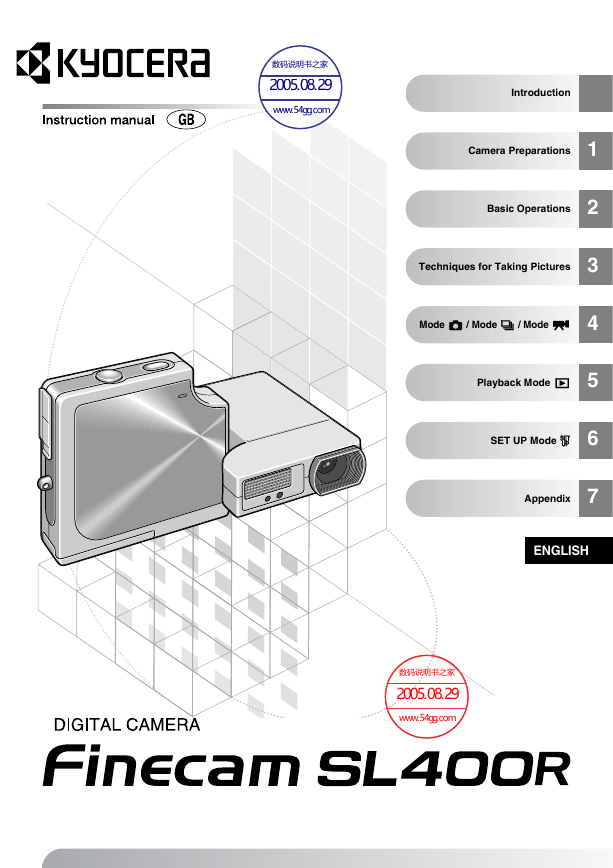
ENGLISH
�
FCC COMPLIANCE STATEMENT FOR AMERICAN USERS
KYOCERA DIGITAL STILL CAMERA
Tested To Comply With FCC Standards
FOR HOME OR OFFICE USE
FCC Statement
This device complies with Part 15 of the FCC Rules. Operation is subject to the
following two conditions:
(1) This device may not cause harmful interference, and (2) this device must accept
any interference received, including interference that may cause undesired operation.
I
n
t
r
o
d
u
c
t
i
o
n
NOTE
This equipment has been tested and found to comply with the limits for a Class B
digital device, pursuant to Part 15 of the FCC Rules. These limits are designed to
provide reasonable protection against harmful interference in a residential installation.
This equipment generates, uses and can radiate radio frequency energy and, if not
installed and used in accordance with the instructions, may cause harmful
interference to radio communications. However, there is no guarantee that
interference will not occur in a particular installation. If this equipment does cause
harmful interference to radio or television reception, which can be determined by
turning the equipment off and on, the user is encouraged to try to correct the
interference by one or more of the following measures:
• Change the direction of the radio or TV antenna. Move the equipment or the radio or
TV. For example, if the equipment is to the right of the TV, move it to the left of the
TV. Or, move the equipment farther away from the radio or TV.
• Plug the equipment into a different outlet. Do not plug your radio or TV into the same
circuit as your equipment.
• Ensure that all expansion slots (on the back or side of the equipment) are covered.
Also, ensure that all metal retaining brackets are tightly attached to the equipment.
• If these suggestions do not help, consult your equipment dealer or experienced
radio/TV technician for help.
CAUTION
If you modify the camera in any way, without getting approval from KYOCERA
CORPORATION, your camera may violate FCC regulations. Violation of FCC
regulations may cause the FCC to void your right to use the modified camera.
Shielded cables must be used for this equipment to comply with the relevant FCC
regulation.
For customers in Canada CAUTION
This Class B digital apparatus complies with Canadian ICES-003.
Cet appareil numérique de la classe B est conforme à la norme NMB-003 du Canada.
2
�
Introduction
Thank you for purchasing this Kyocera product.
The KYOCERA Finecam SL400R is a powerful, high-resolution digital camera featuring an
ultra-slim body and 3✕ optical zoom lens.
Before using the camera, please read this Instruction Manual carefully to ensure that you
use the camera correctly and continue to enjoy this Kyocera product for many years to
come.
Test Photos and Warranties
Make it a practice to take test shots before starting any important photography session, in
order to confirm that images are being recorded properly. Kyocera will not be held
responsible for failure of photographs to be recorded or transmitted to a computer as the
result of any defects in recording media (SD memory card or Multi-Media Card (MMC)).
Notes on Copyright
Photographs taken of professional performances, exhibitions, displays, or copyrighted
materials may be used only for your own personal enjoyment, and only with the consent of
the copyright holders. Other use may constitute violation of applicable copyright laws. Be
aware that some performances, exhibitions, or displays may impose restrictions on
photographic or other recording even when the purpose of such recordings are personal
enjoyment.
I
n
t
r
o
d
u
c
t
i
o
n
• The SD logo is a registered trademark.
• MultiMediaCard™ is a registered trademark of Infineon Technologies AG (Germany),
licensed to MMCA (MultiMediaCard Association).
• Microsoft and Windows are registered trademarks of Microsoft Corporation in the United
• Macintosh, Mac OS, QuickTime™, and the QuickTime logo are registered trademarks of
States and/or other countries.
Apple Computer, Inc.
• PRINT Image Matching is trademark of Seiko Epson Corporation. The PRINT Image
Matching logo is a trademark of Seiko Epson Corporation.
• The DPOF trademark indicates that the product conforms to the specifications of the
“Digital Print Order Format (DPOF) for digital camera print information”. Copyright for
DPOF Version 1.00 is held jointly by Canon Inc., Eastman Kodak Co., Fuji Photo Film Co.,
Ltd and Matsushita Electric Industrial Co., Ltd.
• All other corporate and brand names are the registered trademarks or trademarks of their
respective owners.
PRINT Image Matching
* This product supports PRINT Image Matching II. When used in combination, PRINT
Image Matching II enabled digital still cameras, printers and software help photographers
to produce images more faithful to their intentions.
3
�
I
n
t
r
o
d
u
c
t
i
o
n
Contents
Introduction.............................................................................................................. 3
Test Photos and Warranties........................................................................... 3
Notes on Copyright......................................................................................... 3
How to Use this Instruction Manual................................................................ 7
Nomenclature Names of camera controls and reference pages.............. 12
A World of Possibilities................................................................................. 13
1 Camera Preparations........................................................................ 1-1
Inserting the Battery Pack ...................................................................................1-2
Removing the Battery Pack .................................................................................1-2
Charging the Battery ............................................................................................1-3
Loading the Memory Card ...................................................................................1-3
Removing the Memory Card ................................................................................1-4
Switching the Camera On ....................................................................................1-5
Setting the Date and Time....................................................................................1-6
Using the Accessories .........................................................................................1-7
2 Basic Operations .............................................................................. 2-1
Taking Pictures — Shooting Still Images...........................................................2-2
Shooting Movies ...................................................................................................2-4
Viewing Images – Still Image Playback ..............................................................2-6
Viewing Images – Movie Playback......................................................................2-6
Displaying Information for Playback Images – INFORMATION........................2-7
Checking Photography Data and Erasing Images – Manual REC Review.........2-8
Deleting Unwanted Images – Erasing Images ...................................................2-8
When the Memory Card is Full... .......................................................................2-10
Connecting the Camera to a Computer ............................................................2-11
Computer hardware and software requirements .......................................2-11
Connecting to a Windows PC............................................................................2-12
Installing the USB drivers (Windows 98 and Windows 98SE only) ...........2-12
Viewing images on a Windows PC............................................................2-13
Disconnecting the USB cable from a Windows PC ...................................2-16
Deleting or uninstalling devices (Windows 98 and Windows 98SE only) ....2-18
Connecting to a Macintosh................................................................................2-20
Viewing images on a Macintosh computer................................................2-20
Disconnecting the USB cable from a Macintosh computer .......................2-22
Digital Printing on a Printer ...............................................................................2-23
3 Techniques for Taking Pictures ...................................................... 3-1
Using Focus Lock to Take Pictures ....................................................................3-2
Using the Zoom Button – Optical Zoom and Digital Zoom...............................3-3
Setting the Best Camera Mode for the Scene Shot — SCENE Button I .....3-4
Displaying the Scene Mode menu...............................................................3-4
Shooting modes ..........................................................................................3-5
Using Continuous Shooting Mode......................................................................3-7
Switching the LCD Monitor Icon Display and Backlight On and Off ...............3-9
Specifying the settings ................................................................................3-9
Conserving Battery Power.................................................................................3-10
4
�
I
n
t
r
o
d
u
c
t
i
o
n
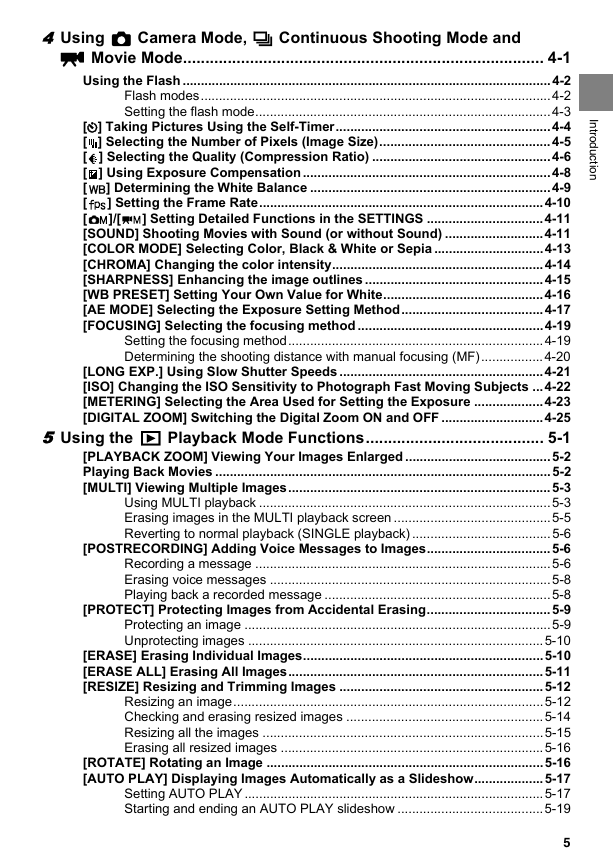
4 Using C Camera Mode, N Continuous Shooting Mode and
M Movie Mode................................................................................. 4-1
Using the Flash .....................................................................................................4-2
Flash modes................................................................................................4-2
Setting the flash mode.................................................................................4-3
[t] Taking Pictures Using the Self-Timer...........................................................4-4
] Selecting the Number of Pixels (Image Size)...............................................4-5
[
] Selecting the Quality (Compression Ratio) .................................................4-6
[
] Using Exposure Compensation....................................................................4-8
[
] Determining the White Balance ..................................................................4-9
[
[
] Setting the Frame Rate..............................................................................4-10
[
] Setting Detailed Functions in the SETTINGS ................................4-11
]/[
[SOUND] Shooting Movies with Sound (or without Sound) ...........................4-11
[COLOR MODE] Selecting Color, Black & White or Sepia ..............................4-13
[CHROMA] Changing the color intensity..........................................................4-14
[SHARPNESS] Enhancing the image outlines .................................................4-15
[WB PRESET] Setting Your Own Value for White............................................4-16
[AE MODE] Selecting the Exposure Setting Method.......................................4-17
[FOCUSING] Selecting the focusing method ...................................................4-19
Setting the focusing method......................................................................4-19
Determining the shooting distance with manual focusing (MF).................4-20
[LONG EXP.] Using Slow Shutter Speeds ........................................................4-21
[ISO] Changing the ISO Sensitivity to Photograph Fast Moving Subjects ...4-22
[METERING] Selecting the Area Used for Setting the Exposure ...................4-23
[DIGITAL ZOOM] Switching the Digital Zoom ON and OFF ............................4-25
5 Using the P Playback Mode Functions........................................ 5-1
[PLAYBACK ZOOM] Viewing Your Images Enlarged ........................................5-2
Playing Back Movies ............................................................................................5-2
[MULTI] Viewing Multiple Images........................................................................5-3
Using MULTI playback ................................................................................5-3
Erasing images in the MULTI playback screen ...........................................5-5
Reverting to normal playback (SINGLE playback) ......................................5-6
[POSTRECORDING] Adding Voice Messages to Images..................................5-6
Recording a message .................................................................................5-6
Erasing voice messages .............................................................................5-8
Playing back a recorded message ..............................................................5-8
[PROTECT] Protecting Images from Accidental Erasing..................................5-9
Protecting an image ....................................................................................5-9
Unprotecting images .................................................................................5-10
[ERASE] Erasing Individual Images..................................................................5-10
[ERASE ALL] Erasing All Images......................................................................5-11
[RESIZE] Resizing and Trimming Images ........................................................5-12
Resizing an image.....................................................................................5-12
Checking and erasing resized images ......................................................5-14
Resizing all the images .............................................................................5-15
Erasing all resized images ........................................................................5-16
[ROTATE] Rotating an Image ............................................................................5-16
[AUTO PLAY] Displaying Images Automatically as a Slideshow...................5-17
Setting AUTO PLAY ..................................................................................5-17
Starting and ending an AUTO PLAY slideshow ........................................5-19
5
�
I
n
t
r
o
d
u
c
t
i
o
n
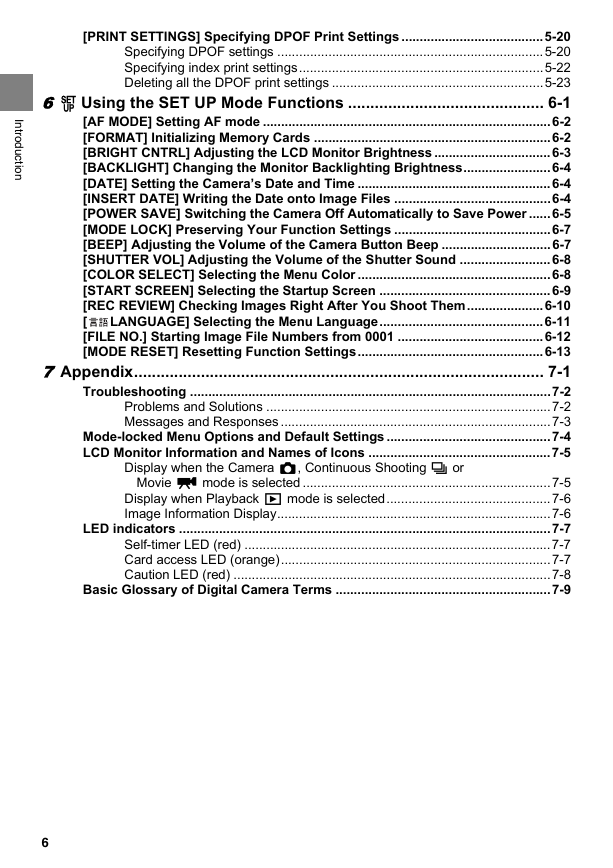
[PRINT SETTINGS] Specifying DPOF Print Settings .......................................5-20
Specifying DPOF settings .........................................................................5-20
Specifying index print settings...................................................................5-22
Deleting all the DPOF print settings ..........................................................5-23
6 G Using the SET UP Mode Functions ............................................ 6-1
[AF MODE] Setting AF mode ...............................................................................6-2
[FORMAT] Initializing Memory Cards .................................................................6-2
[BRIGHT CNTRL] Adjusting the LCD Monitor Brightness ................................6-3
[BACKLIGHT] Changing the Monitor Backlighting Brightness........................6-4
[DATE] Setting the Camera’s Date and Time .....................................................6-4
[INSERT DATE] Writing the Date onto Image Files ...........................................6-4
[POWER SAVE] Switching the Camera Off Automatically to Save Power ......6-5
[MODE LOCK] Preserving Your Function Settings ...........................................6-7
[BEEP] Adjusting the Volume of the Camera Button Beep ..............................6-7
[SHUTTER VOL] Adjusting the Volume of the Shutter Sound .........................6-8
[COLOR SELECT] Selecting the Menu Color .....................................................6-8
[START SCREEN] Selecting the Startup Screen ...............................................6-9
[REC REVIEW] Checking Images Right After You Shoot Them.....................6-10
[
LANGUAGE] Selecting the Menu Language.............................................6-11
[FILE NO.] Starting Image File Numbers from 0001 ........................................6-12
[MODE RESET] Resetting Function Settings...................................................6-13
7 Appendix............................................................................................ 7-1
Troubleshooting ...................................................................................................7-2
Problems and Solutions ..............................................................................7-2
Messages and Responses ..........................................................................7-3
Mode-locked Menu Options and Default Settings .............................................7-4
LCD Monitor Information and Names of Icons ..................................................7-5
Display when the Camera C, Continuous Shooting N or
Movie M mode is selected ....................................................................7-5
Display when Playback P mode is selected.............................................7-6
Image Information Display...........................................................................7-6
LED indicators ......................................................................................................7-7
Self-timer LED (red) ....................................................................................7-7
Card access LED (orange)..........................................................................7-7
Caution LED (red) .......................................................................................7-8
Basic Glossary of Digital Camera Terms ...........................................................7-9
6
�
I
n
t
r
o
d
u
c
t
i
o
n
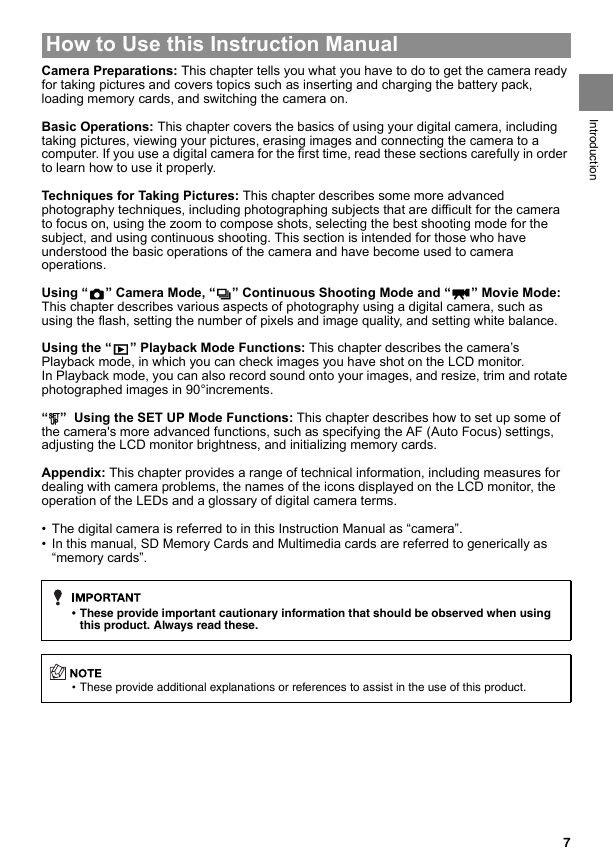
How to Use this Instruction Manual
Camera Preparations: This chapter tells you what you have to do to get the camera ready
for taking pictures and covers topics such as inserting and charging the battery pack,
loading memory cards, and switching the camera on.
Basic Operations: This chapter covers the basics of using your digital camera, including
taking pictures, viewing your pictures, erasing images and connecting the camera to a
computer. If you use a digital camera for the first time, read these sections carefully in order
to learn how to use it properly.
Techniques for Taking Pictures: This chapter describes some more advanced
photography techniques, including photographing subjects that are difficult for the camera
to focus on, using the zoom to compose shots, selecting the best shooting mode for the
subject, and using continuous shooting. This section is intended for those who have
understood the basic operations of the camera and have become used to camera
operations.
Using “C” Camera Mode, “N” Continuous Shooting Mode and “M” Movie Mode:
This chapter describes various aspects of photography using a digital camera, such as
using the flash, setting the number of pixels and image quality, and setting white balance.
Using the “P” Playback Mode Functions: This chapter describes the camera’s
Playback mode, in which you can check images you have shot on the LCD monitor.
In Playback mode, you can also record sound onto your images, and resize, trim and rotate
photographed images in 90°increments.
“G” Using the SET UP Mode Functions: This chapter describes how to set up some of
the camera's more advanced functions, such as specifying the AF (Auto Focus) settings,
adjusting the LCD monitor brightness, and initializing memory cards.
Appendix: This chapter provides a range of technical information, including measures for
dealing with camera problems, the names of the icons displayed on the LCD monitor, the
operation of the LEDs and a glossary of digital camera terms.
• The digital camera is referred to in this Instruction Manual as “camera”.
• In this manual, SD Memory Cards and Multimedia cards are referred to generically as
“memory cards”.
• These provide important cautionary information that should be observed when using
this product. Always read these.
• These provide additional explanations or references to assist in the use of this product.
7
�
I
n
t
r
o
d
u
c
t
i
o
n
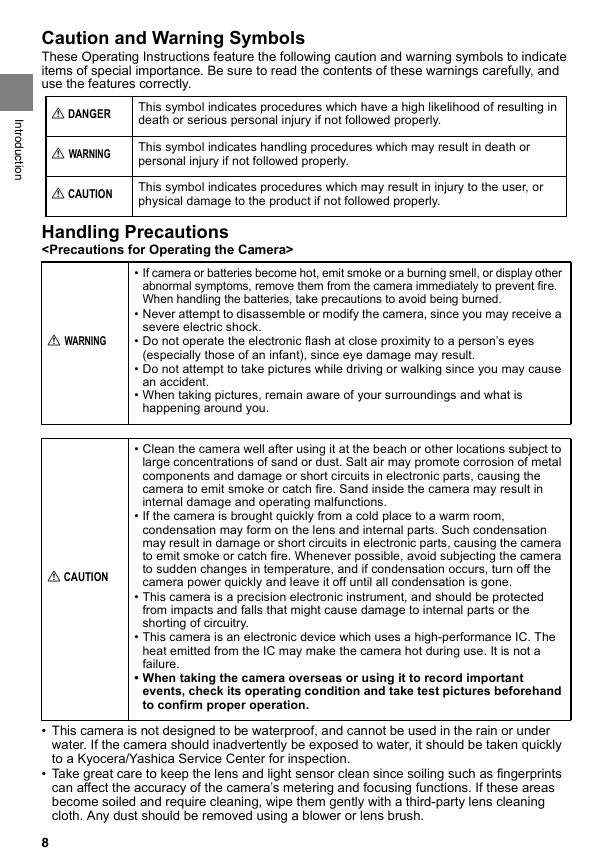
Caution and Warning Symbols
These Operating Instructions feature the following caution and warning symbols to indicate
items of special importance. Be sure to read the contents of these warnings carefully, and
use the features correctly.
a DANGER
a WARNING
a CAUTION
This symbol indicates procedures which have a high likelihood of resulting in
death or serious personal injury if not followed properly.
This symbol indicates handling procedures which may result in death or
personal injury if not followed properly.
This symbol indicates procedures which may result in injury to the user, or
physical damage to the product if not followed properly.
Handling Precautions
a WARNING
a CAUTION
• If camera or batteries become hot, emit smoke or a burning smell, or display other
abnormal symptoms, remove them from the camera immediately to prevent fire.
When handling the batteries, take precautions to avoid being burned.
• Never attempt to disassemble or modify the camera, since you may receive a
severe electric shock.
• Do not operate the electronic flash at close proximity to a person’s eyes
(especially those of an infant), since eye damage may result.
• Do not attempt to take pictures while driving or walking since you may cause
an accident.
• When taking pictures, remain aware of your surroundings and what is
happening around you.
• Clean the camera well after using it at the beach or other locations subject to
large concentrations of sand or dust. Salt air may promote corrosion of metal
components and damage or short circuits in electronic parts, causing the
camera to emit smoke or catch fire. Sand inside the camera may result in
internal damage and operating malfunctions.
• If the camera is brought quickly from a cold place to a warm room,
condensation may form on the lens and internal parts. Such condensation
may result in damage or short circuits in electronic parts, causing the camera
to emit smoke or catch fire. Whenever possible, avoid subjecting the camera
to sudden changes in temperature, and if condensation occurs, turn off the
camera power quickly and leave it off until all condensation is gone.
• This camera is a precision electronic instrument, and should be protected
from impacts and falls that might cause damage to internal parts or the
shorting of circuitry.
• This camera is an electronic device which uses a high-performance IC. The
heat emitted from the IC may make the camera hot during use. It is not a
failure.
• When taking the camera overseas or using it to record important
events, check its operating condition and take test pictures beforehand
to confirm proper operation.
• This camera is not designed to be waterproof, and cannot be used in the rain or under
water. If the camera should inadvertently be exposed to water, it should be taken quickly
to a Kyocera/Yashica Service Center for inspection.
• Take great care to keep the lens and light sensor clean since soiling such as fingerprints
can affect the accuracy of the camera’s metering and focusing functions. If these areas
become soiled and require cleaning, wipe them gently with a third-party lens cleaning
cloth. Any dust should be removed using a blower or lens brush.
8
�


 2023年江西萍乡中考道德与法治真题及答案.doc
 2012年重庆南川中考生物真题及答案.doc
 2013年江西师范大学地理学综合及文艺理论基础考研真题.doc
 2020年四川甘孜小升初语文真题及答案I卷.doc
 2020年注册岩土工程师专业基础考试真题及答案.doc
 2023-2024学年福建省厦门市九年级上学期数学月考试题及答案.doc
 2021-2022学年辽宁省沈阳市大东区九年级上学期语文期末试题及答案.doc
 2022-2023学年北京东城区初三第一学期物理期末试卷及答案.doc
 2018上半年江西教师资格初中地理学科知识与教学能力真题及答案.doc
 2012年河北国家公务员申论考试真题及答案-省级.doc
 2020-2021学年江苏省扬州市江都区邵樊片九年级上学期数学第一次质量检测试题及答案.doc
 2022下半年黑龙江教师资格证中学综合素质真题及答案.doc