SDWANDT
SD-WAN Deployment
and Troubleshooting
Version 1.2
Lab Guide
�
SDWANDT
Lab Guide
Overview
This guide presents the instructions and other information concerning the lab activities for this course.
Outline
This guide includes these activities:
n
n
n
n
n
n
n
n
n
Lab 0: Introduction to the Lab Environment
Lab 1: Access the Internal Lab Devices
Lab 1-1: Reset vEdge Cloud Router
Lab 1-2: Remove vEdge from vManage Inventory
Lab 1-3: Add vEdge to vManage Inventory
Lab 1-4: Configure and Deploy Control-Plane Connectivity
Lab 1-5: Configure and Deploy an Overlay Network
Lab 2-1: Provision and Deploy vManage Templates
Lab 2-2: Provision and Deploy vManage Policies
�
Lab 0: Introduction to the Lab Environment
This procedure details the tasks you will use to access the lab equipment. The diagram below represents the necessary
tasks
Task 1: Connect to your Assigned Student Pod
This procedure details the steps you will use to access the lab.
Step 1
Your instructor will tell you which Student Pod you should be using during the current lab. Determine the
following information about the Student Pod assigned to you for this lab. This information should be
provided to you by your instructor.
n
n
n
n
n
n
Pod Number/Name
Username
Password
Each Pod in the Lab consists of a Team of one or two class participants
Each team has the same topology: 8 vEdge and 6 Controllers (1 vManage, 3 vSmart, and 2 vBond)
Each participant has access to the topology using either of the following methods.
§ Browser: Access to Sandbox and vManage NMS
§ SSH: Provides CLI access for terminal (Mac) or Putty (Windows)
Step 2
Step 3
Log in to your personal computer.
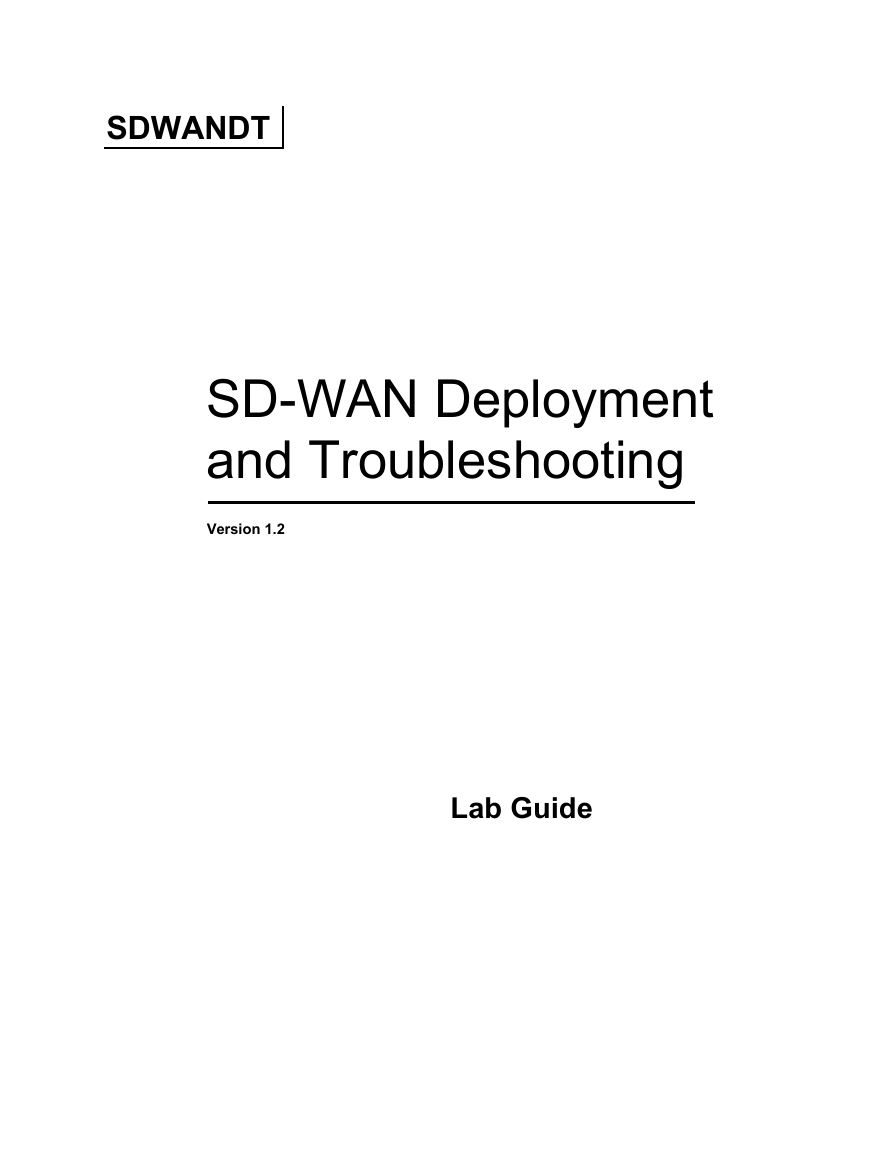
Navigate to https://enterprise.criterionnetworks.com/viptela and enter the credentials provided to you
by your instructor.
SD-WAN Deployment and Troubleshooting (SDWANDT) Lab Guide v1.2
Page 3
�
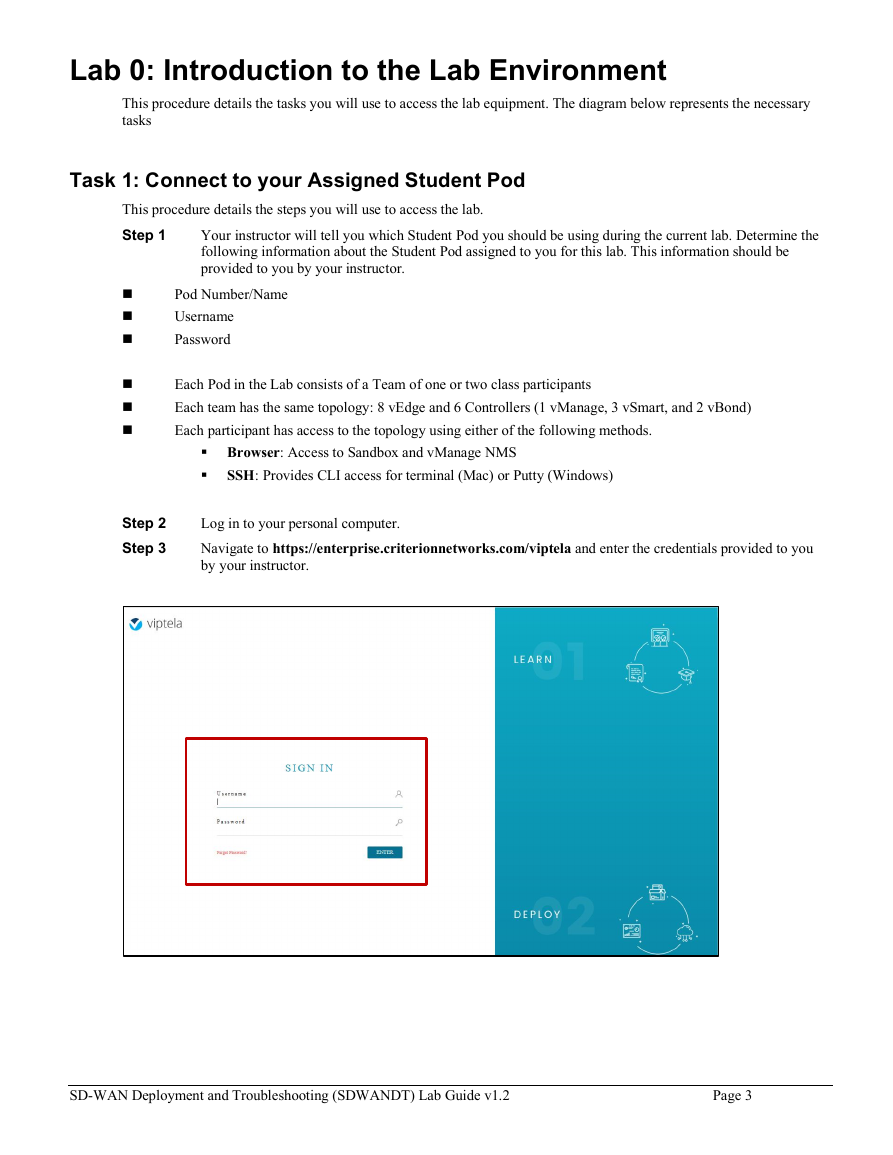
Step 4
Click on Sandboxes
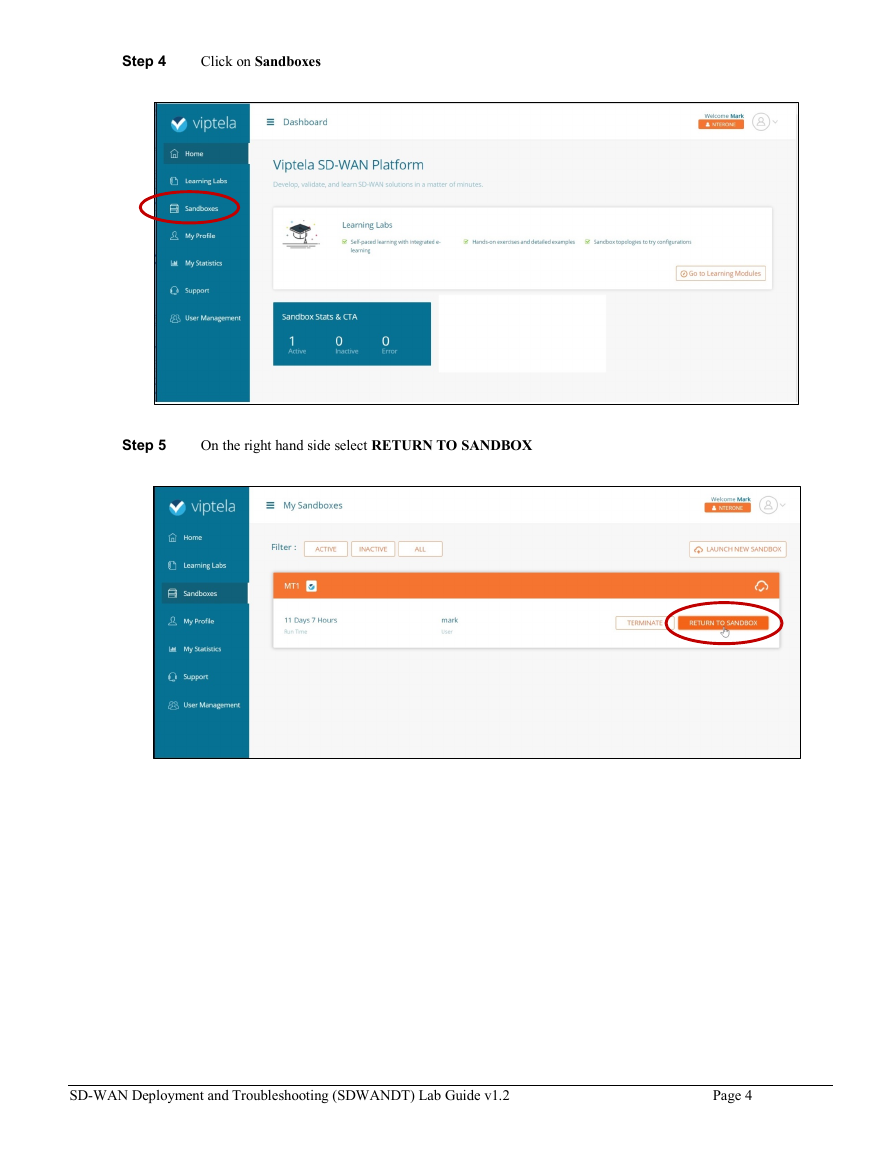
Step 5
On the right hand side select RETURN TO SANDBOX
SD-WAN Deployment and Troubleshooting (SDWANDT) Lab Guide v1.2
Page 4
�
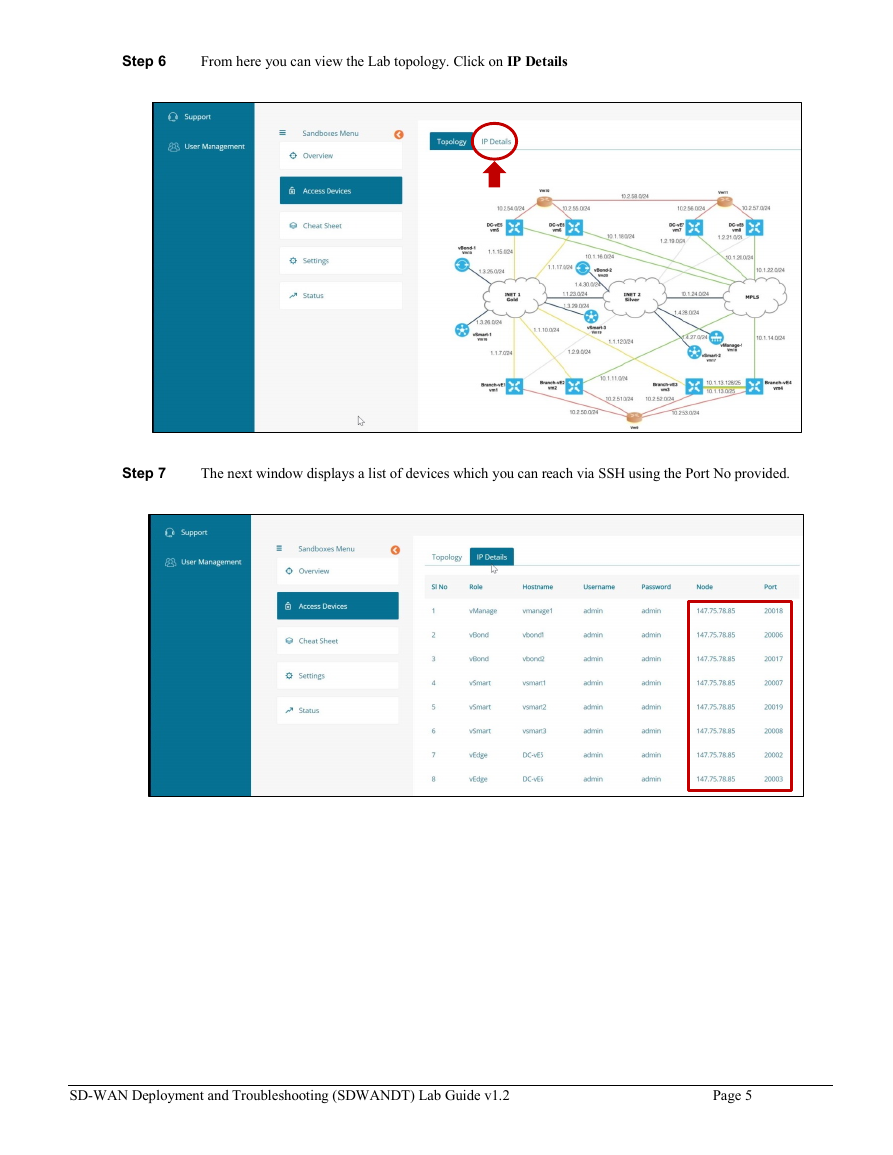
Step 6
From here you can view the Lab topology. Click on IP Details
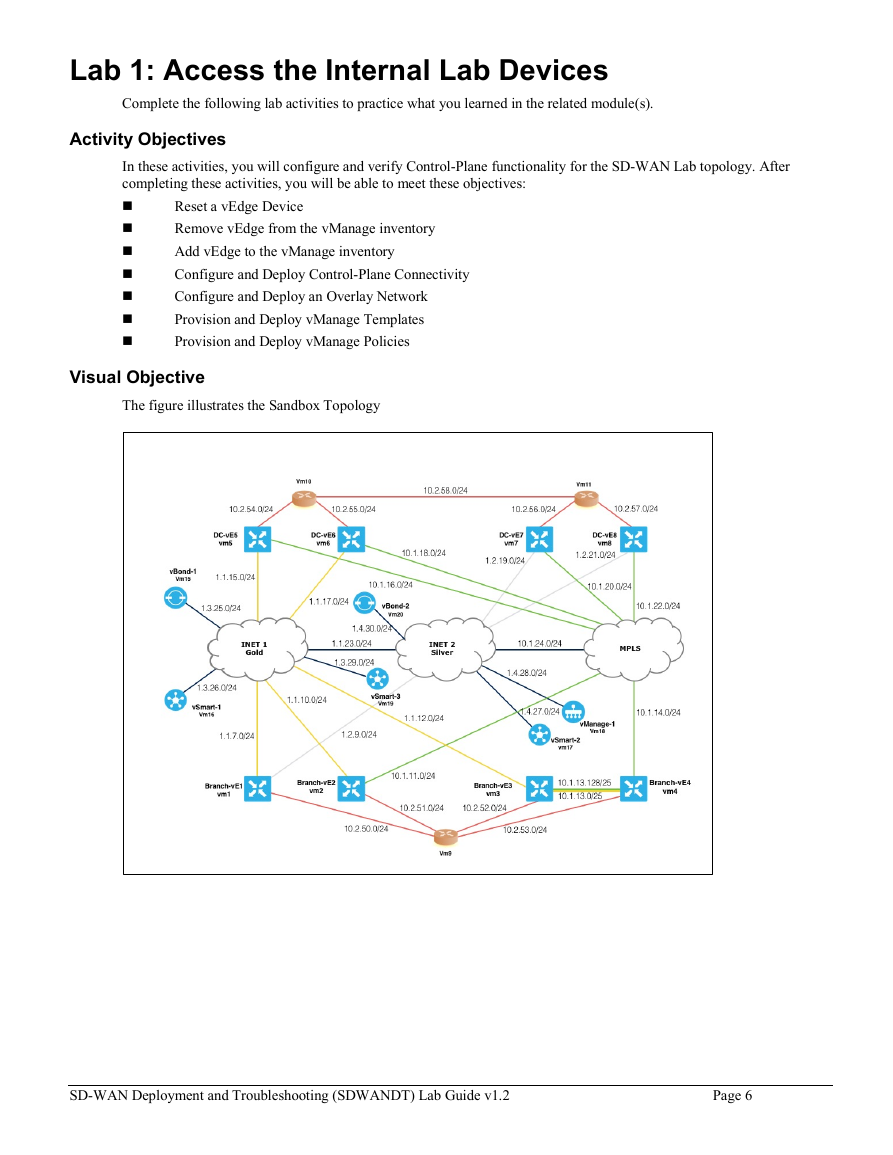
Step 7
The next window displays a list of devices which you can reach via SSH using the Port No provided.
SD-WAN Deployment and Troubleshooting (SDWANDT) Lab Guide v1.2
Page 5
�
Lab 1: Access the Internal Lab Devices
Complete the following lab activities to practice what you learned in the related module(s).
Activity Objectives
In these activities, you will configure and verify Control-Plane functionality for the SD-WAN Lab topology. After
completing these activities, you will be able to meet these objectives:
n
n
n
n
n
n
n
Reset a vEdge Device
Remove vEdge from the vManage inventory
Add vEdge to the vManage inventory
Configure and Deploy Control-Plane Connectivity
Configure and Deploy an Overlay Network
Provision and Deploy vManage Templates
Provision and Deploy vManage Policies
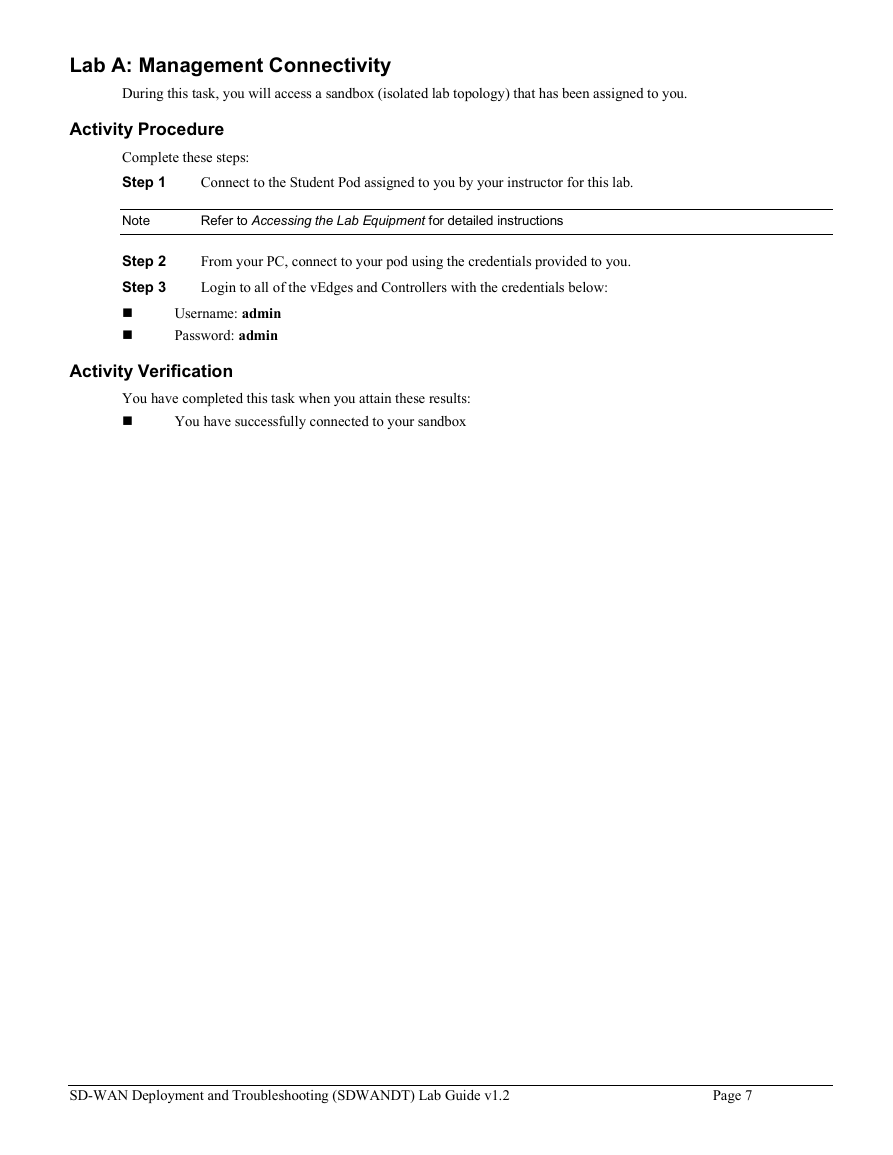
Visual Objective
The figure illustrates the Sandbox Topology
SD-WAN Deployment and Troubleshooting (SDWANDT) Lab Guide v1.2
Page 6
�
Lab A: Management Connectivity
During this task, you will access a sandbox (isolated lab topology) that has been assigned to you.
Activity Procedure
Complete these steps:
Step 1
Connect to the Student Pod assigned to you by your instructor for this lab.
Note
Refer to Accessing the Lab Equipment for detailed instructions
Step 2
Step 3
n
n
From your PC, connect to your pod using the credentials provided to you.
Login to all of the vEdges and Controllers with the credentials below:
Username: admin
Password: admin
Activity Verification
You have completed this task when you attain these results:
n
You have successfully connected to your sandbox
SD-WAN Deployment and Troubleshooting (SDWANDT) Lab Guide v1.2
Page 7
�
Lab 1-1 Reset vEdge Cloud Router
In this Lab, you will use CLI commands and the vManage GUI to reset your vEdge Cloud Router.
Activity Procedure
Complete these steps:
Step 1
Using PuTTY SSH connect to your vEdge Cloud Router. Use the information in the table below. Verify
with your instructor for Correct IP and Custom Port Number.
Device Name
Branch-vE1
IP Address or URL Username Password
“IP:PORT”
admin
admin
Step 2
Step 3
Open a browser window and login to vManage
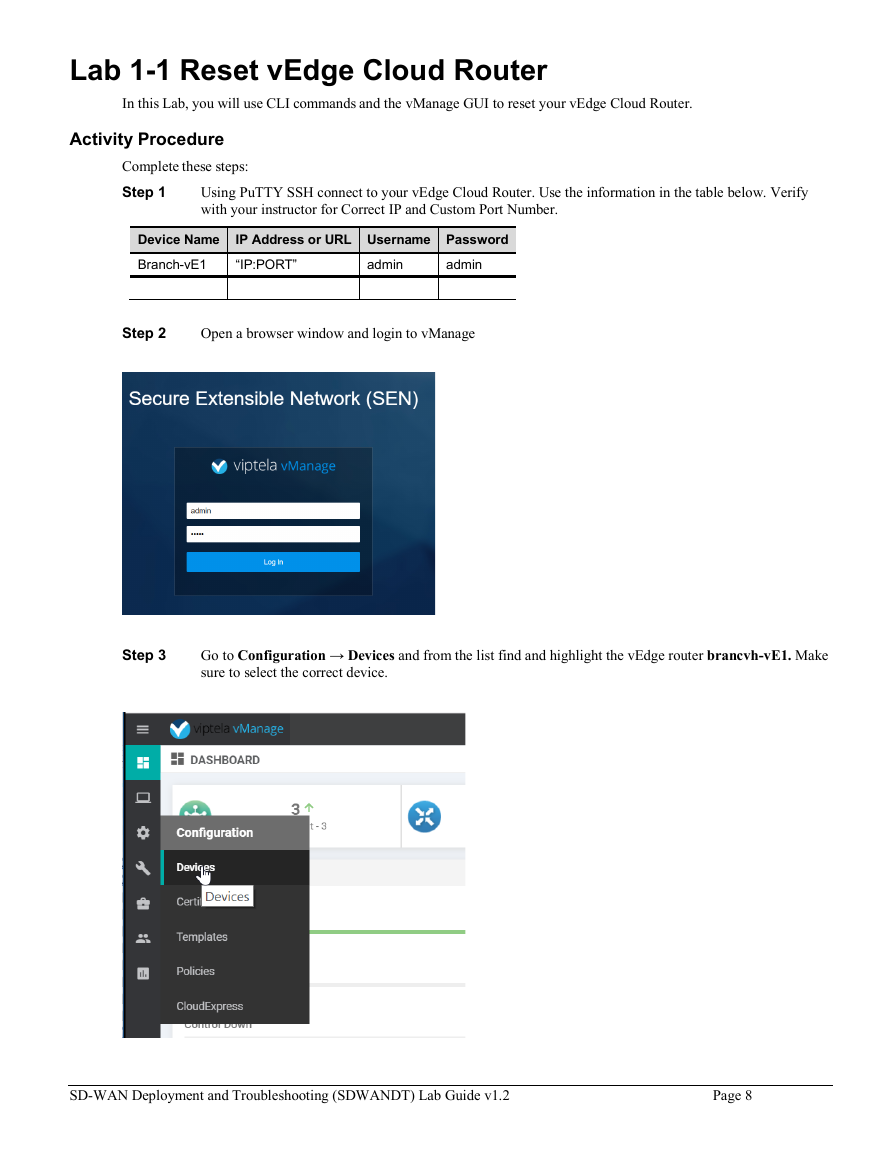
Go to Configuration → Devices and from the list find and highlight the vEdge router brancvh-vE1. Make
sure to select the correct device.
SD-WAN Deployment and Troubleshooting (SDWANDT) Lab Guide v1.2
Page 8
�


 2023年江西萍乡中考道德与法治真题及答案.doc
 2012年重庆南川中考生物真题及答案.doc
 2013年江西师范大学地理学综合及文艺理论基础考研真题.doc
 2020年四川甘孜小升初语文真题及答案I卷.doc
 2020年注册岩土工程师专业基础考试真题及答案.doc
 2023-2024学年福建省厦门市九年级上学期数学月考试题及答案.doc
 2021-2022学年辽宁省沈阳市大东区九年级上学期语文期末试题及答案.doc
 2022-2023学年北京东城区初三第一学期物理期末试卷及答案.doc
 2018上半年江西教师资格初中地理学科知识与教学能力真题及答案.doc
 2012年河北国家公务员申论考试真题及答案-省级.doc
 2020-2021学年江苏省扬州市江都区邵樊片九年级上学期数学第一次质量检测试题及答案.doc
 2022下半年黑龙江教师资格证中学综合素质真题及答案.doc