logo资料库

Barco巴可投影机-F35说明书.pdf

第1页 / 共90页
第2页 / 共90页
第3页 / 共90页
第4页 / 共90页
第5页 / 共90页
第6页 / 共90页
第7页 / 共90页
第8页 / 共90页
资料共90页,剩余部分请下载后查看
toc
1. Introduction
1.1 About this manual
2. Safety
2.1 General Considerations
2.2 Important safety instructions
2.3 Product safety labels
3. Get to know the projector
3.1 Introducing the F35
3.2 Main components
3.3 Accessories and peripherals
4. Lenses
4.1 Lens range
4.2 Lens monitoring
4.3 Replacing a lens
4.4 Lens shift
4.5 Adjust zoom, focus and iris
5. Installation
5.1 Installing the projector
5.2 Installation conditions
5.3 Initial inspection
5.4 Positioning the projector
5.5 Mount the projector on a flat surface
5.6 Mount the projector on the ceiling
5.7 Throw distance
5.8 Lens shift
5.9 Offset Matrix
5.10 Scheimpflug (Boresight) adjustment
5.11 Scheimpflug adjustment procedure
6. Input and Communication
6.1 Local keypad
6.2 Projector status indicator
6.3 Lamp status indicators
6.4 LCD Panel
6.5 Turn the LCD screen and LED indicators ON or OFF
6.6 Wireless remote control
6.7 Connector Panel
6.8 Connect to a source
6.9 LAN
6.10 3D SYNC
6.11 RS-232
6.12 Sync In / Out
6.13 Dual link DVI
6.14 VGA
6.15 YPbPr
6.16 HDMI
6.17 Wired IR
6.18 Triggers
6.19 USB A
6.20 USB B
7. Change projector settings
7.1 Select a power mode
7.2 Use RTC to set projector ON/OFF programs
7.3 Control screens with triggers
7.4 Lock the projector
7.5 Customize the On Screen Display (OSD)
7.6 Review and change network settings
7.7 Review system status
7.8 Revert to factory settings
8. Set up the picture
8.1 Select the image orientation
8.2 Use test images
8.3 Apply a display profile
8.4 Adjust lamp power
8.5 Use gamma curves
8.6 Adjust brightness, saturation and contrast
8.7 Choose an aspect ratio
9. Advanced setup and picture adjustment
9.1 Set up dual head input
9.2 Adjust VGA input signal
9.3 Apply source corrections
10. Color calibration
10.1 RealColor™
10.2 BrilliantColor™
10.3 Color calibration best practice
10.4 Calibrate projector color
11. Color Wheels
11.1 VizSim
11.2 VizSim Bright
11.3 High Brightness MKIII
12. Setup a multichannel installation
12.1 Synchronization best practice
12.2 The Installation - Synchronization menu
12.3 Dual Head Mode
12.4 Synchronization menu (2D)
12.5 Synchronization menu (3D)
12.6 Troubleshoot source sync issues
13. Stereoscopic multichannel setup
13.1 AS3D modes
13.2 The 3D menu
13.3 Synchronous frame sequential
13.4 Asynchronous frame sequential
13.5 Synchronous side by side
13.6 Asynchronous side by side
14. X-Port
14.1 X-PORT Installation
14.2 X-PORT DCC 120
14.3 X-PORT 3G-SDI
15. User Maintenance
15.1 Change the projector lamp
15.2 Update the projector firmware
16. Technical Specifications
16.1 F35
16.2 F35 WQXGA
16.3 F35 Panorama
17. Environmental information
17.1 Disposal information
17.2 RoHS compliance
17.3 Production address
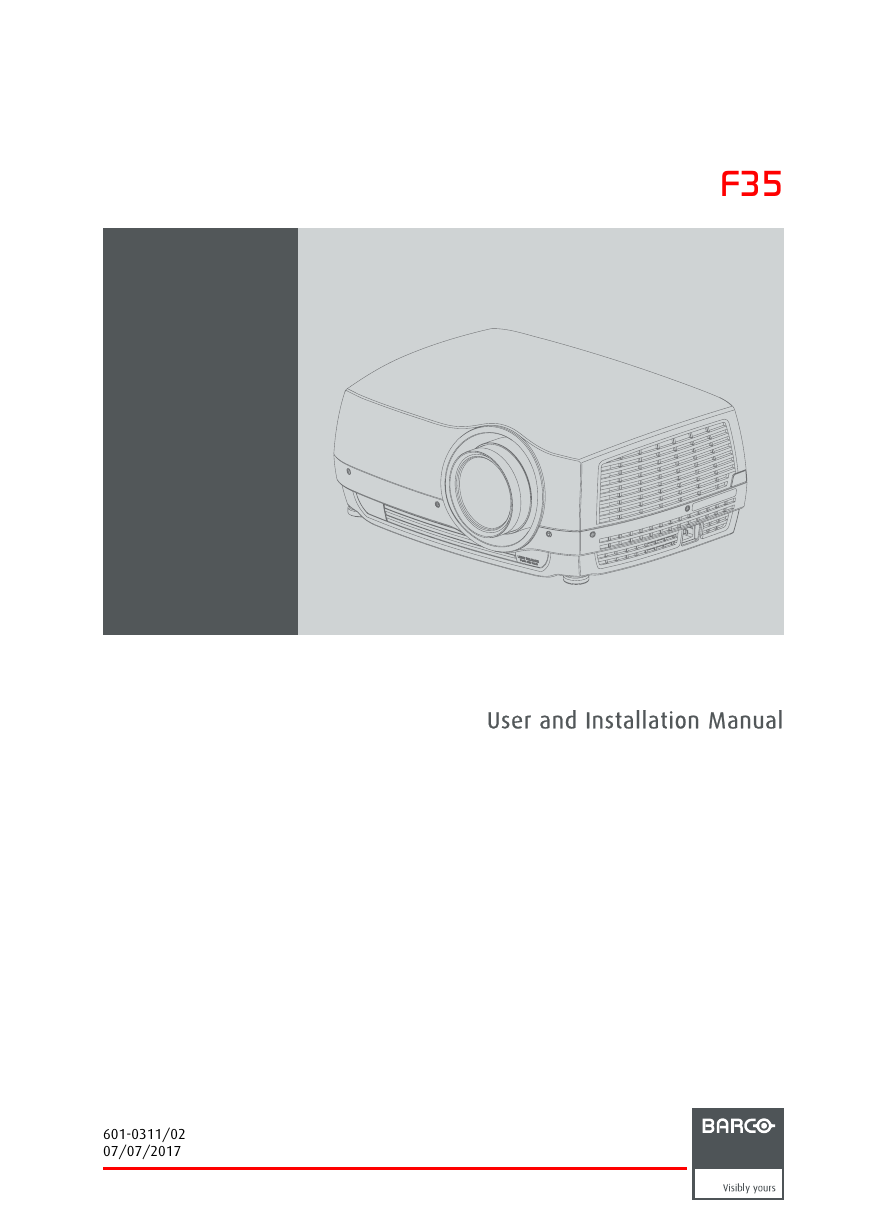
F35 User and Installation Manual 601-0311/02 07/07/2017
Barco Fredrikstad AS Habornveien 53, N-1630 Gamle Fredrikstad, Norway Phone: +47 6930 4550 Fax: +47 6930 4580 Support: Support.fre@barco.com Visit us at the web: www.barco.com Printed in NO
Changes Barco provides this manual ’as is’ without warranty of any kind, either expressed or implied, including but not limited to the implied war- ranties or merchantability and fitness for a particular purpose. Barco may make improvements and/or changes to the product(s) and/or the program(s) described in this publication at any time without notice. This publication could contain technical inaccuracies or typographical errors. Changes are periodically made to the information in this publication; these changes are incorporated in new editions of this publication. The latest edition of Barco manuals can be downloaded from the Barco web site www.barco.com or from the secured Barco web site https://www.barco.com/en/signin. Federal Communications Commission (FCC Statement) This equipment has been tested and found to comply with the limits for a class A digital device, pursuant to Part 15 of the FCC rules. These limits are designed to provide reasonable protection against harmful interference when the equipment is operated in a commercial environment. This equipment generates, uses, and can radiate radio frequency energy and, if not installed and used in accordance with the instruction manual, may cause harmful interference to radio communications. Operation of this equipment in a residential area may cause harmful interference, in which case the user will be responsible for correcting any interference at his own expense Changes or modifications not expressly approved by the party responsible for compliance could void the user’s authority to operate the equipment Guarantee and Compensation Barco provides a guarantee relating to perfect manufacturing as part of the legally stipulated terms of guarantee. On receipt, the purchaser must immediately inspect all delivered goods for damage incurred during transport, as well as for material and manufacturing faults Barco must be informed immediately in writing of any complaints. The period of guarantee begins on the date of transfer of risks, in the case of special systems and software on the date of commissioning, at latest 30 days after the transfer of risks. In the event of justified notice of complaint, Barco can repair the fault or provide a replacement at its own discretion within an appropriate period. If this measure proves to be impossible or unsuccessful, the purchaser can demand a reduction in the purchase price or cancellation of the contract. All other claims, in particular those relating to compensation for direct or indirect damage, and also damage attributed to the operation of software as well as to other services provided by Barco, being a component of the system or independent service, will be deemed invalid provided the damage is not proven to be attributed to the absence of properties guaranteed in writing or due to the intent or gross negligence or part of Barco. If the purchaser or a third party carries out modifications or repairs on goods delivered by Barco, or if the goods are handled incorrectly, in particular if the systems are operated incorrectly or if, after the transfer of risks, the goods are subject to influences not agreed upon in the contract, all guarantee claims of the purchaser will be rendered invalid. Not included in the guarantee coverage are system failures which are attributed to programs or special electronic circuitry provided by the purchaser, e.g. interfaces. Normal wear as well as normal maintenance are not subject to the guarantee provided by Barco either. The environmental conditions as well as the servicing and maintenance regulations specified in this manual must be complied with by the customer.
TABLE OF CONTENTS Tableofcontents 5. 6. 1. Introduction ........................................................................................................ 3 1.1 About this manual . .. . . . . . . .. . . . . . .. . . . . . . .. . . . . . .. . . . . . . .. . . . . . .. . . . . . . .. . . . . . .. . . . . . . .. . . . . . .. . . . . . . .. . . . . . .. . . . . . . .. . . . . . .. . . . . . . . 3 2. Safety................................................................................................................ 5 2.1 General Considerations . . . .. . . . . . .. . . . . . . .. . . . . . .. . . . . . . .. . . . . . .. . . . . . . .. . . . . . .. . . . . . . .. . . . . . .. . . . . . . .. . . . . . .. . . . . . . .. . . . . . .. . . . . . . . 5 Important safety instructions . . . . . .. . . . . . . .. . . . . . .. . . . . . . .. . . . . . .. . . . . . . .. . . . . . .. . . . . . . .. . . . . . .. . . . . . . .. . . . . . .. . . . . . . .. . . . . . .. . . . . . . . 6 2.2 2.3 Product safety labels . . . . . . .. . . . . . .. . . . . . . .. . . . . . .. . . . . . . .. . . . . . .. . . . . . . .. . . . . . .. . . . . . . .. . . . . . .. . . . . . . .. . . . . . .. . . . . . . .. . . . . . .. . . . . . . . 8 3. Get to know the projector........................................................................................11 3.1 Introducing the F35 .. . . . . . . .. . . . . . .. . . . . . . .. . . . . . .. . . . . . . .. . . . . . .. . . . . . . .. . . . . . .. . . . . . . .. . . . . . .. . . . . . . .. . . . . . .. . . . . . . .. . . . . . ... . . . . . . 11 3.2 Main components. . .. . . . . . . .. . . . . . .. . . . . . . .. . . . . . .. . . . . . . .. . . . . . .. . . . . . . .. . . . . . .. . . . . . . .. . . . . . .. . . . . . . .. . . . . . .. . . . . . . .. . . . . . .. . . . . . . . 12 Accessories and peripherals . . . . . .. . . . . . . .. . . . . . .. . . . . . . .. . . . . . .. . . . . . . .. . . . . . .. . . . . . . .. . . . . . .. . . . . . . .. . . . . . .. . . . . . . .. . . . . . .. . . . . . . . 12 3.3 4. Lenses...............................................................................................................15 Lens range . . .. . . . . . .. . . . . . . .. . . . . . .. . . . . . . .. . . . . . .. . . . . . . .. . . . . . .. . . . . . . .. . . . . . .. . . . . . . .. . . . . . .. . . . . . . .. . . . . . .. . . . . . . .. . . . . . .. . . . . . . . 15 4.1 4.2 Lens monitoring. . . . .. . . . . . . .. . . . . . .. . . . . . . .. . . . . . .. . . . . . . .. . . . . . .. . . . . . . .. . . . . . .. . . . . . . .. . . . . . .. . . . . . . .. . . . . . .. . . . . . . .. . . . . . .. . . . . . . . 17 4.3 Replacing a lens . . . .. . . . . . . .. . . . . . .. . . . . . . .. . . . . . .. . . . . . . .. . . . . . .. . . . . . . .. . . . . . .. . . . . . . .. . . . . . .. . . . . . . .. . . . . . .. . . . . . . .. . . . . . ... . . . . . . 17 Lens shift. . . . .. . . . . . .. . . . . . . .. . . . . . .. . . . . . . .. . . . . . .. . . . . . . .. . . . . . .. . . . . . . .. . . . . . .. . . . . . . .. . . . . . .. . . . . . . .. . . . . . .. . . . . . . .. . . . . . .. . . . . . . . 18 4.4 4.5 Adjust zoom, focus and iris.. . . . . . .. . . . . . . .. . . . . . .. . . . . . . .. . . . . . .. . . . . . . .. . . . . . .. . . . . . . .. . . . . . .. . . . . . . .. . . . . . .. . . . . . . .. . . . . . .. . .. . . . . 18 Installation..........................................................................................................21 Installing the projector . . . . . .. . . . . . .. . . . . . . .. . . . . . .. . . . . . . .. . . . . . .. . . . . . . .. . . . . . .. . . . . . . .. . . . . . .. . . . . . . .. . . . . . .. . . . . . . .. . . . . ... . . . . . . . 21 5.1 Installation conditions . . . . . .. . . . . . .. . . . . . . .. . . . . . .. . . . . . . .. . . . . . .. . . . . . . .. . . . . . .. . . . . . . .. . . . . . .. . . . . . . .. . . . . . .. . . . . . . .. . . . . . .. . . . . . . . 21 5.2 Initial inspection. . . . .. . . . . . . .. . . . . . .. . . . . . . .. . . . . . .. . . . . . . .. . . . . . .. . . . . . . .. . . . . . .. . . . . . . .. . . . . . .. . . . . . . .. . . . . . .. . . . . . . .. . . .. . .. . . . . . . . 23 5.3 5.4 Positioning the projector. . . .. . . . . . .. . . . . . . .. . . . . . .. . . . . . . .. . . . . . .. . . . . . . .. . . . . . .. . . . . . . .. . . . . . .. . . . . . . .. . . . . . .. . . . . . . .. . . . . . .. . . . . . . . 23 5.5 Mount the projector on a flat surface . . . . .. . . . . . .. . . . . . . .. . . . . . .. . . . . . . .. . . . . . .. . . . . . . .. . . . . . .. . . . . . . .. . . . . . .. . . . . . . .. . . . . . .. . . . . . . . 24 5.6 Mount the projector on the ceiling.. . . . . . . .. . . . . . .. . . . . . . .. . . . . . .. . . . . . . .. . . . . . .. . . . . . . .. . . . . . .. . . . . . . .. . . . . . .. . . . . . . .. . . . . . .. . . . . . . . 25 Throw distance . . . . .. . . . . . . .. . . . . . .. . . . . . . .. . . . . . .. . . . . . . .. . . . . . .. . . . . . . .. . . . . . .. . . . . . . .. . . . . . .. . . . . . . .. . . . . . .. . . . . . . .. . . . . . ... . . . . . . 25 5.7 5.8 Lens shift. . . . .. . . . . . .. . . . . . . .. . . . . . .. . . . . . . .. . . . . . .. . . . . . . .. . . . . . .. . . . . . . .. . . . . . .. . . . . . . .. . . . . . .. . . . . . . .. . . . . . .. . . . . . . .. . . . . . .. . . . . . . . 28 5.9 Offset Matrix .. . . . . . .. . . . . . . .. . . . . . .. . . . . . . .. . . . . . .. . . . . . . .. . . . . . .. . . . . . . .. . . . . . .. . . . . . . .. . . . . . .. . . . . . . .. . . . . . .. . . . . . . .. . . . . ... . . . . . . . 29 5.10 Scheimpflug (Boresight) adjustment . . . . . .. . . . . . .. . . . . . . .. . . . . . .. . . . . . . .. . . . . . .. . . . . . . .. . . . . . .. . . . . . . .. . . . . . .. . . . . . . .. . . . . . .. . . . . . . . 30 5.11 Scheimpflug adjustment procedure . . . . . . .. . . . . . .. . . . . . . .. . . . . . .. . . . . . . .. . . . . . .. . . . . . . .. . . . . . .. . . . . . . .. . . . . . .. . . . . . . .. . . . . . .. . . . . . . . 31 Input and Communication .......................................................................................33 Local keypad.. . . . . . .. . . . . . . .. . . . . . .. . . . . . . .. . . . . . .. . . . . . . .. . . . . . .. . . . . . . .. . . . . . .. . . . . . . .. . . . . . .. . . . . . . .. . . . . . .. . . . . . . .. . . . . . .. . . . . . . . 33 6.1 6.2 Projector status indicator . . .. . . . . . .. . . . . . . .. . . . . . .. . . . . . . .. . . . . . .. . . . . . . .. . . . . . .. . . . . . . .. . . . . . .. . . . . . . .. . . . . . .. . . . . . . .. . . . . . .. . . . . . . . 34 Lamp status indicators . . . . .. . . . . . .. . . . . . . .. . . . . . .. . . . . . . .. . . . . . .. . . . . . . .. . . . . . .. . . . . . . .. . . . . . .. . . . . . . .. . . . . . .. . . . . . . .. . . . . . .. .. . . . . . 35 6.3 LCD Panel . . .. . . . . . .. . . . . . . .. . . . . . .. . . . . . . .. . . . . . .. . . . . . . .. . . . . . .. . . . . . . .. . . . . . .. . . . . . . .. . . . . . .. . . . . . . .. . . . . . .. . . . . . . .. . . . . . ... . . . . . . 35 6.4 6.5 Turn the LCD screen and LED indicators ON or OFF. . .. . . . . . .. . . . . . . .. . . . . . .. . . . . . . .. . . . . . .. . . . . . . .. . . . . . .. . . . . . . .. . . . . . .. . . . . . . . 36 6.6 Wireless remote control . . . .. . . . . . .. . . . . . . .. . . . . . .. . . . . . . .. . . . . . .. . . . . . . .. . . . . . .. . . . . . . .. . . . . . .. . . . . . . .. . . . . . .. . . . . . . .. . . . . . .. .. . . . . . 37 6.7 Connector Panel. . . .. . . . . . . .. . . . . . .. . . . . . . .. . . . . . .. . . . . . . .. . . . . . .. . . . . . . .. . . . . . .. . . . . . . .. . . . . . .. . . . . . . .. . . . . . .. . . . . . . .. . . . . . .. . . . . . . . 38 6.8 Connect to a source . . . . . . . .. . . . . . .. . . . . . . .. . . . . . .. . . . . . . .. . . . . . .. . . . . . . .. . . . . . .. . . . . . . .. . . . . . .. . . . . . . .. . . . . . .. . . . . . . .. . . . . . .. . . . . . . . 38 6.9 LAN . .. . . . . . . .. . . . . . .. . . . . . . .. . . . . . .. . . . . . . .. . . . . . .. . . . . . . .. . . . . . .. . . . . . . .. . . . . . .. . . . . . . .. . . . . . .. . . . . . . .. . . . . . .. . . . . . . .. . . . . ... . . . . . . . 39 6.10 3D SYNC . . . .. . . . . . .. . . . . . . .. . . . . . .. . . . . . . .. . . . . . .. . . . . . . .. . . . . . .. . . . . . . .. . . . . . .. . . . . . . .. . . . . . .. . . . . . . .. . . . . . .. . . . . . . .. . . . . . ... . . . . . . 39 6.11 RS-232 . . . . . . .. . . . . . .. . . . . . . .. . . . . . .. . . . . . . .. . . . . . .. . . . . . . .. . . . . . .. . . . . . . .. . . . . . .. . . . . . . .. . . . . . .. . . . . . . .. . . . . . .. . . . . . . .. . . . .. .. . . . . . . . 39 6.12 Sync In / Out .. . . . . . .. . . . . . . .. . . . . . .. . . . . . . .. . . . . . .. . . . . . . .. . . . . . .. . . . . . . .. . . . . . .. . . . . . . .. . . . . . .. . . . . . . .. . . . . . .. . . . . . . .. . . . . . .. . . . . . . . 39 6.13 Dual link DVI .. . . . . . .. . . . . . . .. . . . . . .. . . . . . . .. . . . . . .. . . . . . . .. . . . . . .. . . . . . . .. . . . . . .. . . . . . . .. . . . . . .. . . . . . . .. . . . . . .. . . . . . . .. . . . . ... . . . . . . . 40 6.14 VGA . .. . . . . . . .. . . . . . .. . . . . . . .. . . . . . .. . . . . . . .. . . . . . .. . . . . . . .. . . . . . .. . . . . . . .. . . . . . .. . . . . . . .. . . . . . .. . . . . . . .. . . . . . .. . . . . . . .. . . . .. .. . . . . . . . 40 6.15 YPbPr . . . . . . . .. . . . . . .. . . . . . . .. . . . . . .. . . . . . . .. . . . . . .. . . . . . . .. . . . . . .. . . . . . . .. . . . . . .. . . . . . . .. . . . . . .. . . . . . . .. . . . . . .. . . . . . . .. . . . .. .. . . . . . . . 40 6.16 HDMI .. . . . . . . .. . . . . . .. . . . . . . .. . . . . . .. . . . . . . .. . . . . . .. . . . . . . .. . . . . . .. . . . . . . .. . . . . . .. . . . . . . .. . . . . . .. . . . . . . .. . . . . . .. . . . . . . .. . . . .. .. . . . . . . . 40 6.17 Wired IR. . . . . .. . . . . . .. . . . . . . .. . . . . . .. . . . . . . .. . . . . . .. . . . . . . .. . . . . . .. . . . . . . .. . . . . . .. . . . . . . .. . . . . . .. . . . . . . .. . . . . . .. . . . . . . .. . . . .. .. . . . . . . . 41 6.18 Triggers . . . . . .. . . . . . .. . . . . . . .. . . . . . .. . . . . . . .. . . . . . .. . . . . . . .. . . . . . .. . . . . . . .. . . . . . .. . . . . . . .. . . . . . .. . . . . . . .. . . . . . .. . . . . . . .. . . .. . .. . . . . . . . 41 6.19 USB A. . . . . . . .. . . . . . .. . . . . . . .. . . . . . .. . . . . . . .. . . . . . .. . . . . . . .. . . . . . .. . . . . . . .. . . . . . .. . . . . . . .. . . . . . .. . . . . . . .. . . . . . .. . . . . . . .. . . . . ... . . . . . . . 41 6.20 USB B. . . . . . . .. . . . . . .. . . . . . . .. . . . . . .. . . . . . . .. . . . . . .. . . . . . . .. . . . . . .. . . . . . . .. . . . . . .. . . . . . . .. . . . . . .. . . . . . . .. . . . . . .. . . . . . . .. . . . . ... . . . . . . . 41 7. Change projector settings .......................................................................................43 7.1 Select a power mode . . . . . . .. . . . . . .. . . . . . . .. . . . . . .. . . . . . . .. . . . . . .. . . . . . . .. . . . . . .. . . . . . . .. . . . . . .. . . . . . . .. . . . . . .. . . . . . . .. . . . . . .. . . .. . . . 43 7.2 Use RTC to set projector ON/OFF programs. . . .. . . . . . . .. . . . . . .. . . . . . . .. . . . . . .. . . . . . . .. . . . . . .. . . . . . . .. . . . . . .. . . . . . . .. . . . . . .. . . . . . . . 43 7.3 Control screens with triggers. . . . . .. . . . . . . .. . . . . . .. . . . . . . .. . . . . . .. . . . . . . .. . . . . . .. . . . . . . .. . . . . . .. . . . . . . .. . . . . . .. . . . . . . .. . . . . . .. . . . . . . . 44 7.4 Lock the projector . .. . . . . . . .. . . . . . .. . . . . . . .. . . . . . .. . . . . . . .. . . . . . .. . . . . . . .. . . . . . .. . . . . . . .. . . . . . .. . . . . . . .. . . . . . .. . . . . . . .. . . . . . ... . . . . . . 45 7.5 Customize the On Screen Display (OSD) . . . . . . .. . . . . . . .. . . . . . .. . . . . . . .. . . . . . .. . . . . . . .. . . . . . .. . . . . . . .. . . . . . .. . . . . . . .. . . . . . .. . . . . . . . 45 7.6 Review and change network settings . . . . .. . . . . . .. . . . . . . .. . . . . . .. . . . . . . .. . . . . . .. . . . . . . .. . . . . . .. . . . . . . .. . . . . . .. . . . . . . .. . . . . . .. . . . . . . . 46 7.7 Review system status . . . . . .. . . . . . .. . . . . . . .. . . . . . .. . . . . . . .. . . . . . .. . . . . . . .. . . . . . .. . . . . . . .. . . . . . .. . . . . . . .. . . . . . .. . . . . . . .. . . . . . .. . .. . . . . 46 7.8 Revert to factory settings. . .. . . . . . .. . . . . . . .. . . . . . .. . . . . . . .. . . . . . .. . . . . . . .. . . . . . .. . . . . . . .. . . . . . .. . . . . . . .. . . . . . .. . . . . . . .. . . . . . ... . . . . . . 47 8. Set up the picture .................................................................................................49 8.1 Select the image orientation . . . . . .. . . . . . . .. . . . . . .. . . . . . . .. . . . . . .. . . . . . . .. . . . . . .. . . . . . . .. . . . . . .. . . . . . . .. . . . . . .. . . . . . . .. . . . . . .. . . . . . . . 49 8.2 Use test images . . . .. . . . . . . .. . . . . . .. . . . . . . .. . . . . . .. . . . . . . .. . . . . . .. . . . . . . .. . . . . . .. . . . . . . .. . . . . . .. . . . . . . .. . . . . . .. . . . . . . .. . . . . . .. .. . . . . . 49 8.3 Apply a display profile . . . . . .. . . . . . .. . . . . . . .. . . . . . .. . . . . . . .. . . . . . .. . . . . . . .. . . . . . .. . . . . . . .. . . . . . .. . . . . . . .. . . . . . .. . . . . . . .. . . . . . .. . . . . . . . 50 8.4 Adjust lamp power . .. . . . . . . .. . . . . . .. . . . . . . .. . . . . . .. . . . . . . .. . . . . . .. . . . . . . .. . . . . . .. . . . . . . .. . . . . . .. . . . . . . .. . . . . . .. . . . . . . .. . . . . . .. .. . . . . . 50 8.5 Use gamma curves .. . . . . . . .. . . . . . .. . . . . . . .. . . . . . .. . . . . . . .. . . . . . .. . . . . . . .. . . . . . .. . . . . . . .. . . . . . .. . . . . . . .. . . . . . .. . . . . . . .. . . . . . .. . . .. . . . 50 8.6 Adjust brightness, saturation and contrast. . . . . . .. . . . . . . .. . . . . . .. . . . . . . .. . . . . . .. . . . . . . .. . . . . . .. . . . . . . .. . . . . . .. . . . . . . .. . . . . . .. . . .. . . . 53 8.7 Choose an aspect ratio. . . . .. . . . . . .. . . . . . . .. . . . . . .. . . . . . . .. . . . . . .. . . . . . . .. . . . . . .. . . . . . . .. . . . . . .. . . . . . . .. . . . . . .. . . . . . . .. . . . . . .. . . . . . . . 53 601-0311 F35 07/07/2017 1
Tableofcontents 9.1 9.2 9.3 9. Advanced setup and picture adjustment .....................................................................55 Set up dual head input . . . . .. . . . . . .. . . . . . . .. . . . . . .. . . . . . . .. . . . . . .. . . . . . . .. . . . . . .. . . . . . . .. . . . . . .. . . . . . . .. . . . . . .. . . . . . . .. . . . . . .. . . . . . . . 55 Adjust VGA input signal . . . .. . . . . . .. . . . . . . .. . . . . . .. . . . . . . .. . . . . . .. . . . . . . .. . . . . . .. . . . . . . .. . . . . . .. . . . . . . .. . . . . . .. . . . . . . .. . . . . . .. . . . . . . . 55 Apply source corrections . . .. . . . . . .. . . . . . . .. . . . . . .. . . . . . . .. . . . . . .. . . . . . . .. . . . . . .. . . . . . . .. . . . . . .. . . . . . . .. . . . . . .. . . . . . . .. . . . . . .. .. . . . . . 56 10. Color calibration...................................................................................................57 10.1 RealColor™ .. . . . . . .. . . . . . . .. . . . . . .. . . . . . . .. . . . . . .. . . . . . . .. . . . . . .. . . . . . . .. . . . . . .. . . . . . . .. . . . . . .. . . . . . . .. . . . . . .. . . . . . . .. . . . . . .. . . . . . . . 57 10.2 BrilliantColor™ . . . . .. . . . . . . .. . . . . . .. . . . . . . .. . . . . . .. . . . . . . .. . . . . . .. . . . . . . .. . . . . . .. . . . . . . .. . . . . . .. . . . . . . .. . . . . . .. . . . . . . .. . . . .. .. . . . . . . . 58 10.3 Color calibration best practice. . . . .. . . . . . . .. . . . . . .. . . . . . . .. . . . . . .. . . . . . . .. . . . . . .. . . . . . . .. . . . . . .. . . . . . . .. . . . . . .. . . . . . . .. . . . . . .. . . . . . . . 59 10.4 Calibrate projector color . . . .. . . . . . .. . . . . . . .. . . . . . .. . . . . . . .. . . . . . .. . . . . . . .. . . . . . .. . . . . . . .. . . . . . .. . . . . . . .. . . . . . .. . . . . . . .. . . . . ... . . . . . . . 59 11. Color Wheels.......................................................................................................61 11.1 VizSim. . . . . . . .. . . . . . .. . . . . . . .. . . . . . .. . . . . . . .. . . . . . .. . . . . . . .. . . . . . .. . . . . . . .. . . . . . .. . . . . . . .. . . . . . .. . . . . . . .. . . . . . .. . . . . . . .. . . .. . .. . . . . . . . 61 11.2 VizSim Bright . . . . . . .. . . . . . . .. . . . . . .. . . . . . . .. . . . . . .. . . . . . . .. . . . . . .. . . . . . . .. . . . . . .. . . . . . . .. . . . . . .. . . . . . . .. . . . . . .. . . . . . . .. . . . . ... . . . . . . . 61 11.3 High Brightness MKIII . . . . . .. . . . . . .. . . . . . . .. . . . . . .. . . . . . . .. . . . . . .. . . . . . . .. . . . . . .. . . . . . . .. . . . . . .. . . . . . . .. . . . . . .. . . . . . . .. . . . . . ... . . . . . . 62 12. Setup a multichannel installation ..............................................................................63 12.1 Synchronization best practice . . . . .. . . . . . . .. . . . . . .. . . . . . . .. . . . . . .. . . . . . . .. . . . . . .. . . . . . . .. . . . . . .. . . . . . . .. . . . . . .. . . . . . . .. . . . . . ... . . . . . . 63 12.2 The Installation - Synchronization menu. .. . . . . . .. . . . . . . .. . . . . . .. . . . . . . .. . . . . . .. . . . . . . .. . . . . . .. . . . . . . .. . . . . . .. . . . . . . .. . . . . . .. . . .. . . . 64 12.3 Dual Head Mode. . . .. . . . . . . .. . . . . . .. . . . . . . .. . . . . . .. . . . . . . .. . . . . . .. . . . . . . .. . . . . . .. . . . . . . .. . . . . . .. . . . . . . .. . . . . . .. . . . . . . .. . . . . . .. .. . . . . . 64 12.4 Synchronization menu (2D) . . . . . . .. . . . . . . .. . . . . . .. . . . . . . .. . . . . . .. . . . . . . .. . . . . . .. . . . . . . .. . . . . . .. . . . . . . .. . . . . . .. . . . . . . .. . . . . . .. . . . . . . . 64 12.5 Synchronization menu (3D) . . . . . . .. . . . . . . .. . . . . . .. . . . . . . .. . . . . . .. . . . . . . .. . . . . . .. . . . . . . .. . . . . . .. . . . . . . .. . . . . . .. . . . . . . .. . . . . . .. . . . . . . . 64 12.6 Troubleshoot source sync issues .. . . . . . . .. . . . . . .. . . . . . . .. . . . . . .. . . . . . . .. . . . . . .. . . . . . . .. . . . . . .. . . . . . . .. . . . . . .. . . . . . . .. . . . . . .. . . . . . . . 65 13. Stereoscopic multichannel setup ..............................................................................67 13.1 AS3D modes.. . . . . . .. . . . . . . .. . . . . . .. . . . . . . .. . . . . . .. . . . . . . .. . . . . . .. . . . . . . .. . . . . . .. . . . . . . .. . . . . . .. . . . . . . .. . . . . . .. . . . . . . .. . . . . . .. . . . . . . . 67 13.2 The 3D menu . . . . . . .. . . . . . . .. . . . . . .. . . . . . . .. . . . . . .. . . . . . . .. . . . . . .. . . . . . . .. . . . . . .. . . . . . . .. . . . . . .. . . . . . . .. . . . . . .. . . . . . . .. . . . . . .. .. . . . . . 68 13.3 Synchronous frame sequential. . . .. . . . . . . .. . . . . . .. . . . . . . .. . . . . . .. . . . . . . .. . . . . . .. . . . . . . .. . . . . . .. . . . . . . .. . . . . . .. . . . . . . .. . . . . . .. . . . . . . . 69 13.4 Asynchronous frame sequential . .. . . . . . . .. . . . . . .. . . . . . . .. . . . . . .. . . . . . . .. . . . . . .. . . . . . . .. . . . . . .. . . . . . . .. . . . . . .. . . . . . . .. . . . . . .. . . . . . . . 70 13.5 Synchronous side by side . .. . . . . . .. . . . . . . .. . . . . . .. . . . . . . .. . . . . . .. . . . . . . .. . . . . . .. . . . . . . .. . . . . . .. . . . . . . .. . . . . . .. . . . . . . .. . . . . . .. . . . . . . . 70 13.6 Asynchronous side by side.. . . . . . .. . . . . . . .. . . . . . .. . . . . . . .. . . . . . .. . . . . . . .. . . . . . .. . . . . . . .. . . . . . .. . . . . . . .. . . . . . .. . . . . . . .. . . . . . .. . . . . . . . 70 14. X-Port................................................................................................................73 14.1 X-PORT Installation . . . . . . . .. . . . . . .. . . . . . . .. . . . . . .. . . . . . . .. . . . . . .. . . . . . . .. . . . . . .. . . . . . . .. . . . . . .. . . . . . . .. . . . . . .. . . . . . . .. . . . . . .. . . . . . . . 73 14.2 X-PORT DCC 120 . .. . . . . . . .. . . . . . .. . . . . . . .. . . . . . .. . . . . . . .. . . . . . .. . . . . . . .. . . . . . .. . . . . . . .. . . . . . .. . . . . . . .. . . . . . .. . . . . . . .. . . . . . .. . . .. . . . 73 14.3 X-PORT 3G-SDI . . . .. . . . . . . .. . . . . . .. . . . . . . .. . . . . . .. . . . . . . .. . . . . . .. . . . . . . .. . . . . . .. . . . . . . .. . . . . . .. . . . . . . .. . . . . . .. . . . . . . .. . . . . . .. .. . . . . . 74 15. User Maintenance .................................................................................................77 15.1 Change the projector lamp .. . . . . . .. . . . . . . .. . . . . . .. . . . . . . .. . . . . . .. . . . . . . .. . . . . . .. . . . . . . .. . . . . . .. . . . . . . .. . . . . . .. . . . . . . .. . . . . . .. . . . . . . . 77 15.2 Update the projector firmware. . . . .. . . . . . . .. . . . . . .. . . . . . . .. . . . . . .. . . . . . . .. . . . . . .. . . . . . . .. . . . . . .. . . . . . . .. . . . . . .. . . . . . . .. . . . . . .. . . . . . . . 78 16. Technical Specifications .........................................................................................81 16.1 F35 . .. . . . . . . .. . . . . . .. . . . . . . .. . . . . . .. . . . . . . .. . . . . . .. . . . . . . .. . . . . . .. . . . . . . .. . . . . . .. . . . . . . .. . . . . . .. . . . . . . .. . . . . . .. . . . . . . .. . . . .. .. . . . . . . . 81 16.2 F35 WQXGA . . . . . . .. . . . . . . .. . . . . . .. . . . . . . .. . . . . . .. . . . . . . .. . . . . . .. . . . . . . .. . . . . . .. . . . . . . .. . . . . . .. . . . . . . .. . . . . . .. . . . . . . .. . . . . . .. . .. . . . . 82 16.3 F35 Panorama . . . . . .. . . . . . . .. . . . . . .. . . . . . . .. . . . . . .. . . . . . . .. . . . . . .. . . . . . . .. . . . . . .. . . . . . . .. . . . . . .. . . . . . . .. . . . . . .. . . . . . . .. . . . . . .. . . . . . . . 83 17. Environmental information ......................................................................................85 17.1 Disposal information. . . . . . . .. . . . . . .. . . . . . . .. . . . . . .. . . . . . . .. . . . . . .. . . . . . . .. . . . . . .. . . . . . . .. . . . . . .. . . . . . . .. . . . . . .. . . . . . . .. . . . . ... . . . . . . . 85 17.2 RoHS compliance . .. . . . . . . .. . . . . . .. . . . . . . .. . . . . . .. . . . . . . .. . . . . . .. . . . . . . .. . . . . . .. . . . . . . .. . . . . . .. . . . . . . .. . . . . . .. . . . . . . .. . . . . . .. .. . . . . . 85 17.3 Production address .. . . . . . . .. . . . . . .. . . . . . . .. . . . . . .. . . . . . . .. . . . . . .. . . . . . . .. . . . . . .. . . . . . . .. . . . . . .. . . . . . . .. . . . . . .. . . . . . . .. . . . . . .. . . . . . . . 86 2 601-0311 F35 07/07/2017
1.Introduction 1. INTRODUCTION Welcome Congratulations on your purchase of a Barco F35 projector! The F35 projectors are part of a proud tradition of quality projectors built for superior performance, and feature compact footprint, high performance optics and lenses, Active Stereo 3D capabilities, built-in frame-lock synchronization and are warranted for 24/7 operation. 1.1 About this manual General We recommend you read this user manual before setting up and operating your projector for the first time. Familiarizing yourself with the projectors’ features and functions, as well as its safety and maintenance features, will help ensure you enjoy many years of hassle-free projection. Following is a brief overview of how information in the manual is organized and presented. The content in this manual is systematized primarily by function, and then topic. On the first page of each chapter is an overview of the chapter contents. A menu path is expressed in the following manner: Main Menu — Sub Menu — Sub sub menu. For example, Main Menu — Installation — Synchronization All physical measurement units given in this manual are according to the International Standard of Units (SI units). Conversion from this to other measurement units is the responsibility of the user. Illustrations used in the manual are for general reference only, and may differ from your product. 601-0311 F35 07/07/2017 3
1.Introduction 4 601-0311 F35 07/07/2017
分享到:
收藏