logo资料库

卡西欧数码相机-卡西欧 QV-2300ux说明书.pdf

第1页 / 共151页
第2页 / 共151页
第3页 / 共151页
第4页 / 共151页
第5页 / 共151页
第6页 / 共151页
第7页 / 共151页
第8页 / 共151页
资料共151页,剩余部分请下载后查看
INTRODUCTION
Unpacking
Contents
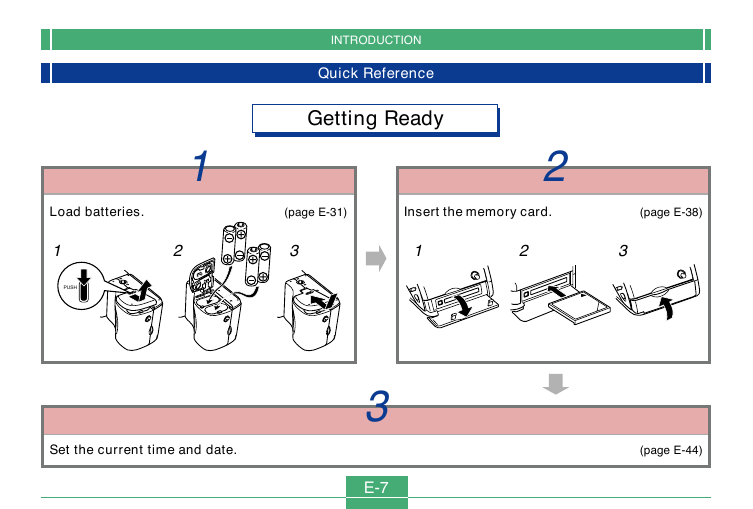
Quick Reference
Getting Ready
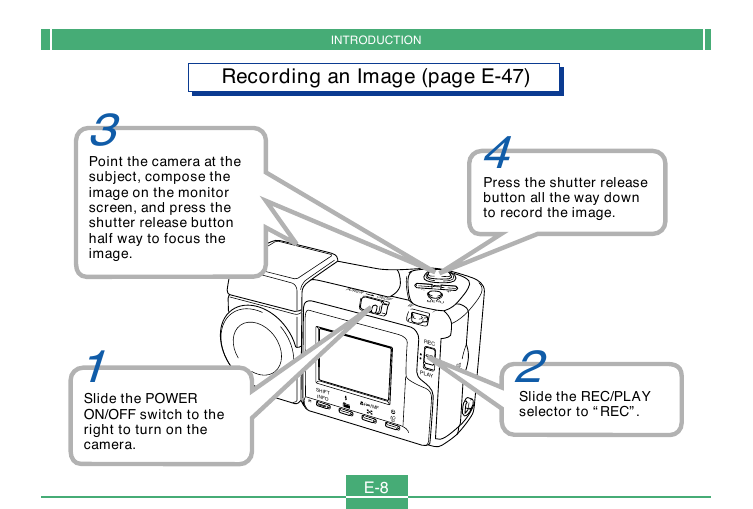
Recording an Image
Playback
Deleting Images
Features
Recording Features
Precautions
General Precautions
Operating conditions
Condensation
About the camera’s backlight…
GETTING ACQUAINTED
General Guide
Front
Back
Terminals and Ports
Bottom
Lens
Changing the Lens Angle
Installing a Conversion Lens
Lens Precautions
Monitor Screen Indicators
REC mode
PLAY mode
Operation Indicator Lamp
REC mode
PLAY mode
Using the Bundled Accessories
Using the Lens Cap
Attaching the Strap
Using the Soft Case
Power Requirements
Loading Batteries
Battery Handling Precautions
Low Battery Indicator
Using AC Power
Turning the Camera On and Off
Power Save Settings
Memory Cards
Inserting a Memory Card into the Camera
Removing a Memory Card from the Camera
Formatting a Memory Card
Memory Card Precautions
IBM Microdrive Precautions
Menu Screens
Setting the Current Date and Time
Setting the Date and Time
Selecting the Date Format
Time Stamp
BASIC IMAGE RECORDING
Recording a Simple Snapshot
About the REC Mode Monitor Screen
About Auto Focus
Recording Precautions
Image Recording when the Battery is Low
Using Zoom
Using Optical Zoom
Using Digital Zoom
Using the Flash
Flash Status Indicators
Adjusting the Flash Intensity
Precautions when Using Flash
Selecting the Focus Mode
Using the Auto Focus Mode
Using the Macro Mode
Using the Infinity Mode
Using the Manual Focus Mode
Using Focus Lock
Specifying Image Size and Quality
Using the Self-timer
Exposure Compensation
OTHER RECORDING FUNCTIONS
Shooting Portraits
Shooting Landscapes
Shooting Night Scenes
Instant Setup Using the Scene Mode
Registering Your Own Scene Setups
Recording a Movie
To record a movie using the normal mode
To record a movie using the past mode
Shooting Panoramas
Shooting at Fixed Intervals
Canceling an Interval Mode Timer Operation
Specifying the Exposure Mode
Program AE
Aperture Priority AE
Shutter Speed Priority AE
Manual Exposure
Quick Exposure Mode Selection
Selecting the Metering Mode
Quick Metering Mode Selection
Setting the Sensitivity Level
Using the Filter Function
Selecting White Balance
Adjusting White Balance Manually
Quick White Balance Selection
Enhancing Certain Colors
Turning the On-screen Grid On and Off
Specifying Outline Sharpness
Specifying Color Saturation
Specifying Contrast
Specifying Power On Default Settings
Resetting the Camera
Using the Camera’s Shortcut Features
Changing REC mode FUNCTION Menu Settings Using the Shortcut Buttons
To assign REC mode FUNCTION menu items to shortcut buttons
Directly Accessing the REC mode FUNCTION Menu
PLAYBACK
Basic Playback Operation
Playing a Movie
Playing a Panorama
Enlarging the Playback Image
Displaying the 9-image View
Selecting a Specific Image in the 9-image View
Using the Slide Show Feature
DELETING IMAGES
Deleting the Displayed Image
Deleting Selected Images
Deleting All Images in Selected Folders
Deleting All Unprotected Images
MANAGING IMAGES
Folders and Files
Folders
Files
Selecting a Folder for Playback
Protecting Images Against Deletion
Protecting Selected Images
Protecting and Unprotecting All Images in Selected Folders
Protecting and Unprotecting All Images
DPOF
Making DPOF Settings for Particular Images
Making DPOF Settings for Particular Folders
Making DPOF Settings of All Images on the Memory Card
OTHER SETTINGS
Turning the Monitor Screen Indicators On and Off
Changing the Display Language
Turning the Confirmation Beep On and Off
CONNECTING TO EXTERNAL EQUIPMENT
Connecting to a Television
Selecting the Video Output Signal Mode
Connecting the Wired Remote Controller to the Camera
Connecting an External Flash Unit (QV-2800UX Only)
External Flash Unit Requirements
Attaching an External Flash Unit
Connecting to a Computer
USB Port Connection (Windows, Macintosh)
Using a Serial Port Connection
Using a Memory Card to Transfer Image Data
Memory Card Data
DCF Protocol
Memory Card File Structure
Image Files Supported by the Camera
Precautions when Using a Memory Card on a Computer
Using the HTML Card Browser
Specifying the Card Browser Type
Viewing Card Browser File Contents
Saving Card Browser Files
REFERENCE
Camera Menus
REC mode
PLAY mode
Scene List
Scene Mode Camera Setups
Mode Settings
Settings in Each Mode
Recording Mode + Exposure Mode Combinations
Troubleshooting
Messages
Specifications
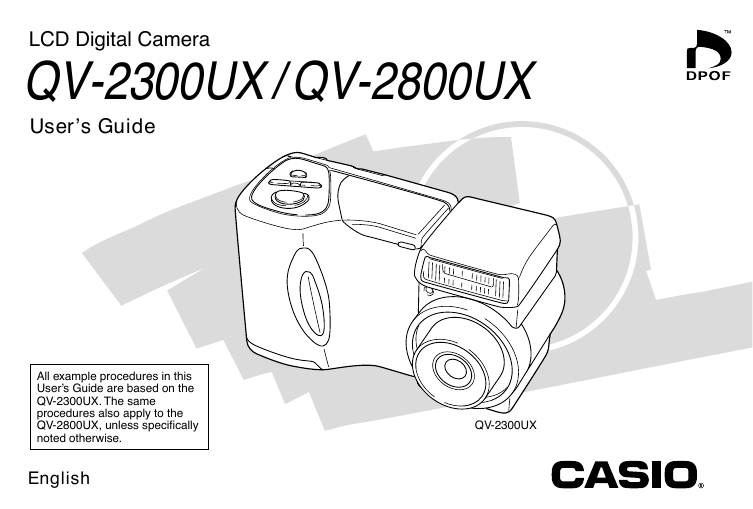
LCD Digital Camera QV-2300UX / QV-2800UX User’s Guide All example procedures in this User’s Guide are based on the QV-2300UX. The same procedures also apply to the QV-2800UX, unless specifically noted otherwise. English QV-2300UX
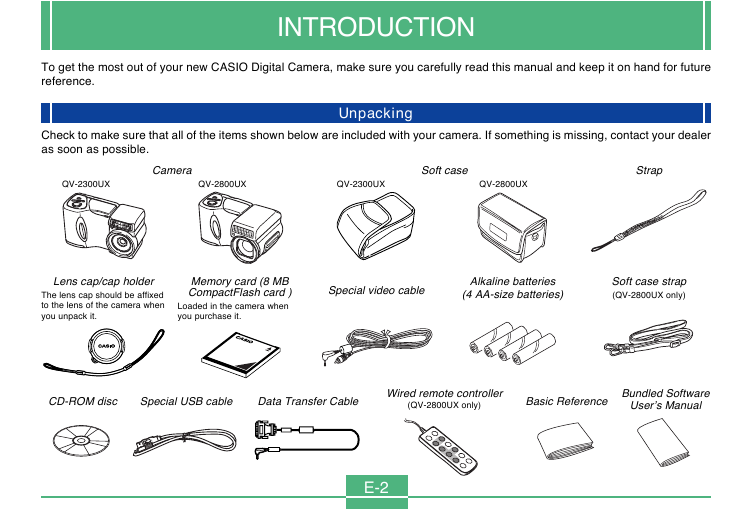
INTRODUCTION INTRODUCTION To get the most out of your new CASIO Digital Camera, make sure you carefully read this manual and keep it on hand for future reference. Check to make sure that all of the items shown below are included with your camera. If something is missing, contact your dealer as soon as possible. QV-2300UX QV-2800UX QV-2300UX QV-2800UX Camera Soft case Strap Unpacking Lens cap/cap holder The lens cap should be affixed to the lens of the camera when you unpack it. Memory card (8 MB CompactFlash card ) Loaded in the camera when you purchase it. Special video cable Alkaline batteries (4 AA-size batteries) Soft case strap (QV-2800UX only) CD-ROM disc Special USB cable Data Transfer Cable Wired remote controller (QV-2800UX only) Basic Reference Bundled Software User’s Manual E-2
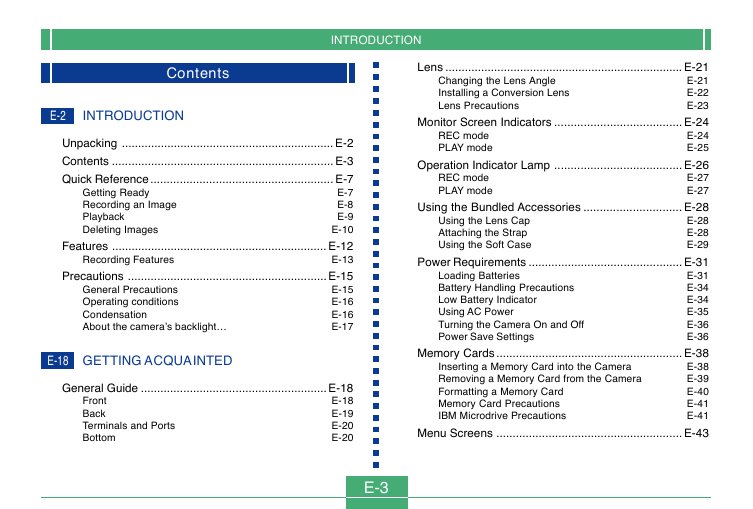
INTRODUCTION Contents E-2 INTRODUCTION Getting Ready Recording an Image Playback Deleting Images Unpacking ................................................................. E-2 Contents .................................................................... E-3 Quick Reference ........................................................ E-7 E-7 E-8 E-9 E-10 Features .................................................................. E-12 E-13 Precautions ............................................................. E-15 E-15 E-16 E-16 E-17 General Precautions Operating conditions Condensation About the camera’s backlight… Recording Features E-18 GETTING ACQUAINTED General Guide ......................................................... E-18 E-18 E-19 E-20 E-20 Front Back Terminals and Ports Bottom E-3 REC mode PLAY mode REC mode PLAY mode Using the Lens Cap Attaching the Strap Using the Soft Case Changing the Lens Angle Installing a Conversion Lens Lens Precautions Lens ......................................................................... E-21 E-21 E-22 E-23 Monitor Screen Indicators ....................................... E-24 E-24 E-25 Operation Indicator Lamp ....................................... E-26 E-27 E-27 Using the Bundled Accessories .............................. E-28 E-28 E-28 E-29 Power Requirements ............................................... E-31 E-31 E-34 E-34 E-35 E-36 E-36 Memory Cards ......................................................... E-38 E-38 E-39 E-40 E-41 E-41 Menu Screens ......................................................... E-43 Inserting a Memory Card into the Camera Removing a Memory Card from the Camera Formatting a Memory Card Memory Card Precautions IBM Microdrive Precautions Loading Batteries Battery Handling Precautions Low Battery Indicator Using AC Power Turning the Camera On and Off Power Save Settings
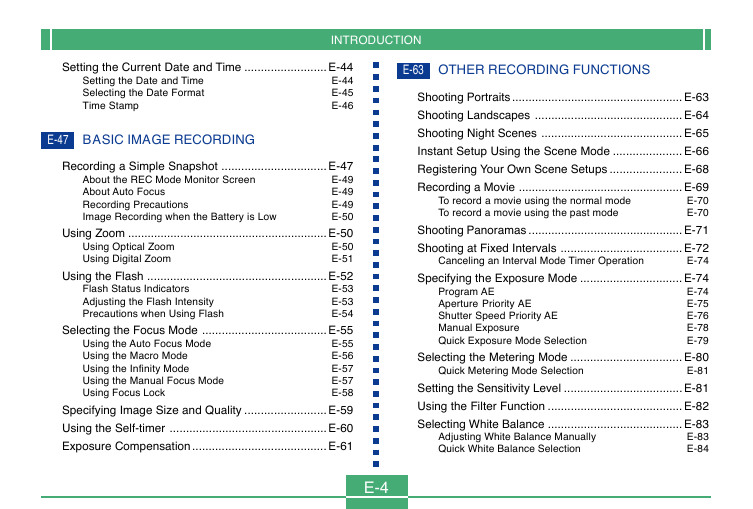
INTRODUCTION E-63 OTHER RECORDING FUNCTIONS Setting the Current Date and Time ......................... E-44 E-44 E-45 E-46 Setting the Date and Time Selecting the Date Format Time Stamp E-47 BASIC IMAGE RECORDING Using Optical Zoom Using Digital Zoom Flash Status Indicators Adjusting the Flash Intensity Precautions when Using Flash About the REC Mode Monitor Screen About Auto Focus Recording Precautions Image Recording when the Battery is Low Recording a Simple Snapshot ................................ E-47 E-49 E-49 E-49 E-50 Using Zoom ............................................................. E-50 E-50 E-51 Using the Flash ....................................................... E-52 E-53 E-53 E-54 Selecting the Focus Mode ...................................... E-55 E-55 E-56 E-57 E-57 E-58 Specifying Image Size and Quality ......................... E-59 Using the Self-timer ................................................ E-60 Exposure Compensation ......................................... E-61 Using the Auto Focus Mode Using the Macro Mode Using the Infinity Mode Using the Manual Focus Mode Using Focus Lock E-4 Canceling an Interval Mode Timer Operation To record a movie using the normal mode To record a movie using the past mode Shooting Portraits .................................................... E-63 Shooting Landscapes ............................................. E-64 Shooting Night Scenes ........................................... E-65 Instant Setup Using the Scene Mode ..................... E-66 Registering Your Own Scene Setups ...................... E-68 Recording a Movie .................................................. E-69 E-70 E-70 Shooting Panoramas ............................................... E-71 Shooting at Fixed Intervals ..................................... E-72 E-74 Specifying the Exposure Mode ............................... E-74 E-74 E-75 E-76 E-78 E-79 Selecting the Metering Mode .................................. E-80 E-81 Setting the Sensitivity Level .................................... E-81 Using the Filter Function ......................................... E-82 Selecting White Balance ......................................... E-83 E-83 E-84 Program AE Aperture Priority AE Shutter Speed Priority AE Manual Exposure Quick Exposure Mode Selection Adjusting White Balance Manually Quick White Balance Selection Quick Metering Mode Selection
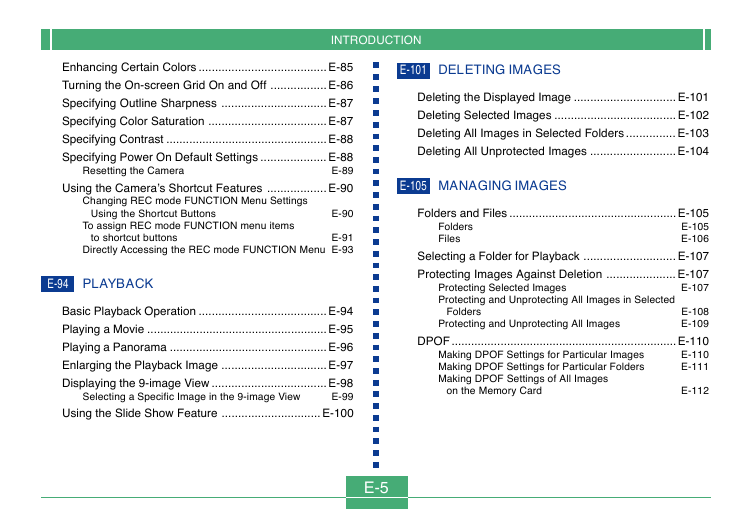
INTRODUCTION Enhancing Certain Colors ....................................... E-85 Turning the On-screen Grid On and Off ................. E-86 Specifying Outline Sharpness ................................ E-87 Specifying Color Saturation .................................... E-87 Specifying Contrast ................................................. E-88 Specifying Power On Default Settings .................... E-88 E-89 Using the Camera’s Shortcut Features .................. E-90 Resetting the Camera Changing REC mode FUNCTION Menu Settings Using the Shortcut Buttons E-90 To assign REC mode FUNCTION menu items to shortcut buttons E-91 Directly Accessing the REC mode FUNCTION Menu E-93 E-94 PLAYBACK Basic Playback Operation ....................................... E-94 Playing a Movie ....................................................... E-95 Playing a Panorama ................................................ E-96 Enlarging the Playback Image ................................ E-97 Displaying the 9-image View ................................... E-98 E-99 Using the Slide Show Feature .............................. E-100 Selecting a Specific Image in the 9-image View E-101 DELETING IMAGES Deleting the Displayed Image ............................... E-101 Deleting Selected Images ..................................... E-102 Deleting All Images in Selected Folders ............... E-103 Deleting All Unprotected Images .......................... E-104 E-105 MANAGING IMAGES Folders Files Folders and Files ................................................... E-105 E-105 E-106 Selecting a Folder for Playback ............................ E-107 Protecting Images Against Deletion ..................... E-107 E-107 Protecting Selected Images Protecting and Unprotecting All Images in Selected Folders Protecting and Unprotecting All Images E-108 E-109 DPOF ..................................................................... E-110 E-110 E-111 Making DPOF Settings for Particular Images Making DPOF Settings for Particular Folders Making DPOF Settings of All Images on the Memory Card E-112 E-5
INTRODUCTION Using the HTML Card Browser ............................. E-130 E-130 E-132 E-135 Specifying the Card Browser Type Viewing Card Browser File Contents Saving Card Browser Files E-136 REFERENCE REC mode PLAY mode Camera Menus ...................................................... E-136 E-136 E-137 Scene List .............................................................. E-138 Scene Mode Camera Setups ................................ E-140 Mode Settings ....................................................... E-142 E-142 E-143 Troubleshooting ..................................................... E-144 E-147 Specifications ........................................................ E-149 Settings in Each Mode Recording Mode + Exposure Mode Combinations Messages E-113 OTHER SETTINGS Turning the Monitor Screen Indicators On and Off ... E-113 Changing the Display Language ........................... E-114 Turning the Confirmation Beep On and Off .......... E-115 E-116 CONNECTING TO EXTERNAL EQUIPMENT Connecting to a Television .................................... E-117 E-118 Selecting the Video Output Signal Mode External Flash Unit Requirements Attaching an External Flash Unit Connecting the Wired Remote Controller to the Camera ....................................................... E-119 Connecting an External Flash Unit (QV-2800UX Only) ................................................ E-119 E-119 E-120 Connecting to a Computer .................................... E-122 E-123 E-124 Using a Memory Card to Transfer Image Data ..... E-125 E-126 E-126 E-127 E-128 Memory Card Data DCF Protocol Memory Card File Structure Image Files Supported by the Camera Precautions when Using a Memory Card USB Port Connection (Windows, Macintosh) Using a Serial Port Connection on a Computer E-128 E-6
INTRODUCTION Quick Reference Getting Ready 1 2 Load batteries. (page E-31) Insert the memory card. (page E-38) 1 PUSH 2 3 1 2 3 Set the current time and date. 3 E-7 (page E-44)
INTRODUCTION Recording an Image (page E-47) 3 Point the camera at the subject, compose the image on the monitor screen, and press the shutter release button half way to focus the image. 1 Slide the POWER ON/OFF switch to the right to turn on the camera. 4 Press the shutter release button all the way down to record the image. POWER ON/OFF W MENU T REC PLAY CARD 2 Slide the REC/PLAY selector to “REC”. SHIFT INFO MF E-8
分享到:
收藏