两台电脑间用 MQ 传递消息
①要用 java 程序向 MQ 发送消息首选要将 MQ 配置好。
MQ 的配置:
一、要有 WebSphere MQ 软件,
可以到 http://www.ibm.com/developerworks/cn/downloads/ws/wmq/下载
在两台电脑上都要安装 MQ 软件,安装过程不多说。
二、配置
(我本地电脑 ip:10.153.20.13
另一台电脑 ip:10.153.20.80)
将本机做位服务器段另一台电脑做客户段
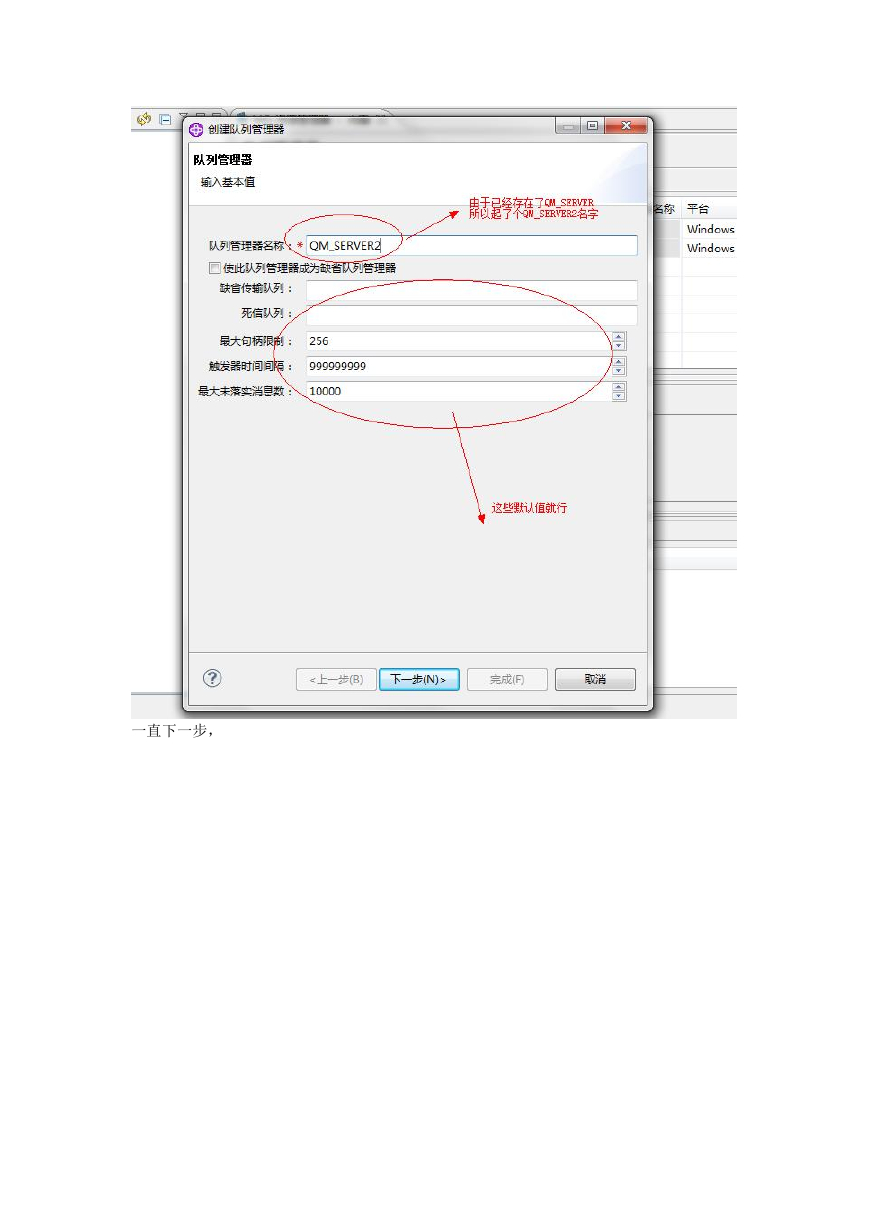
新建一个本地的队列管理器 QM_SERVER2,如下:
右击“队列管理器”,新建“队列管理器”,如下
�
一直下一步,
�
到了这一步后就点完成,此时队列管理器 QM_SERVER2 已经创建完成。
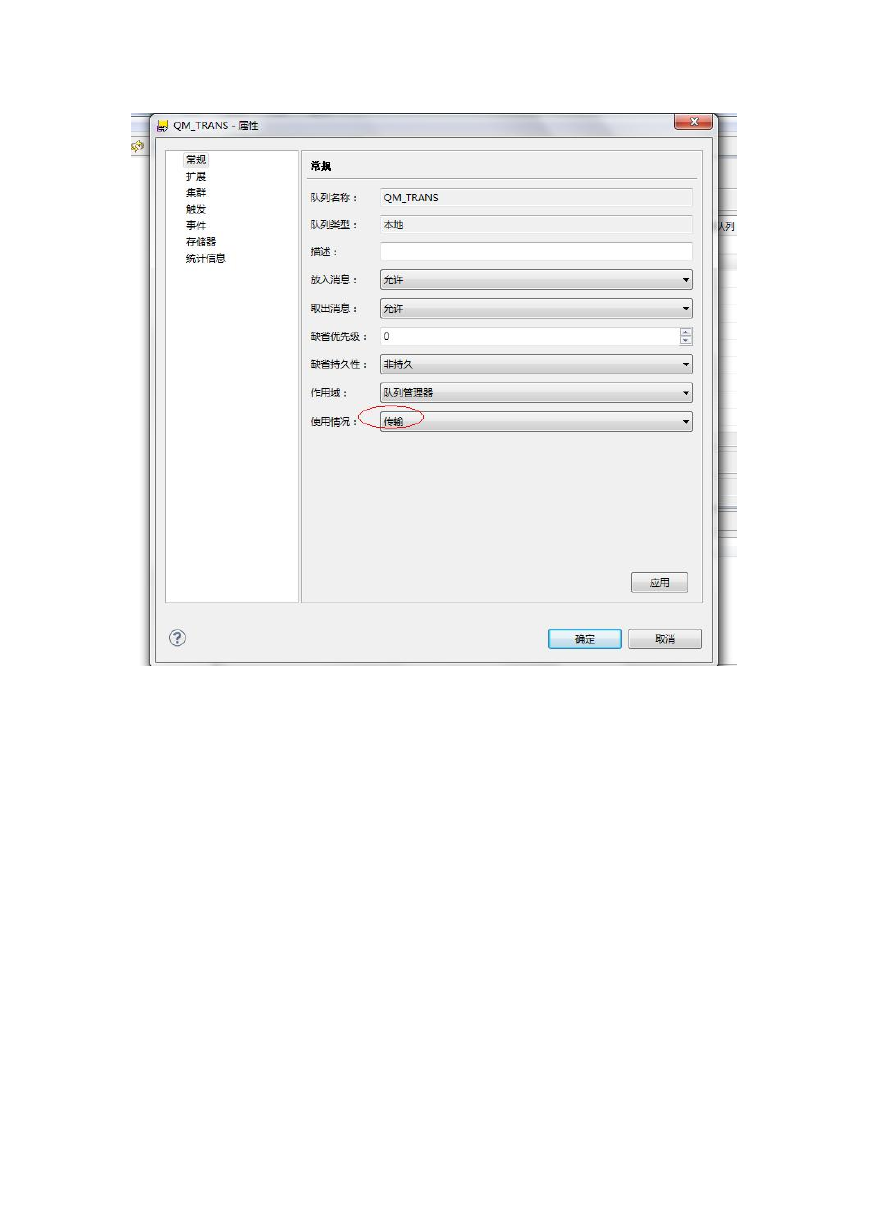
然后在“队列”里面新建一个本地队列和一个远程队列,如下
本地队列里的 使用情况选择‘传输’,完成就 ok。
远程队列里面的,远程队列填 Q1,远程队列管理器 QM_CLIENT2,传输队列 QM_TRANS
�
�
通道里面新建‘发送方通道’QM_SERVER2.QM_CLIENT,'服务器连接通道' QM_CHANNEL
发送发通道 连接名称:10.153.20.80(1416) 传输队列 QM_TRANS
另一台计算机上:
新建队列管理器,名字 QM_CLIENT2 端口号 1416
在队列上新建一个本地队列 Q1
在 通 道 上 新 建 一 个 接 收 方 通 道 QM_SERVER2.QM_CLIENT 和 一 个 服 务 器 连 接 通 道
QM_CHANNEL
这样两台机器都配置好了。
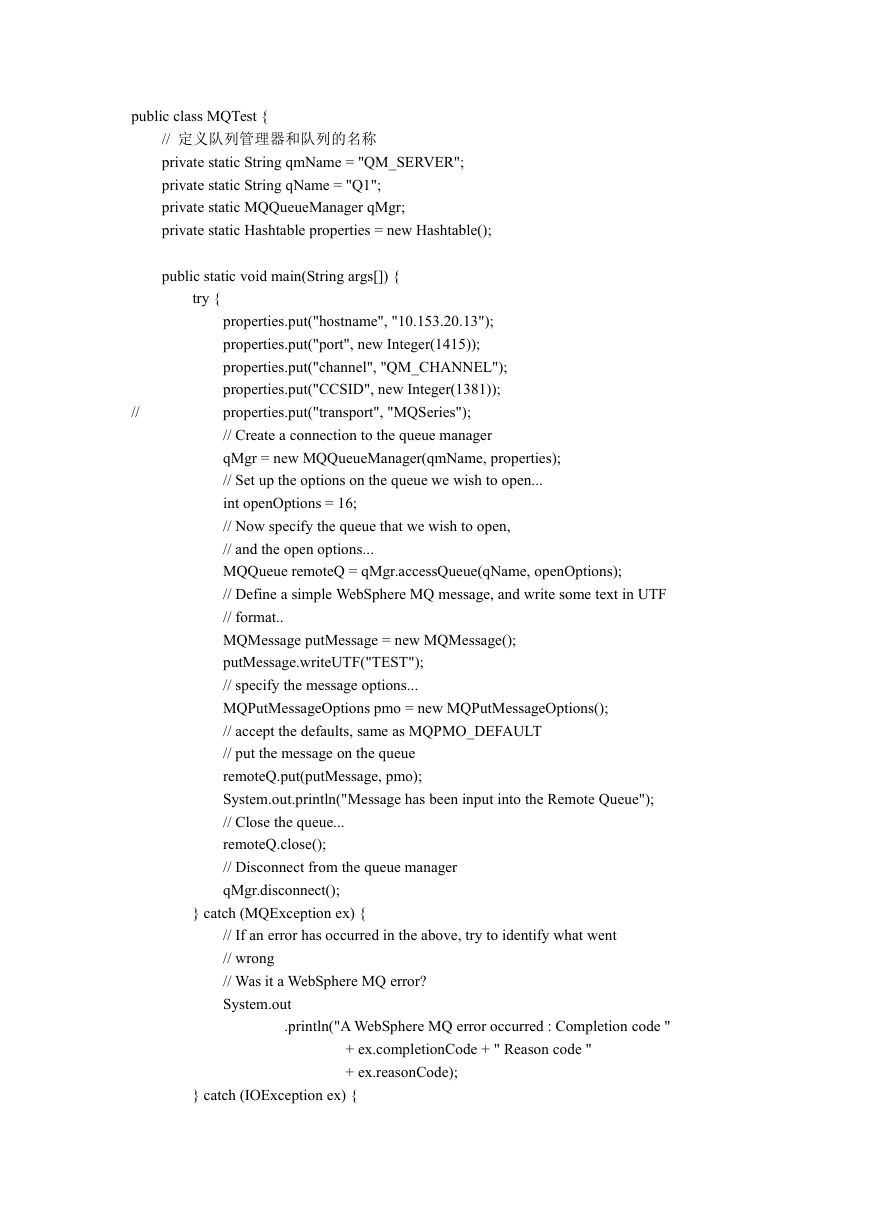
以下是存在本机的代码:
package mq.bao;
import java.io.IOException;
import java.util.Hashtable;
import com.ibm.mq.MQException;
import com.ibm.mq.MQMessage;
import com.ibm.mq.MQPutMessageOptions;
import com.ibm.mq.MQQueue;
import com.ibm.mq.MQQueueManager;
�
public class MQTest {
// 定义队列管理器和队列的名称
private static String qmName = "QM_SERVER";
private static String qName = "Q1";
private static MQQueueManager qMgr;
private static Hashtable properties = new Hashtable();
public static void main(String args[]) {
try {
//
properties.put("hostname", "10.153.20.13");
properties.put("port", new Integer(1415));
properties.put("channel", "QM_CHANNEL");
properties.put("CCSID", new Integer(1381));
properties.put("transport", "MQSeries");
// Create a connection to the queue manager
qMgr = new MQQueueManager(qmName, properties);
// Set up the options on the queue we wish to open...
int openOptions = 16;
// Now specify the queue that we wish to open,
// and the open options...
MQQueue remoteQ = qMgr.accessQueue(qName, openOptions);
// Define a simple WebSphere MQ message, and write some text in UTF
// format..
MQMessage putMessage = new MQMessage();
putMessage.writeUTF("TEST");
// specify the message options...
MQPutMessageOptions pmo = new MQPutMessageOptions();
// accept the defaults, same as MQPMO_DEFAULT
// put the message on the queue
remoteQ.put(putMessage, pmo);
System.out.println("Message has been input into the Remote Queue");
// Close the queue...
remoteQ.close();
// Disconnect from the queue manager
qMgr.disconnect();
} catch (MQException ex) {
// If an error has occurred in the above, try to identify what went
// wrong
// Was it a WebSphere MQ error?
System.out
.println("A WebSphere MQ error occurred : Completion code "
+ ex.completionCode + " Reason code "
+ ex.reasonCode);
} catch (IOException ex) {
�
// Was it a Java buffer space error?
System.out
.println("An error occurred whilst writing to the message buffer: "
+ ex);
} catch (Exception ex) {
ex.printStackTrace();
}
}
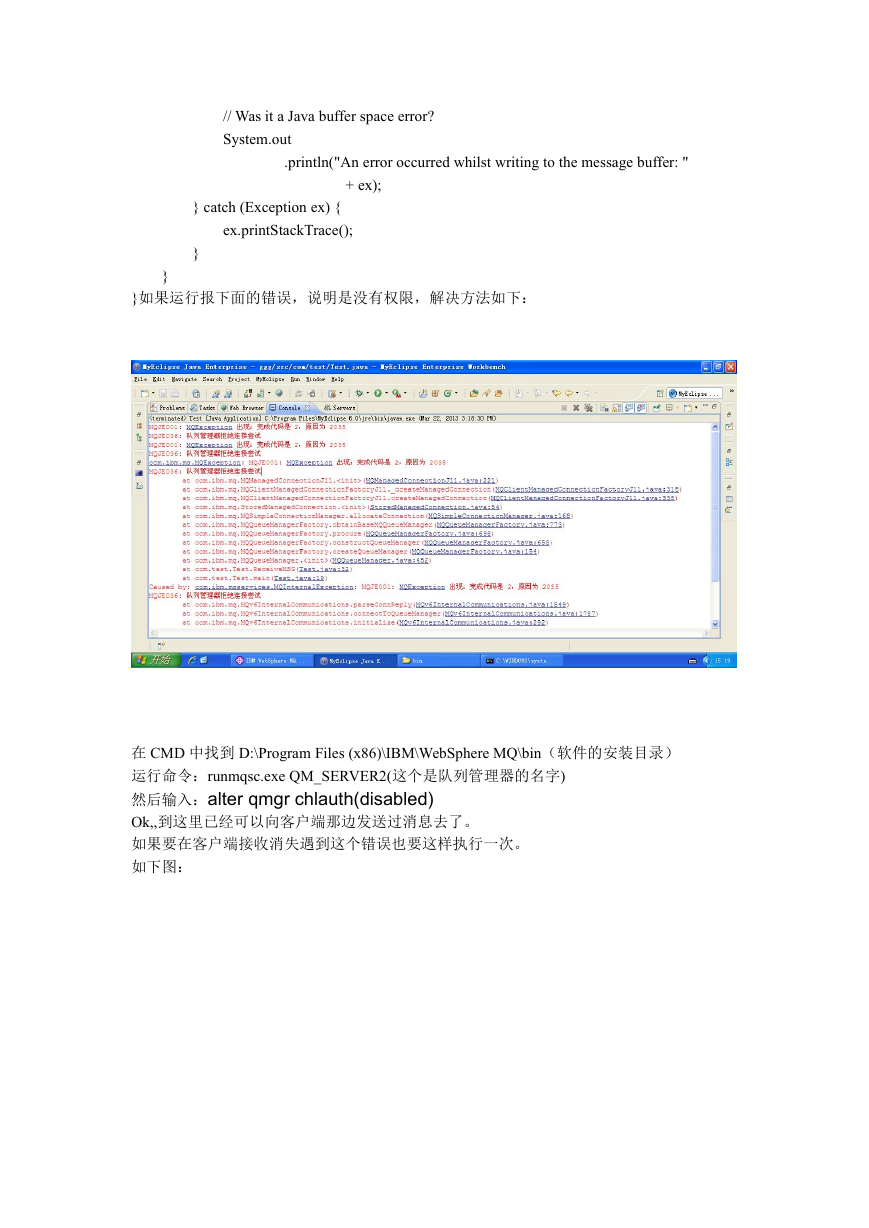
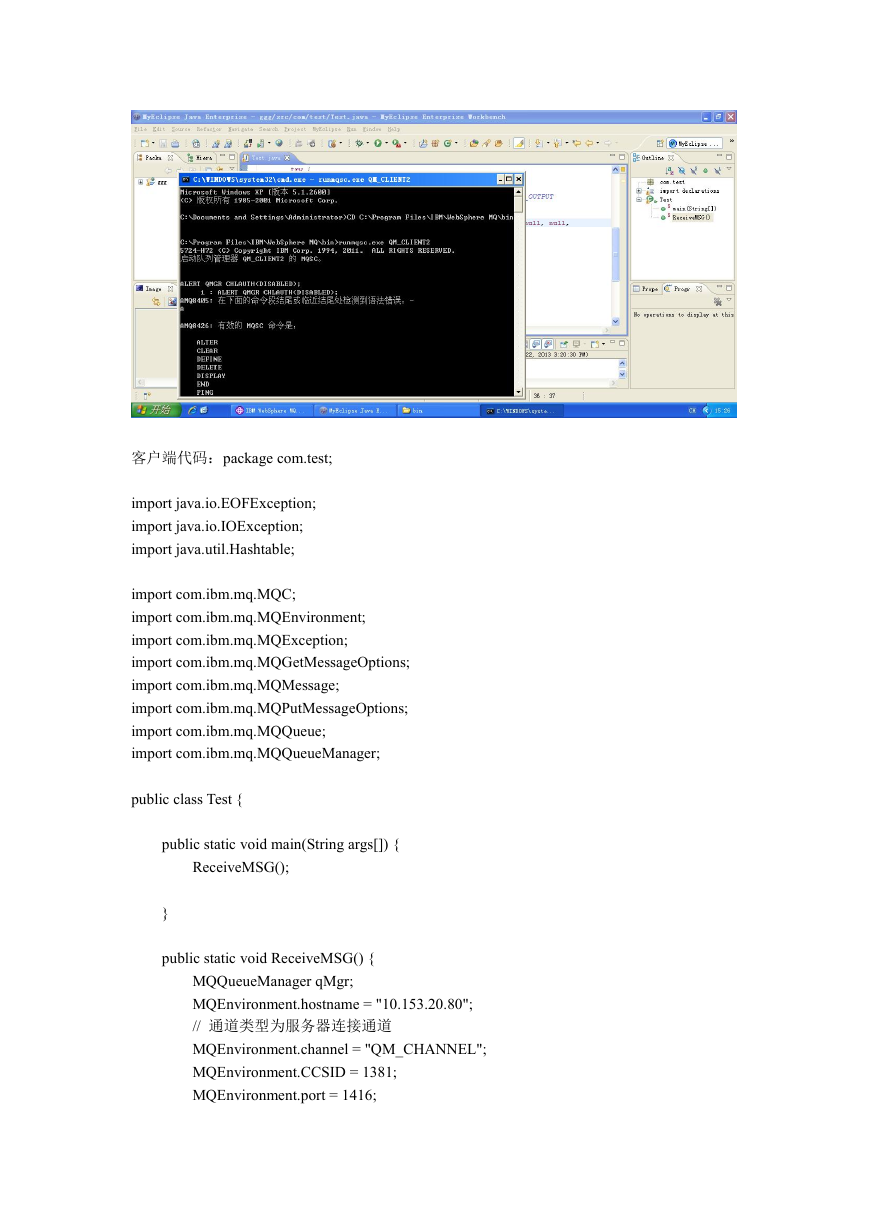
}如果运行报下面的错误,说明是没有权限,解决方法如下:
在 CMD 中找到 D:\Program Files (x86)\IBM\WebSphere MQ\bin(软件的安装目录)
运行命令:runmqsc.exe QM_SERVER2(这个是队列管理器的名字)
然后输入:alter qmgr chlauth(disabled)
Ok,,到这里已经可以向客户端那边发送过消息去了。
如果要在客户端接收消失遇到这个错误也要这样执行一次。
如下图:
�
客户端代码:package com.test;
import java.io.EOFException;
import java.io.IOException;
import java.util.Hashtable;
import com.ibm.mq.MQC;
import com.ibm.mq.MQEnvironment;
import com.ibm.mq.MQException;
import com.ibm.mq.MQGetMessageOptions;
import com.ibm.mq.MQMessage;
import com.ibm.mq.MQPutMessageOptions;
import com.ibm.mq.MQQueue;
import com.ibm.mq.MQQueueManager;
public class Test {
public static void main(String args[]) {
ReceiveMSG();
}
public static void ReceiveMSG() {
MQQueueManager qMgr;
MQEnvironment.hostname = "10.153.20.80";
// 通道类型为服务器连接通道
MQEnvironment.channel = "QM_CHANNEL";
MQEnvironment.CCSID = 1381;
MQEnvironment.port = 1416;
�





 2023年江西萍乡中考道德与法治真题及答案.doc
 2012年重庆南川中考生物真题及答案.doc
 2013年江西师范大学地理学综合及文艺理论基础考研真题.doc
 2020年四川甘孜小升初语文真题及答案I卷.doc
 2020年注册岩土工程师专业基础考试真题及答案.doc
 2023-2024学年福建省厦门市九年级上学期数学月考试题及答案.doc
 2021-2022学年辽宁省沈阳市大东区九年级上学期语文期末试题及答案.doc
 2022-2023学年北京东城区初三第一学期物理期末试卷及答案.doc
 2018上半年江西教师资格初中地理学科知识与教学能力真题及答案.doc
 2012年河北国家公务员申论考试真题及答案-省级.doc
 2020-2021学年江苏省扬州市江都区邵樊片九年级上学期数学第一次质量检测试题及答案.doc
 2022下半年黑龙江教师资格证中学综合素质真题及答案.doc