STK X Tutorial - Managed C++ with MFC
In this exercise you will gain hands-on experience using STK X to embed STK
functionality in a container application created with Managed C++ with MFC. This
tutorial uses Microsoft Visual Studio.NET 2003.
CONTENTS
CREATE THE PROJECT .............................................................................................1
ADD THE STK X CONTROLS TO THE TOOLBOX ............................................................2
SEND COMMANDS TO STK X ....................................................................................4
ADD ZOOM IN/OUT TO THE MAP CONTROL ................................................................6
RESPOND TO EVENTS RAISED BY STK X ....................................................................8
ADD MAP PICKING................................................................................................10
SET STK X PROPERTIES ........................................................................................13
Create the project
1) Start Visual Studio .NET.
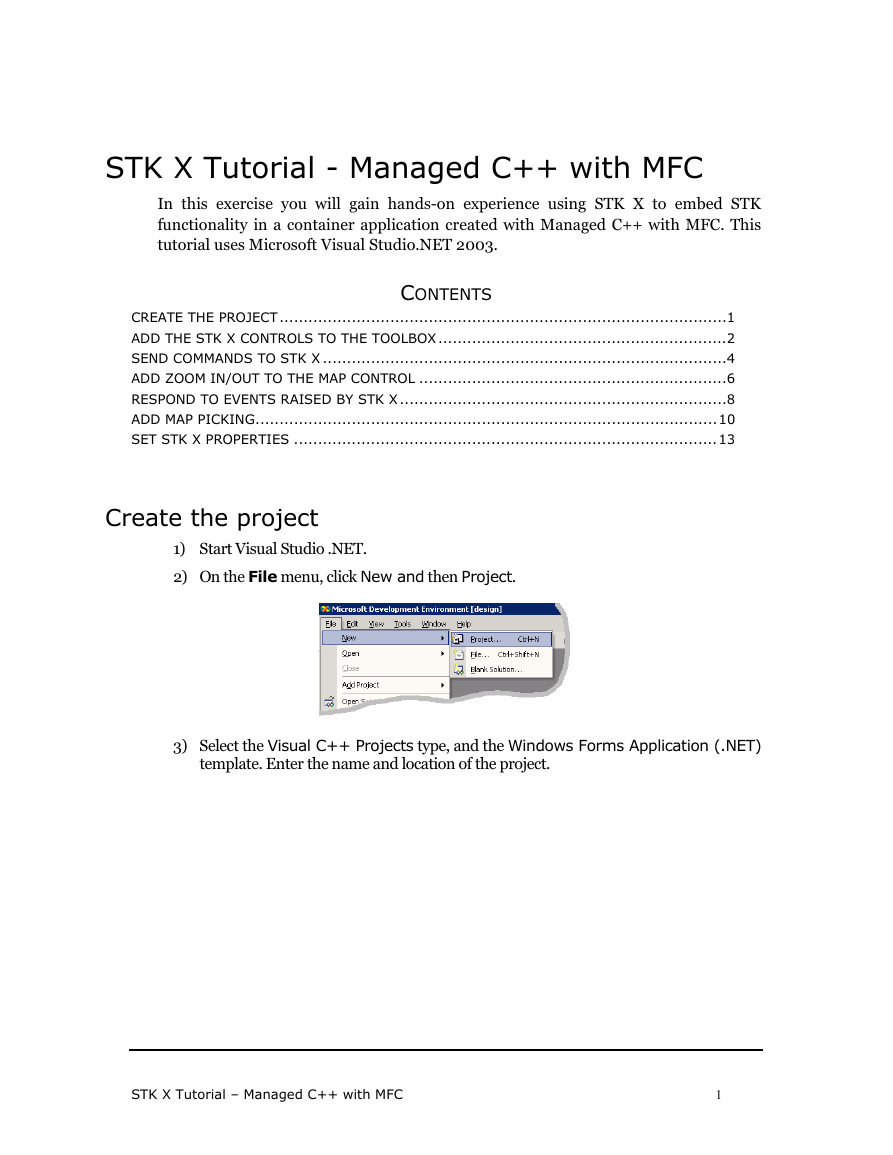
2) On the File menu, click New and then Project.
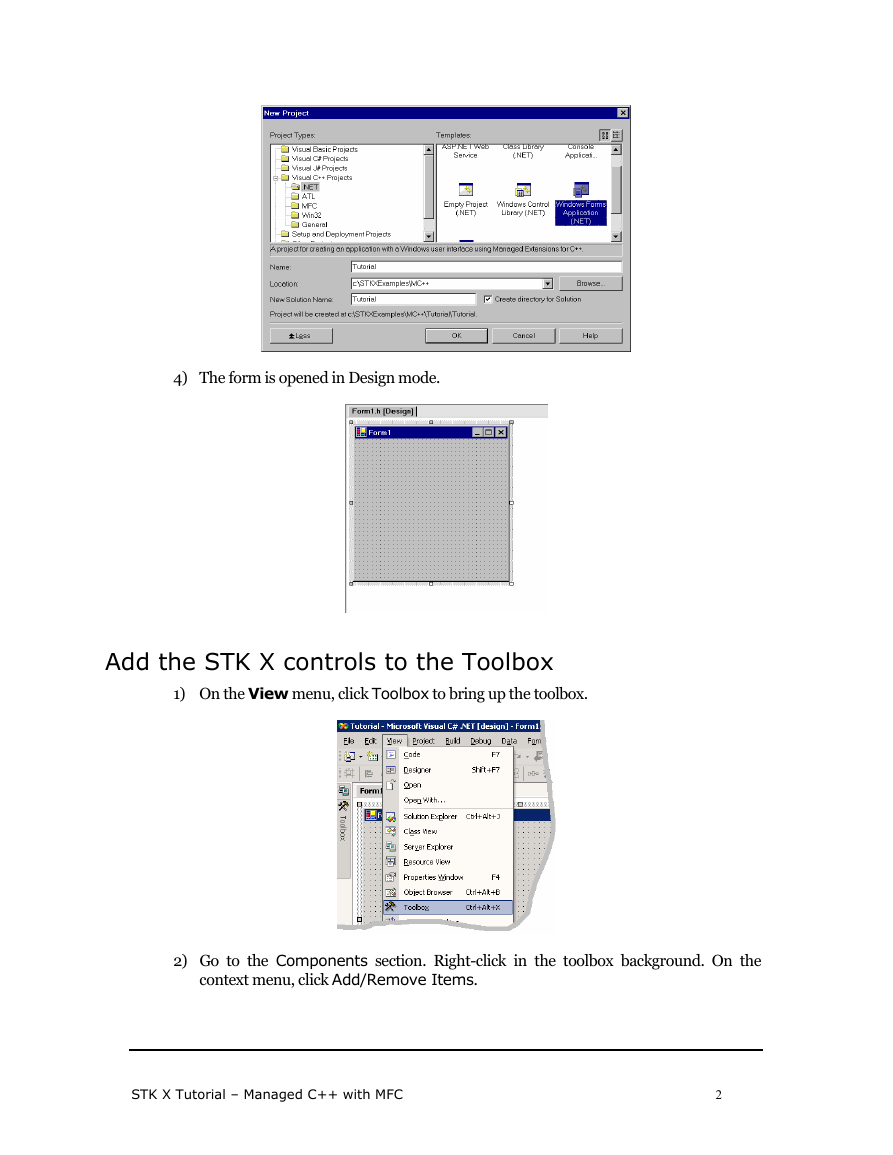
3) Select the Visual C++ Projects type, and the Windows Forms Application (.NET)
template. Enter the name and location of the project.
STK X Tutorial – Managed C++ with MFC
1
�
4) The form is opened in Design mode.
Add the STK X controls to the Toolbox
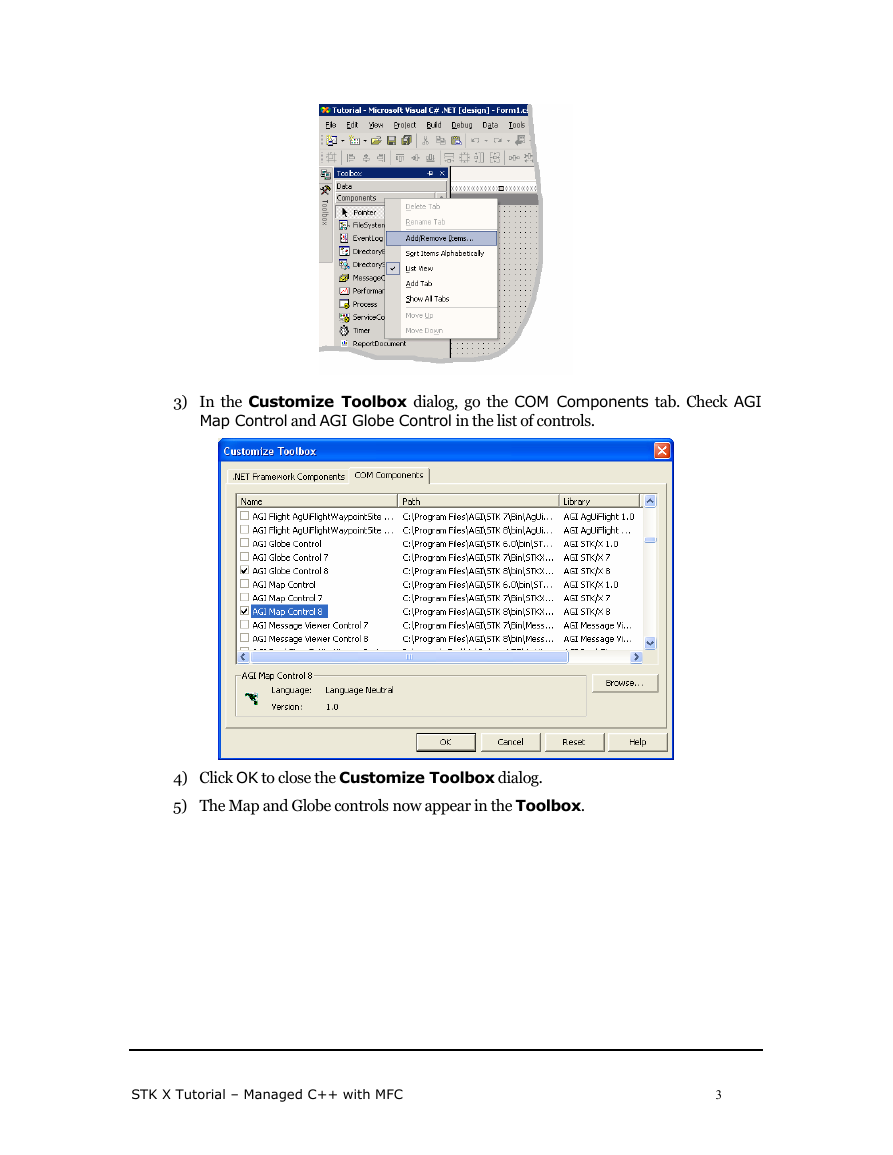
1) On the View menu, click Toolbox to bring up the toolbox.
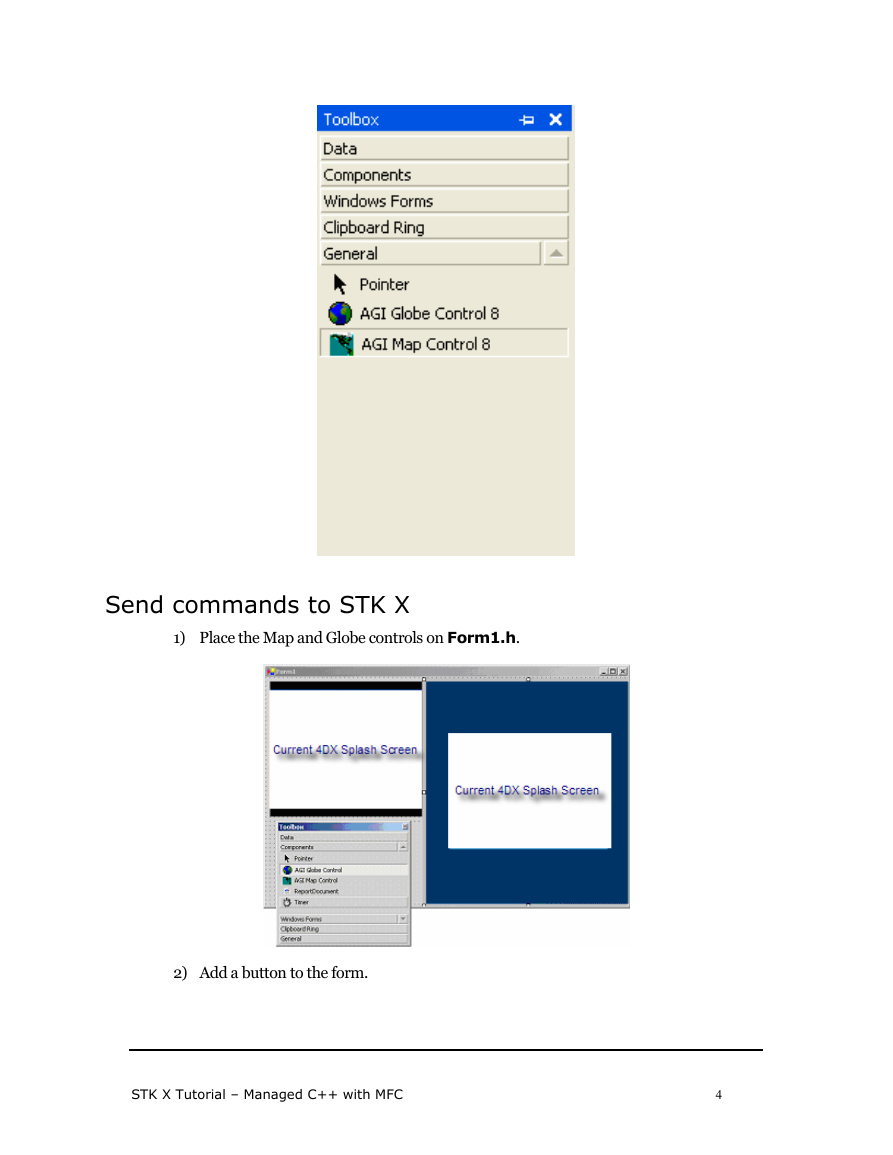
2) Go to the Components section. Right-click in the toolbox background. On the
context menu, click Add/Remove Items.
STK X Tutorial – Managed C++ with MFC
2
�
3) In the Customize Toolbox dialog, go the COM Components tab. Check AGI
Map Control and AGI Globe Control in the list of controls.
4) Click OK to close the Customize Toolbox dialog.
5) The Map and Globe controls now appear in the Toolbox.
STK X Tutorial – Managed C++ with MFC
3
�
Send commands to STK X
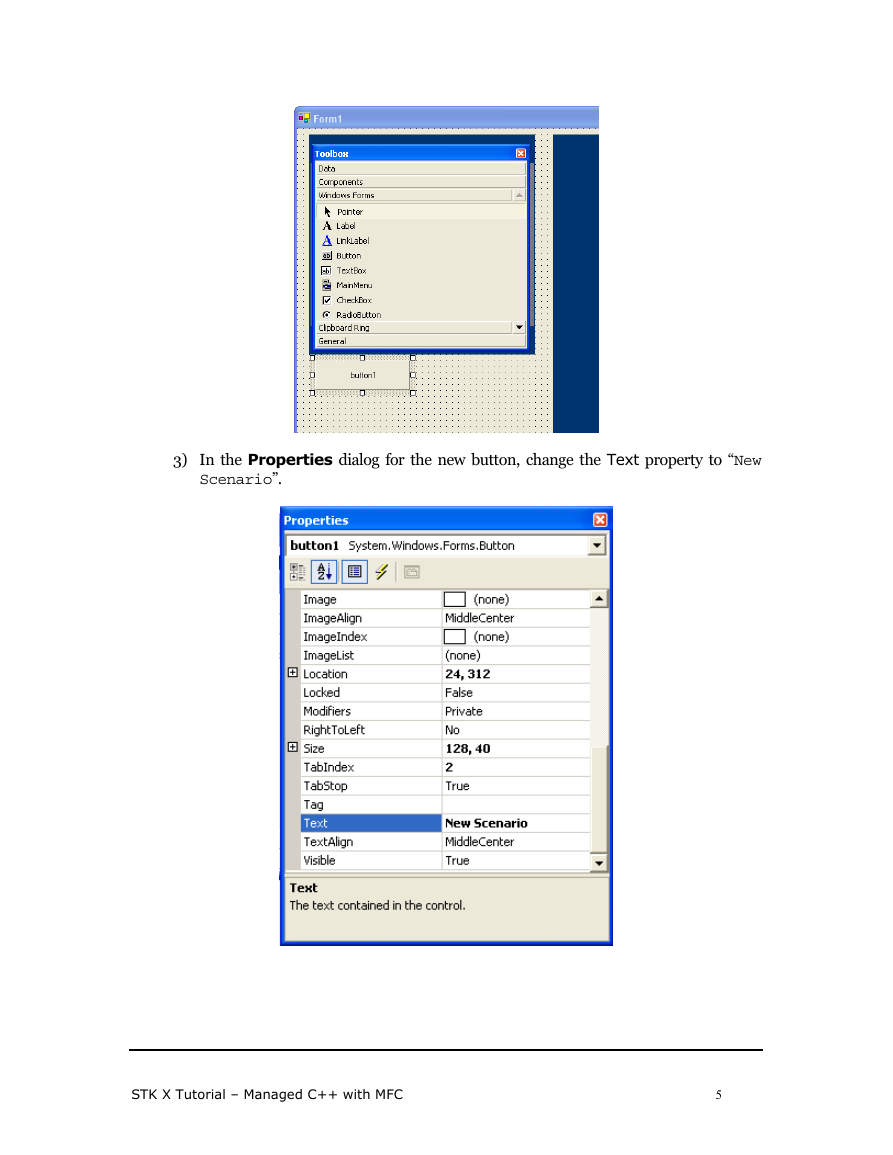
1) Place the Map and Globe controls on Form1.h.
2) Add a button to the form.
STK X Tutorial – Managed C++ with MFC
4
�
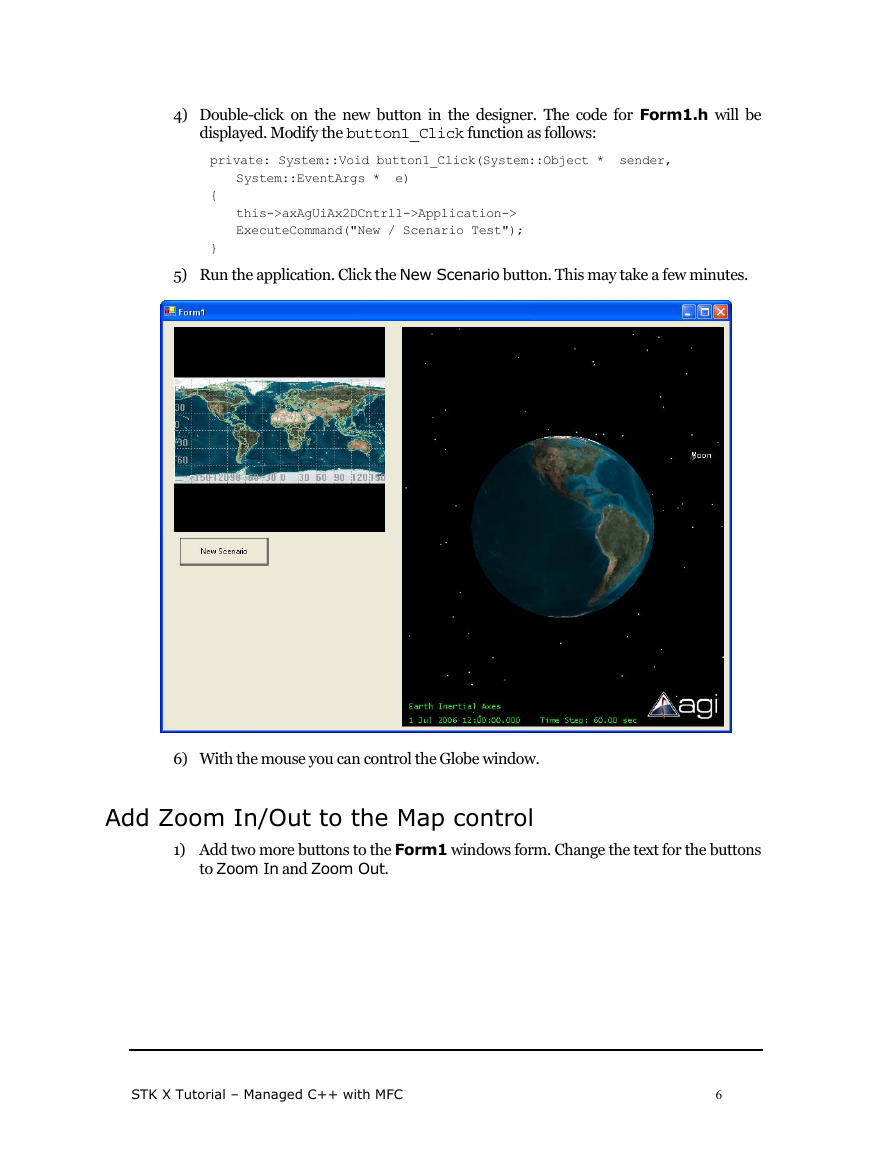
3) In the Properties dialog for the new button, change the Text property to “New
Scenario”.
STK X Tutorial – Managed C++ with MFC
5
�
4) Double-click on the new button in the designer. The code for Form1.h will be
System::EventArgs * e)
displayed. Modify the button1_Click function as follows:
private: System::Void button1_Click(System::Object * sender,
{
}
this->axAgUiAx2DCntrl1->Application->
ExecuteCommand("New / Scenario Test");
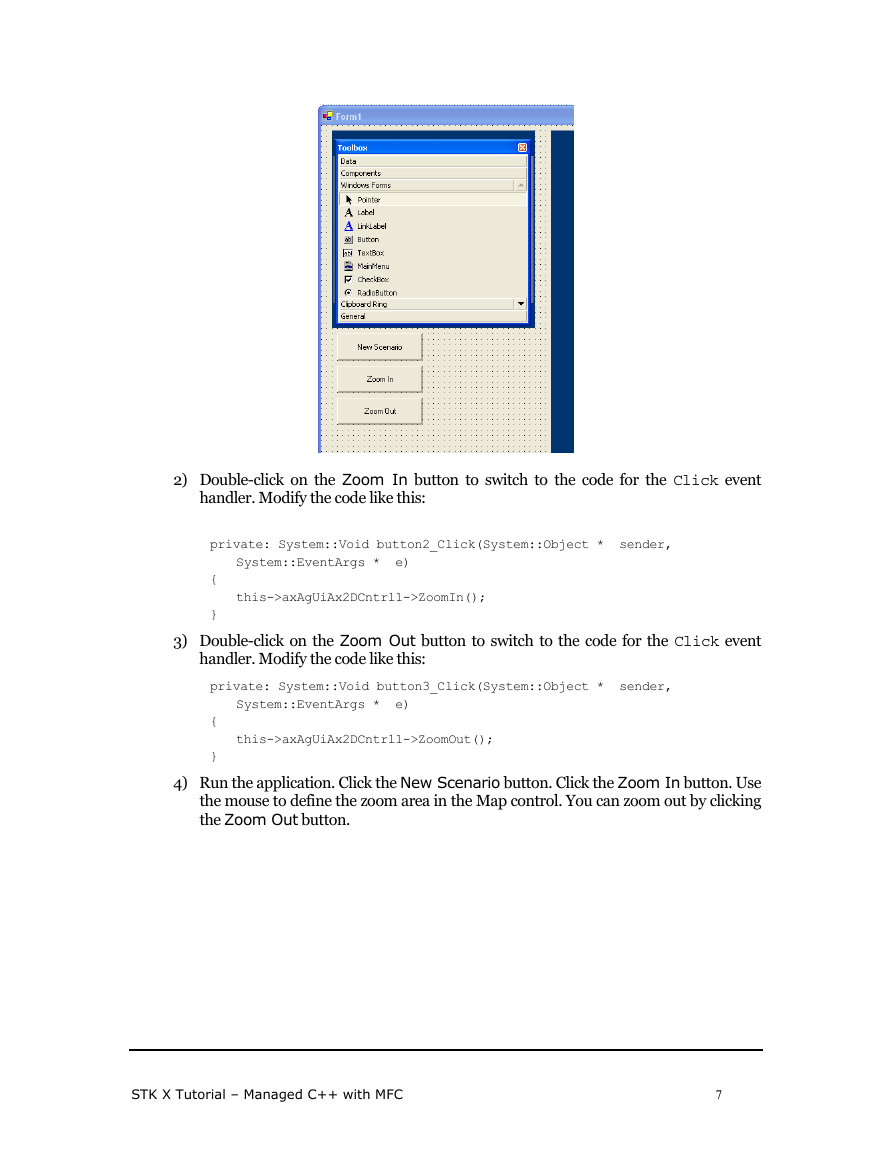
5) Run the application. Click the New Scenario button. This may take a few minutes.
6) With the mouse you can control the Globe window.
Add Zoom In/Out to the Map control
1) Add two more buttons to the Form1 windows form. Change the text for the buttons
to Zoom In and Zoom Out.
STK X Tutorial – Managed C++ with MFC
6
�
2) Double-click on the Zoom In button to switch to the code for the Click event
handler. Modify the code like this:
System::EventArgs * e)
private: System::Void button2_Click(System::Object * sender,
{
}
this->axAgUiAx2DCntrl1->ZoomIn();
3) Double-click on the Zoom Out button to switch to the code for the Click event
System::EventArgs * e)
handler. Modify the code like this:
private: System::Void button3_Click(System::Object * sender,
{
}
this->axAgUiAx2DCntrl1->ZoomOut();
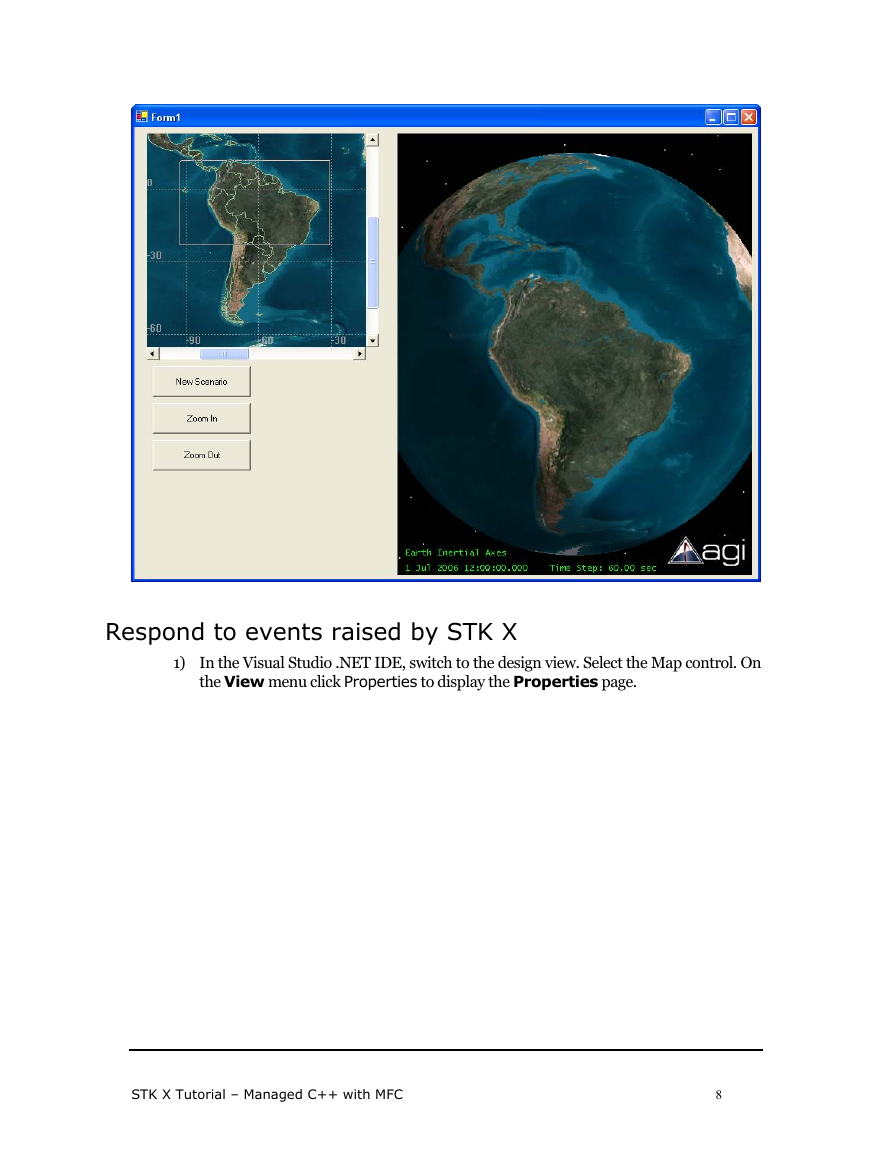
4) Run the application. Click the New Scenario button. Click the Zoom In button. Use
the mouse to define the zoom area in the Map control. You can zoom out by clicking
the Zoom Out button.
STK X Tutorial – Managed C++ with MFC
7
�
Respond to events raised by STK X
1) In the Visual Studio .NET IDE, switch to the design view. Select the Map control. On
the View menu click Properties to display the Properties page.
STK X Tutorial – Managed C++ with MFC
8
�


 2023年江西萍乡中考道德与法治真题及答案.doc
 2012年重庆南川中考生物真题及答案.doc
 2013年江西师范大学地理学综合及文艺理论基础考研真题.doc
 2020年四川甘孜小升初语文真题及答案I卷.doc
 2020年注册岩土工程师专业基础考试真题及答案.doc
 2023-2024学年福建省厦门市九年级上学期数学月考试题及答案.doc
 2021-2022学年辽宁省沈阳市大东区九年级上学期语文期末试题及答案.doc
 2022-2023学年北京东城区初三第一学期物理期末试卷及答案.doc
 2018上半年江西教师资格初中地理学科知识与教学能力真题及答案.doc
 2012年河北国家公务员申论考试真题及答案-省级.doc
 2020-2021学年江苏省扬州市江都区邵樊片九年级上学期数学第一次质量检测试题及答案.doc
 2022下半年黑龙江教师资格证中学综合素质真题及答案.doc