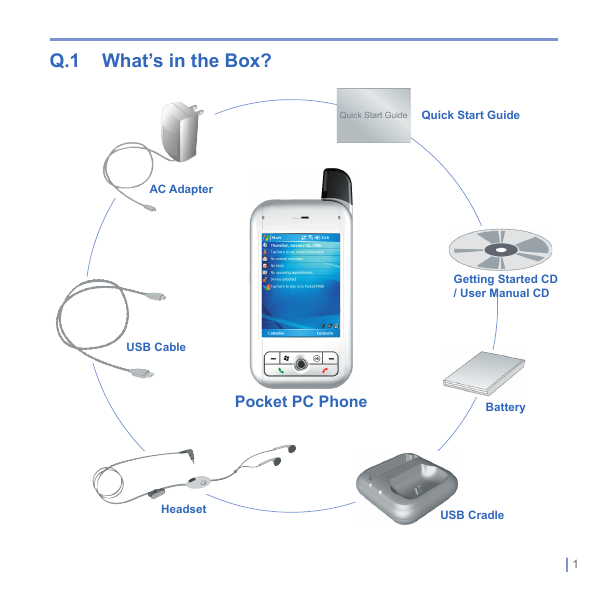
Q.1 What’s in the Box?
AC Adapter
USB Cable
Quick Start Guide
Getting Started CD
/ User Manual CD
Pocket PC Phone
Battery
Headset
USB Cradle
| 1
�
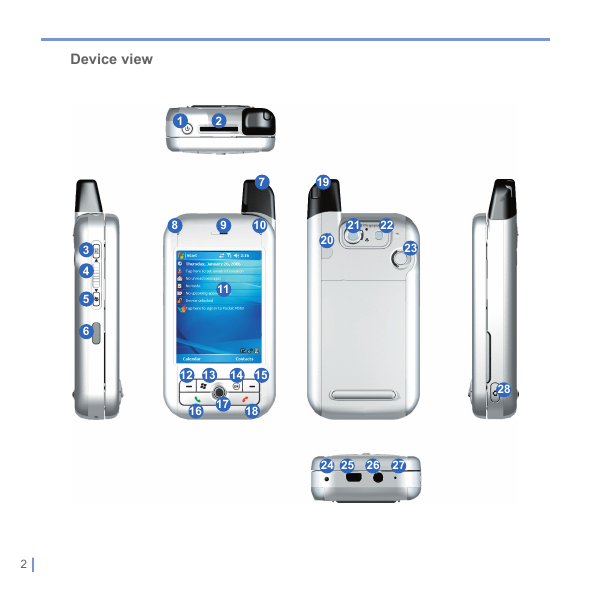
Device view
1
2
7
19
8
9
10
21
22
20
23
11
12
13
14
15
17
16
18
28
24 25 26 27
3
4
5
6
2 |
�
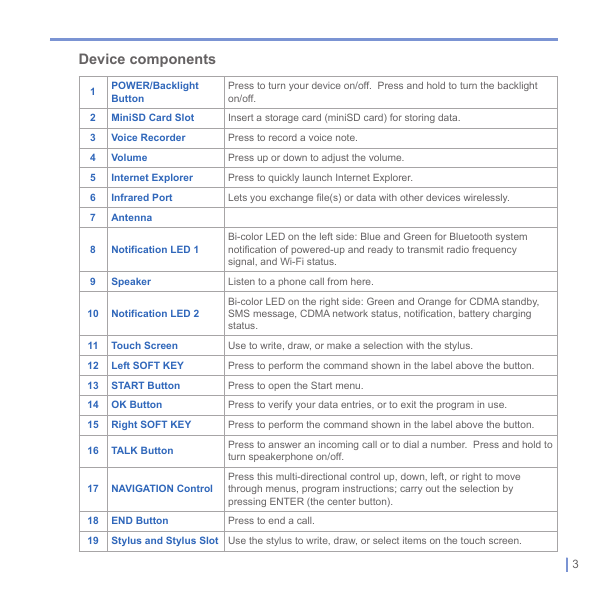
Device components
1
POWER/Backlight
Button
2 MiniSD Card Slot
3
4
5
6
7
Voice Recorder
Volume
Internet Explorer
Infrared Port
Antenna
8
9
Notification LED 1
Speaker
10 Notification LED 2
Touch Screen
11
Left SOFT KEY
12
13 START Button
14 OK Button
15 Right SOFT KEY
16
TALK Button
17 NAVIGATION Control
Press to turn your device on/off. Press and hold to turn the backlight
on/off.
Insert a storage card (miniSD card) for storing data.
Press to record a voice note.
Press up or down to adjust the volume.
Press to quickly launch Internet Explorer.
Lets you exchange file(s) or data with other devices wirelessly.
Bi-color LED on the left side: Blue and Green for Bluetooth system
notification of powered-up and ready to transmit radio frequency
signal, and Wi-Fi status.
Listen to a phone call from here.
Bi-color LED on the right side: Green and Orange for CDMA standby,
SMS message, CDMA network status, notification, battery charging
status.
Use to write, draw, or make a selection with the stylus.
Press to perform the command shown in the label above the button.
Press to open the Start menu.
Press to verify your data entries, or to exit the program in use.
Press to perform the command shown in the label above the button.
Press to answer an incoming call or to dial a number. Press and hold to
turn speakerphone on/off.
Press this multi-directional control up, down, left, or right to move
through menus, program instructions; carry out the selection by
pressing ENTER (the center button).
Press to end a call.
18 END Button
19 Stylus and Stylus Slot Use the stylus to write, draw, or select items on the touch screen.
| 3
�
20 External Antenna
Connector
21 Camera Lens
22
Flash
23 Self-Portrait Mirror
24 RESET Button
25 Sync Connector
26 Earphone Jack
27 Microphone
28 CAMERA Button
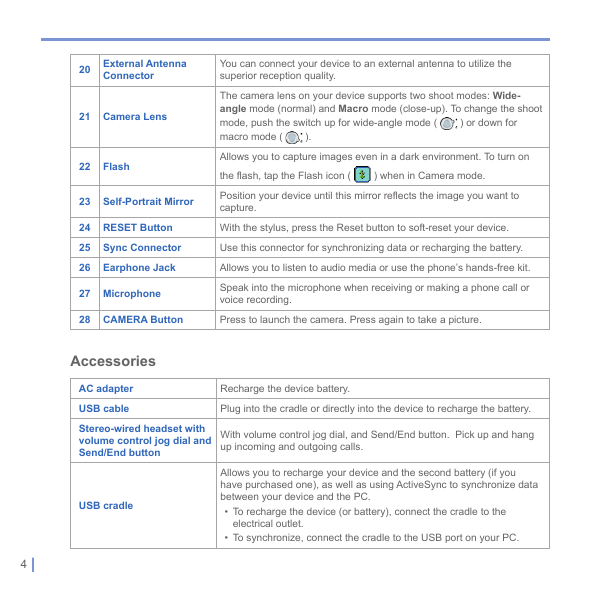
Accessories
AC adapter
USB cable
Stereo-wired headset with
volume control jog dial and
Send/End button
USB cradle
4 |
).
) or down for
You can connect your device to an external antenna to utilize the
superior reception quality.
The camera lens on your device supports two shoot modes: Wide-
angle mode (normal) and Macro mode (close-up). To change the shoot
mode, push the switch up for wide-angle mode (
macro mode (
Allows you to capture images even in a dark environment. To turn on
the flash, tap the Flash icon (
Position your device until this mirror reflects the image you want to
capture.
With the stylus, press the Reset button to soft-reset your device.
Use this connector for synchronizing data or recharging the battery.
Allows you to listen to audio media or use the phone’s hands-free kit.
Speak into the microphone when receiving or making a phone call or
voice recording.
Press to launch the camera. Press again to take a picture.
) when in Camera mode.
Recharge the device battery.
Plug into the cradle or directly into the device to recharge the battery.
With volume control jog dial, and Send/End button. Pick up and hang
up incoming and outgoing calls.
Allows you to recharge your device and the second battery (if you
have purchased one), as well as using ActiveSync to synchronize data
between your device and the PC.
• To recharge the device (or battery), connect the cradle to the
electrical outlet.
• To synchronize, connect the cradle to the USB port on your PC.
�
The QWERTY keyboard
Your device provides you with a QWERTY keyboard, which is similar to a standard keyboard
on your PC. To use the hardware keyboard, slide the main screen rightward to reveal the
keyboard.
Note: Once the keypad is revealed, the screen orientation changes from portrait to landscape.
The QWERTY keyboard
You can do the following with the QWERTY keyboard:
• To type lowercase letters, press the keys using your thumbs or fingers.
• To use all uppercase letters, press
• To type a single uppercase letter, press
• To enter a number or symbol (labeled on the top left of each key in red), press
, and then press the corresponding key.
,
first, then
.
then press the corresponding key.
• Press the Left/Right SOFT KEY (
the screen.
) to perform the command shown on the bottom of
to verify your data entries or exit the program in use.
to open the Start menu.
• Press
• Press
• Press the arrow keys (
• To choose a word that is being predicted, press
) for directional movement.
the selection and add a space.
to select. Then press
to finish
| 5
�
Q.2 Getting Your Device Ready
Install and charge the battery
New batteries are shipped partially charged. Before you can use your Pocket PC Phone,
you need to install and charge the battery. To install the battery, remove the battery cover
first, and then insert the battery by aligning the exposed copper part of the battery pack with
the protruding copper conductor. Then, gently push the battery into place, and replace the
battery cover.
Some batteries perform best after several full charge/discharge cycles. The time needed to
fully charge the battery is less than 4 hours. You can charge the battery by:
• Connecting your device directly to the electrical outlet via the AC Adapter.
• Plugging the device sync cable into the USB port on your PC.
• You can also charge the battery using the USB cradle (connecting to the electrical
outlet or your PC).
When your device is turned off, charging is indicated by a solid amber light on the LED
indicator. When your device is turned on, charging is indicated by a solid amber light on
the LED indicator as well as a charging icon (
the LED indicator or a charged icon (
complete.
When the battery power gets very low, your device screen displays a warning message.
When you see this, immediately save your data by synchronizing with your PC, or save your
data on a secondary storage card, and then turn off your device. Do not try to restart your
device until you have connected your device to an external power supply.
) on the device screen. A green light on
) on the device screen indicates that charging is
Turn on your device
Press POWER to turn on your device. When you turn on the device for the first time, you are
asked to complete a screen calibration process.
To turn off the device, press POWER again.
6 |
�
Q.3 Making a Call
Like a standard mobile phone, you can use your Pocket PC Phone to make, receive, and
keep track of calls and send SMS messages. You can also take notes while talking, and dial
directly from Contacts.
The Phone screen
From the Phone screen, you can access Call History, Speed
Dial, and Phone settings. To open the Phone screen:
• Use the stylus and tap Start > Phone.
-or-
• Press TALK on the device.
The TALK button
• Directly dial the phone number by pressing numeric keys
on the hardware keyboard.
The Phone screen
Make a call from the Phone screen
On the Phone screen, tap the desired phone number, then tap
.
Make a call from Contacts
1. On the Phone screen, tap Contacts at the bottom of the display.
2. Tap the desired contact, and press TALK twice.
Make a call from Call History
1. On the Phone screen, tap
2. Scroll to the desired contact or phone number, and tap Call.
.
| 7
�
Q.4 Synchronizing with ActiveSync
Using Microsoft® ActiveSync®, you can synchronize information on your device with
information on your PC, such as Outlook content. ActiveSync is already installed on your
device, but you need to install it on your PC if you don’t already have it. Insert the Getting
Started CD into the CD drive of your PC. Follow the instructions on the installation wizard
screen to install ActiveSync. Once installation is completed, connect the sync cable to the
device and plug it into your PC’s USB port.
To set up a partnership between the device and the PC, turn on your device. When the PC
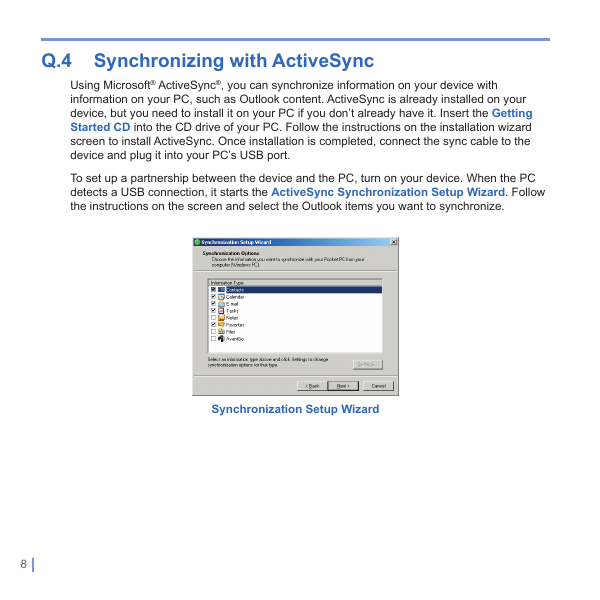
detects a USB connection, it starts the ActiveSync Synchronization Setup Wizard. Follow
the instructions on the screen and select the Outlook items you want to synchronize.
Synchronization Setup Wizard
8 |
�




 2023年江西萍乡中考道德与法治真题及答案.doc
 2012年重庆南川中考生物真题及答案.doc
 2013年江西师范大学地理学综合及文艺理论基础考研真题.doc
 2020年四川甘孜小升初语文真题及答案I卷.doc
 2020年注册岩土工程师专业基础考试真题及答案.doc
 2023-2024学年福建省厦门市九年级上学期数学月考试题及答案.doc
 2021-2022学年辽宁省沈阳市大东区九年级上学期语文期末试题及答案.doc
 2022-2023学年北京东城区初三第一学期物理期末试卷及答案.doc
 2018上半年江西教师资格初中地理学科知识与教学能力真题及答案.doc
 2012年河北国家公务员申论考试真题及答案-省级.doc
 2020-2021学年江苏省扬州市江都区邵樊片九年级上学期数学第一次质量检测试题及答案.doc
 2022下半年黑龙江教师资格证中学综合素质真题及答案.doc