SmallHD DP1 User Manual
DP1x User
Manual
1
�
SmallHD DP1 User Manual
Table of Contents
Overview
•Key Features
•Key Specifications
•What’s new in the DP1x
Monitor Diagram
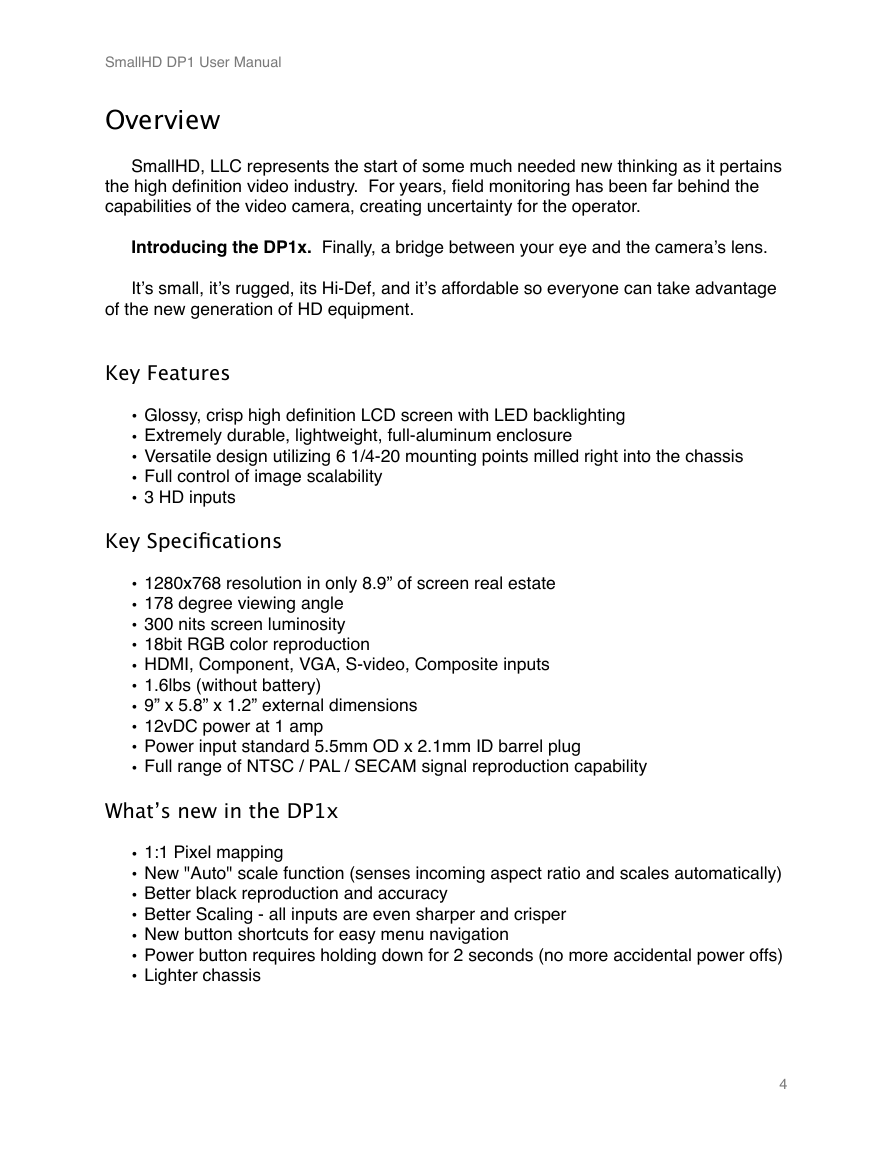
•Front
•Top
•Back
•Power Indicator Light
•Dimensions
Getting Started
•Powering the DP1
AC Power
Battery Specifics (v1.0)
•Menu/Button Interface Basics
Button Contexts
The Input Menu
Introduction to the Main Menu
•Connecting a Source
The Menu
•Picture Control Menu
•OSD Menu
4
4
4
4
5
5
6
7
8
9
10
10
10
10
10
10
12
13
14
15
15
17
2
�
SmallHD DP1 User Manual
•PIP Menu
Setting Color Temp Presets
Setting Picture Mode Presets
Using Overscan and Setting Presets
Additional Advanced Menu Options
•ADC Adjust
Various Calibration / Setups
•Configuration Settings for RED
•Crop
Specifications
•General
•Display
•Connectivity
•Physical
•SmallHD Battery Specifications
Warranty
•2-Year Manufacturer Guarantee
•Customer Service
18
19
21
23
27
27
28
28
29
31
31
31
32
32
33
34
34
34
3
�
SmallHD DP1 User Manual
Overview
SmallHD, LLC represents the start of some much needed new thinking as it pertains
the high definition video industry. For years, field monitoring has been far behind the
capabilities of the video camera, creating uncertainty for the operator.
Introducing the DP1x. Finally, a bridge between your eye and the cameraʼs lens.
Itʼs small, itʼs rugged, its Hi-Def, and itʼs affordable so everyone can take advantage
of the new generation of HD equipment.
Key Features
• Glossy, crisp high definition LCD screen with LED backlighting
• Extremely durable, lightweight, full-aluminum enclosure
• Versatile design utilizing 6 1/4-20 mounting points milled right into the chassis
• Full control of image scalability
• 3 HD inputs
Key Specifications
• 1280x768 resolution in only 8.9” of screen real estate
• 178 degree viewing angle
• 300 nits screen luminosity
• 18bit RGB color reproduction
• HDMI, Component, VGA, S-video, Composite inputs
• 1.6lbs (without battery)
• 9” x 5.8” x 1.2” external dimensions
• 12vDC power at 1 amp
• Power input standard 5.5mm OD x 2.1mm ID barrel plug
• Full range of NTSC / PAL / SECAM signal reproduction capability
What’s new in the DP1x
• 1:1 Pixel mapping
• New "Auto" scale function (senses incoming aspect ratio and scales automatically)
• Better black reproduction and accuracy
• Better Scaling - all inputs are even sharper and crisper
• New button shortcuts for easy menu navigation
• Power button requires holding down for 2 seconds (no more accidental power offs)
• Lighter chassis
4
�
SmallHD DP1 User Manual
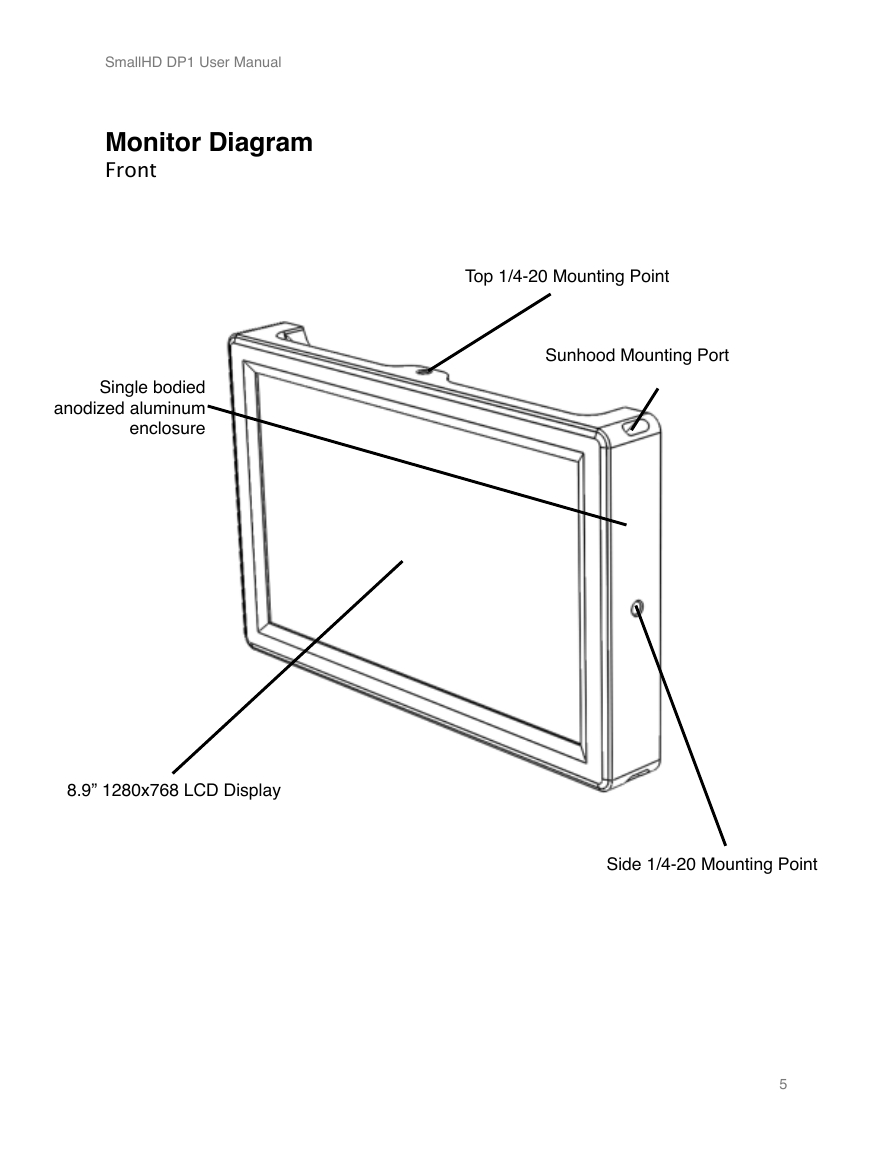
Monitor Diagram
Front
Single bodied
anodized aluminum
enclosure
8.9” 1280x768 LCD Display
Top 1/4-20 Mounting Point
Sunhood Mounting Port
Side 1/4-20 Mounting Point
5
�
SmallHD DP1 User Manual
Monitor Diagram
Top
HDMI
VGA Composite
S-video
YPbPr (Component)
Top 1/4-20 Mounting Point
Sunhood mounting ports
12vDC Power In
5.5mm OD 2.1mm ID Barrel Power Plug
Negative
Positive
Positive
Negative
6
�
SmallHD DP1 User Manual
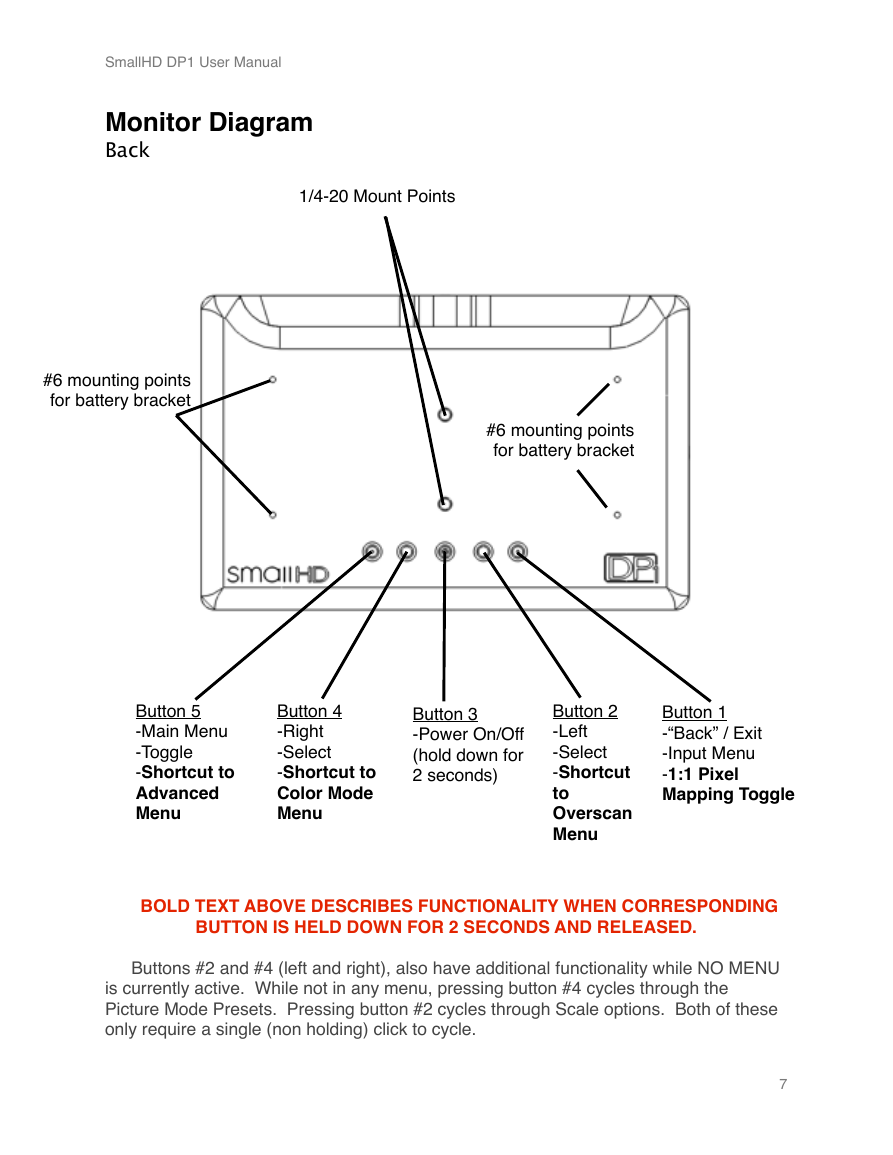
Monitor Diagram
Back
1/4-20 Mount Points
#6 mounting points
for battery bracket
#6 mounting points
for battery bracket
Button 5
-Main Menu
-Toggle
-Shortcut to
Advanced
Menu
Button 4
-Right
-Select
-Shortcut to
Color Mode
Menu
Button 3
-Power On/Off
(hold down for
2 seconds)
Button 1
-“Back” / Exit
-Input Menu
-1:1 Pixel
Mapping Toggle
Button 2
-Left
-Select
-Shortcut
to
Overscan
Menu
BOLD TEXT ABOVE DESCRIBES FUNCTIONALITY WHEN CORRESPONDING
BUTTON IS HELD DOWN FOR 2 SECONDS AND RELEASED.
Buttons #2 and #4 (left and right), also have additional functionality while NO MENU
is currently active. While not in any menu, pressing button #4 cycles through the
Picture Mode Presets. Pressing button #2 cycles through Scale options. Both of these
only require a single (non holding) click to cycle.
7
�
SmallHD DP1 User Manual
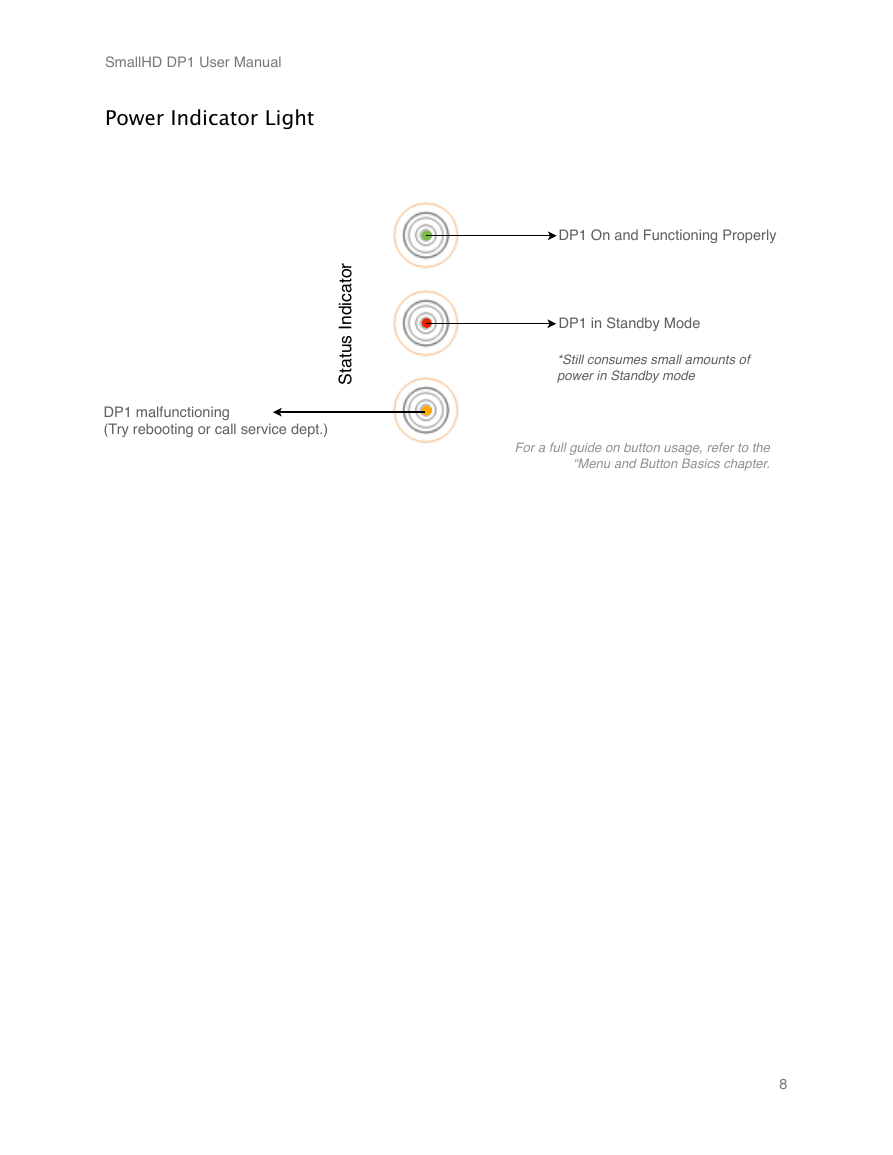
Power Indicator Light
r
o
t
i
a
c
d
n
I
s
u
t
t
a
S
DP1 malfunctioning
(Try rebooting or call service dept.)
DP1 On and Functioning Properly
DP1 in Standby Mode
*Still consumes small amounts of
power in Standby mode
For a full guide on button usage, refer to the
“Menu and Button Basics chapter.
8
�




 2023年江西萍乡中考道德与法治真题及答案.doc
 2012年重庆南川中考生物真题及答案.doc
 2013年江西师范大学地理学综合及文艺理论基础考研真题.doc
 2020年四川甘孜小升初语文真题及答案I卷.doc
 2020年注册岩土工程师专业基础考试真题及答案.doc
 2023-2024学年福建省厦门市九年级上学期数学月考试题及答案.doc
 2021-2022学年辽宁省沈阳市大东区九年级上学期语文期末试题及答案.doc
 2022-2023学年北京东城区初三第一学期物理期末试卷及答案.doc
 2018上半年江西教师资格初中地理学科知识与教学能力真题及答案.doc
 2012年河北国家公务员申论考试真题及答案-省级.doc
 2020-2021学年江苏省扬州市江都区邵樊片九年级上学期数学第一次质量检测试题及答案.doc
 2022下半年黑龙江教师资格证中学综合素质真题及答案.doc