�
SYSTEM REQUIREMETS WINDOWS
• for USB –Windows 98/ 98 SE/ 2000/ Me/ XP
• 32 MB RAM
• 110MB free memory capacity
• VGA colour monitor
• CD ROM drive
• USB
SYSTEM REQUIREMETS
IMac,iBook,G3 blue&white series,G4 series
• MacOS 8.6/ 9/ 9.0.2/ if possible 9.0.4
• 32MB RAM or higher
• 110MB free memory capacity
• VGA colour monitor
• CD ROM drive
• USB
Thank you for purchasing the TRAVELER 410z.
Please take the time to read through this instruction manual so you can enjoy all
its features.
This mark on your camera certifies that this camera meets the requirements of the
EU (European Union) concerning interference causing equipment regulations.
CE stands for Conformité Européenne (European Conformity).
Digital Camera SX410z
Tested To Comply
With FCC Standards
FOR HOME OR OFFICE USE
This device complies with Part 15 of the FCC Rules. Operation is subject to the fol-
lowing two conditions: (1) This device may not cause harmful interference, and (2)
this device must accept any interference received, including interference that may
cause undesired operation.
This Class B digital apparatus complies with Canadian ICES-003.
Do not remove the ferrite cores form the cables.
3
�
FOR PROPER AND SAFE USE
Read and understand all warnings and cautions before using this product.
WARNING
Batteries may become hot or explode due to improper use.
Ä Use only the batteries specified in this instruction manual.
Ä Do not install the batteries with the polarity (+/-) reversed.
Ä Do not subject batteries to fire or high temperatures.
Ä Do not attempt to recharge, short, or disassemble.
Ä Do not mix batteries of different types, brands, or ages.
Ä Follow local regulations for battery disposal.
Use caution, accidents may occur when using this product near young chil-dren.Keep batteries or
things that could be swallowed away from young children.Contact a doctor immediately if an object
is swallowed.Immediately remove the batteries and discontinue use if...
Ä the camera is dropped or subjected to an impact in which the interior is exposed.
Ä the product emits a strange smell, heat, or smoke.
Do not walk while looking at the monitor.
Do not disassemble. Electric shock may occur if a high voltage circuit inside
the camera is touched.
T a k e y o u r c a m e r a t o a T r a v e l e r S e r v i c e F a c i l i t y w h e n r e p a i r s a r e r e q u i r e d .
Camera power consumption is about 550mA or 3.2W.
The heat of the camera rises with extended periods of use. Use caution when handling the camera or
removing the batteries and compact flash card.
CAUTION
4
�
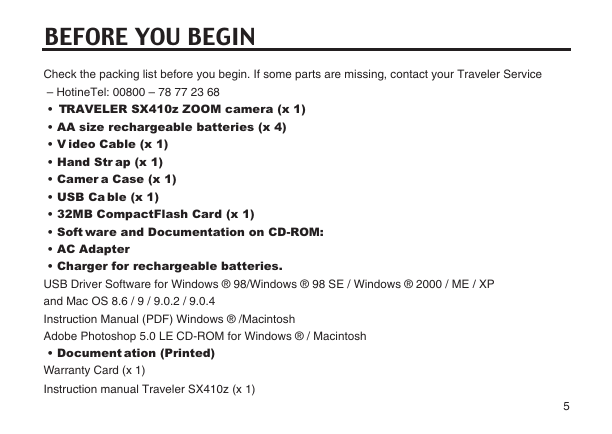
BEFORE YOU BEGIN
Check the packing list before you begin. If some parts are missing, contact your Traveler Service
– HotineTel: 00800 – 78 77 23 68
• TRAVELER SX410z ZOOM camera (x 1)
• AA size rechargeable batteries (x 4)
• V ideo Cable (x 1)
• Hand Str ap (x 1)
• Camer a Case (x 1)
• USB Ca ble (x 1)
• 32MB CompactFlash Card (x 1)
• Soft ware and Documentation on CD-ROM:
• AC Adapter
• Charger for rechargeable batteries.
USB Driver Software for Windows ® 98/Windows ® 98 SE / Windows ® 2000 / ME / XP
and Mac OS 8.6 / 9 / 9.0.2 / 9.0.4
Instruction Manual (PDF) Windows ® /Macintosh
Adobe Photoshop 5.0 LE CD-ROM for Windows ® / Macintosh
• Document ation (Printed)
Warranty Card (x 1)
Instruction manual Traveler SX410z (x 1)
5
�
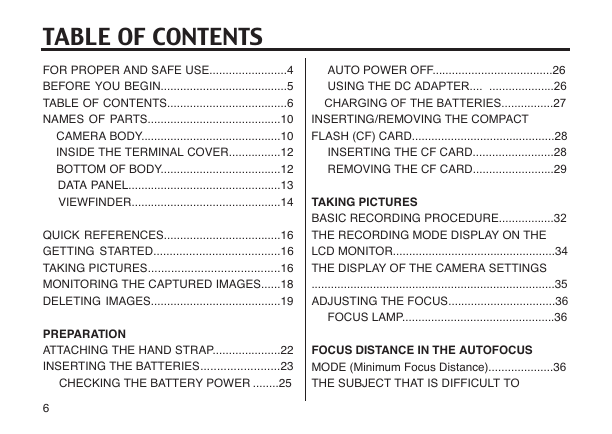
TABLE OF CONTENTS
FOR PROPER AND SAFE USE........................4
BEFORE YOU BEGIN.......................................5
TABLE OF CONTENTS.....................................6
NAMES OF PARTS.........................................10
CAMERA BODY...........................................10
INSIDE THE TERMINAL COVER................12
BOTTOM OF BODY.....................................12
DATA PANEL...............................................13
VIEWFINDER..............................................14
QUICK REFERENCES....................................16
GETTING STARTED.......................................16
TAKING PICTURES........................................16
MONITORING THE CAPTURED IMAGES......18
DELETING IMAGES........................................19
PREPARATION
ATTACHING THE HAND STRAP.....................22
INSERTING THE BATTERIES........................23
CHECKING THE BATTERY POWER ........25
6
AUTO POWER OFF.....................................26
USING THE DC ADAPTER.... ....................26
CHARGING OF THE BATTERIES................27
INSERTING/REMOVING THE COMPACT
FLASH (CF) CARD............................................28
INSERTING THE CF CARD.........................28
REMOVING THE CF CARD.........................29
TAKING PICTURES
BASIC RECORDING PROCEDURE.................32
THE RECORDING MODE DISPLAY ON THE
LCD MONITOR..................................................34
THE DISPLAY OF THE CAMERA SETTINGS
...........................................................................35
ADJUSTING THE FOCUS.................................36
FOCUS LAMP...............................................36
FOCUS DISTANCE IN THE AUTOFOCUS
MODE (Minimum Focus Distance)....................36
THE SUBJECT THAT IS DIFFICULT TO
�
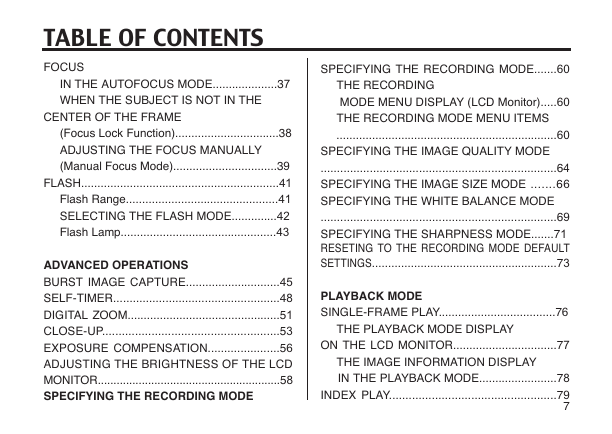
TABLE OF CONTENTS
FOCUS
IN THE AUTOFOCUS MODE....................37
WHEN THE SUBJECT IS NOT IN THE
CENTER OF THE FRAME
(Focus Lock Function)................................38
ADJUSTING THE FOCUS MANUALLY
(Manual Focus Mode)................................39
FLASH.............................................................41
Flash Range...............................................41
SELECTING THE FLASH MODE..............42
Flash Lamp................................................43
ADVANCED OPERATIONS
BURST IMAGE CAPTURE.............................45
SELF-TIMER...................................................48
DIGITAL ZOOM...............................................51
CLOSE-UP......................................................53
EXPOSURE COMPENSATION......................56
ADJUSTING THE BRIGHTNESS OF THE LCD
MONITOR..........................................................58
SPECIFYING THE RECORDING MODE
SPECIFYING THE RECORDING MODE.......60
THE RECORDING
MODE MENU DISPLAY (LCD Monitor).....60
THE RECORDING MODE MENU ITEMS
....................................................................60
SPECIFYING THE IMAGE QUALITY MODE
........................................................................64
SPECIFYING THE IMAGE SIZE MODE .......66
SPECIFYING THE WHITE BALANCE MODE
........................................................................69
SPECIFYING THE SHARPNESS MODE.......71
RESETING TO THE RECORDING MODE DEFAULT
SETTINGS.........................................................73
PLAYBACK MODE
SINGLE-FRAME PLAY....................................76
THE PLAYBACK MODE DISPLAY
ON THE LCD MONITOR................................77
THE IMAGE INFORMATION DISPLAY
IN THE PLAYBACK MODE........................78
INDEX PLAY...................................................79
7
�
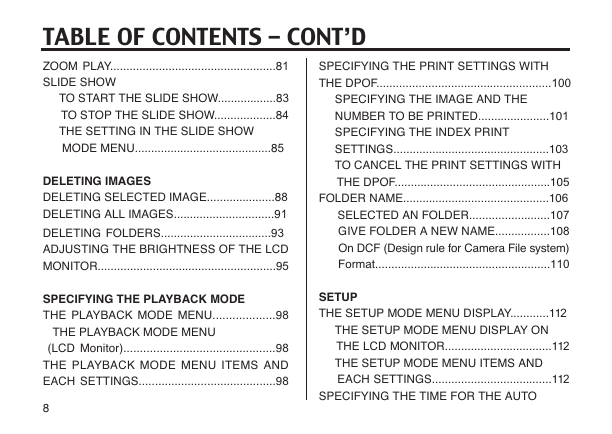
TABLE OF CONTENTS - CONT’D
ZOOM PLAY...................................................81
SLIDE SHOW
TO START THE SLIDE SHOW..................83
TO STOP THE SLIDE SHOW...................84
THE SETTING IN THE SLIDE SHOW
MODE MENU..........................................85
DELETING IMAGES
DELETING SELECTED IMAGE.....................88
DELETING ALL IMAGES...............................91
DELETING FOLDERS..................................93
ADJUSTING THE BRIGHTNESS OF THE LCD
MONITOR.......................................................95
SPECIFYING THE PLAYBACK MODE
THE PLAYBACK MODE MENU...................98
THE PLAYBACK MODE MENU
(LCD Monitor)..............................................98
THE PLAYBACK MODE MENU ITEMS AND
EACH SETTINGS..........................................98
8
SPECIFYING THE PRINT SETTINGS WITH
THE DPOF......................................................100
SPECIFYING THE IMAGE AND THE
NUMBER TO BE PRINTED......................101
SPECIFYING THE INDEX PRINT
SETTINGS................................................103
TO CANCEL THE PRINT SETTINGS WITH
THE DPOF................................................105
FOLDER NAME.............................................106
SELECTED AN FOLDER.........................107
GIVE FOLDER A NEW NAME.................108
On DCF (Design rule for Camera File system)
Format......................................................110
SETUP
THE SETUP MODE MENU DISPLAY............112
THE SETUP MODE MENU DISPLAY ON
THE LCD MONITOR.................................112
THE SETUP MODE MENU ITEMS AND
EACH SETTINGS.....................................112
SPECIFYING THE TIME FOR THE AUTO
�


 2023年江西萍乡中考道德与法治真题及答案.doc
 2012年重庆南川中考生物真题及答案.doc
 2013年江西师范大学地理学综合及文艺理论基础考研真题.doc
 2020年四川甘孜小升初语文真题及答案I卷.doc
 2020年注册岩土工程师专业基础考试真题及答案.doc
 2023-2024学年福建省厦门市九年级上学期数学月考试题及答案.doc
 2021-2022学年辽宁省沈阳市大东区九年级上学期语文期末试题及答案.doc
 2022-2023学年北京东城区初三第一学期物理期末试卷及答案.doc
 2018上半年江西教师资格初中地理学科知识与教学能力真题及答案.doc
 2012年河北国家公务员申论考试真题及答案-省级.doc
 2020-2021学年江苏省扬州市江都区邵樊片九年级上学期数学第一次质量检测试题及答案.doc
 2022下半年黑龙江教师资格证中学综合素质真题及答案.doc