Contents
1
Omni6900 Switch configuration ..........................................................................................2
1.1
1.2
1.3
1.4
1.5
1.6
1.7
1.8
1.9
Cable connection .....................................................................................................2
Login switch .............................................................................................................3
Set EMP IP (switch management IP) ......................................................................3
Allow WEB/SSH/FTP .............................................................................................. 4
Set date/time ........................................................................................................... 4
Restart switch ..........................................................................................................4
VLAN configure CLI .................................................................................................4
Save and backup configuration ...............................................................................5
Enabling/Disabling Spanning Tree on a Port ..........................................................6
1.10
LAG ......................................................................................................................... 6
1.11 CRAN VLAN SCRIPT ..............................................................................................7
1.12 VCRAN VLAN SCRIPT ........................................................................................... 8
1.13 Save configuration ...................................................................................................8
1.14 GUI vlan configuration .............................................................................................8
1.15 Upgrade firmware ....................................................................................................9
1.16 Port Statistics ...........................................................................................................9
1.17 Port mirror ..............................................................................................................11
�
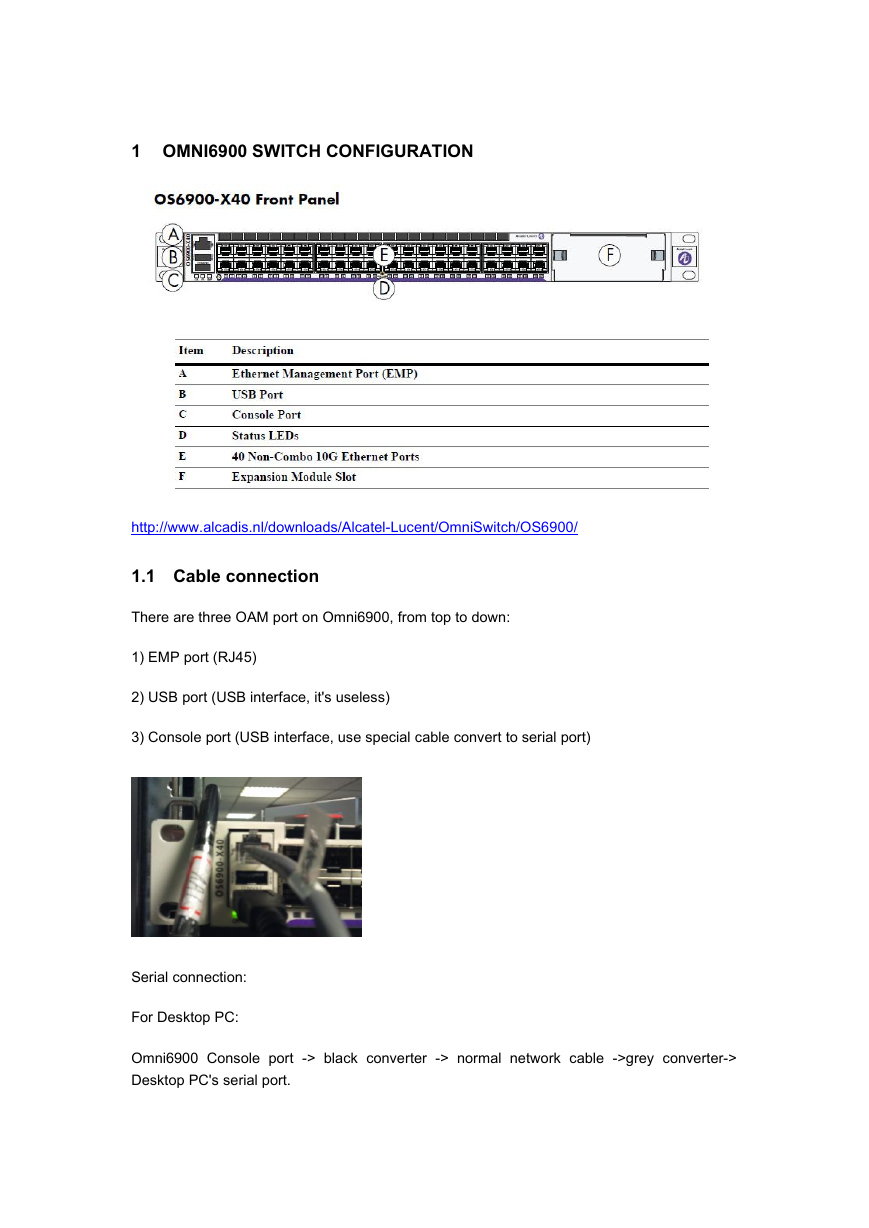
1 OMNI6900 SWITCH CONFIGURATION
http://www.alcadis.nl/downloads/Alcatel-Lucent/OmniSwitch/OS6900/
1.1 Cable connection
There are three OAM port on Omni6900, from top to down:
1) EMP port (RJ45)
2) USB port (USB interface, it's useless)
3) Console port (USB interface, use special cable convert to serial port)
Serial connection:
For Desktop PC:
Omni6900 Console port -> black converter -> normal network cable ->grey converter->
Desktop PC's serial port.
�
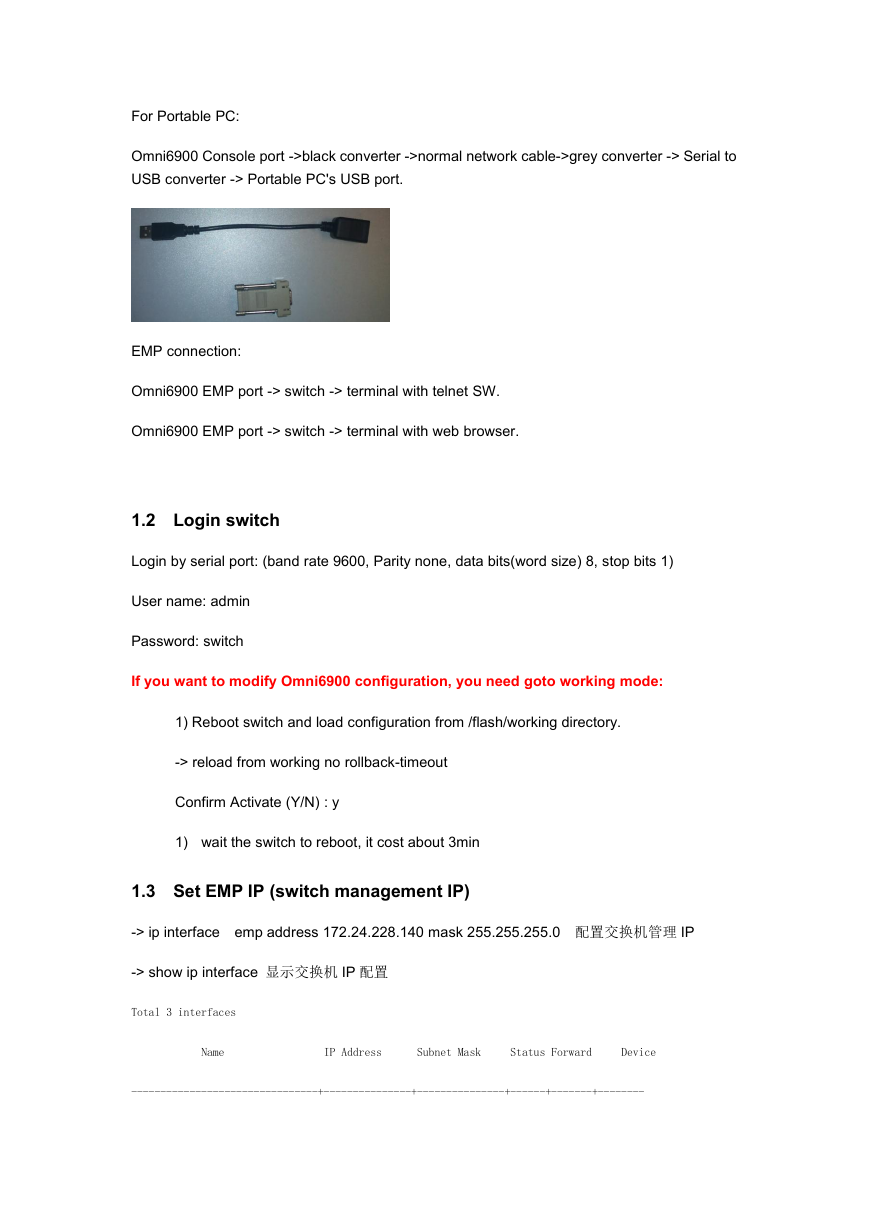
For Portable PC:
Omni6900 Console port ->black converter ->normal network cable->grey converter -> Serial to
USB converter -> Portable PC's USB port.
EMP connection:
Omni6900 EMP port -> switch -> terminal with telnet SW.
Omni6900 EMP port -> switch -> terminal with web browser.
1.2 Login switch
Login by serial port: (band rate 9600, Parity none, data bits(word size) 8, stop bits 1)
User name: admin
Password: switch
If you want to modify Omni6900 configuration, you need goto working mode:
1) Reboot switch and load configuration from /flash/working directory.
-> reload from working no rollback-timeout
Confirm Activate (Y/N) : y
1) wait the switch to reboot, it cost about 3min
1.3 Set EMP IP (switch management IP)
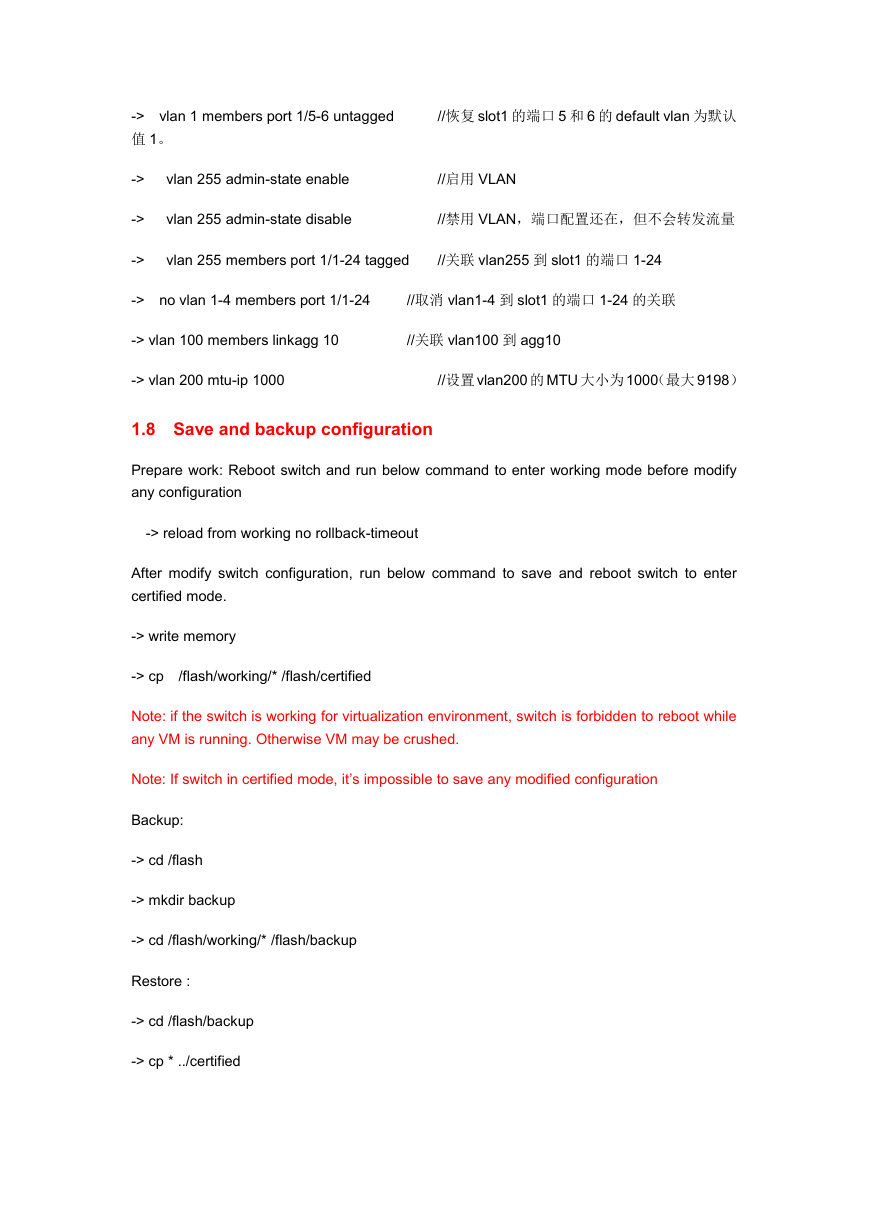
-> ip interface emp address 172.24.228.140 mask 255.255.255.0 配置交换机管理 IP
-> show ip interface 显示交换机 IP 配置
Total 3 interfaces
Name
IP Address
Subnet Mask
Status Forward
Device
--------------------------------+---------------+---------------+------+-------+--------
�
EMP
EMP-CMMA
Loopback
172.24.228.140 255.255.255.0
UP
0.0.0.0
0.0.0.0
DOWN
127.0.0.1
255.255.255.255
UP
NO
NO
NO
EMP
EMP
Loopback
注意:EMP 端口不支持 default GW,如果要从不同网段访问 EMP,需要设置在交换机里设置
静态路由。如果只用同一网段访问,则不需要设置。
-> ip static-route 135.0.0.0 mask 255.0.0.0 gateway 172.24.228.1 设置 135 来访 IP 使用指定的
网关
1.4 Allow WEB/SSH/FTP
-> aaa authentication default local 允许 WEB,SSH,FTP 访问
1.5 Set date/time
-> system date 02/27/2011
-> system time 18:35:00
1.6 Restart switch
-> reload all
1.7 VLAN configure CLI
Telent to Omni6900 EMP port, IP address reference to above chapter.
Vlan configuration
->
->
->
->
->
show vlan
//显示 vlan
show vlan members
//显示 vlan 与端口的关联
show vlan members port 1/1
//显示端口 1/1 的所有 vlan 信息
show vlan 1234 members
//显示 vlan1234 的所有端口
vlan 255 name “vlanname”
//创建 VLAN
-> no vlan 255
//删除 VLAN
-> vlan 220 members port 1/5-6 untagged 设置 slot1 的端口 5 和 6 的 default vlan 为 220,
从端口 5 和 6 进来的没有 vlan 的包会强制变成 vlan 220,从端口 5 和 6 出去的 IP 包,如果带
vlan220,就会被强制变成 no vlan.
�
-> vlan 1 members port 1/5-6 untagged
值 1。
//恢复 slot1 的端口 5 和 6 的 default vlan 为默认
->
->
->
vlan 255 admin-state enable
//启用 VLAN
vlan 255 admin-state disable
//禁用 VLAN,端口配置还在,但不会转发流量
vlan 255 members port 1/1-24 tagged
//关联 vlan255 到 slot1 的端口 1-24
-> no vlan 1-4 members port 1/1-24
//取消 vlan1-4 到 slot1 的端口 1-24 的关联
-> vlan 100 members linkagg 10
//关联 vlan100 到 agg10
-> vlan 200 mtu-ip 1000
//设置 vlan200 的 MTU 大小为 1000(最大 9198)
1.8 Save and backup configuration
Prepare work: Reboot switch and run below command to enter working mode before modify
any configuration
-> reload from working no rollback-timeout
After modify switch configuration, run below command to save and reboot switch to enter
certified mode.
-> write memory
-> cp /flash/working/* /flash/certified
Note: if the switch is working for virtualization environment, switch is forbidden to reboot while
any VM is running. Otherwise VM may be crushed.
Note: If switch in certified mode, it’s impossible to save any modified configuration
Backup:
-> cd /flash
-> mkdir backup
-> cd /flash/working/* /flash/backup
Restore :
-> cd /flash/backup
-> cp * ../certified
�
1.9 Enabling/Disabling Spanning Tree on a Port
-> spantree vlan 10 port 8/1 enable
-> spantree vlan 20 port 6/2 disable
1.10 LAG
-> linkagg static agg 3-10 size 8 创建 agg3-10,每个 agg 都是 8 端口的
-> no linkagg static agg 3-10删除 agg3-10
-> show linkagg 显示已创建的 agg
-> linkagg static agg 2 name accounting
命名 agg2 为”accounting”
-> no linkagg static agg 2 name
删除 agg2-10 的命名
-> linkagg static agg 2 admin-state disable 把 agg2 禁用
-> linkagg static agg 2 admin-state enable 把 agg2 启用
-> linkagg static port 2/1-5 agg 4
把 2/1-5 端口加入 agg4
-> no linkagg static port 2/1-5
把 2/1-5 端口从 agg 里删除
-> show linkagg agg 1
显示 agg1 的端口信息
-> show linkagg agg 1-5 port
显示 agg1-5 的端口信息
-> show linkagg port 4/1
显示端口 4/1 的 agg 信息
-> show linkagg port
显示所有 agg 的端口信息
//查看agg
//查看agg绑定的端口,例如看到端口1/10,1/12
删除动态链路聚合命令
-> show linkagg
-> show linkagg port
-> linkagg lacp agg 126 admin-state disable //禁用agg 126
-> no linkagg lacp agg 126
-> no linkagg lacp port 1/10
-> no linkagg lacp port 1/12
例子:
-> show linkagg
Att/Sel Ports
Number Aggregate
-------+-------------+---------+----+------------+--------------+-----------
--
//删除与链路聚合相关的端口绑定
//删除与链路聚合相关的端口绑定
//删除agg2-10
SNMP Id
Size Admin State Oper State
�
123
124
125
126
127
Dynamic
Dynamic
Dynamic
Dynamic
Dynamic
40000123 16
40000124 16
40000125 16
40000126 16
40000127 16
ENABLED
ENABLED
ENABLED
ENABLED
ENABLED
UP
UP
DOWN
DOWN
DOWN
1
1
0
0
0
1
1
0
0
0
-> show linkagg port
Slot/Port
Link Prim
-------------------+----------+--------+----------+----+-----+-----+----
Aggregate
Agg Oper
SNMP Id
Status
1/10
1/12
Dynamic
Dynamic
1010
1012
ATTACHED
ATTACHED
124 UP
123 UP
UP
UP
YES
YES
These two ports seem to have configured dynamically
To remove:
linkagg lacp agg 123 admin-state disable
linkagg lacp agg 124 admin-state disable
Then remove the ports currently in the dynamic linkagg
no linkagg lacp port 1/10
no linkagg lacp port 1/12
You then should be able to remove the linkagg entirely:
no linkagg lacp agg 123
no linkagg lacp agg 124
1.11 CRAN VLAN SCRIPT
Both up and down switch need to run this script.
�
1.12 VCRAN VLAN SCRIPT
Only down switch need to run this script.
1.13 Save configuration
-> write memory
-> cp /flash/working/* /flash/certified
1.14 GUI vlan configuration
Use web browse to open 6900 web GUI. Select “Layer 2”->”VLAN Mgmt”
Select VLAN to create/modify/delete vlan
Select Members to create/modify/delete vlan port in switch.
�


 2023年江西萍乡中考道德与法治真题及答案.doc
 2012年重庆南川中考生物真题及答案.doc
 2013年江西师范大学地理学综合及文艺理论基础考研真题.doc
 2020年四川甘孜小升初语文真题及答案I卷.doc
 2020年注册岩土工程师专业基础考试真题及答案.doc
 2023-2024学年福建省厦门市九年级上学期数学月考试题及答案.doc
 2021-2022学年辽宁省沈阳市大东区九年级上学期语文期末试题及答案.doc
 2022-2023学年北京东城区初三第一学期物理期末试卷及答案.doc
 2018上半年江西教师资格初中地理学科知识与教学能力真题及答案.doc
 2012年河北国家公务员申论考试真题及答案-省级.doc
 2020-2021学年江苏省扬州市江都区邵樊片九年级上学期数学第一次质量检测试题及答案.doc
 2022下半年黑龙江教师资格证中学综合素质真题及答案.doc