Adafruit AMG8833 8x8 Thermal Camera Sensor
Created by Justin Cooper
Last updated on 2018-01-17 05:57:08 PM UTC
�
Guide Contents
Guide Contents
Overview
Pinouts
Power Pins:
Logic pins:
Assembly
Prepare the header strips:
Add the breakout board:
And Solder!
Arduino Wiring & Test
I2C Wiring
Download Adafruit_AMG88xx library
Load Thermistor Test
Pixel Array Output
Library Reference
Arduino Library Docs
Arduino Thermal Camera
Adafruit 1.44" Color TFT LCD Display with MicroSD Card breakout
CircuitPython Wiring & Test
I2C Wiring
Download Adafruit_CircuitPython_AMG88xx library
Raspberry Pi Thermal Camera
Raspberry Pi 3 - Model B - ARMv8 with 1G RAM
PiTFT Plus Assembled 320x240 2.8" TFT + Resistive Touchscreen
Assembled Pi T-Cobbler Plus - GPIO Breakout
Setup PiTFT
Install Python Software
Enable I2C
Wiring Up Sensor
Run example code
Downloads
Documents
Schematic
Dimensions
2
3
6
6
6
8
8
9
10
12
12
12
13
14
15
16
17
17
19
19
19
22
22
23
23
23
23
24
25
26
28
28
28
28
© Adafruit Industries
https://learn.adafruit.com/adafruit-amg8833-8x8-thermal-camera-sensor
Page 2 of 29
�
Overview
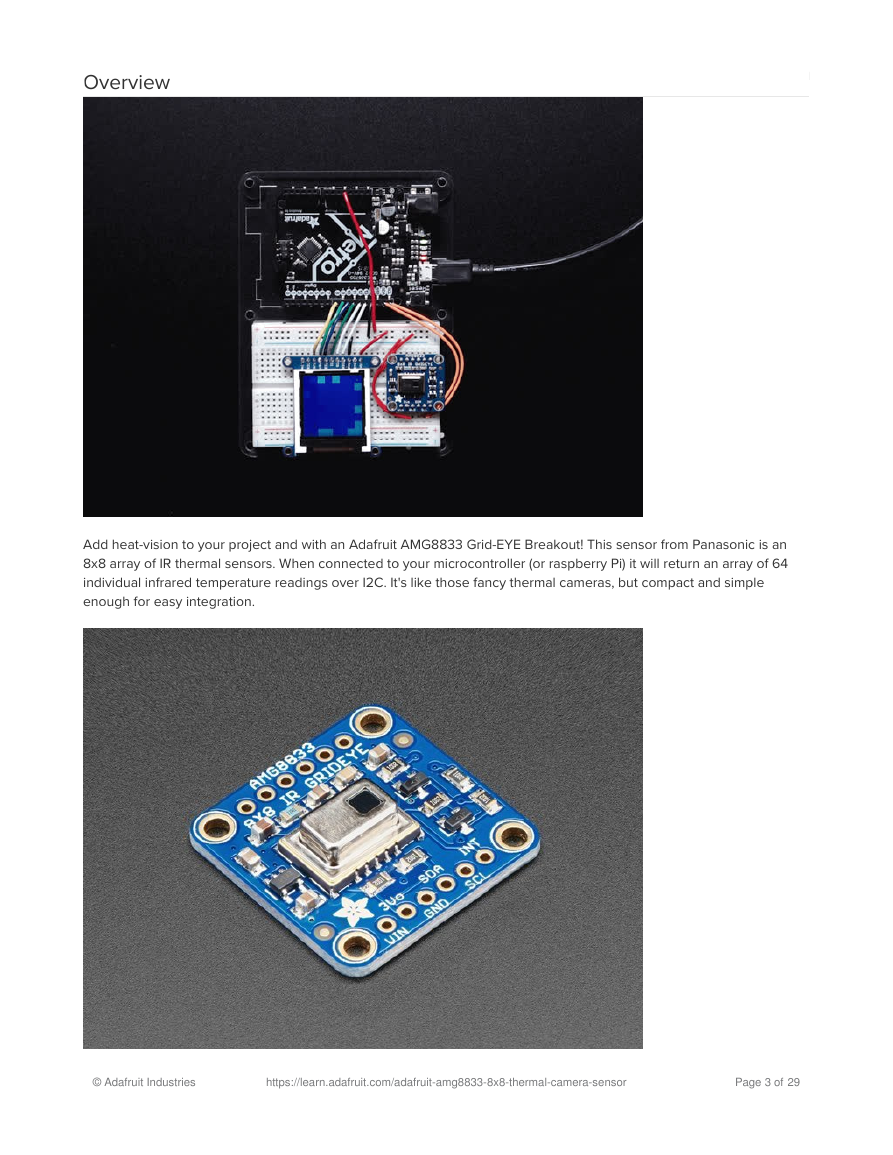
Add heat-vision to your project and with an Adafruit AMG8833 Grid-EYE Breakout! This sensor from Panasonic is an
8x8 array of IR thermal sensors. When connected to your microcontroller (or raspberry Pi) it will return an array of 64
individual infrared temperature readings over I2C. It's like those fancy thermal cameras, but compact and simple
enough for easy integration.
© Adafruit Industries
https://learn.adafruit.com/adafruit-amg8833-8x8-thermal-camera-sensor
Page 3 of 29
�
This part will measure temperatures ranging from 0°C to 80°C (32°F to 176°F) with an accuracy of +- 2.5°C (4.5°F). It can
detect a human from a distance of up to 7 meters (23) feet. With a maximum frame rate of 10Hz, It's perfect for creating
your own human detector or mini thermal camera. We have code for using this breakout on an Arduino or compatible
(the sensor communicates over I2C) or on a Raspberry Pi with Python. On the Pi, with a bit of image processing help
from the SciPy python library we were able to interpolate the 8x8 grid and get some pretty nice results!
© Adafruit Industries
https://learn.adafruit.com/adafruit-amg8833-8x8-thermal-camera-sensor
Page 4 of 29
�
The AMG8833 is the next generation of 8x8 thermal IR sensors from Panasonic, and offers higher performance than
it's predecessor the AMG8831. The sensor only supports I2C, and has a configurable interrupt pin that can fire when
any individual pixel goes above or below a thresholds that you set.
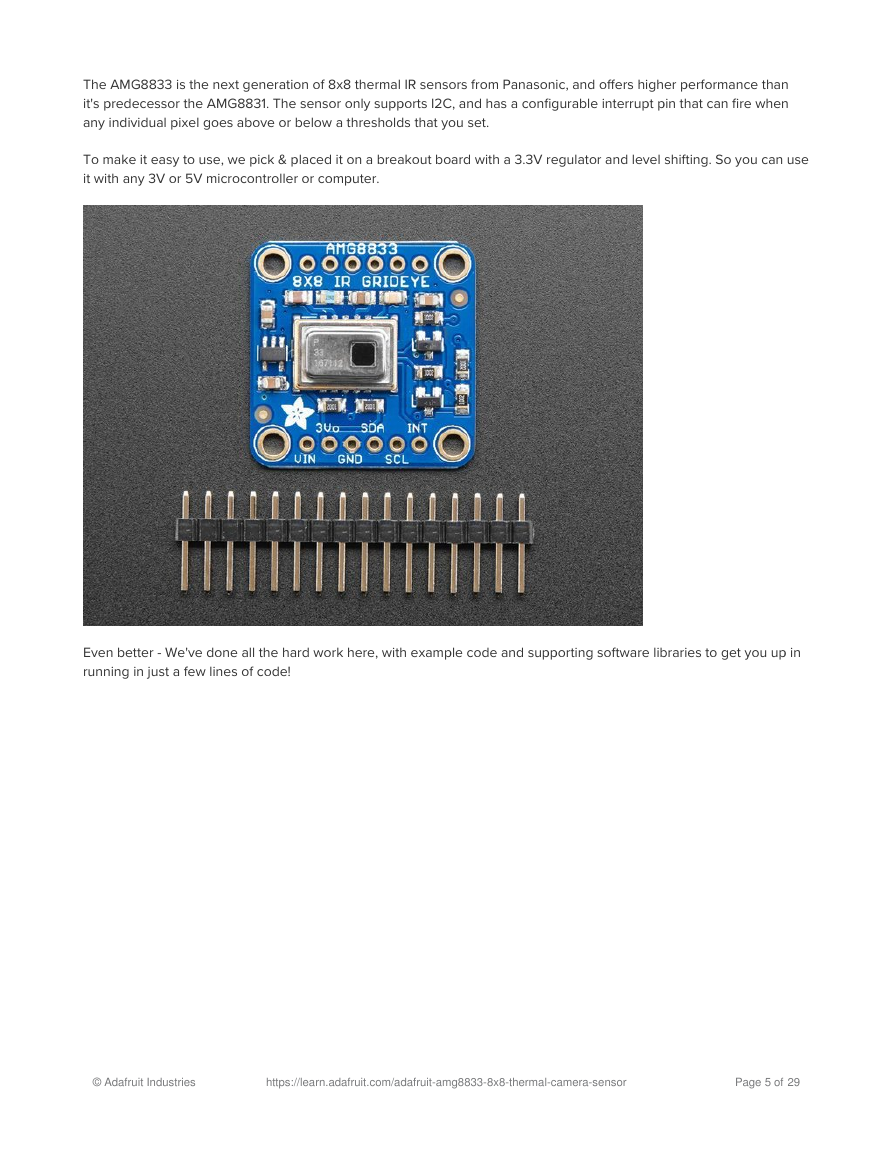
To make it easy to use, we pick & placed it on a breakout board with a 3.3V regulator and level shifting. So you can use
it with any 3V or 5V microcontroller or computer.
Even better - We've done all the hard work here, with example code and supporting software libraries to get you up in
running in just a few lines of code!
© Adafruit Industries
https://learn.adafruit.com/adafruit-amg8833-8x8-thermal-camera-sensor
Page 5 of 29
�
Pinouts
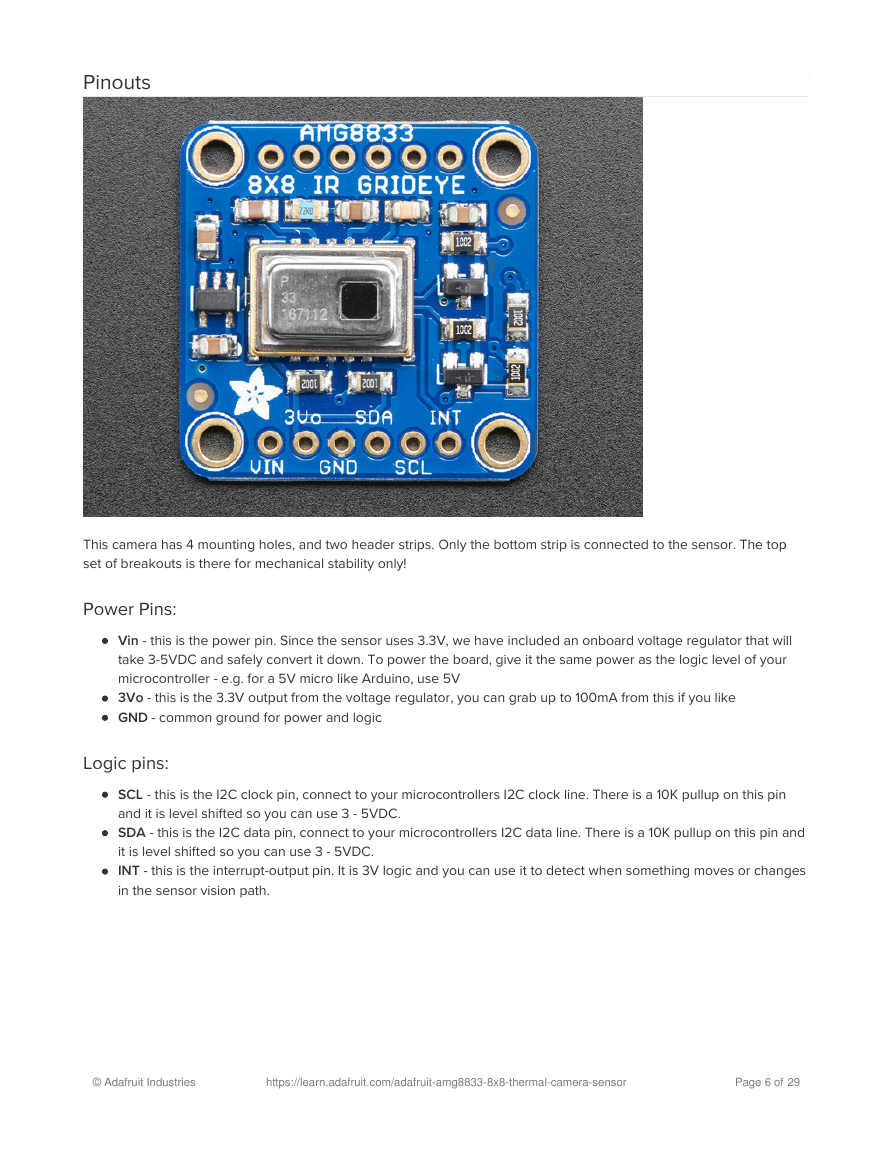
This camera has 4 mounting holes, and two header strips. Only the bottom strip is connected to the sensor. The top
set of breakouts is there for mechanical stability only!
Power Pins:
Vin - this is the power pin. Since the sensor uses 3.3V, we have included an onboard voltage regulator that will
take 3-5VDC and safely convert it down. To power the board, give it the same power as the logic level of your
microcontroller - e.g. for a 5V micro like Arduino, use 5V
3Vo - this is the 3.3V output from the voltage regulator, you can grab up to 100mA from this if you like
GND - common ground for power and logic
Logic pins:
SCL - this is the I2C clock pin, connect to your microcontrollers I2C clock line. There is a 10K pullup on this pin
and it is level shifted so you can use 3 - 5VDC.
SDA - this is the I2C data pin, connect to your microcontrollers I2C data line. There is a 10K pullup on this pin and
it is level shifted so you can use 3 - 5VDC.
INT - this is the interrupt-output pin. It is 3V logic and you can use it to detect when something moves or changes
in the sensor vision path.
© Adafruit Industries
https://learn.adafruit.com/adafruit-amg8833-8x8-thermal-camera-sensor
Page 6 of 29
�
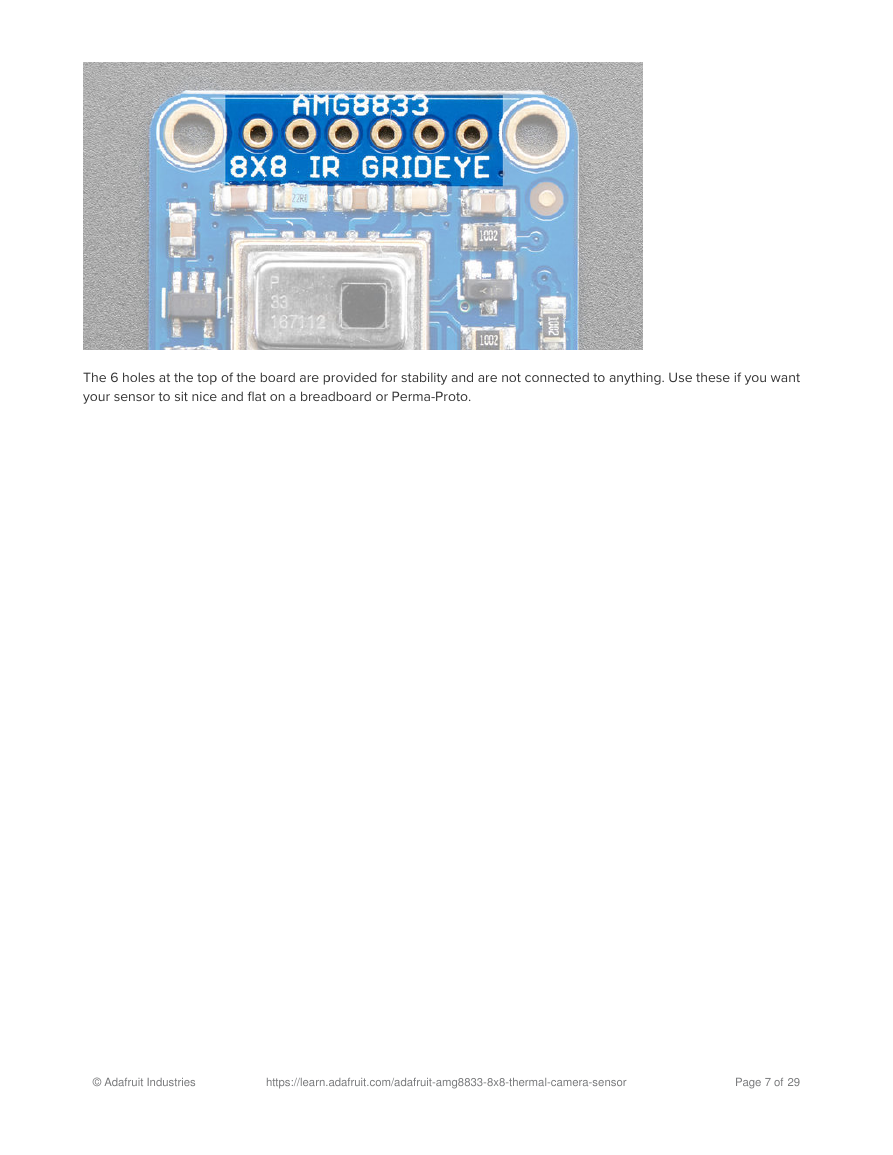
The 6 holes at the top of the board are provided for stability and are not connected to anything. Use these if you want
your sensor to sit nice and flat on a breadboard or Perma-Proto.
© Adafruit Industries
https://learn.adafruit.com/adafruit-amg8833-8x8-thermal-camera-sensor
Page 7 of 29
�
Assembly
Prepare the header strips:
Cut the strips to length if necessary. It will be easier to
solder if you insert it into a breadboard - long pins down
© Adafruit Industries
https://learn.adafruit.com/adafruit-amg8833-8x8-thermal-camera-sensor
Page 8 of 29
�




 2023年江西萍乡中考道德与法治真题及答案.doc
 2012年重庆南川中考生物真题及答案.doc
 2013年江西师范大学地理学综合及文艺理论基础考研真题.doc
 2020年四川甘孜小升初语文真题及答案I卷.doc
 2020年注册岩土工程师专业基础考试真题及答案.doc
 2023-2024学年福建省厦门市九年级上学期数学月考试题及答案.doc
 2021-2022学年辽宁省沈阳市大东区九年级上学期语文期末试题及答案.doc
 2022-2023学年北京东城区初三第一学期物理期末试卷及答案.doc
 2018上半年江西教师资格初中地理学科知识与教学能力真题及答案.doc
 2012年河北国家公务员申论考试真题及答案-省级.doc
 2020-2021学年江苏省扬州市江都区邵樊片九年级上学期数学第一次质量检测试题及答案.doc
 2022下半年黑龙江教师资格证中学综合素质真题及答案.doc